
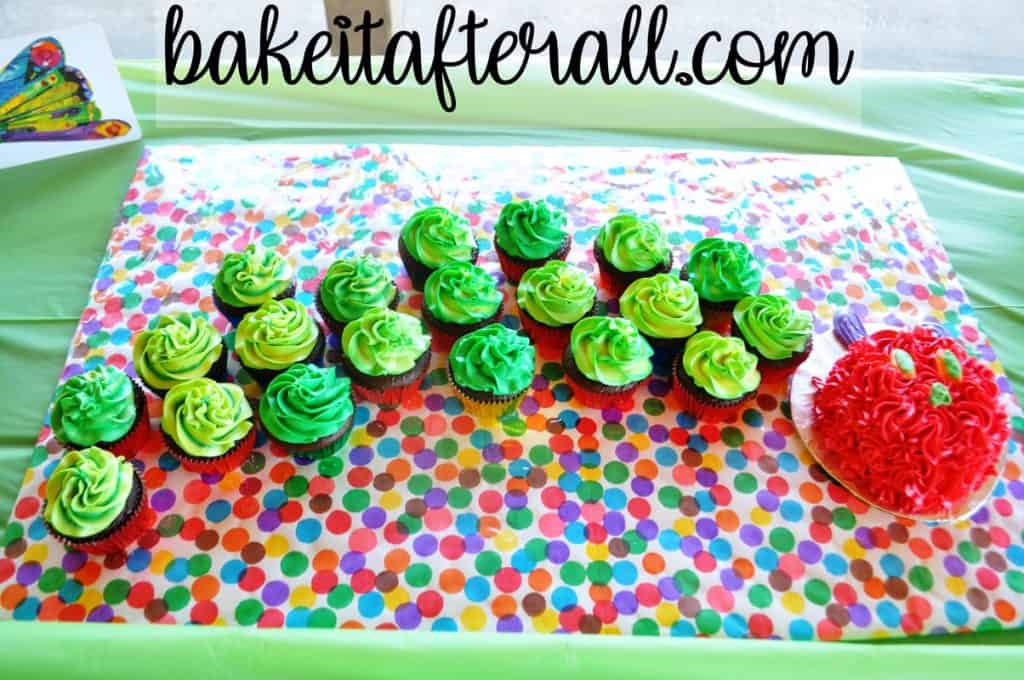
To fit my daughter's Very Hungry Caterpillar First Birthday Party theme, I made this deconstructed pull apart The Very Hungry Caterpillar Cupcake Cake. It can easily be transported to a party location and assembled on site. I've included step by step instructions for making the mini cake and cupcakes to look just like The Very Hungry Caterpillar!
We hosted a Very Hungry Caterpillar birthday party for my youngest daughter's first birthday. I shared all of the party details in my last post. Today I want to take you through all of the details of the Very Hungry Caterpillar cake we served at the party.
When I was searching for Very Hungry Caterpillar cake ideas, I saw so many cute cakes. Most of them were full sized layer cakes with lots of fondant decorations.
We were hosting this party at a park, so I didn't want to mess with having to cut a cake and get crumbs everywhere, get frosting on my hands, have a messy cake knife and server to take home, etc.
For that reason, the idea of a Very Hungry Caterpillar birthday cake made out of cupcakes was very appealing. This way, the guests could just grab a cupcake when they wanted rather than wait for a formal cake cutting.
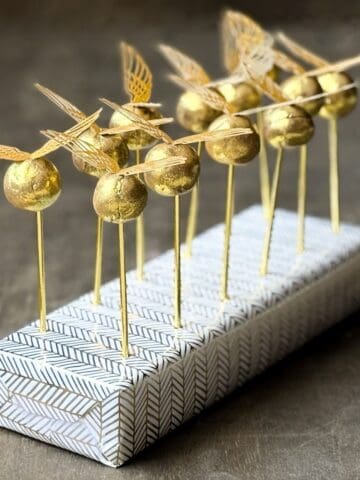
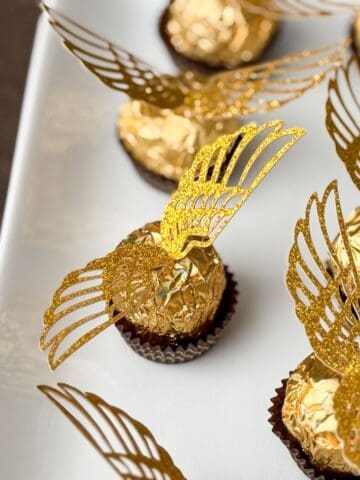
In addition, I already knew I was making these Butterfly Cupcakes. Having extra cupcakes from this caterpillar cake allowed me to cut down on the number of Butterfly Cupcakes I needed to make.
Many of the cupcake cakes I found were pull apart cakes, where the cupcakes are arranged in a shape and frosted together as a single cake. I wanted to avoid having to transport an already assembled large cake, so mine is a deconstructed cupcake cake with space left between each individually frosted cupcake. This also allowed guests to take a cupcake without having to accidentally touch a nearby cupcake, which seemed more sanitary and less messy.
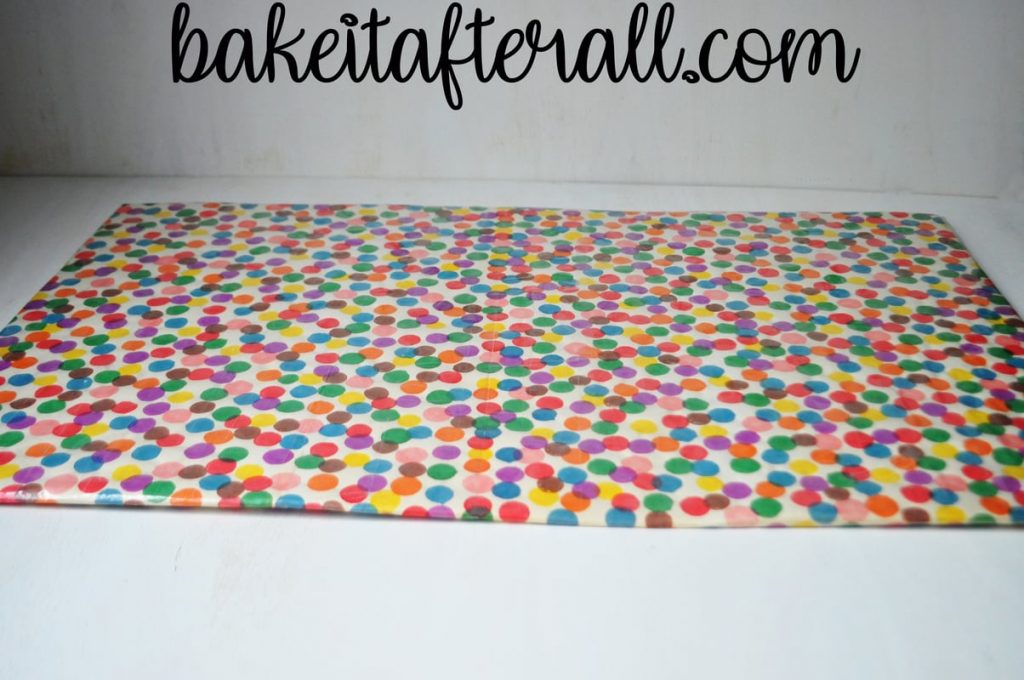
I wanted to assemble the cupcake cake on a cake board that matched the other Very Hungry Caterpillar birthday decorations. I created a multi colored dot pattern cake board to bring in all those colors and tie it together with the other party decorations. I'll take you through how I made the cake board and the other cake components.
Jump to:
- How to Make the Multi Colored Dot Cake Board
- Make the Caterpillar Cake Head Candy Decorations
- Choosing a Cake and Frosting Recipe
- Decorate Caterpillar Cake (the Head)
- Decorate Caterpillar Cupcakes (the Body)
- How to Transport the Cupcake Cake
- Assemble the Cake
- Gluten Free Option
- Looking for More Party Ideas?
- 📖 Recipe
How to Make the Multi Colored Dot Cake Board
Typically for this type of cake, you would use a large rectangular cake board. For this project, I needed something even bigger. I used a broken down cardboard box that measured about 20 x 30 inches. This is the same size as a piece of 20 x 30-inch foam core board. These boards are available in most craft stores and some large chain stores.
To fit with the Very Hungry Caterpillar birthday theme, I wanted the cake board to feature the abstract dot pattern so famously present in the book.
To achieve this, I taped together large pieces of easel paper to be about 6 inches larger than my board on each side (approximately 32 x 42 inches). I used washable dot markers to create the pattern on the side of the paper without the tape. I then wrapped the paper around the board and secured it with tape on the other side.
To make sure that my board was protected and could be reused for other projects, I applied clear packaging tape over the entire surface of the dot pattern paper to essentially laminate the board.
Make the Caterpillar Cake Head Candy Decorations
To make the decorations for the caterpillar head cake, I used purple, orange, and green colored candy melts. Technically in The Very Hungry Caterpillar book, the larger portion of the eyes is a yellow color. I already needed orange candy melts for the Butterfly Cupcakes, and I didn't want to buy another color.
Before beginning, lay out waxed paper over a baking sheet or cookie sheet. This will be the surface on which you'll pipe the shapes.
To make the candy shapes, first melt the candy melts according to the package directions. Then, transfer the melted candy to disposable piping bags fitted with plastic couplers and large round tips (such as #5) or to resealable gallon sized bags with a corner cut off.
Next, pipe the purple candy onto the waxed paper into 2 long shapes with a point at one end and rounded at the other, which will be the caterpillars ears. Pipe the orange (or yellow) into 2 oval shapes measuring approximately 2 inches long. Pipe the green into 2 oval shapes slightly larger than the orange ovals. Also pipe a green triangle with rounded points measuring about 1 inch in across.
Allow the candy to set up at room temperature or in the refrigerator. Once completely set, carefully peel the shapes off of the waxed paper. Store the shapes in an airtight container at room temperature or in the refrigerator until ready to decorate the head.

Choosing a Cake and Frosting Recipe
For this Very Hungry Caterpillar buttercream cake, you'll need to choose a cake and frosting recipe. As I've said in the past, I often turn to cake mixes when I'm baking large quantities of cake for a crowd that will require a lot of time decorating. When I'm preparing for a birthday party especially, I use this time saving tip to free up time to spend working on party crafts and cake decorating. For the best homemade chocolate cake, I recommend this Two Layer Chocolate Cake recipe. If you need 3 layers, just make the cake portion of Chocolate Layer Cake or Salted Caramel Chocolate Fudge Cake.
For the caterpillar head portion of this cake, I did use a boxed cake mix and I baked my layers in two small ramekins that measured approximately 4 inches in diameter. If using a cake mix, you can fill two ramekins and divide the remaining batter among approximately 20 cupcake liners. If using a homemade cake recipe, scale your recipe for a two layer (8- or 9-inch) portion of cake batter and fill the small ramekins and cupcake liners accordingly. I like to use aluminum foil lined liners to prevent the grease from the cake from soaking through the liner.
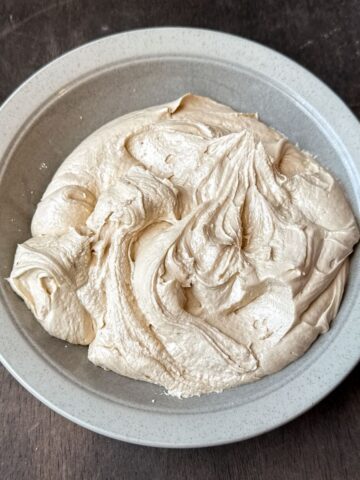
For frosting the cakes, I recommend Easy Vanilla Buttercream, but Vanilla Swiss Meringue Buttercream is great too. I used just under 5 batches of Easy Vanilla Buttercream. You may be able to get away with just 4 batches depending on heavily you pipe.
Decorate Caterpillar Cake (the Head)
This cake consists of a small head cake and then a body of cupcakes. The head is the perfect size for a Very Hungry Caterpillar Smash Cake, but I chose not to use it as one due to the large quantity of food dye required to make the head this shade of red. Not only do I try to avoid giving babies large amounts of food dye, but it would have been a big mess! I made a separate small cake decorated in homemade whipped cream, and it worked out very well!
To decorate the head of the caterpillar, you'll want to use an aluminum foil covered cardboard cake circle. If you're cake measures about 4-inches in diameter, an 8-inch cake circle will work well. Use a larger cake circle if your cake is bigger than 4-inches.
You'll start by placing a smear of the untinted buttercream toward the bottom edge of the cake circle. The cake will not be centered on the cake circle because you need to leave room for the ears. Place one layer of cake on top of the buttercream. The purpose of this step is to secure the cake in place. Add buttercream on top of the first cake layer and smooth, then place the second cake on top. You may do a crumb coat at this point, but it is not necessary.
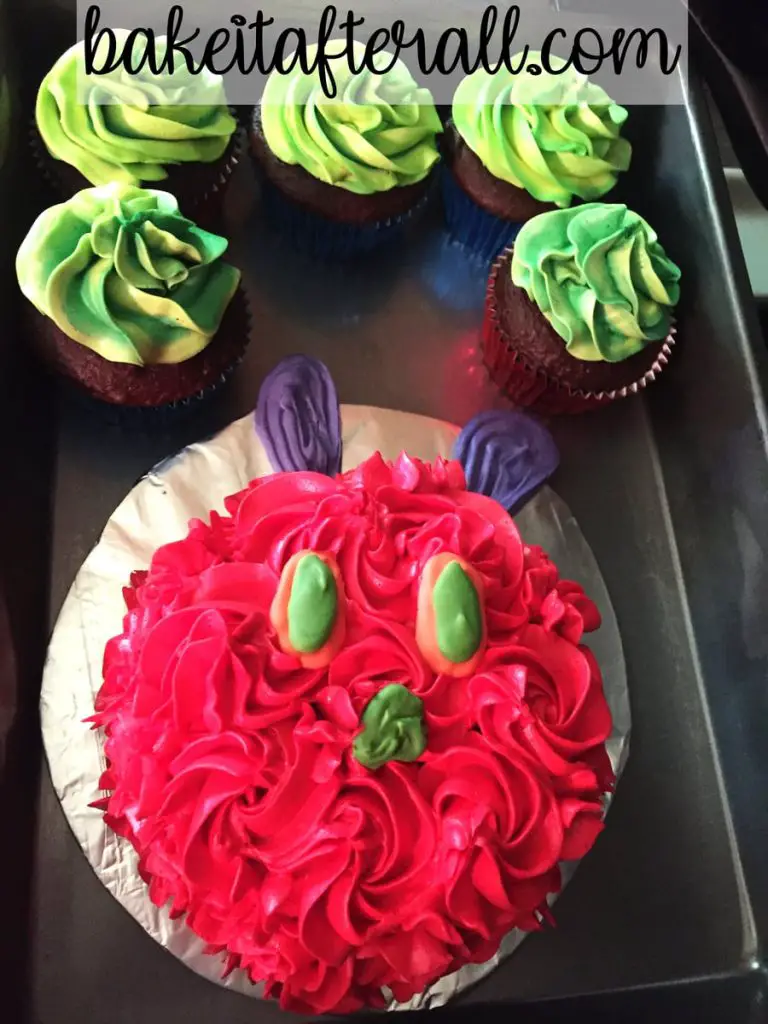
Next, tint a portion of the buttercream bright red using red no taste food coloring gel. Using no taste red food coloring gel is important to prevent the buttercream from having a bad aftertaste due to the amount of red gel required to achieve this bright of a color. Once your buttercream is the desired color, transfer it to a disposable pastry bag fitted with a large star tip. Pipe rosettes of buttercream over the entire surface of the cake so no cake is showing through.
After the cake is entirely covered in buttercream, carefully stick the purple candy ears into the top of the head, having them rest on the cake circle. Place the oval orange eyes on the red buttercream, then add the green ovals centered on top of the orange ovals. Place green triangle onto the buttercream for the nose.
Decorate Caterpillar Cupcakes (the Body)
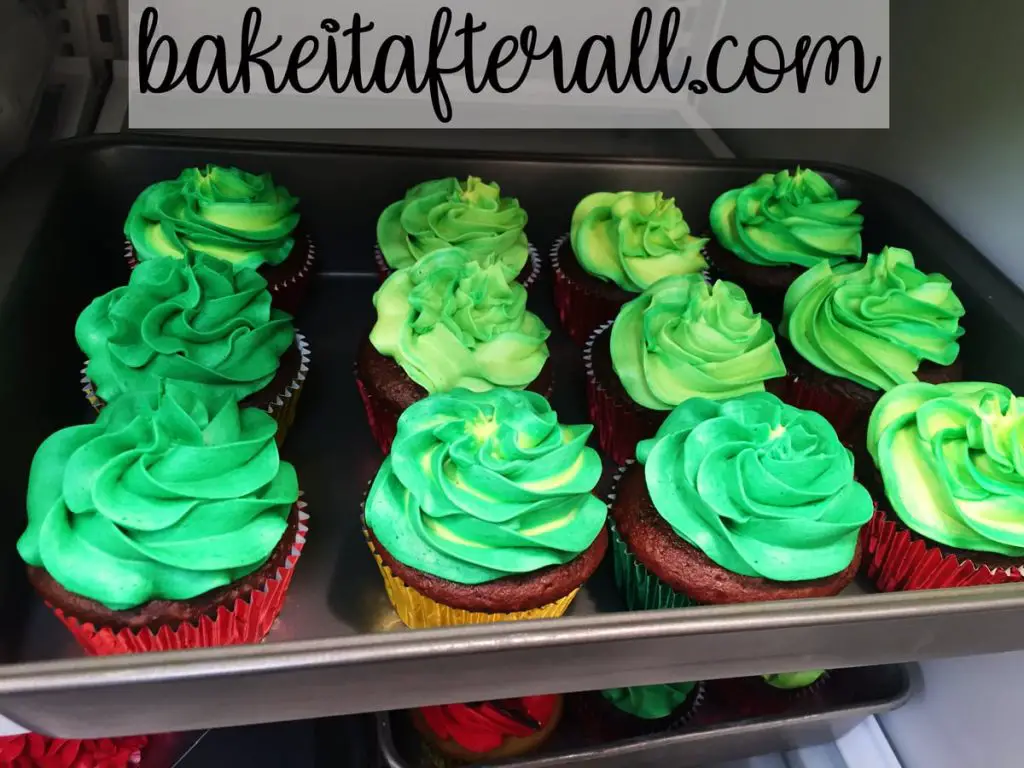
After frosting the caterpillar head, it's time to frost the cupcakes the will make up the body of the caterpillar. First, you'll divide the remaining buttercream into 2 or 3 small bowls, depending on how many shades of green you would like for the body. Tint each bowl of buttercream a different shade of green, adjusting the color by adding more green food coloring gel or adding a bit of yellow gel to the green buttercream.
Transfer each shade of green buttercream to a disposable piping bags fitted with a large star tip. If you only have one tip, you can use a large plastic coupler on each bag and transfer the tip after you finish each color. There's no need to clean the tip in between shades of green because the mixing on the colors adds to the whimsy of the caterpillar. Pipe a swirled pattern on the top of each cupcake, alternating the shade of green. You can also add a different shade to a bag that already had green buttercream in it to make a swirly pattern when piped.
How to Transport the Cupcake Cake
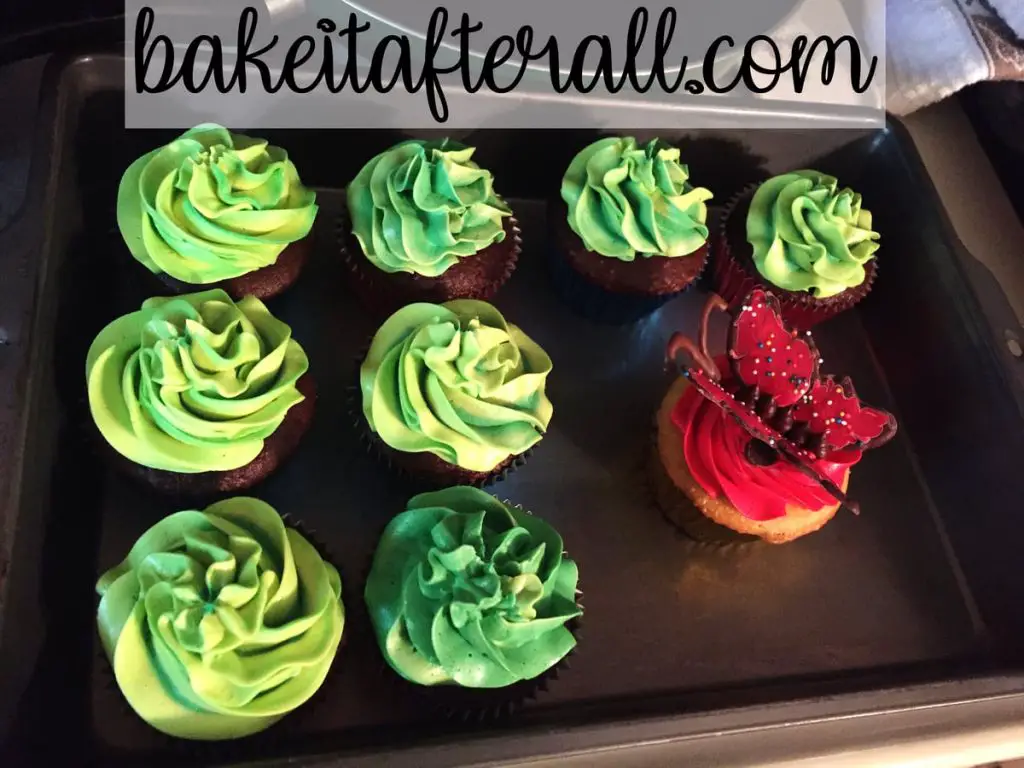
The easiest way to transport cupcakes is to use a cupcake carrier or disposable cupcake container. My cupcake carrier holds 24 cupcakes, but it was already full with Butterfly Cupcakes. I decided to use empty metal cake pans to transport the cupcakes that would compose the caterpillar body as well as the circle cake board with the caterpillar head cake.
You can see one straggler Butterfly Cupcake in this pan!
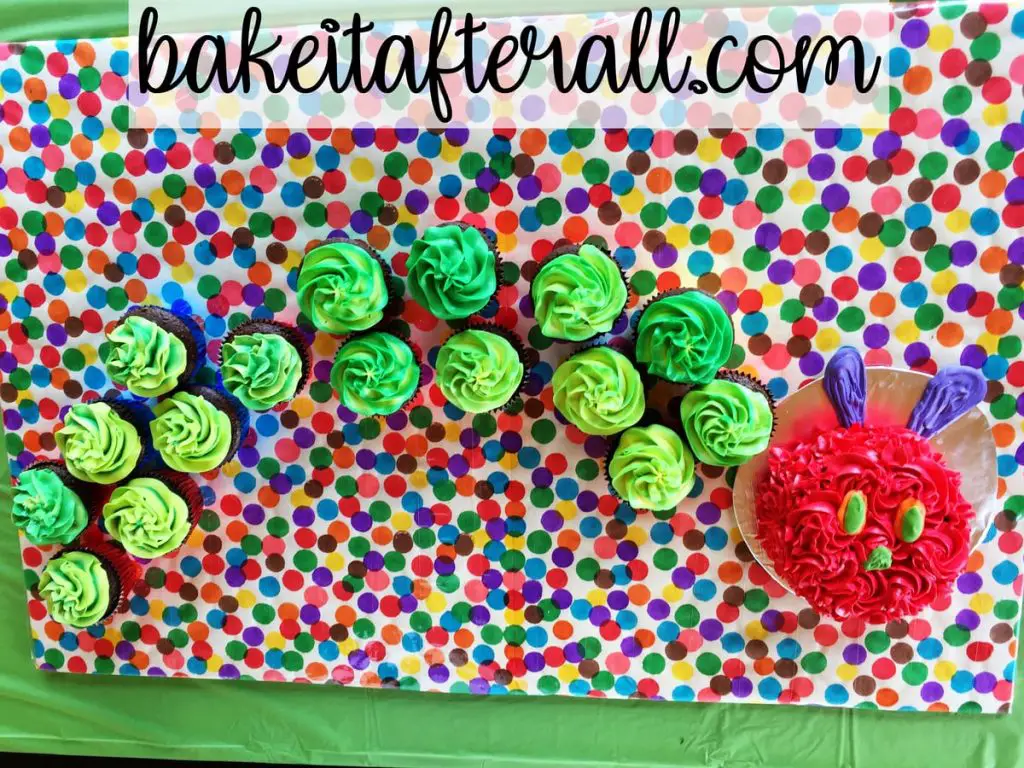
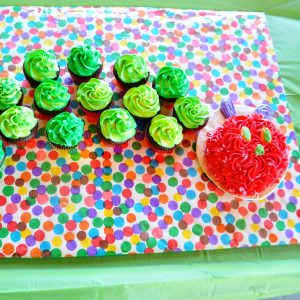
Assemble the Cake
As I mentioned earlier, this is a deconstructed pull apart cupcake cake, where each cupcake is individually frosted and spaced a bit from the neighboring cupcakes. The reason for the spacing is to allow the guests to easily grab a cupcake without touching the other cupcakes. To assemble the caterpillar, place the round cake board containing the caterpillar head near the lower right corner of the large rectangular cake board. Then, arrange the green cupcakes to the left of the head in alternating rows of 2 or 3 cupcakes to look like the body of the caterpillar. You can have your caterpillar face the other way if you'd like, and use your artistic license to arrange the cupcakes however you prefer.
Gluten Free Option
To make this cake gluten free, you may use a gluten free cake mix or make a homemade gluten free cake. My favorite gluten free cake is the Beatty's Chocolate Cake made with a measure for measure gluten free flour blend such as Bob's Red Mill Gluten Free 1 to 1 Baking Flour. The Easy Vanilla Buttercream used to frost the cupcakes and mini cake is naturally gluten free.
Looking for More Party Ideas?
Check out these other themed desserts and parties:
Butterfly Cupcakes
Very Hungry Caterpillar Birthday Ideas
Butterfly Sugar Cookies with Royal Icing
Butterfly and Dragonfly Sugar Cookies with Royal Icing
Monkey Face Sugar Cookies with Royal Icing
Starfish Cookies
Oyster Pearl Cookies
Under the Sea Birthday Party
Mermaid Birthday Ice Cream Cake
Bridal Shower Dessert Table
Rainbow Brownie Ice Cream Sandwiches
Painted Rainbow Cookies
Penelope Bird 1st Birthday Party
Winter ONEderland 1st Birthday Party
Sesame Street Birthday Party with Cookie Monster Smash Cake
My Little Pony Rainbow Unicorn Ice Cream Cake
Daniel Tiger Cake and Party
Disney's FROZEN Birthday Cake and Party
Cinderella Cake and Birthday Party
Thomas the Train Smash Cake
📖 Recipe
Very Hungry Caterpillar Cupcake Cake
Equipment
- 8-inch cardboard cake circle, covered in aluminum foil
- large rectangular cake board
Ingredients
- 5 batches buttercream (recommended Easy Vanilla Buttercream, see note)
For the Caterpillar Head:
- purple, orange and green candy melts (yellow can be used in place of orange if desired)
- 2 layers cake (approximately 4 inches in diameter, see note)
- red no taste food coloring gel (see note)
For the Caterpillar Body:
- 20 cupcakes (store bought or homemade, see note)
- green food coloring gel
- yellow food coloring gel
Instructions
Make the Caterpillar Head Decorations:
- Melt the candy melts according to package directions. Transfer the melted candy to disposable piping bags fitted with plastic couplers and large round tips or to resealable gallon sized bags with a corner cut off.
- On a waxed paper lined baking sheet, pipe the purple into 2 long shapes with a point at one end and rounded at the other, which will be the caterpillars ears. Pipe the orange/yellow into 2 oval shapes measuring approximately 2 inches long. Pipe the green into 2 oval shapes slightly larger than the orange/yellow ovals. Also pipe a green triangle with rounded points measuring about 1 inch in across.
- Allow the chocolate to set up at room temperature or in the refrigerator. Once completely set, carefully peel the shapes off of the waxed paper and store in an airtight container at room temperature or in the refrigerator until ready to decorate the head.
Decorate the Caterpillar Cake Head:
- Place a small smear of untinted buttercream toward one side of the foil covered cake circle. Place one of the cake layers on top. Add untinted buttercream on top of the layer, smoothing into an even layer of buttercream. Place second layer on top.
- Use the red no taste food coloring gel to tint the buttercream until it is a bright red color. Transfer the red buttercream to a disposable pastry bag fitted with a large star tip. Pipe rosettes of buttercream over the entire surface of the cake so no cake is showing through.
- Carefully stick the purple candy ears into the top of the head, having them rest on the cake circle. Place the oval orange eyes on the red buttercream, then add the green ovals centered on top of the orange ovals. Place green triangle onto the buttercream for the nose.

Decorate the Caterpillar Body Cupcakes:
- Divide the remaining buttercream into 2 or 3 small bowls, depending on how many shades of green you would like for the body.
- Tint buttercream different shades of green. Adjust color by adding more of the green gel or adding a bit of the yellow gel to the green buttercream.
- Transfer colored buttercream to disposable piping bags fitted with large star tips. Pipe a swirled pattern on the top of each cupcake, alternating the shade of green. You can also add a different shade to a bag that already had green buttercream in it to make a swirly pattern when piped.

Assemble the Cake:
- Place the cake board containing the head in the lower right section of a large cake board.
- Arrange the green cupcakes to the left of the head in alternating rows of 2 and 3 to look like the body of the caterpillar.

Leave a Reply