
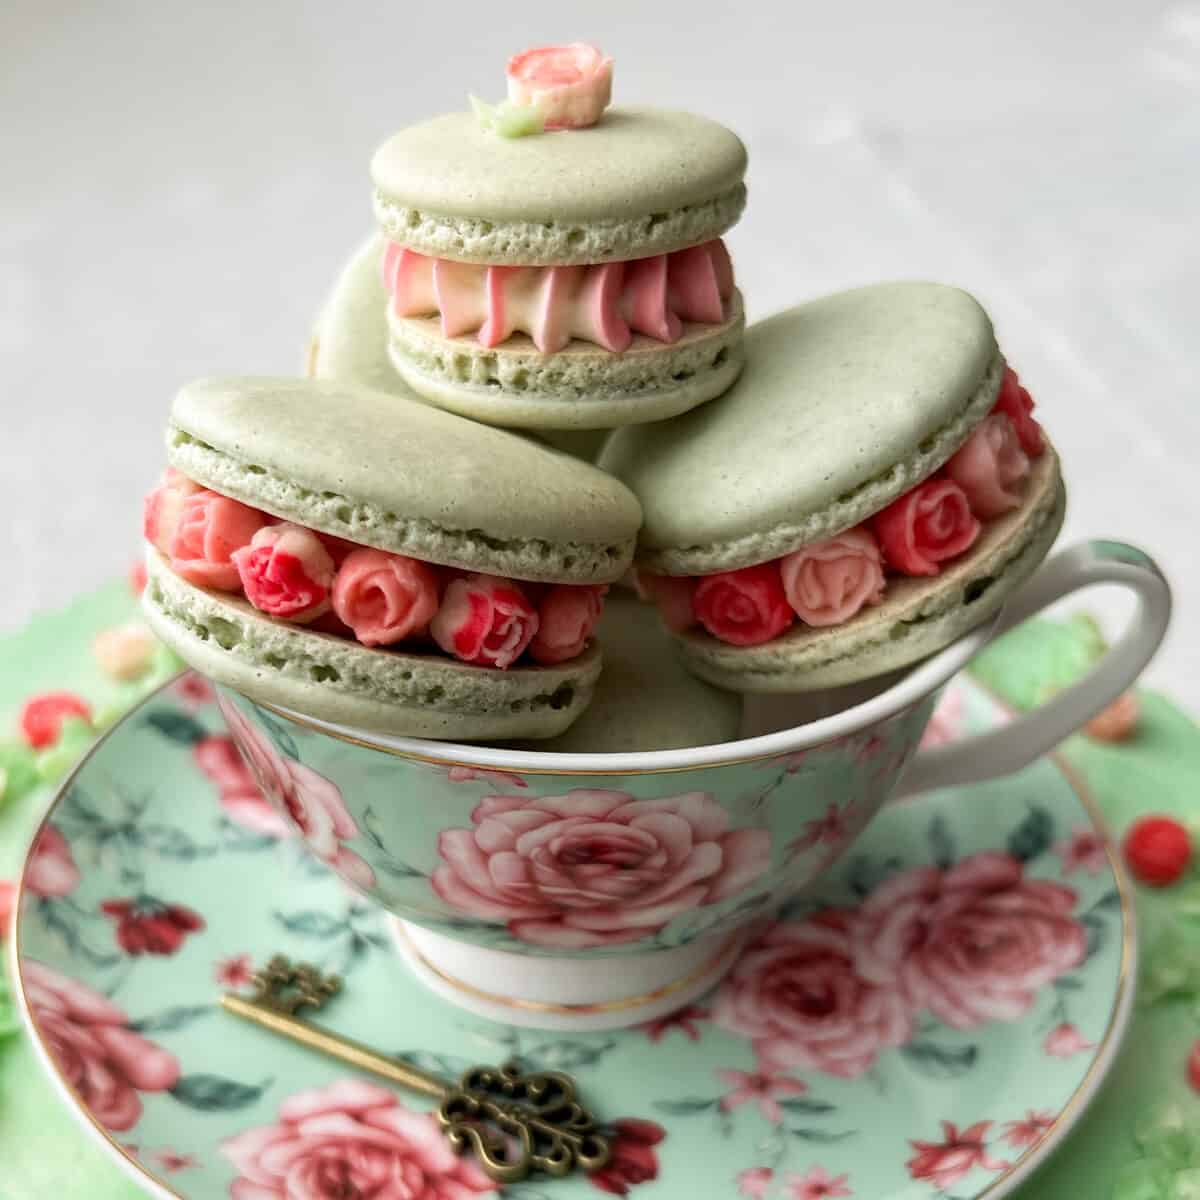
These Mini Rose French Macarons are a gorgeous addition to your tea party or tea party themed birthday, including Alice in Wonderland and Mad Hatter's Tea Party. I will show you how to make the baby roses and assemble the macarons. I make both gluten free and nut free macarons using oat flour instead of almond flour.
When searching for tea party ideas for my daughter's Alice in Wonderland themed birthday, I saw these beautiful mini rose macarons on Pinterest and became obsessed with discovering out how to make them. It was not easy to figure this out!
I was hoping there was a special piping tip that made these roses quickly, like a miniature version of a Russian piping tip, but it turns out it's more involved.

I was able to track down the artist who created them. She shares her creations on Instagram and on her website Macaron Flowers. Her work is so amazing, but because she sells courses, understandably she doesn't provide free tutorials or have a step by step guide for making them.
Her flowers are made with vegan cream, and you can purchase the recipe from her. I have to admit that I'm intrigued by them, and they look so perfect. Because of my nut allergy and other food sensitivities, I'm always cautious of vegan products in case they contain a nut ingredient.
To be clear, I do not know what she uses in her vegan cream, I just don't want to pay for the recipe to find out that I cannot use it.

Another creator, Sweet Josie Bakes, showed how she made these baby roses using buttercream, although hers look slightly larger than I wanted.

If you've ever seen beautiful buttercream flowers on Instagram, you may have noticed that it can be difficult to find out what tip the creator used. This is understandable, as many of them sell their baked goods or sell a course, but I wanted to figure this out on my own.
After watching lots of different videos, I finally determined exactly how I wanted to make them. Mine may not be as perfect as the Instagram creators, but my girls absolutely loved them, and that's what matters most!
To keep these cookies allergy friendly, I used certified gluten free oat flour in place of the traditional almond flour and followed the method outlined in Nut Free French Macarons. With prevalent allergies in children, this means these cookies could be enjoyed by many at birthday parties, tea parties, or other events.
Jump to:
Materials
In addition to the macaron shell ingredients, you will need the following to make these macarons:
- #101s petal piping tip
- disposable piping bags
- plastic tip coupler
- piping bag holders or a tall drinking glass
- metal flower nail
- waxed paper, cut into 1.5- or 2-inch squares
- Easy Vanilla Buttercream or Vanilla Swiss Meringue Buttercream
- food coloring, such as AmeriColor or ChefMaster
- gold or iridescent luster dust, optional
- food grade paintbrush, optional
- 2 macarons mats
- 2 half sheet pans
- medium sized round tip like #12
- large sized round tip like 2A
- plastic cake tweezers, optional
- large star tip, such as 6B
- #65 piping tip (optional: for small leaves)
Pipe the Roses
To make the mini buttercream roses, start out by fitting a disposable piping bag with a small petal piping tip, like a #101s. I like to use a plastic tip coupler to keep the tip in place and make it easy to change the tips if necessary.

The next step is to tint the buttercream. You can do any color you want for the roses. I chose to do pink and white variegated roses.
To achieve this, I made different shades of pink buttercream and only partially combined them with untinted buttercream so that the colors would be swirled when piped.

Another technique I used was to paint the inside of the piping bag with pink food coloring gel and then fill the bag with untinted buttercream. When this is piped, the resulting roses have pink and white variegated petals.
You can pay close attention to where you paint the gel in relation to how the petal tip is positioned, knowing that the wider side of the tip will be the base of the petal and the narrow side will be the outer edge of the petal.

I love roses that have darker pink on the edges of the petals, and this method created some buttercream roses that reminded me of those.

Pipe a small dot of buttercream on a metal flower nail.

Then, place a square of waxed paper on top and press down to adhere.

To make a mini buttercream rose, pipe a small mound of buttercream. Holding the petal tip with the larger opening at the bottom, pipe around the mound to create a bud.

Still holding the larger opening of the piping tip down, pipe 3 to 5 overlapping petals around the bud. You will use an upside-down U motion to create the petals. Most of mine had 3 or 4 petals.
Larger buttercream roses have a base, followed by rows of 3, 5 and 7 petals. The goal here is just making any number of petals that overlap and look like a tiny rose.

For a slightly larger rose, you can do the bud, then 3 overlapping petals, then an outer layer of 5 overlapping petals.
Carefully remove the waxed paper from the flower nail and place it on a baking sheet. Repeat to make many more roses.

Chill the buttercream roses to set them by placing them in the refrigerator or freezer.
Add Luster Dust
To give the roses a little sparkle, you can brush them with edible luster dust after they have been chilled.

I used gold luster dust on some and iridescent dust on others.

Rose Storage
The roses should be stored in the refrigerator or freezer.

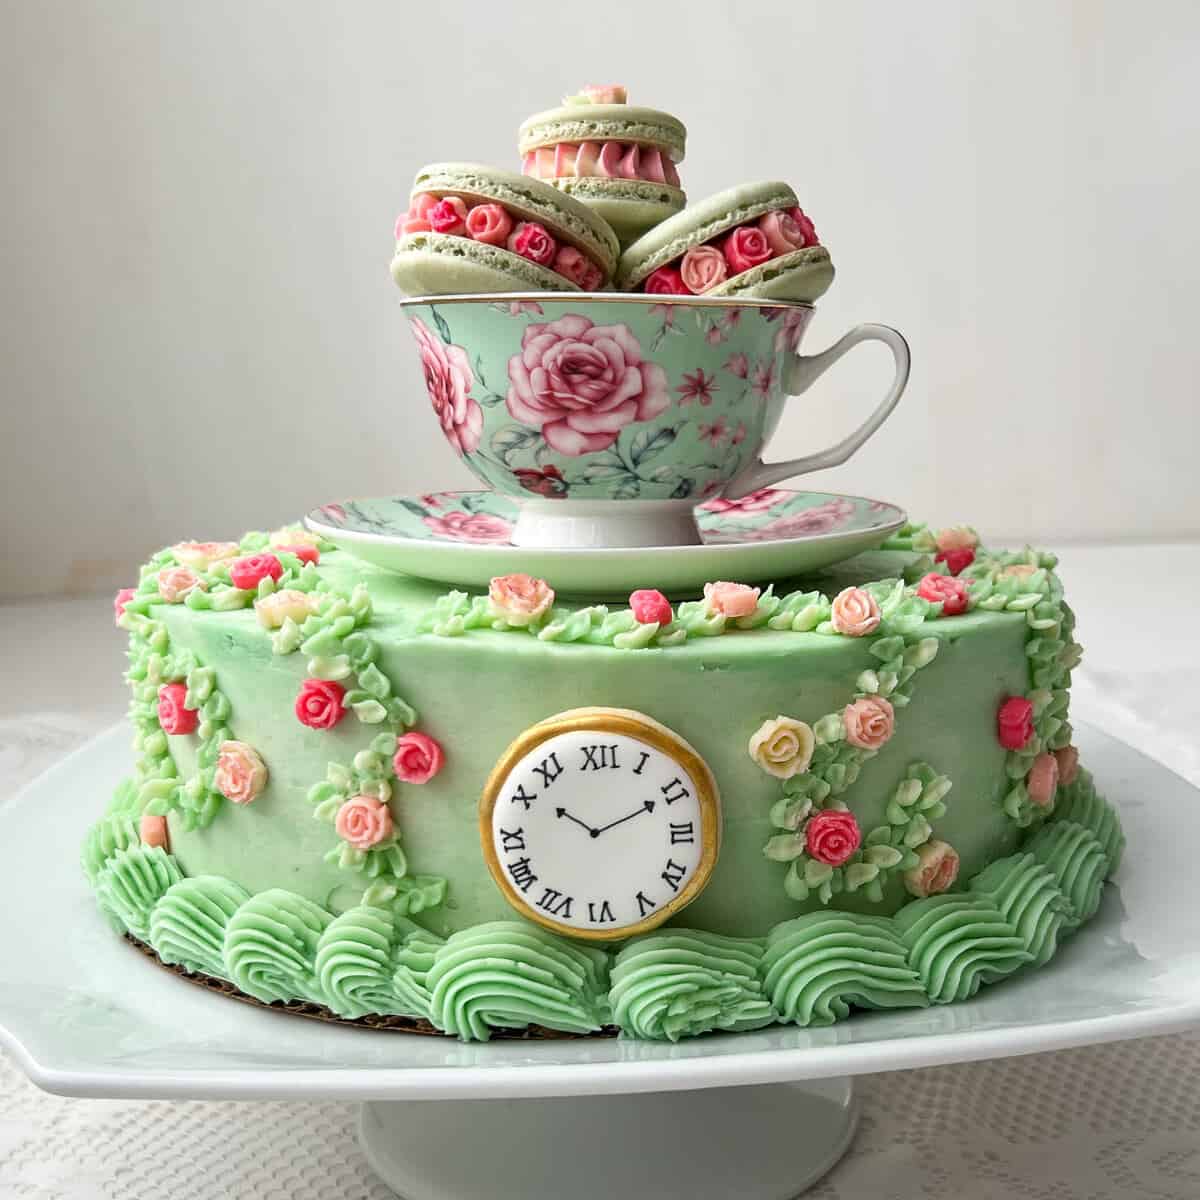
I made extra roses so I could decorate the Garden Tea Party Cake with them too.
Make the Macaron Shells
To make the shells, I follow a Nut Free French Macarons recipe which uses gluten free oat flour in place of the traditional almond flour. This keeps the macarons both nut free and gluten free, so they are allergy friendly cookies.
In this method, a meringue is formed and then the dry ingredients are incorporated in a process called macaronage. I include lots of details in my Nut Free French Macarons recipe.

I like to use a piping bag holder to keep the bag open when I'm transferring the macaron batter to the bag. I also use a small binder clip to keep the batter from flowing into the tip as I am filling the bag.

Once the bag is filled, I remove the clip and allow the batter to flow into the tip. I pipe 1-inch circles of batter onto a macaron mat, then slam the tray down on the counter to force bubbles to the top. I use a toothpick to pop any bubbles on the surface. Then, I pipe the rest of the batter on the second tray.
The macarons should rest for about 40 minutes, until the batter has formed a "skin" and no longer sticks to your finger when touched lightly.

I bake the shells one tray at a time for about 7 minutes, rotate, then bake for about another 7 minutes.
After the shells were baked and cooled, I brushed the top of the shells with iridescent luster dust using a food grade paint brush to give them a little sparkle.

The shells can be assembled immediately or stored in the refrigerator in an airtight container. Separate the layers of shells with waxed paper or parchment to prevent them from sticking to each other.
Assemble the Macarons
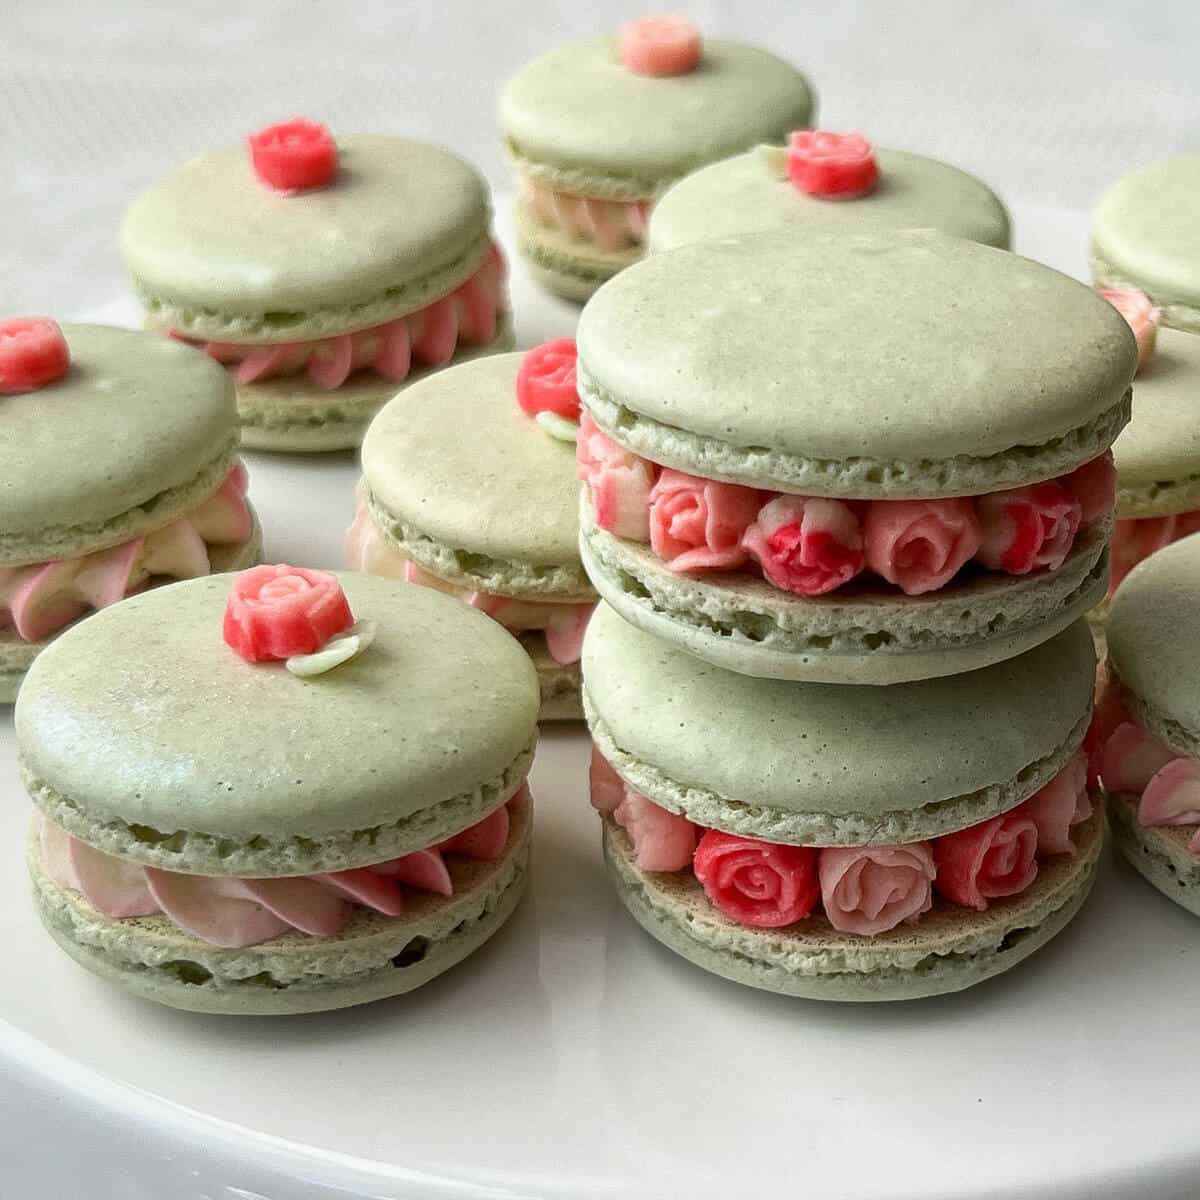
To begin assembly, I like to pair up the macaron shells by size to most closely match the top and bottom shell.

You can use the roses inside the macaron so they are visible from the side of the sandwich cookie, or you can place as single rose or rose grouping on top of each macaron. I did a combination of both.
One thing to keep in mind is that adding roses around the entire perimeter of the cookie takes a lot of roses. Depending on the size of the macaron shells and the roses, it can take up to 14 roses per cookie.
To add the perimeter of roses, first pipe a mound of buttercream using a piping bag fitted with a large round tip, such as a 2A.

Use plastic cake tweezers or gloved hands to carefully transfer a chilled mini rose to the buttercream, facing out.

Repeat until the entire perimeter of the macaron shell is filled with mini roses. If you have some lighter and darker roses, you can alternate them to create a pattern.

Carefully place the top shell on top and press down just enough for it to stick and not have gaps above or below the roses.
Another option is to add some tiny buttercream leaves in between the roses. I wanted a cleaner look so I did not do this.

For the macarons with just a single rose on top, I piped the buttercream on the bottom shell using a #6B large star tip. I like the pattern this makes on the sides when macaron is sandwiched together. I also just partially mixed the pink buttercream with the untinted buttercream so when piped, the color appeared almost ombre.

Carefully place the top shell onto the buttercream. I like to carefully twist the shell as I press down to drag the swirl pattern and make it more dramatic.
Pipe a small dot of buttercream in the center of each top shell and place a single mini buttercream rose on top. Then, use a #65 small leaf tip to pipe two pale green buttercream leaves per rose.

Uses
These macarons are great for a tea party, Alice in Wonderland or Mad Hatter's themed birthday, wedding shower, baby shower, or a number of other events.

I stacked some into a tea cup and placed it on this Garden Tea Party themed cake, which is actually a Godiva Chocolate Cheesecake inside. The cheesecake is covered in Vanilla Swiss Meringue Buttercream and decorated with a single Royal Icing Clock Cookie.
Macaron Storage
Macarons typically should be chilled for 24 hours to mature for the shells to become chewier and less crispy.
Store the macarons in an airtight container in the fridge for up to a week. Macarons can be frozen for up to several months.
Bring the macarons to room temperature before serving.
Gluten Free Option
These cookies are naturally gluten free if you use a certified gluten free brand of oat flour. I like Bob's Red Mill brand of gluten free oat flour.
📖 Recipe

Mini Rose French Macarons
Equipment
- #101s petal piping tip
- disposable piping bags
- Plastic tip coupler
- piping bag holders or a tall drinking glass
- metal flower nail
- Waxed paper cut into 1.5- or 2-inch squares
- food grade paintbrush optional
- 2 macarons mats
- 2 half sheet pans
- large sized round tip like 2A
- plastic cake tweezers optional
- large star tip, such as 6B
- #65 piping tip optional, for small leaves
Ingredients
For the Mini Roses:
- Easy Vanilla Buttercream or Vanilla Swiss Meringue Buttercream (see note)
- pink food coloring gel (such as AmeriColor or ChefMaster)
- gold or iridescent luster dust (optional)
For the Macaron Shells:
- 126 grams oat flour
- 126 grams powdered sugar
- 100 grams egg whites (see note)
- ¼ teaspoon cream of tartar
- 90 grams granulated sugar
- 1 teaspoon vanilla extract (see note)
- green food coloring gel
- iridescent luster dust (optional)
For Assembly:
- Easy Vanilla Buttercream or Vanilla Swiss Meringue Buttercream (see note)
Instructions
Pipe the Mini Buttercream Roses:
- Fit a #101s small petal piping tip into a disposable piping bag with a plastic tip coupler.

- Tint some buttercream shades of pink and carefully stir with the untinted buttercream, then transfer to the piping bag. For a more variegated pattern, paint the inside of the piping bag with pink food coloring gel only on the side of either the wide or narrow end of the piping tip, depending on whether you want the pink more toward the base or top of the roses. Then, fill the bag with untinted buttercream to the bag.
- Pipe a small dot of buttercream on a metal flower nail.

- Place a square of waxed paper on top and press down to adhere.

- Pipe a small mound of buttercream. Holding the petal tip with the larger opening at the bottom, pipe around the mound to create a bud.

- Still holding the larger opening of the piping tip down, pipe 3 - 5 overlapping petals around the bud. You will use an upside-down U motion to create the petals. Most of mine had a single row of 3 or 4 petals around the bud. For a slightly larger rose, you can do the bud, then 3 overlapping petals, then an outer layer of 5 overlapping petals.

- Carefully remove the waxed paper from the flower nail and place it on a baking sheet. Repeat to make many more roses.

- Chill the roses in the refrigerator or freezer to set them. If desired, brush them with gold or iridescent luster dust using a food grade paint brush.

Make the Macaron Batter:
- Place a macaron mat on each of 2 baking sheets. You can also use parchment paper with 1-inch circles drawn on underneath. Set these aside.
- Place a large round tip, like a #12, in a disposable piping bag. Twist the bag above the piping tip and clip it closed with a small binder clip. Fold over the top of the bag and place it in a tall glass or in a piping bag holder so it will be easy to fill with the batter. Set aside.
- Sift together the oat flour and the powdered sugar in a medium-sized bowl, then whisk to combine them completely. Set this bowl aside.
- Place the egg whites in the bowl of a stand mixer fitted with the whisk attachment and beat on medium-high until frothy.
- Add the cream of tartar, then slowly add the granulated sugar, one spoonful at a time, with the mixer still running.
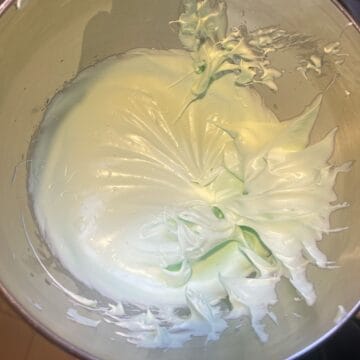
- Add the vanilla extract and a small amount of green food coloring gel, or any color you prefer. Keep in mind that the color of the batter will deepen slightly after the dry ingredients are incorporated. Continue to beat the mixture until the meringue forms stiff peaks. Remove the bowl from the mixer.
- Using a large silicone spatula, carefully fold ⅓ of the flour/powdered sugar mixture into the meringue. Then add the remaining ⅔ of the flour mixture and continue folding until you reach the figure 8 stage. See note.
- Transfer the batter to the prepared piping bag.

- Twist the top of the bag closed and remove the clip to allow the batter to flow into the tip. Pipe 1-inch circles of batter onto a macaron mat, then slam the tray down on the counter to force bubbles to the top. Use a toothpick to pop any bubbles on the surface. Then, pipe the rest of the batter on the second tray and repeat the process of removing bubbles. You will not fill the second tray.
- Allow the batter to dry at room temperature for about 40 minutes, until the batter has formed a "skin" and no longer sticks to your finger when touched lightly. The temperature and humidity of the work space will affect required drying time. Meanwhile, preheat the oven to 300°F.

- Bake the macaron shells for 12-15 minutes, rotating the pan once about 7 minutes into the bake. Only bake one pan at at time. Do not overbake or shells will be crispy.
- Allow the shells to cool completely on the mats before removing them. To remove more easily, push up on the mat from underneath to help them pop off. If you have trouble with them sticking, that may mean they are underbaked. Some of the shells in the center of the tray may have a little bit of sticking. Very carefully use a stiff metal spatula to pry them off the mat, taking care not to rip the shell.
- After the shells have completely cooled, use a food grade paint brush to apply dry luster dust, if desired.

- Cooled shells can be assembled into cookies immediately or stored in the refrigerator or freezer. Store in an airtight container in single layers, with parchment paper separating the layers to prevent sticking.
- Before assembling, pair up the macaron shells by size to most closely match the top and bottom shell.

Macarons with Rose Perimeter:
- Pipe a mound of buttercream using a piping bag fitted with a large round tip, such as a 2A.

- Use plastic cake tweezers or gloved hands to carefully transfer a chilled mini rose to the buttercream, facing out.

- Repeat until the entire perimeter of the macaron shell is filled with mini roses. If you have some lighter and darker roses, you can alternate them to create a pattern. Depending on the size of the macaron shells and the roses, it can take up to 14 roses per cookie.

- Carefully place the top shell on top and press down just enough for it to stick and not have gaps above or below the roses.

- If desired, add small leaves in the spaces between the roses using light green buttercream and a #65 small leaf tip.
Macarons with Single Rose on Top:
- Fill a piping bag fitted with a large star tip, like a #6B, with pink and white buttercream. For a more dramatic ombre effect, fill one side of the bag with pink and one side with untinted buttercream.

- Pipe a mound of buttercream on the bottom shell.

- Lift the top shell by the edges and place it on top of the buttercream, twisting slightly as you press down. Repeat with the remaining pairs until all of the macarons have been filled.
- Pipe a small dot of buttercream in the center of each top shell and place a single mini buttercream rose on top. Then, use a #65 small leaf tip to pipe two pale green buttercream leaves per rose. You can also do a small grouping of 3 roses on top of each macaron and add more leaves.


Leave a Reply