
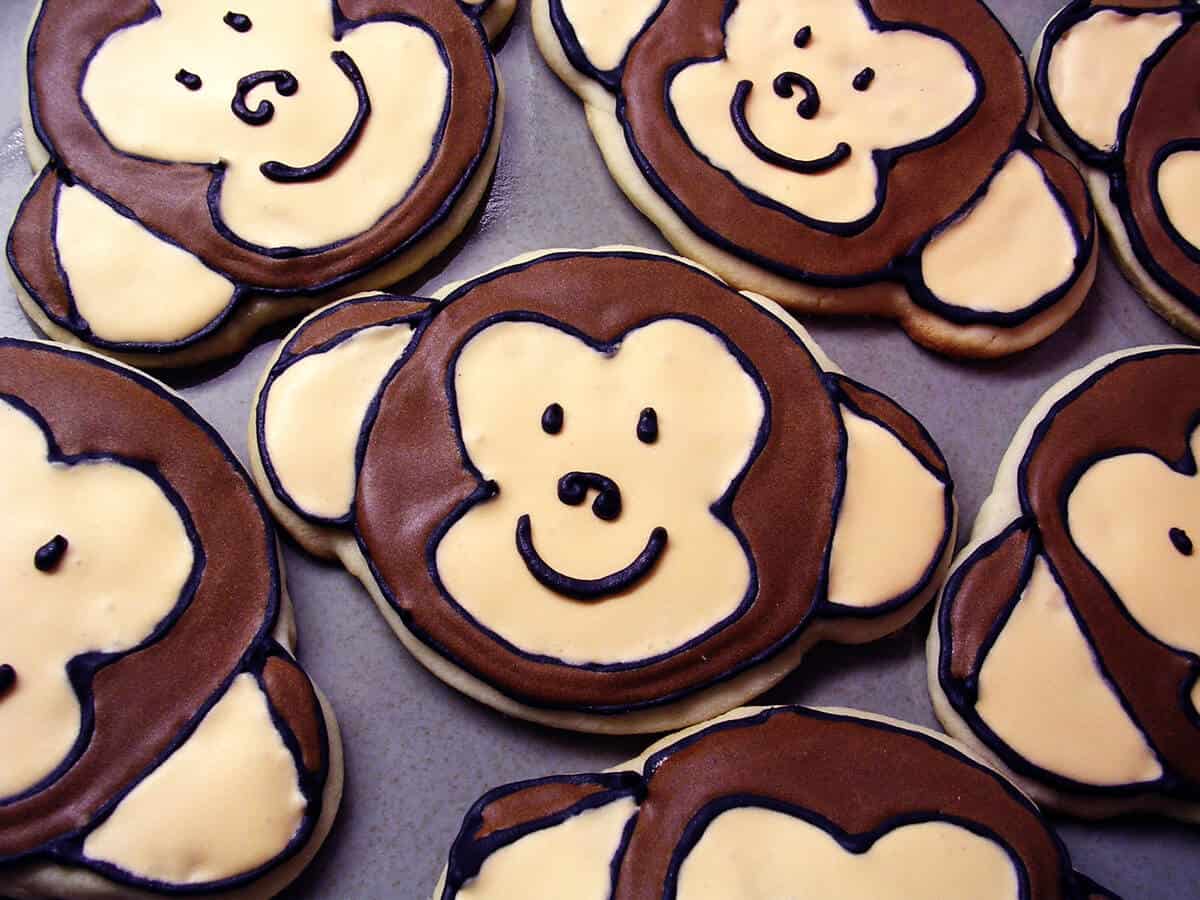
These adorable Monkey Face Sugar Cookies with Royal Icing are a classic roll out sugar cookie decorated with royal icing. Step by step instructions with photos.
My great friend Jenny is expecting her first baby in March, and her baby shower was yesterday. She and her husband Jeff have decided not to find out the sex of the baby, so she's tried to design her nursery around a gender-neutral theme - monkeys!
All of the things for the nursery are so adorable! Unfortunately, I couldn't make it to town for her shower, but I wanted to do something special, so I decided to make some sugar cookies with royal icing in the shapes of monkey faces.

Jump to:
Cookie Design
I started by finding a cute cartoon picture of a monkey face (although he kind of makes my cookies look less cute!):

I needed a monkey-face shaped cookie cutter, but the only ones I could find were online and wouldn't get here in time. I decided to wing it and use a series of shapes to build the monkey face.
Although I've worked with royal icing once before, I looked to a great tutorial Annie recently posted. Since I don't have a particular sugar cookie recipe I always use, I used her favorite one. Bake at 350 has also been posting some FAQ's on royal icing and helpful hints. This ended up being a long, long, and did I mention LONG day! Over 18 hours to be exact.
My problem was that I wasn't sure how many cookies I would get out 1 batch of dough and instead of erring on the side of caution and making 2, I just made 1, and 1 batch of royal icing. Then I discovered I would need more of each, so I had to make them again separately. That combined with the fact that I'm new to piping and the drying time makes for a very long day. I did take 1 break for dinner and to go to Target. I know it would NOT take this long next time (or if any of you decide to make these) - because I have the steps down and know how much it makes. I was kind of making up how to do it as I went along. Plus, you can always make the royal icing, dough, or even bake the cookies ahead of time instead of cramming it all into 1 day.
Cardinal Sugar Cookie with Royal Icing
Knowing that I was sending these cookie to my parents' house, I knew I needed to include a cookie for my dad. He has this idea that he should get to try any dessert that comes through their doors 🙂 Since my dad is a huge Cardinals fan - the baseball team and the birds themselves - I bought this Cardinal cookie cutter this past fall with the intent of making him Cardinal cookies...I decided to just make him 1 since I needed the rest of the dough for the monkeys.
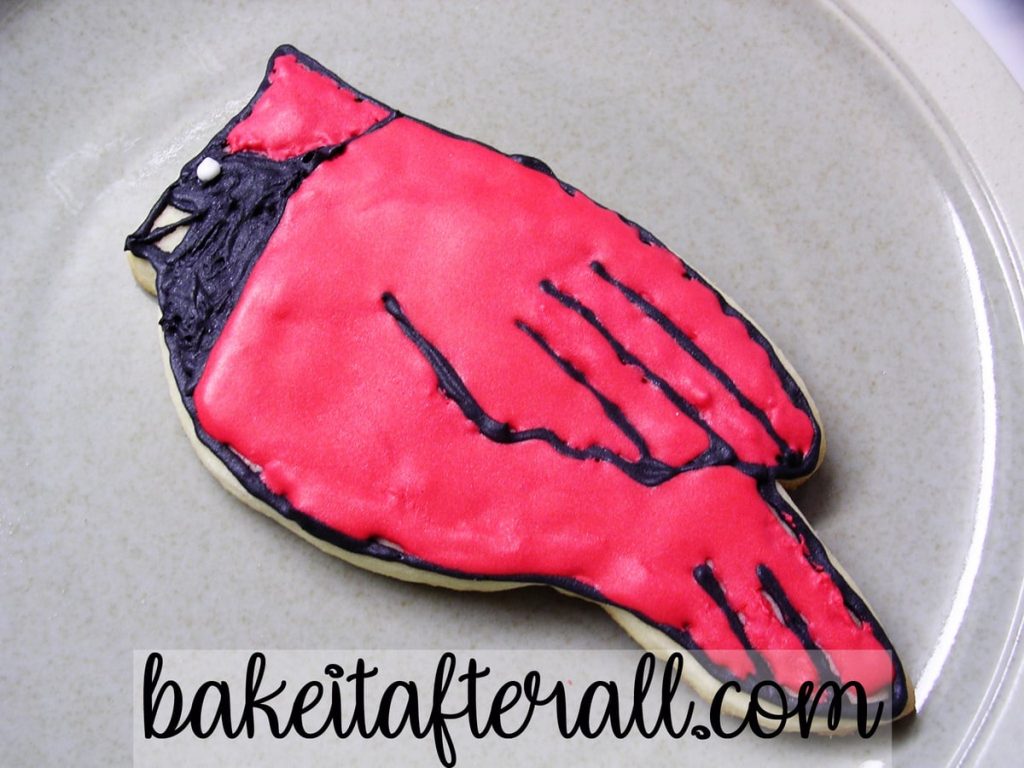
I think it turned out pretty good, except my flooding icing was not thin enough so it was a little clumpy in some spots (I didn't care at that point because I had been making and decorating cookies for almost 18 hours!)
Equipment
1 large and 1 small round biscuit cutters
2 squirt bottles
Disposable pastry bag fitted with a #3 tip
Gel icing colors:
black, brown, and ivory
Prepare the Sugar Cookie Dough and Royal Icing
You can use your favorite roll out sugar cookie recipe. My go-to for rolled sugar cookies is my [Not My] Granny's Sugar Cookies. I recommend 2 batches of sugar cookie dough.
You'll also want to prepare your stock royal icing. Here is my go-to Royal Icing recipe, of which I needed 2 batches.
Roll and Bake the Sugar Cookies
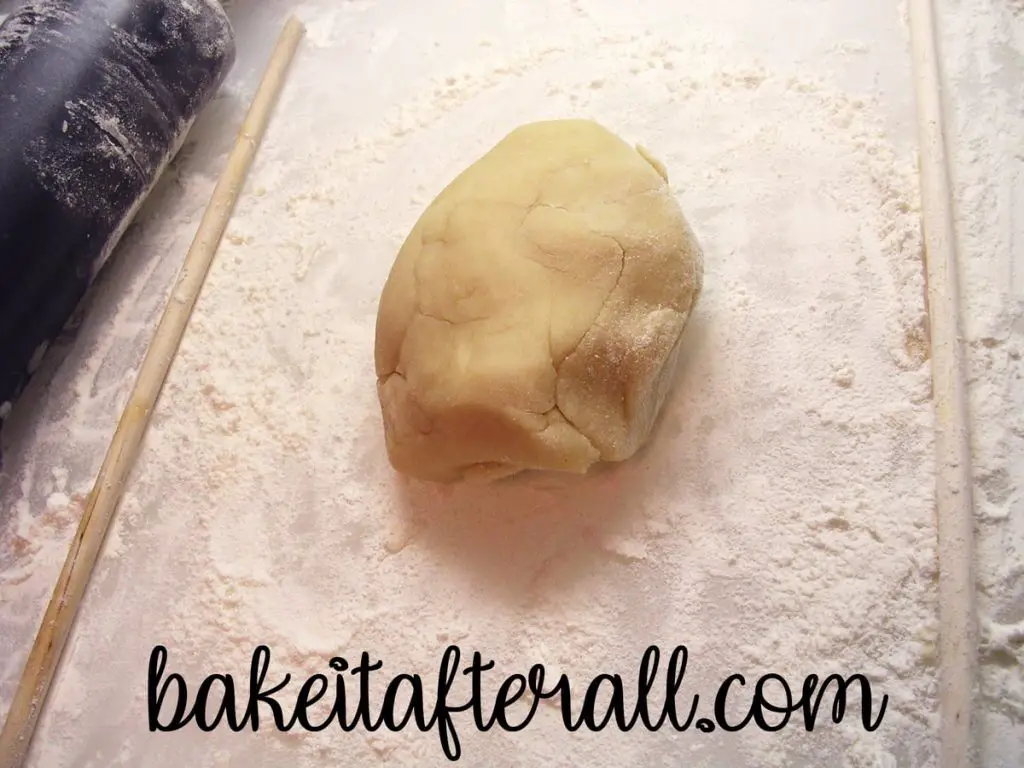
The first step is to roll the dough out on well-floured surface to a thickness of ¼-inch. I used two wooden dowel rods set up like this to guide my rolling and it worked so well! I am SO glad I bought these rods because I always have trouble rolling evenly, especially on the edges. You can also use a rolling pin with rolling pin guides.
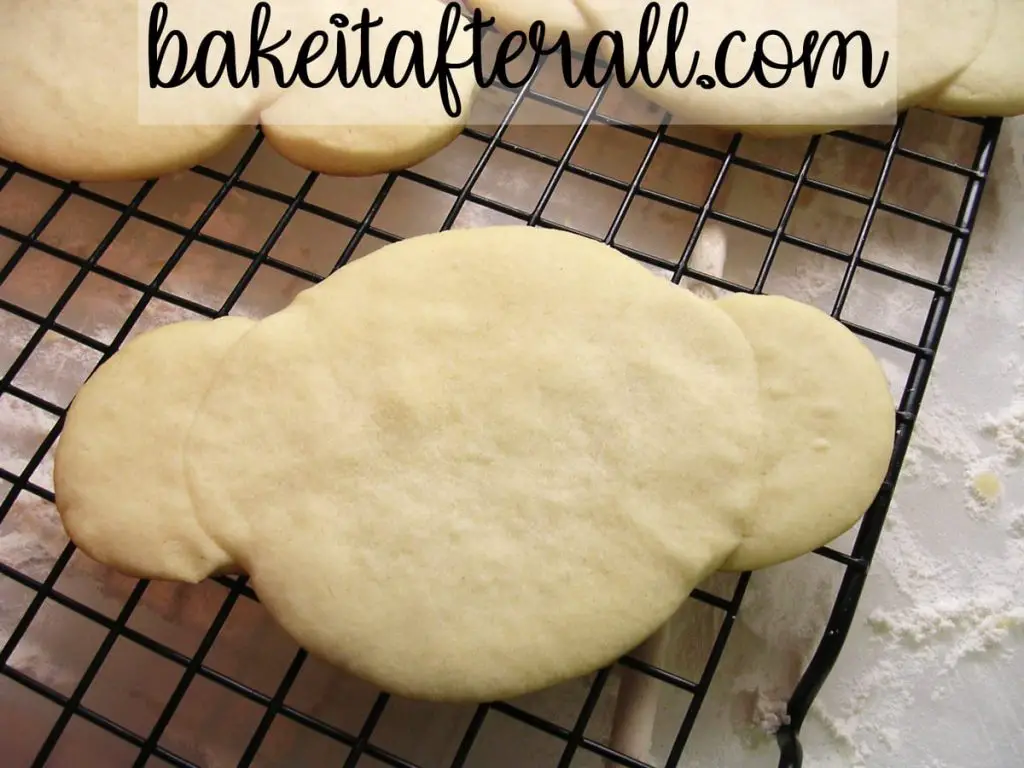
Next, use the large and small round biscuit cutters to cut out circles and transfer to a cold cookie sheet lined with parchment paper. Use a knife to slice the smaller circles in half as shown:

Then overlap the half circles onto the large circle to create the appearance of ears on the monkey face as shown above. When all of the ears have been secured, give them an extra press to make sure they are attached, and bake the cookies according to recipe directions.
When you remove them from the oven, let them sit on the cookie sheet for about 2 minutes, then carefully transfer to cooling racks. Cool completely. (Ignore that the ears in the picture below are underneath the face - it worked much better with them on top!)
Prepare and Apply the Royal Icing
To color your outlining icing, take about ½ cup royal icing into a fresh bowl and color first with brown icing gel, then add black icing gel to achieve a deep, black color.
Assemble a disposable pastry bag with a plastic coupler and a #3 piping tip. Place a wet paper towel in the bottom of a tall water glass. Place the bag in the cup, with the tip touching the paper towel. Fold the pastry bag over the top rim of the glass. Fill a the pastry bag with the black icing.
Using the cooled cookies, carefully pipe the black icing as shown (or with an even steadier hand!):
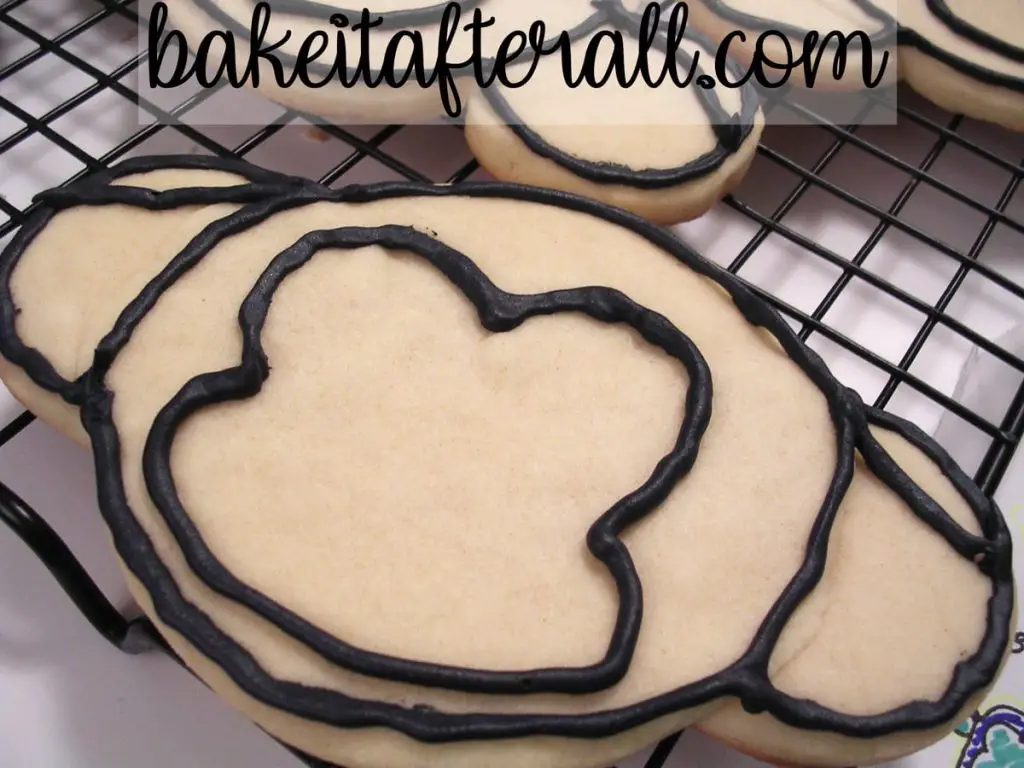
Set the cookies aside to dry for 1 hour.
Meanwhile, prepare your flooding icing by taking about ¾ cup of royal icing into each of 2 bowls. Add water by the teaspoon to achieve a thin consistency. You want the icing to run off the back of the spoon and the drips to disappear back into the icing below within 5 to 10 seconds.
Once you have achieved the right consistency, add brown coloring gel to one of the bowls. This may take quite a bit of gel to get a nice, dark color. Then add the ivory food gel to the next bowl - this will take much less so add it slowly.
Once you are satisfied with your colors, add each of them to one of two plastic squeeze bottles. Use a small piece of plastic wrap to cover the opening if your bottles aren't equipped with a cap. The bottles are now ready to flood. Alternatively, you can use disposable pastry bags fitted with #5 tips for flooding.
After the outlining has dried for at least 1 hour, flood the sections as shown:
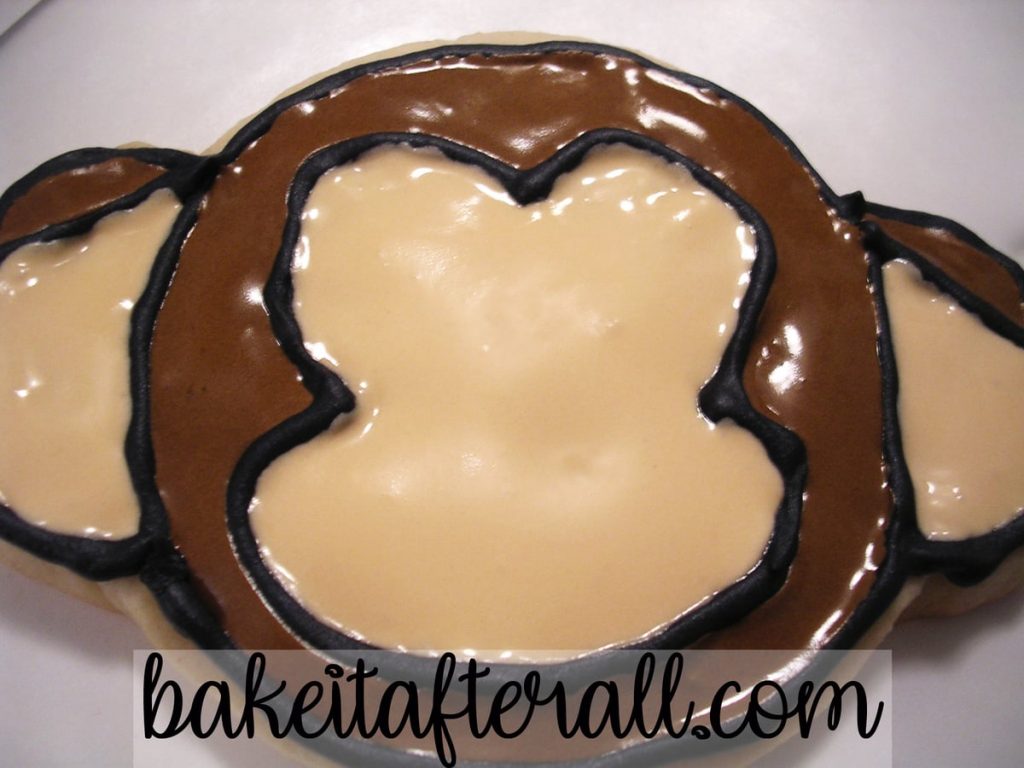
Use a toothpick to help guide the icing to the edges if necessary.
Let cookies dry for several hours or overnight. You can just let them sit out at room temperature, uncovered. You may also leave the black piping icing in the bag, just place a cap on the tip or cover it well with plastic wrap to prevent the icing from crusting over in the tip.
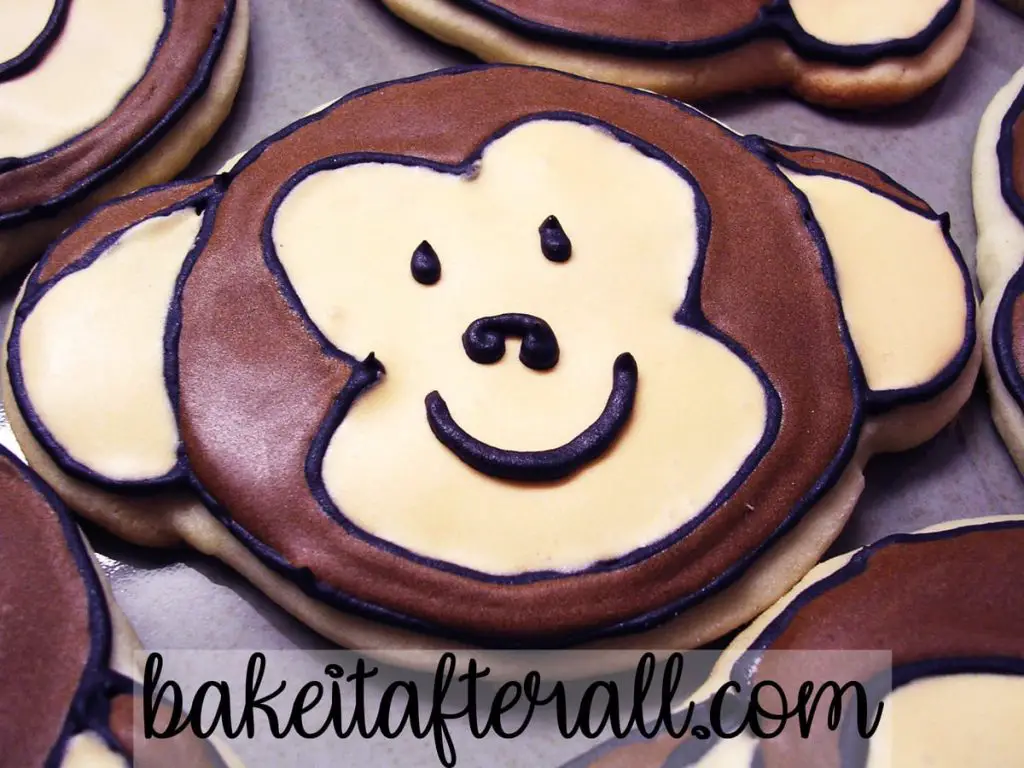
After the cookies have sufficiently dried, use the black frosting to pipe a face onto the monkey as shown:
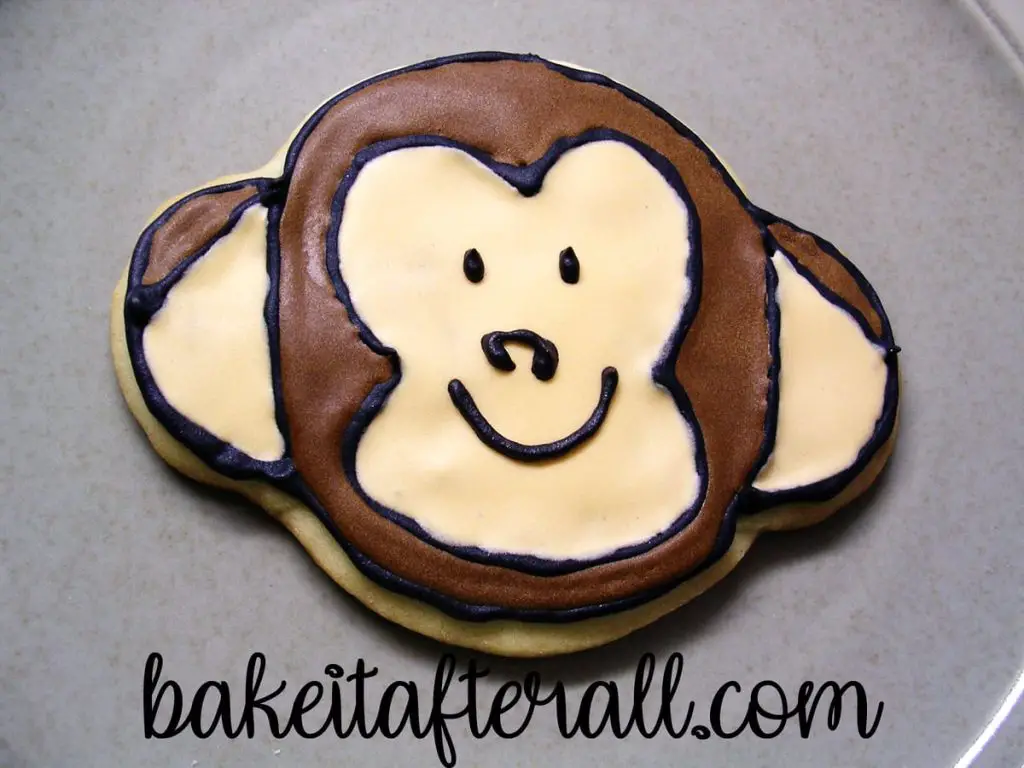
Allow icing to dry for at least an hour, if not more. I did my face piping in the morning and let them sit out all day before packaging them up for mailing. If not mailing them, package them in single layers in airtight containers. If you need to do more than a single layer, use aluminum foil to separate the layers, otherwise the grease from the bottom of the top cookie will get onto the royal icing of the bottom cookie and affect the look.
Gluten Free Option
I haven't tried it myself with this recipe, but I have good luck using Bob's Red Mill Gluten Free 1 to 1 Baking Flour in place of all purpose flour in cookie recipes.
Looking for More Royal Icing Sugar Cookies?
Check out these other Royal Icing Sugar Cookie creations:
Sugar Cookie Gender Reveal
Penelope Bird Cookies
Butterfly Sugar Cookies with Royal Icing
Butterfly and Dragonfly Sugar Cookies with Royal Icing
Snowflake Gingerbread Cookies
Brown Sugar and Spice Winter Mitten Cookies
St. Patrick's Day Cookies
Bridal Shower Sugar Cookies with Royal Icing
Baby Shower Sugar Cookies with Royal Icing
Halloween Sugar Cookies with Royal Icing
Pastel Christmas Sugar Cookies with Royal Icing
Easter Cookies with Royal Icing
See my Painted Watercolor Cookies for decorated cookies that require NO piping!
For an egg free shortbread cookie with a simple egg free icing, check out my Iced Vanilla Shortbread Cookies.
📖 Recipe

Monkey Face Sugar Cookies with Royal Icing
Equipment
- two ¼-inch wooden dowel rods or rolling pin guides
- 1 large and 1 small round biscuit cutters
- disposable pastry bags fitted with a #3 tip
- 2 squeeze bottles
- toothpicks
Ingredients
- 2 batches sugar cookie dough of choice (see note)
- 2 batches royal icing (see note)
- black, brown and ivory gel icing colors (see note)
Instructions
Cut and Bake the Cookies:
- Roll dough out on well-floured surface to a thickness of ¼-inch. You may use wooden dowel rods set up as guides for the rolling pin or rolling pin guides that slip onto the ends of the rolling pin to achieve even rolling thickness.
- Use the large and small round biscuit cutters to cut out circles and transfer to a cold cookie sheet lined with parchment paper. Use a knife to slice the smaller circles in half.
- Then overlap the half circles onto the large circle to create the appearance of ears on the monkey face. Press the dough down to attach the shapes together.
- When all of the ears have been secured, give them an extra press to make sure they are attached, and bake the cookies according to recipe directions.
- When you remove the cookie sheets from the oven, let the cookies sit on the cookie sheet for about 2 minutes, then carefully transfer to cooling racks. Cool completely. Meanwhile, begin coloring your royal icing.
Prepare the Outline Royal Icing:
- Transfer about ½ cup royal icing into a fresh bowl and color first with brown icing gel, then add black icing gel to achieve a deep, black color.
- Assemble a pastry bag with a plastic coupler and a #3 piping tip. Place a wet paper towel in the bottom of a tall water glass. Place the bag in the cup, with the tip touching the paper towel. Fold the pastry bag over the top rim of the glass. Fill a the pastry bag with the black icing.
- After the cookies have cooled completely, carefully pipe the black icing. Set cookies aside to dry for 1 hour. Meanwhile, prepare your flooding icing.
Prepare the Flooding Icing:
- Take about ¾ cup of royal icing into each of 2 bowls. Add water by the teaspoon to achieve a thin consistency. You want the icing to run off the back of the spoon and the drips to disappear back into the icing below within 5 to 10 seconds.
- Once you have achieved the right consistency, add brown coloring gel to one of the bowls. This may take quite a bit of gel to get a nice, dark color. Then add the ivory food gel to the next bowl - this will take much less so add it slowly.
- Once you are satisfied with your colors, add each of them to one of two plastic squeeze bottles. Use a small piece of plastic wrap to cover the opening if your bottles aren't equipped with a cap. The bottles are now ready to flood. Alternatively, use disposable pastry bags fitted with #5 tips for flooding.
- After the outlining has dried for at least 1 hour, flood the sections as shown in the photo.
- Use a toothpick to help guide the icing to the edges if necessary.
- Let cookies dry for several hours or overnight. You can just let them sit out at room temperature, uncovered. You may also leave the black piping icing in the bag, just place a cap on the tip or cover it well with plastic wrap to prevent the icing from crusting over in the tip.
Finish the Cookies:
- After the cookies have sufficiently dried, use the black frosting to pipe a face onto the monkey.
- Allow icing to dry for at least an hour, if not more. I did my face piping in the morning and let them sit out all day before packaging them up for mailing.

Sinful Southern Sweets says
These are just precious! I have 2 little "monkeys" of my own that would adore these!
Mary Ann says
Great job! How kind of you to put all that work into the cookies. They turned out beautifully. I am sure your friend and dad really appreciated it!
Live.Love.Eat says
You did an awesome job. I just love monkeys. And you have way more patience than I do.
Pam says
So cute! They look really delicious too.
Bob says
Heh, that's great.
Sarah says
Just found your blog - super cute monkey faces!
Maria says
I LOVE your cookies! They are too cute!
Karine says
You did an amzing job with your cookies! They are worth the effort! 🙂
elly says
These are beyond adorable! I love them.
Macaroni and Cheesecake says
Oh my goodness! Those are so cute! Great job, especially using different cookie cutters to get the shape!
fimere says
quelle merveilleuse réalisation, sublime
bonne soirée
Sharon says
I'm SO impressed! I'm sure your friends loved these though they're almost too cute to eat.
Unknown says
Those are adorable! I love monkey-anything! I really want to work on my decorating skills some more. This post is great inspiration!
Kerstin says
These are SO cute Meghan - really beyond adorable! Monkeys always make me smile! My first time working with royal icing I foolishly made way too many different colors - never again! I think you live and learn 🙂
Megan says
18 hours? I think I would have dropped dead at that point.
But then you see what an excellent job you did and it was all worthwhile.
Really - those are amazing. My daughter loves monkeys so I just might have to steal this idea.
CaSaundraLeigh says
Yours came out SO adorable. I've only done homemade sugar cookies and the royal icing adventure once, and I actually used the same recipes you did! Annie's always turn out wonderful, she makes it seem so easy. So do you! But then again you must have a lot of patience..I got fed up after an hour ha! 😛
Kay says
Brilliant - I was looking for monkey cookies to do for my daughter's birthday (she is obsessed with monkeys) and these are just perfect. On the second stage so far so hoping they turn out as well as yours!
Anonymous says
Had fun making these cookies. Did a quick short cut though. My husband made a cookie cutter out of tin that allowed me to cut cookies in one piece.Found piping the hardest part, but all went well. Changed the face expression on each to give them character. Thanks for your ideas.
Sharon