
Painted Watercolor Cookies feature several techniques for painting cookies. Use either royal icing or a simple egg free icing for an easier, faster alternative to royal icing with no piping required! I show you how to apply edible paint for cookies and how to paint with luster dust, including gold luster dust. You can easily make edible rose gold paint with this method. I also include tips for adding handwritten calligraphy to cookies.

I recently made a batch of Iced Vanilla Shortbread Cookies, which are a completely egg free cookie. My original idea was to paint the cookies with rose and gold colored luster dust, but the color was so muted. I then remembered how I tint my royal icing with gold food gel before painting on the gold luster dust to enhance the color. This got me wondering if I could paint these cookies with food coloring and then luster dust. It worked!
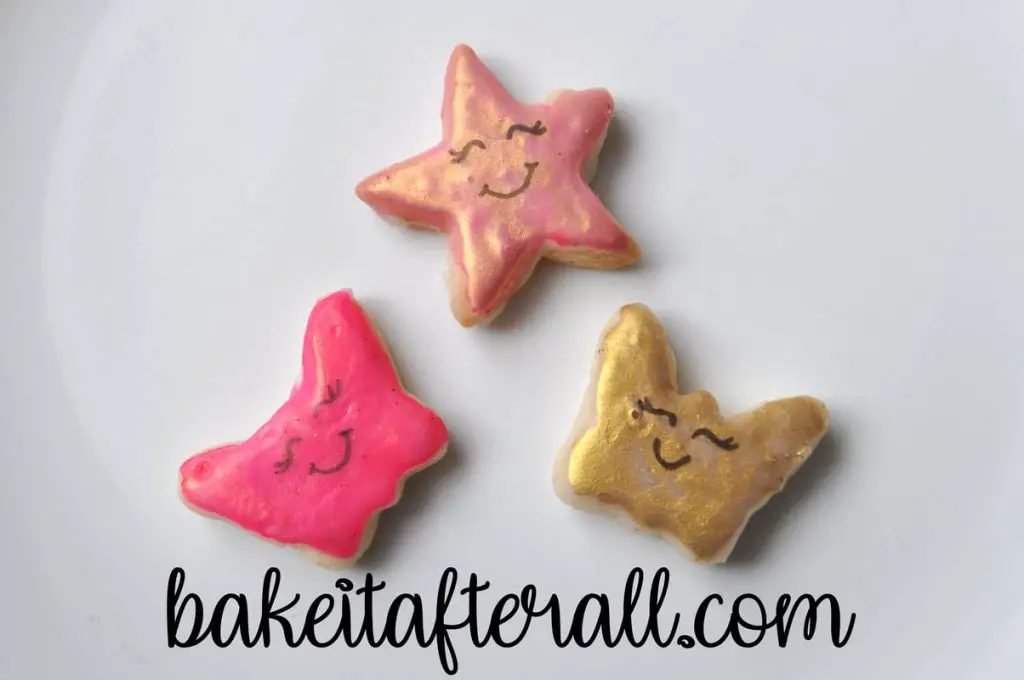
I played around with adding luster dust to the coloring and then adding faces and calligraphy to the cookies with edible food coloring markers. I had so much fun with these cookies! I am so excited to have options for decorating cookies with beautiful designs that does not rely on royal icing.
I love making royal icing cookies, but I don't love eating them. The icing tends to be overly sweet and hard. Furthermore, royal icing contains meringue powder which is an egg based product and not suitable for people with egg allergies. This simple icing is soft and not too sweet when combined with the shortbread cookie that has a lower amount of sugar than most recipes.

While I love using the Iced Vanilla Shortbread Cookie recipe because the icing is so easy and fast, this method will certainly work for painting on royal icing. Using this simple tutorial, you can easily paint your own cookies! I can't wait to let me kids play around with painting cookies. Cookie painting would be such a fun activity for kids at a birthday party or Girl Scout meeting!

WANT MORE PAINTED COOKIE IDEAS? See my Painted Rainbow Cookies!
Jump to:
- Painted Sugar Cookies
- Painting Cookies with Food Coloring
- Painted Ombre Cookies
- Painted Leaf Cookies and Painted Pumpkin Cookies
- Painted Tree Cookies
- Painted Easter Cookies
- Painting Colored Luster Dust
- Gold Luster Dust
- Dry Application
- Wet Application
- Gold Splattered Cookies
- Rose Gold Edible Paint
- Edible Food Coloring Pen
- Calligraphy on Cookies
- Silhouettes on Cookies
- Royal Icing Details
- Storage
- Roll Out Cookie Dough Recipes
- Looking for More Decorated Cookies?
- 📖 Recipe
Painted Sugar Cookies
While I am demonstrating this technique for painted cookies with my Iced Vanilla Shortbread Cookies, this can be done with my go to roll out Sugar Cookie recipe. You can ice those sugar cookies with this easy no egg icing or with royal icing.

Painting Cookies with Food Coloring
Making edible paint for cookies is so easy! First you need to start with a batch of iced cookies. You can use shortbread cookies or sugar cookies and ice them with a simple egg free icing or royal icing.
To begin, you'll need a high proof grain alcohol such as Everclear. You can use vodka, but I've had some trouble with that pitting my royal icing, so I stick with Everclear. It is the highest proof clear alcohol that won't leave behind a flavor when it evaporates.
I've also seen people recommend clear vanilla extract for dissolving food gel or luster dust, but I had pitting issues with that too. The higher water content in vodka and vanilla extract caused my icing to dissolve. The only thing that has worked for me reliably is Everclear. It evaporates so quickly!
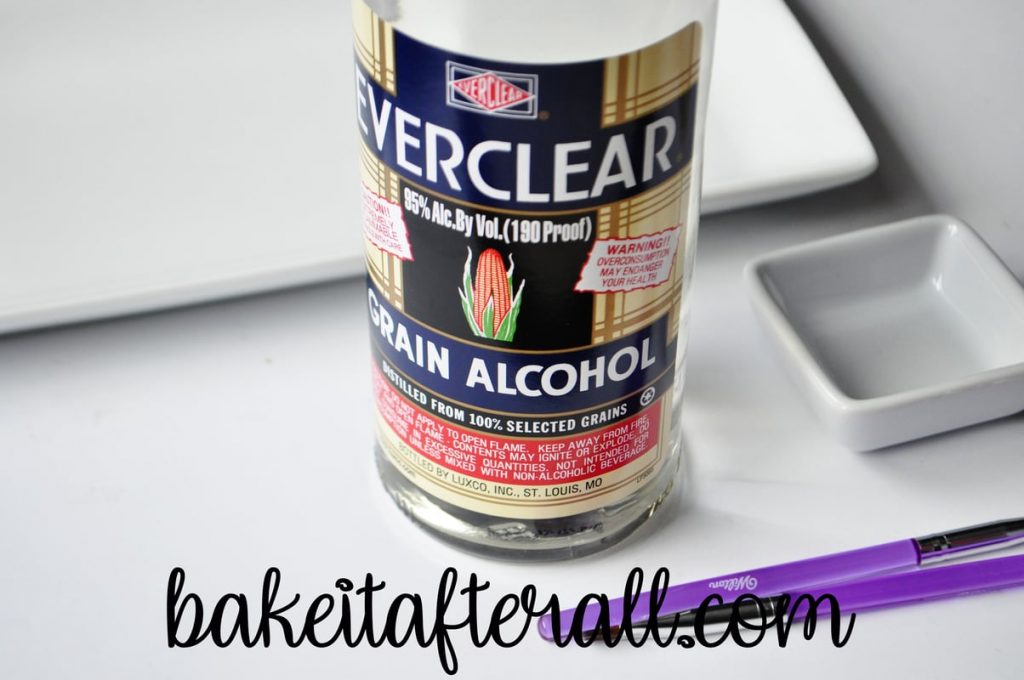
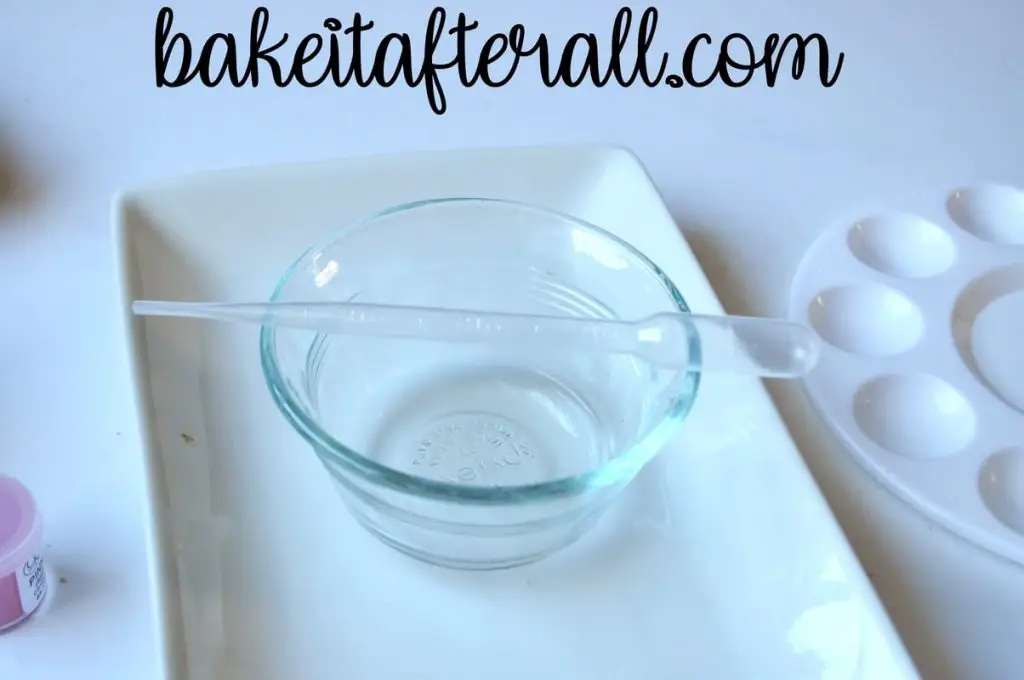
I pour the Everclear into a small dish.
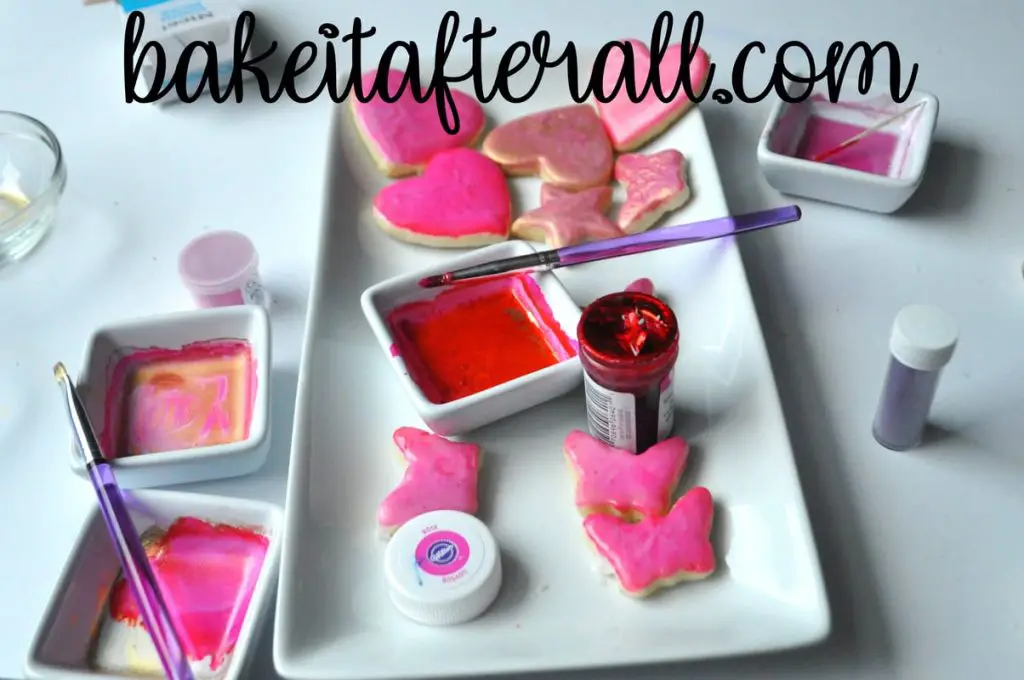
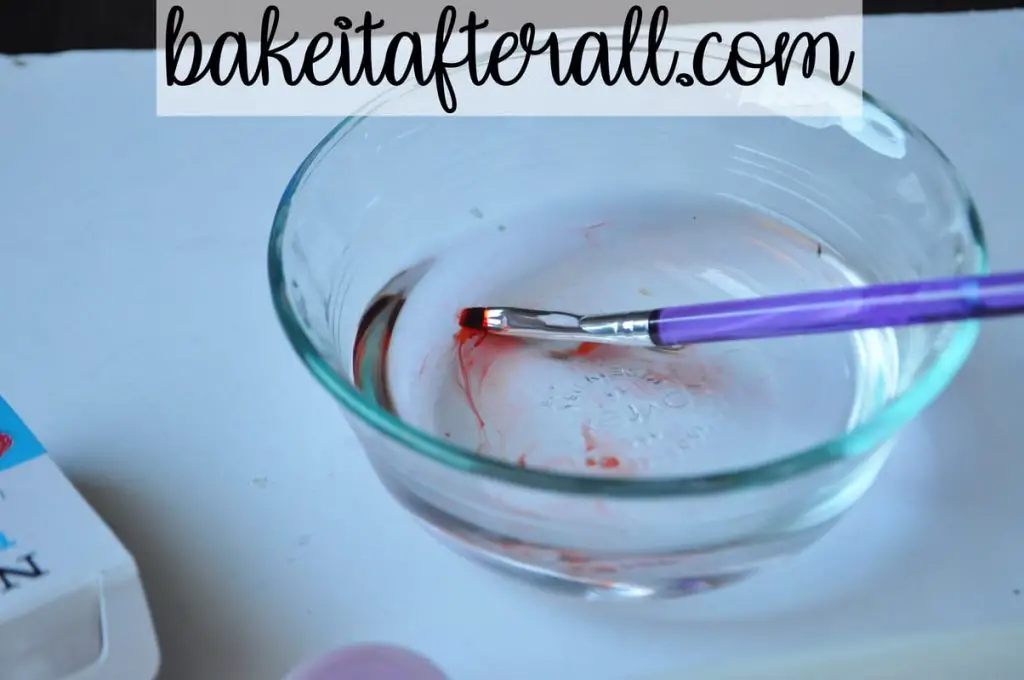
I put a small amount of food coloring gel into a well of a paint palette I've dedicated for cooking decorating.
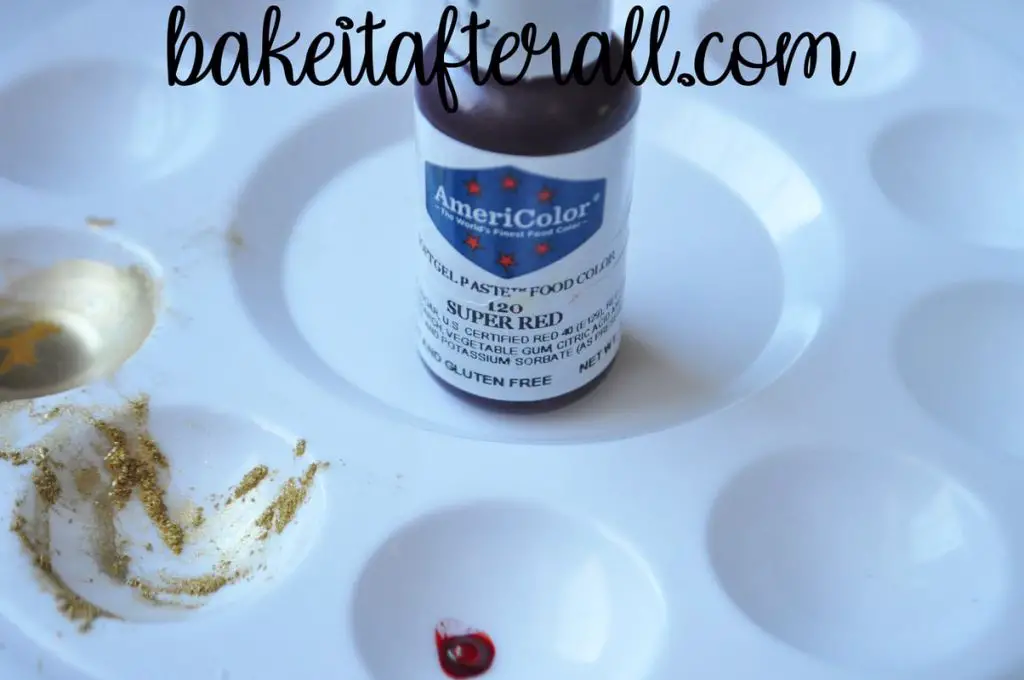
Then, I use a plastic disposable transfer pipette to deliver drops of Everclear to my paint palette. It is easy to put too much liquid in, so I like to do it drop wise. If you do put too much, you want just wait a bit for the alcohol to evaporate and the volume of liquid to decrease. Another option is to add more of the gel coloring.
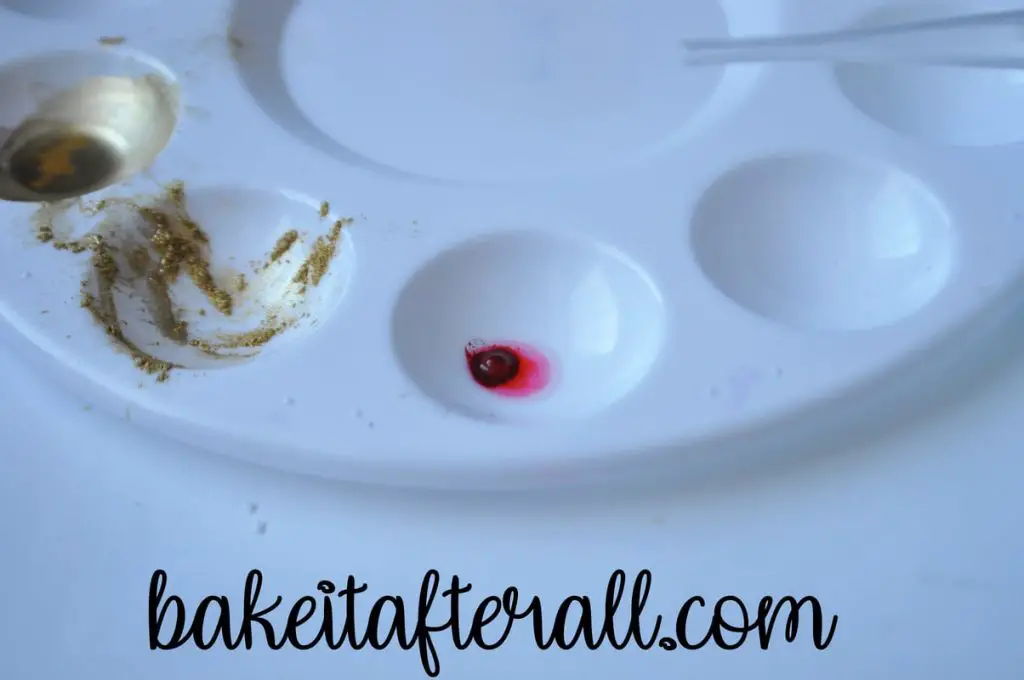
I mix the gel with the alcohol using a food grade paintbrush until the color is mixed evenly. I'll add more drops if the color is too intense, or more food gel if the color is not dark enough.
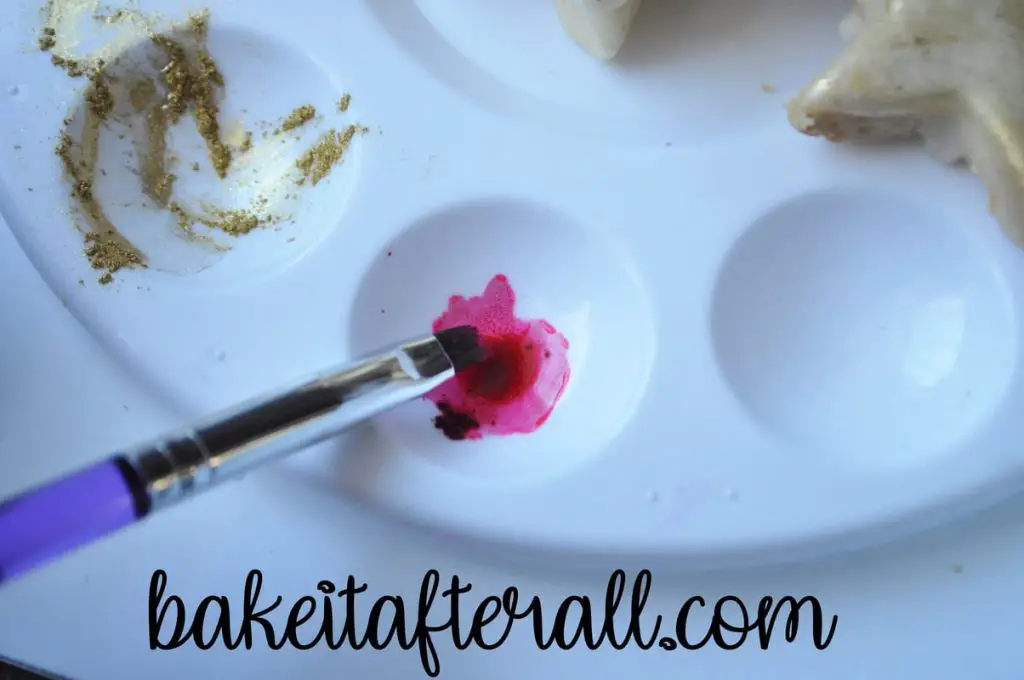
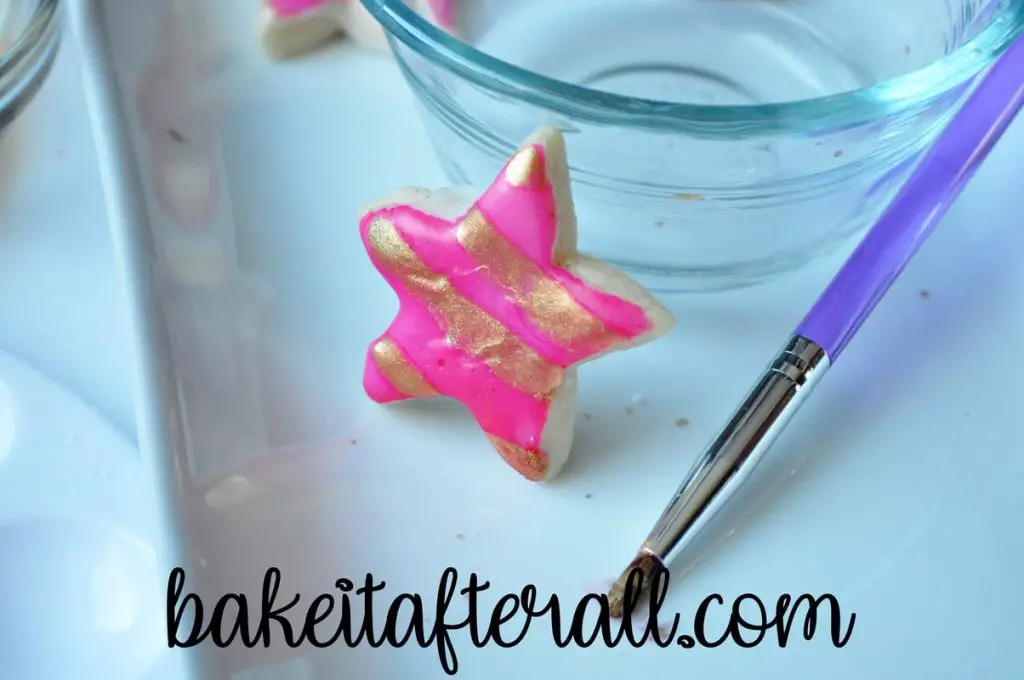
Once your paintbrush has the food coloring paint on it, use nice long brush strokes to cover the surface of the cookie with the edible paint.
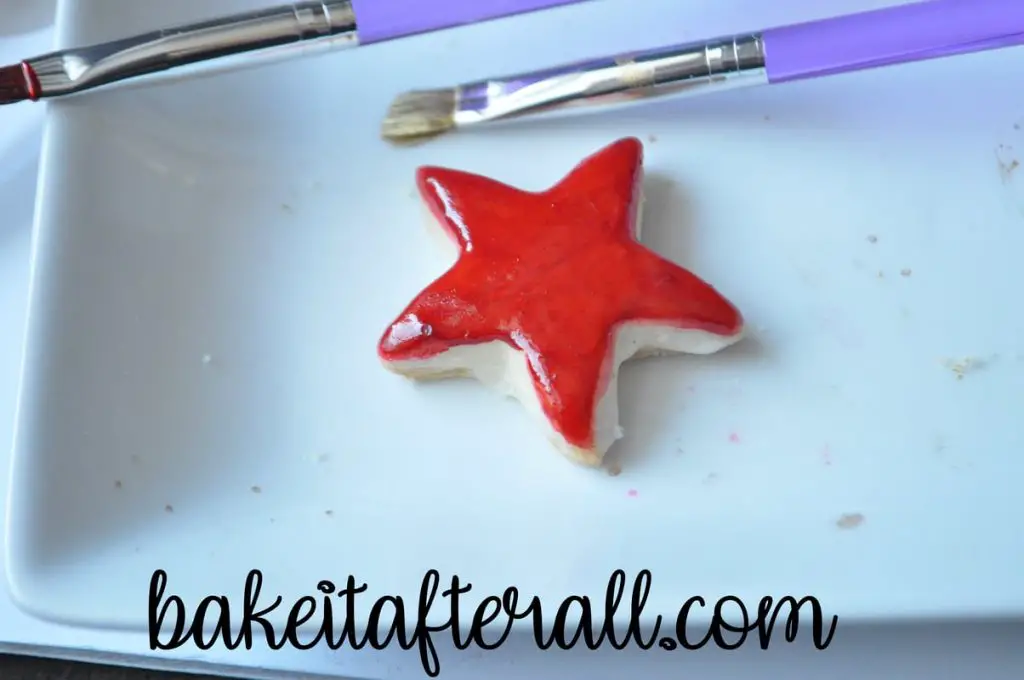
Depending on what design you're going for, you may want to paint the entire surface of the cookie or do patterns, shapes, stripes, or even writing.
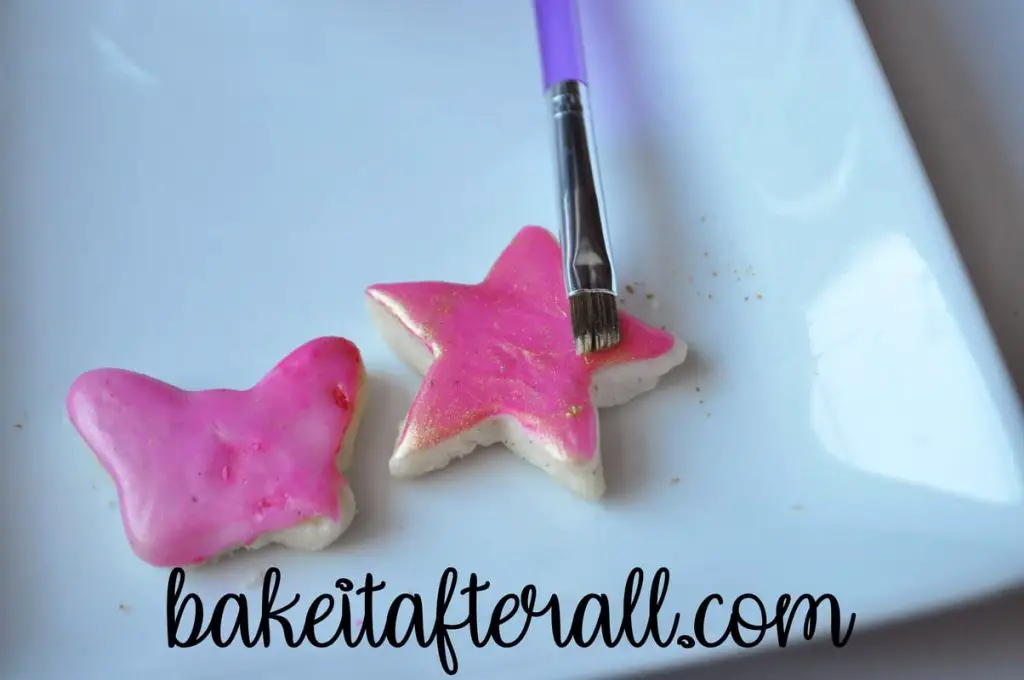
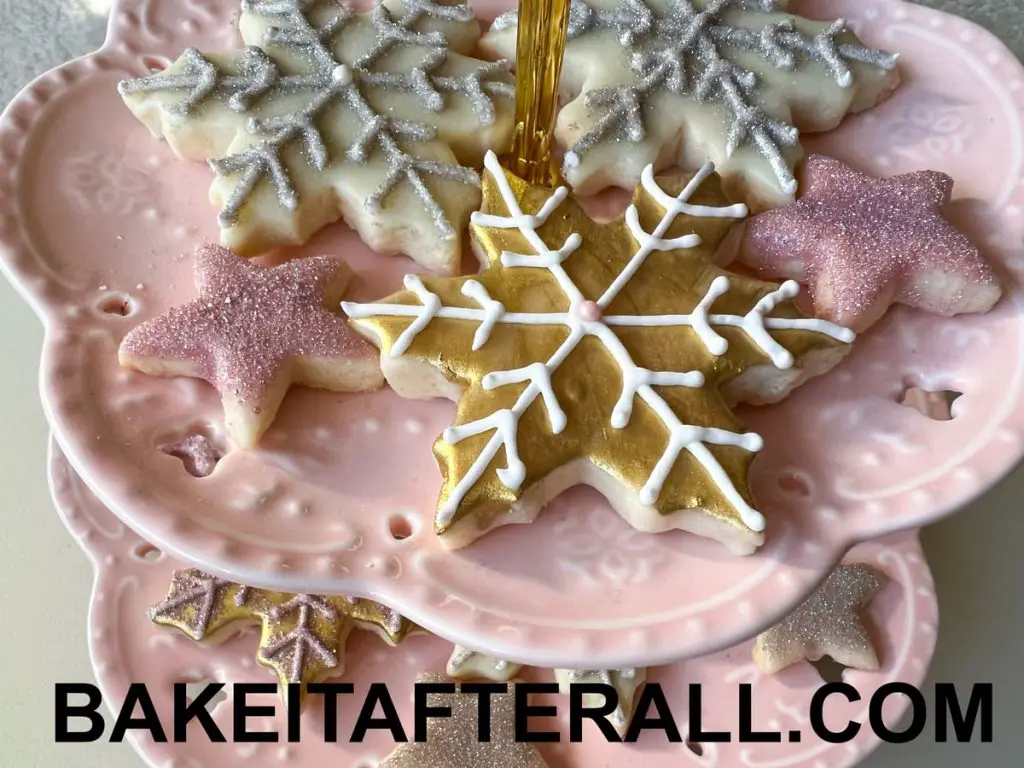
For this cookies, I just painted stripes of dark pink food coloring paint. For the cookie above it, I did pink stripes alternating with gold luster dust paint.
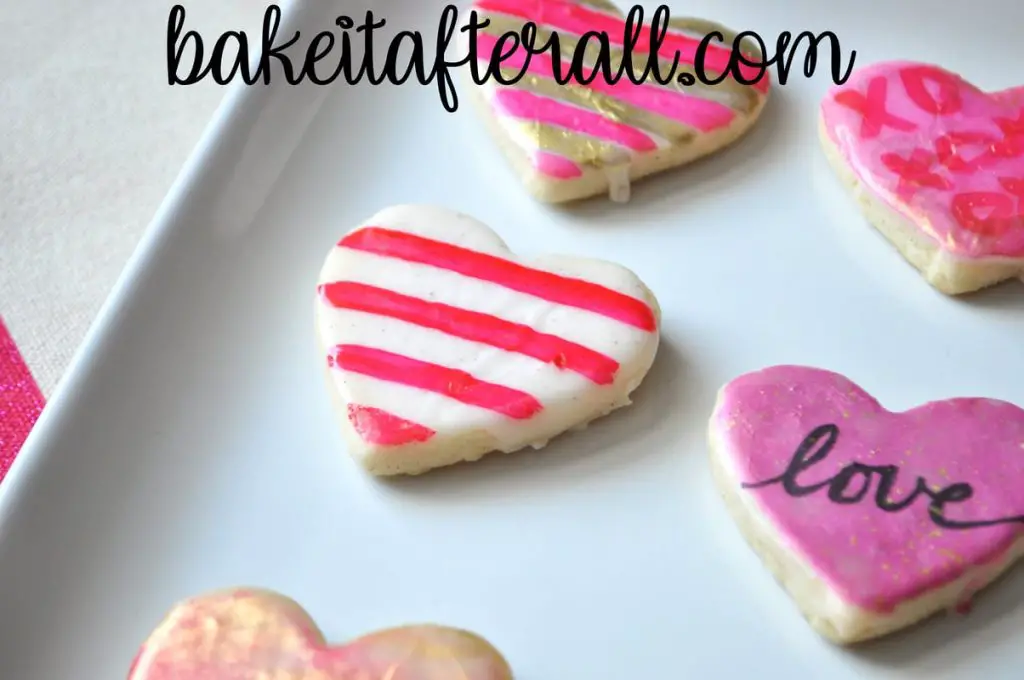
For the bottom middle cookie cookie, I first coated the cookie with a suspension of pink luster dust. After that dried, I painted on the letters X and O for hugs and kisses with darker pink paint.

Just like with actual watercolors or paint, I rinse out my brush in a dish of water in between colors, then dab the bristles dry with a paper towel.
To create these Painted Cardinal Cookies, I added thin layers of coloring and applied additional coats of color to areas I wanted darker and tor create the appearance of shading for the feathers. You can experiment with building layers of the same color or different colors just like you would with painting on paper or a canvas.

Painted Ombre Cookies
One of my favorite cookies is this ombre cookie where I did a gradient of pink.
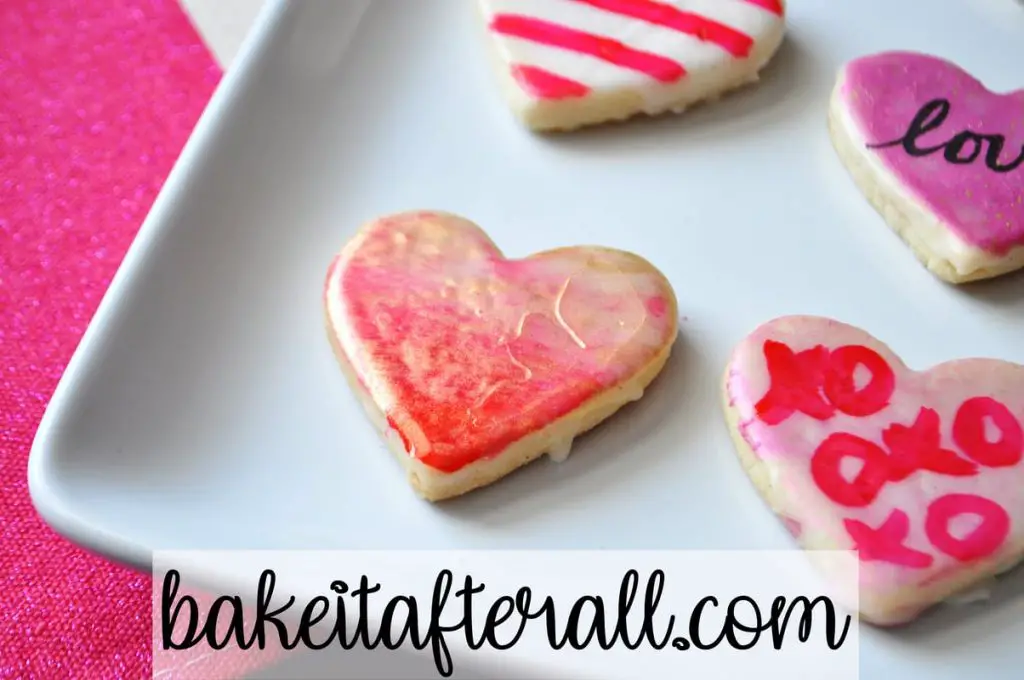
To create this effect, I started with a cookie that had a layer of gold luster dust already applied and dried, which gave it a pretty metallic shine. Next, I began at the bottom of the cookie with paint that had just been applied to the paintbrush and worked my way up the cookie. This naturally created a gradient of color as the paintbrush ran out of paint.
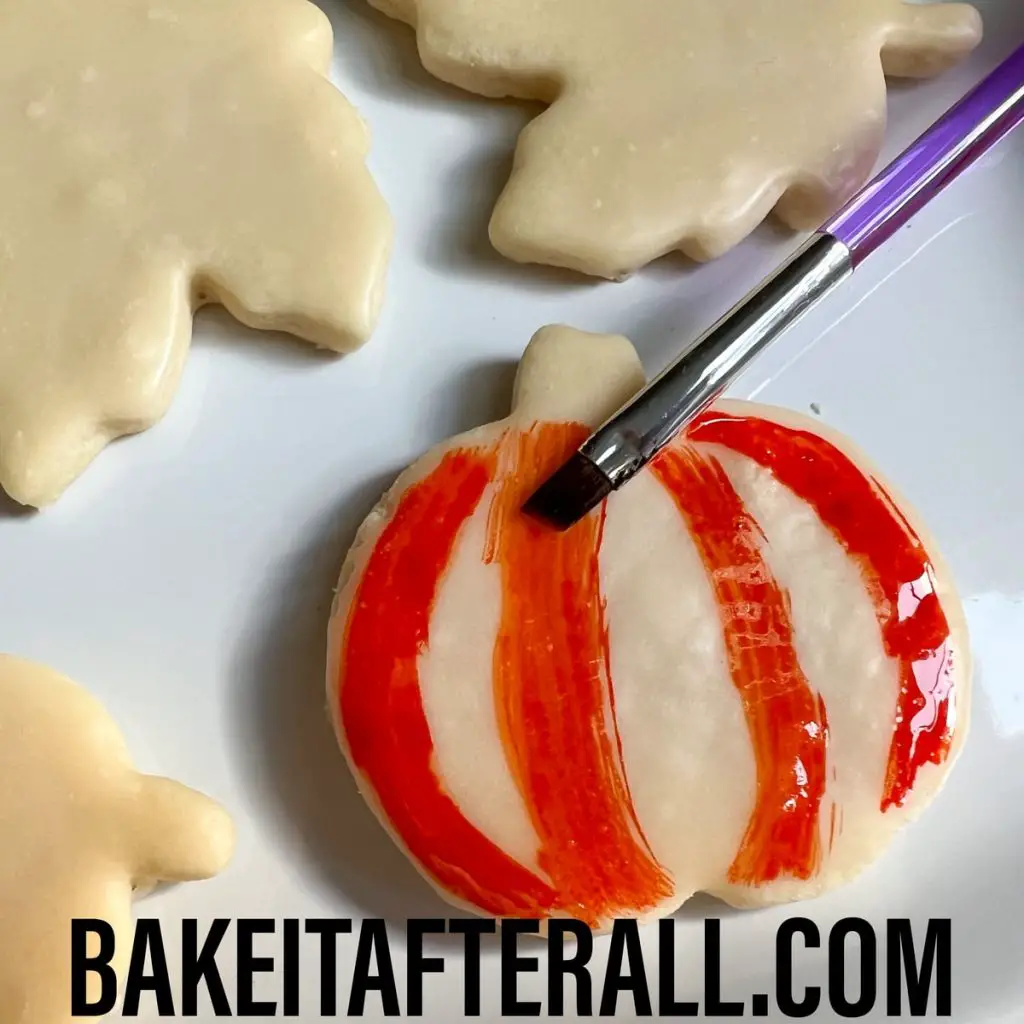
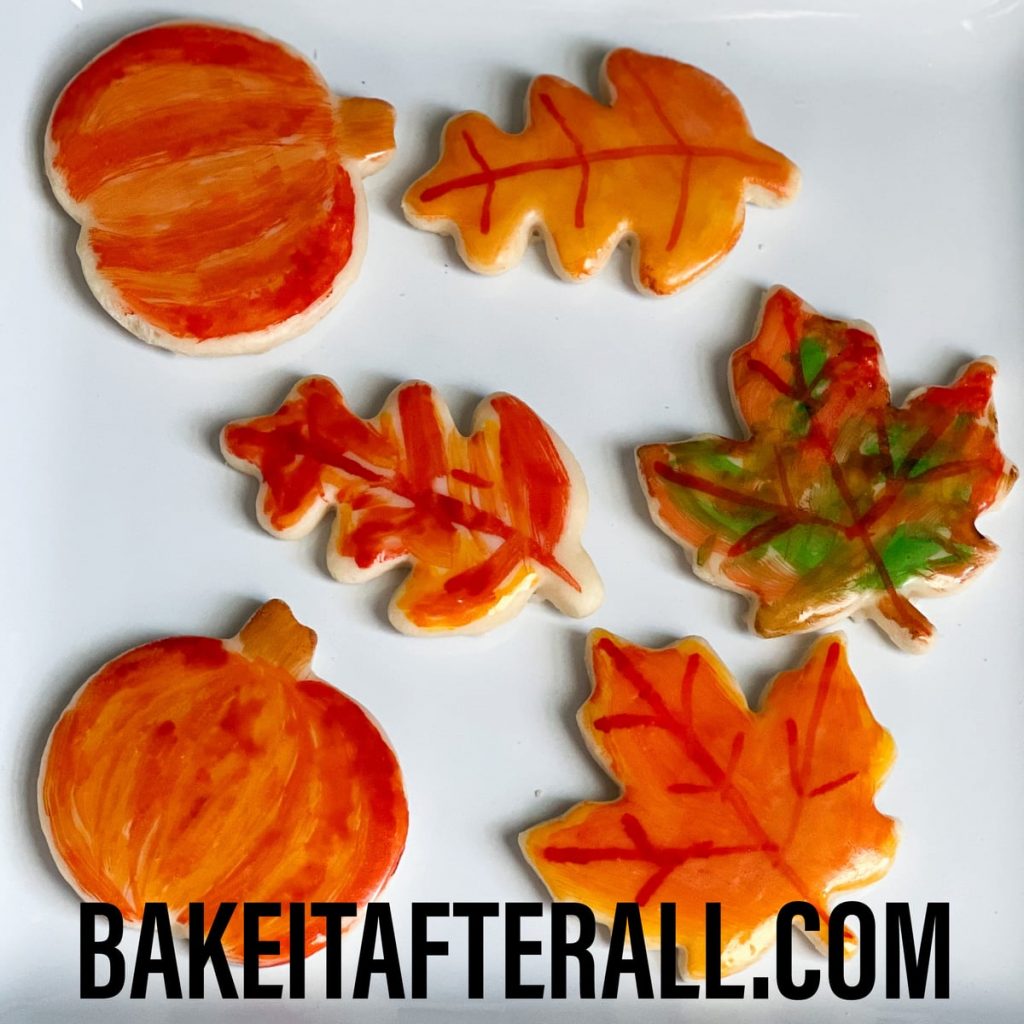
Painted Leaf Cookies and Painted Pumpkin Cookies
Fall leaves and pumpkins are really pretty when painted with edible watercolors. You can customize them in any way. I like to paint the pumpkins with curved vertical lines first and then fill in other details.
For the leaves, I created a variegated pattern with fall colors and then painted on the veins of the leaf.
If you like the look of these cookies, you may also be interested in these Fall Leaf Sugar Cookies and Fall Marbled Cookies.
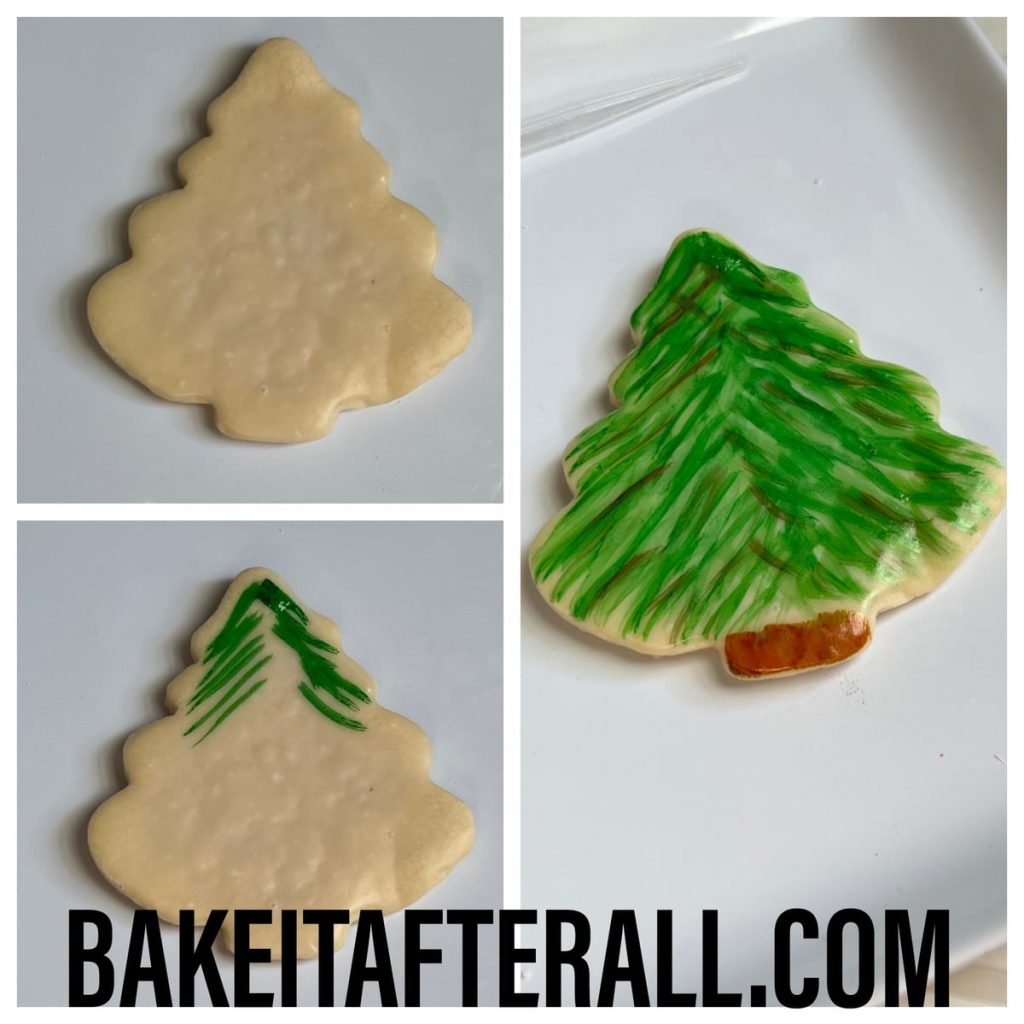
Painted Tree Cookies
To make Painted Evergreen Trees, I used a Christmas tree cookie cutter. Then I painted strokes of different shades of green and brown. Finally, I added a brown tree trunk. For more decorated Christmas Cookies, you may like these Pastel Christmas Sugar Cookies.
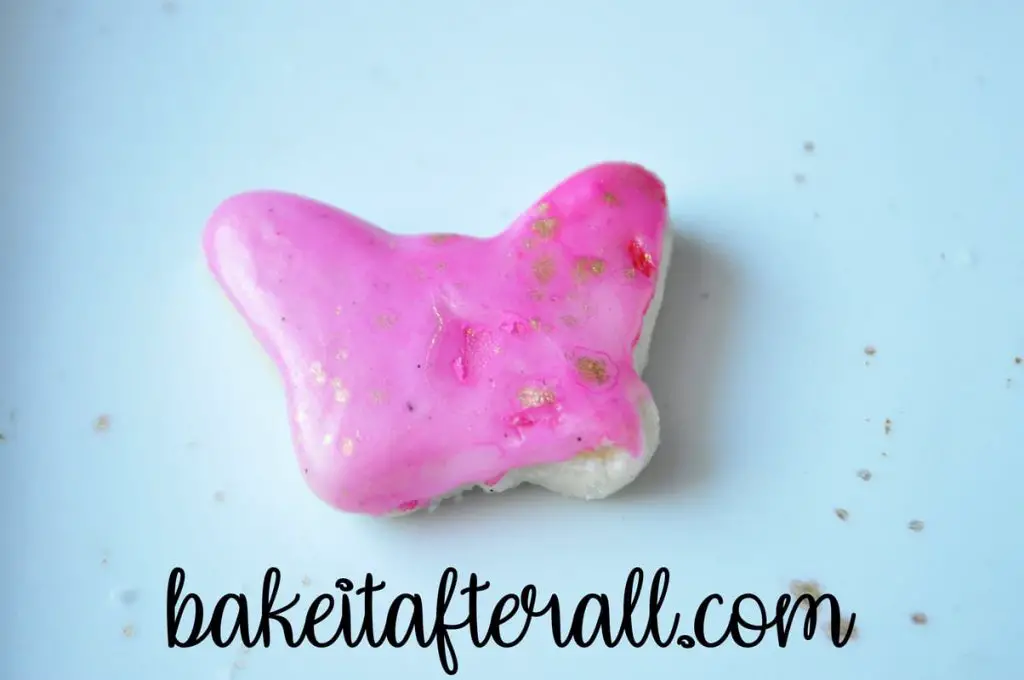
Painted Easter Cookies
For these Painted Easter cookies, I let my girls use the watercolor food colors to paint egg, bunny and butterfly shaped cookies. They enjoyed this activity even more than dyeing Easter eggs! Years ago, my family did this with Royal Icing and had a lot of fun coming up with creative combinations.

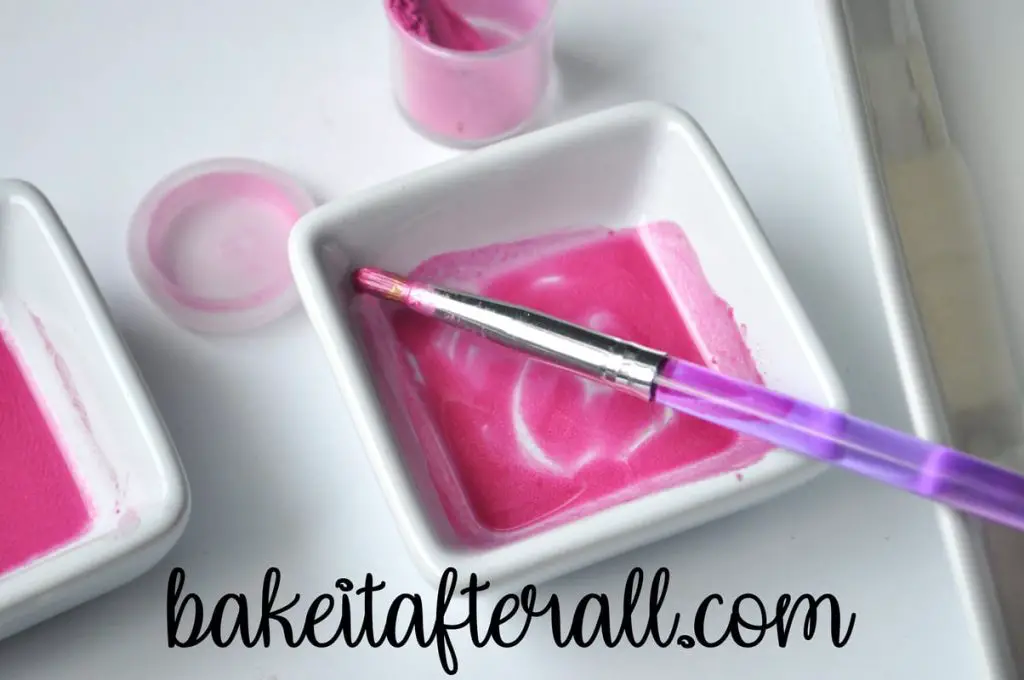
Painting Colored Luster Dust
You have two main options for applying luster dust to the surface of the icing. You can either brush it on dry, or you can make a suspension in alcohol and paint it on.
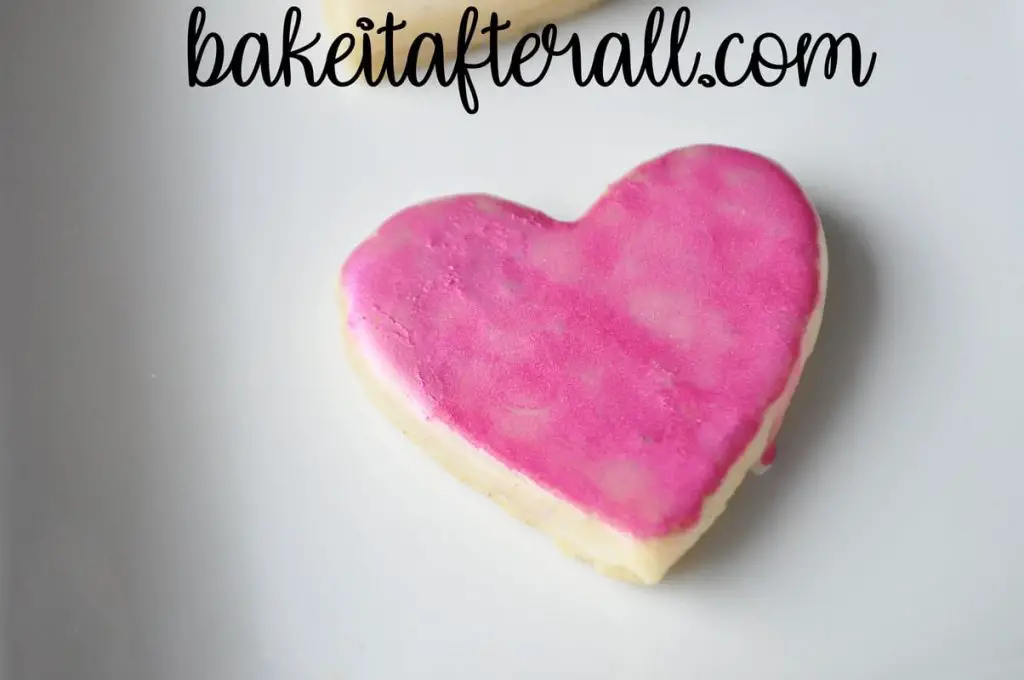
The first option tends to just add a little shimmer; whereas, the suspension option is more vibrant. Like with the food coloring, I add the alcohol drop by drop to the powdered luster dust, in this case pink luster dust, so as not to dilute it too much. I mix it with a paintbrush and then paint the surface of the cookie.
This is about as dark as I can get the color with white icing underneath. To enhance the color, either tint the icing before applying it to the cookies or paint pink gel (diluted in alcohol) on first, let dry, then brush on dry luster dust for shine.
Another option is to mix up the diluted food gel and then add luster dust directly to the paint. I added some gold luster dust to the pink and it made a pretty rose gold color. I buy my luster dust locally, but I have heard Truly Mad Plastics has a great luster dust selection.
Gold Luster Dust
To make a brighter gold color, you can first color your easy egg free icing or royal icing with gold food coloring gel.
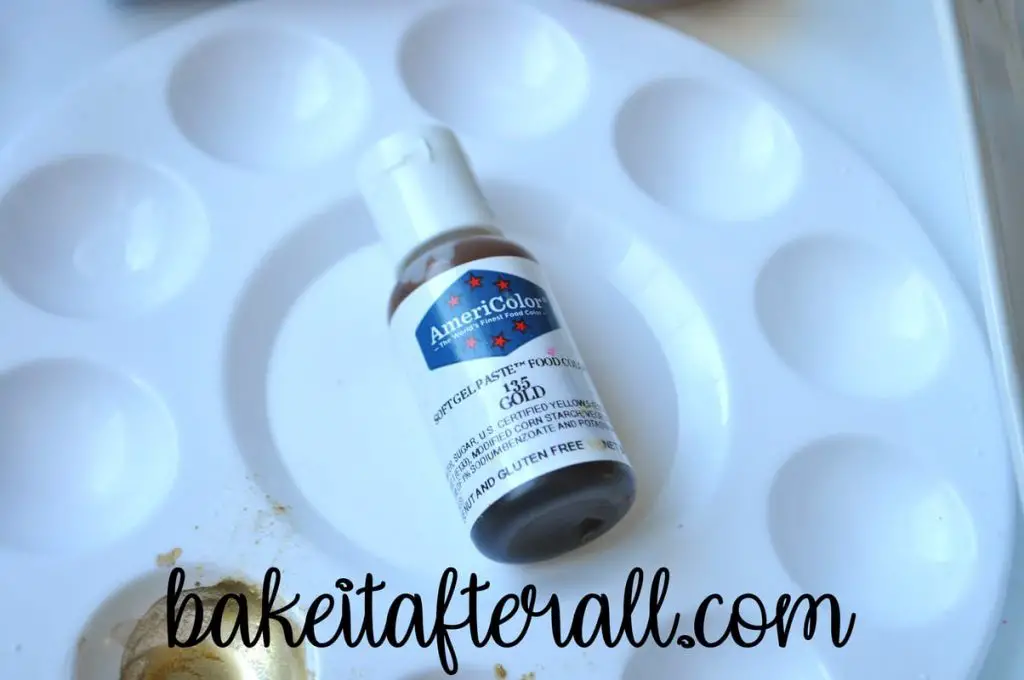
This will give the icing a yellowish color and provide a nice base for underneath the gold dust. You can apply the gold dust with either a dry or wet application.
Dry Application
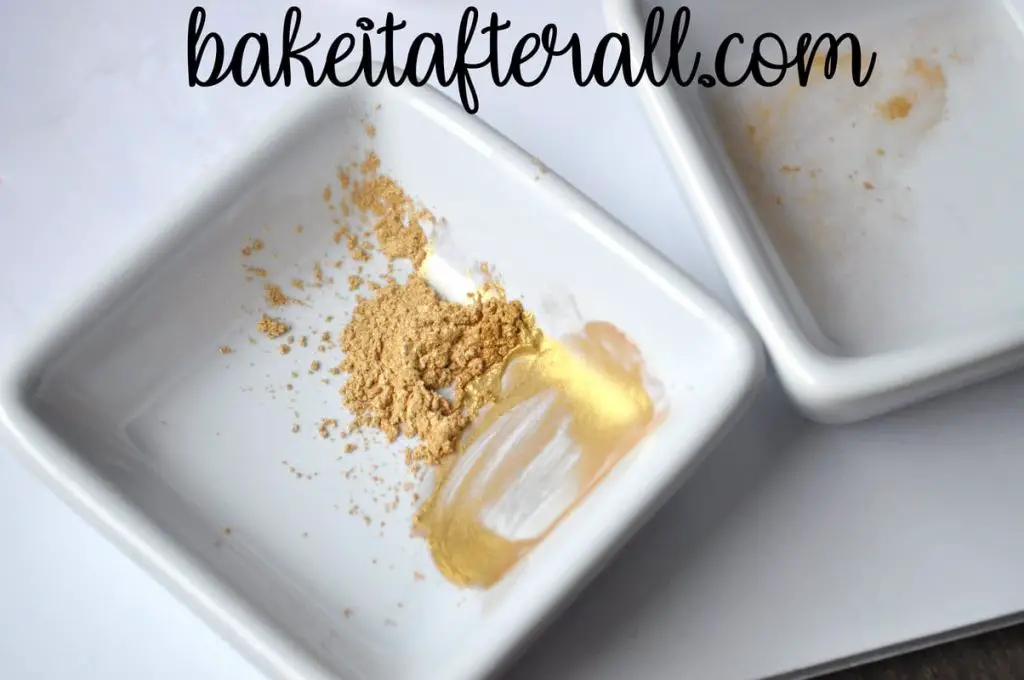
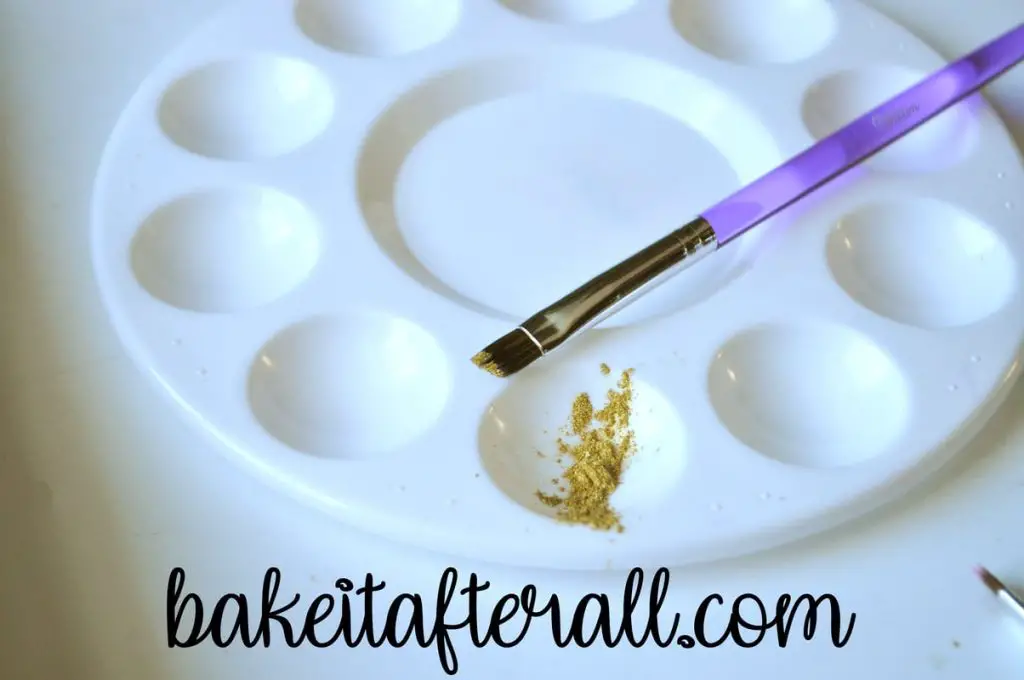
To apply dry gold luster dust, simply tap out a small amount into a dish or paint palette. Use a food grade paintbrush to add the dust to the surface of the icing. This will give you a bit of shimmer but won't be as intense as a wet application of luster dust.
Wet Application
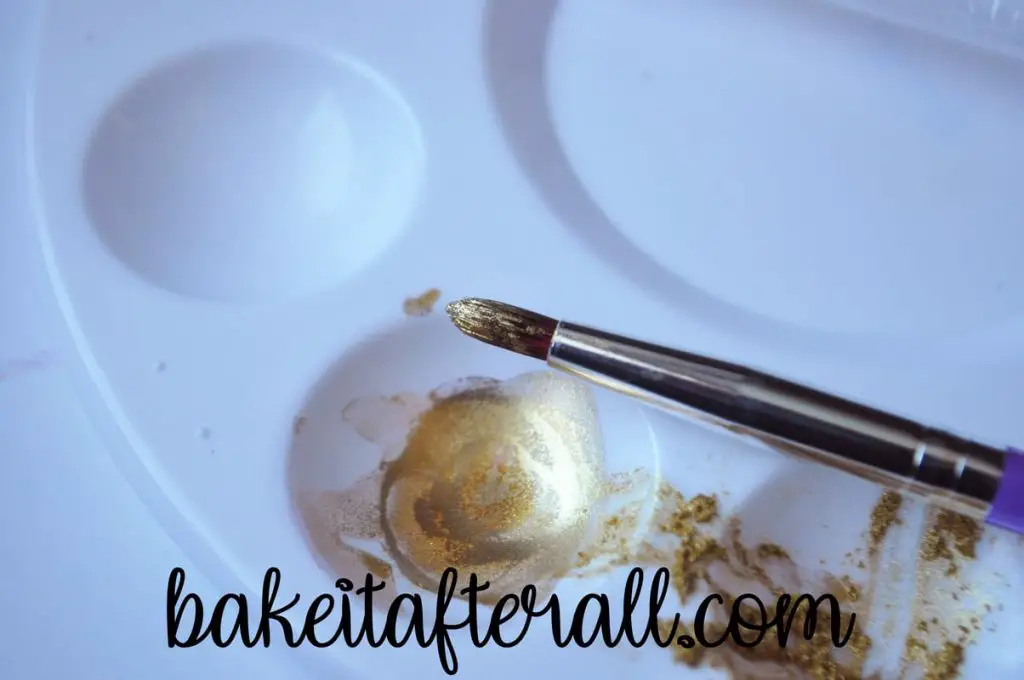
For the most intense gold color, dissolve the gold luster dust in a few drops of Everclear. Mix it well with a paintbrush.
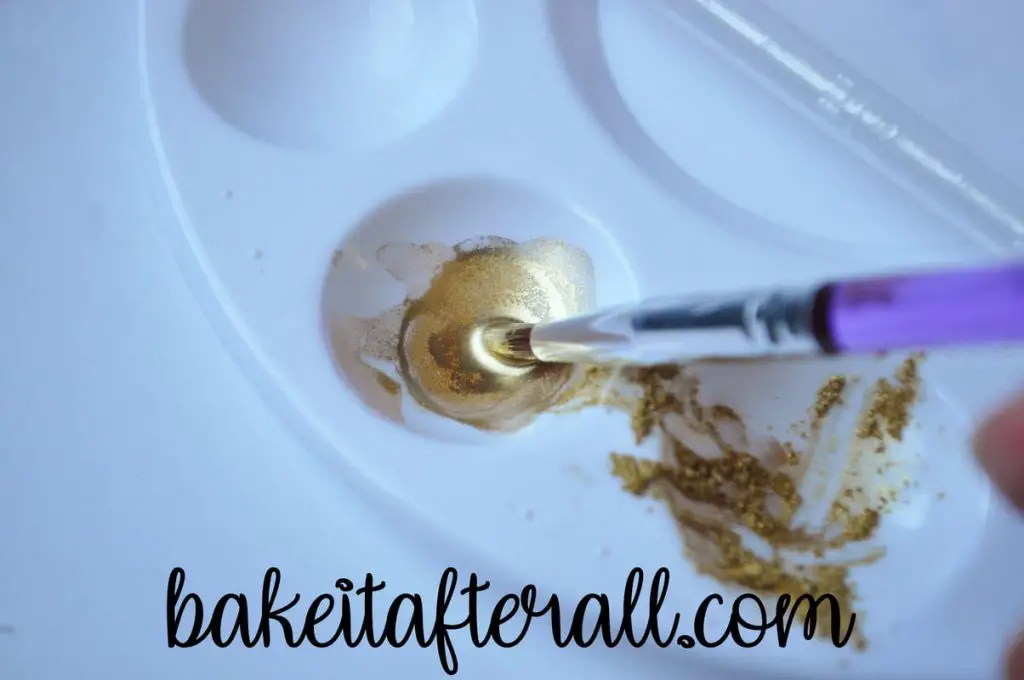
You may need to add more dust or Everclear to get a nice suspension. If your gold dust is too dilute, it won't transfer much color to your icing. If it's too concentrated, it will be dry and won't spread nicely on the icing.
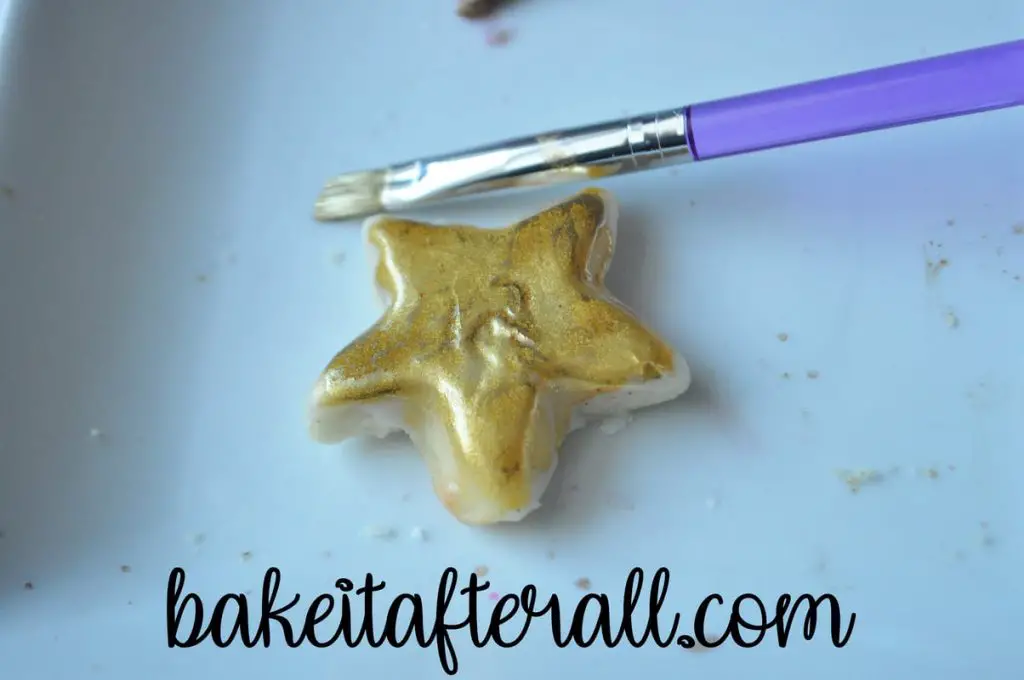
Once you have your suspension, you have a number of options. You can paint the entire surface of a cookie with it.
After the gold has dried, you can bump up the sparkle factor with some edible gold glitter sprinkled on top.
I also love this iridescent luster dust, which I used on the white hearts for this Valentine's Day cookie set.

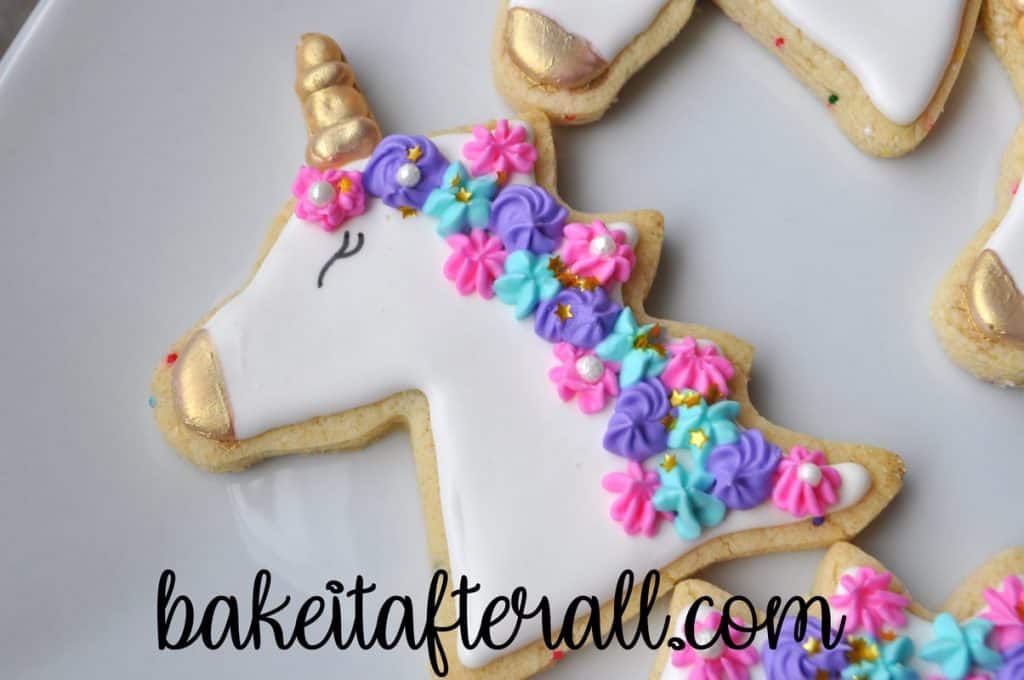
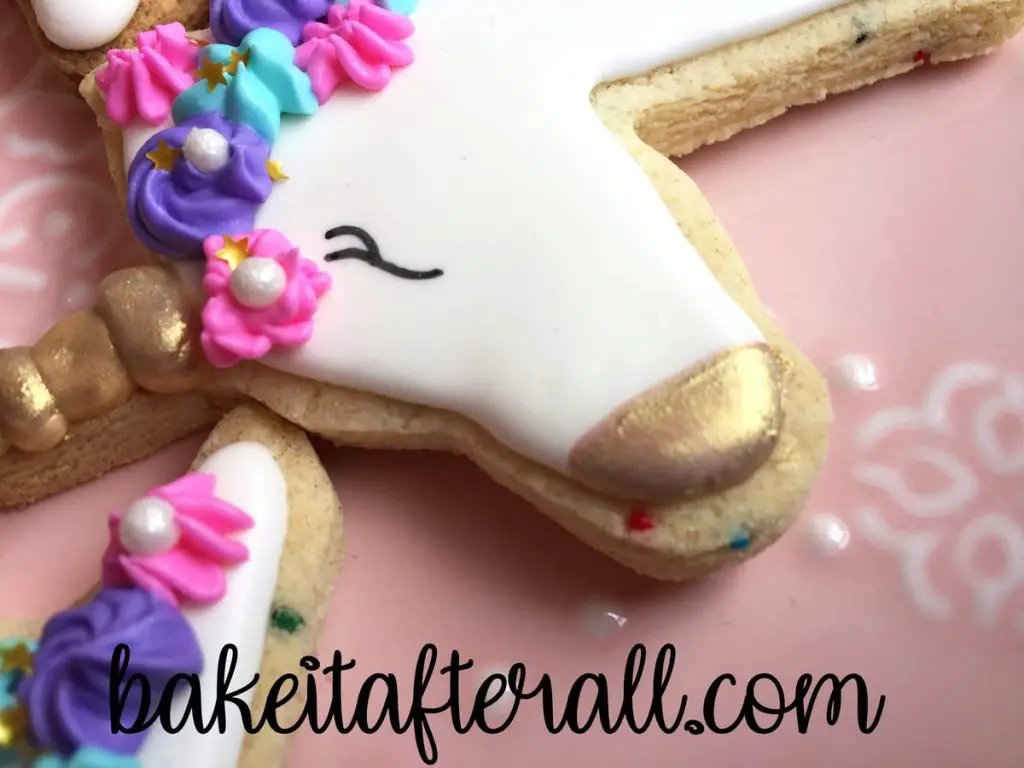
For these Unicorn Cookies, I tinted the royal icing with the gold food gel, piped it on, allowed it to dry completely, then painted it with a gold luster dust liquid suspension. For the unicorn’s nose, I did not color the royal icing with gold gel, so the luster dust was very muted and I had to let it dry and do multiple coats to achieve a more vibrant gold.
You can use the gold suspension to paint designs or stripes on colored cookies.
Gold Splattered Cookies
You can also use the gold liquid to create gold splatters. To do this, you may want to add a few more drops of Everclear to your suspension to make it more fluid. Dip your paintbrush into the liquid, then press it on the side of the dish or palette well to allow the excess to run off. Hold your paintbrush in one hand about 6 inches above the cookie, parallel to your work surface. Then, use the index finger on your other hand to tap on the paintbrush in strong, quick motions to create a splatter. Make sure to have your cookie away from the other cookies, as the splatter tends to travel.
Rose Gold Edible Paint
To make rose gold cookie paint, I diluted pink food coloring gel with the grain alcohol, then added some gold luster dust to the mixture.

This made a very pretty rose gold color that I painted onto some of the cookies.

Edible Food Coloring Pen
One of my favorite cookie tricks is using edible food coloring markers. I have used them in many ways, including for the eye on these unicorn cookies.
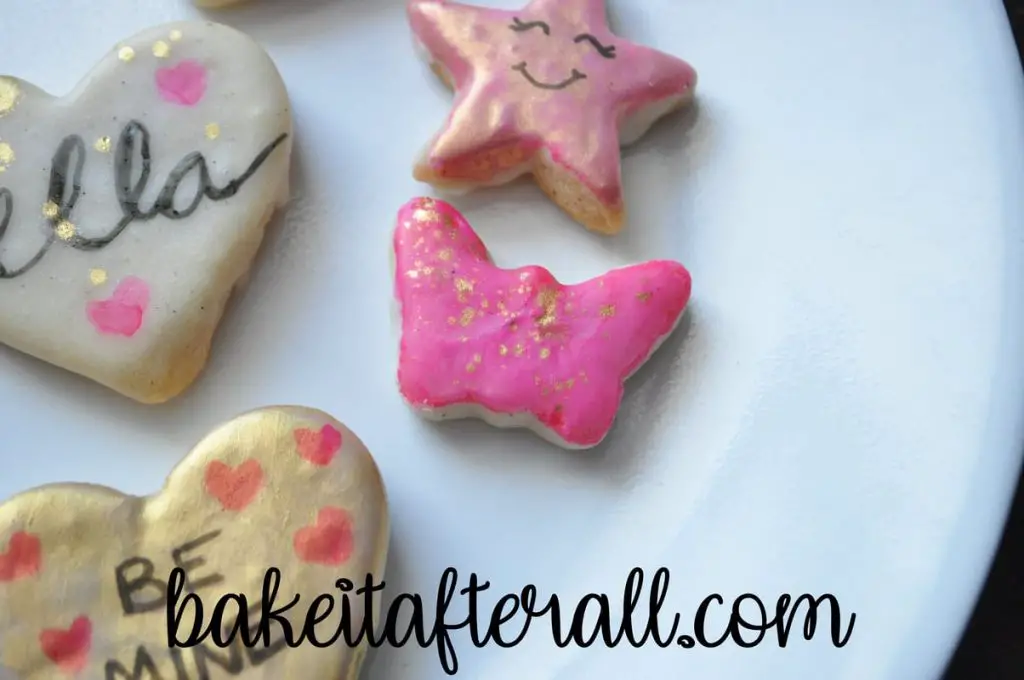
More recently I drew little faces on some of the painted Iced Vanilla Shortbread Cookies.
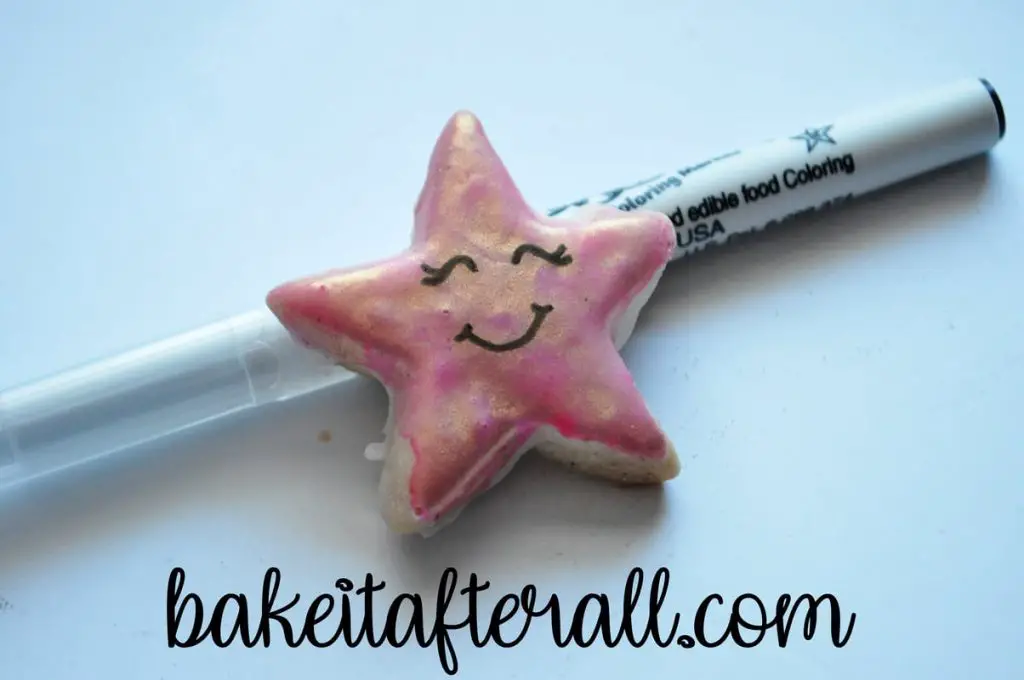
These cookies look so happy!
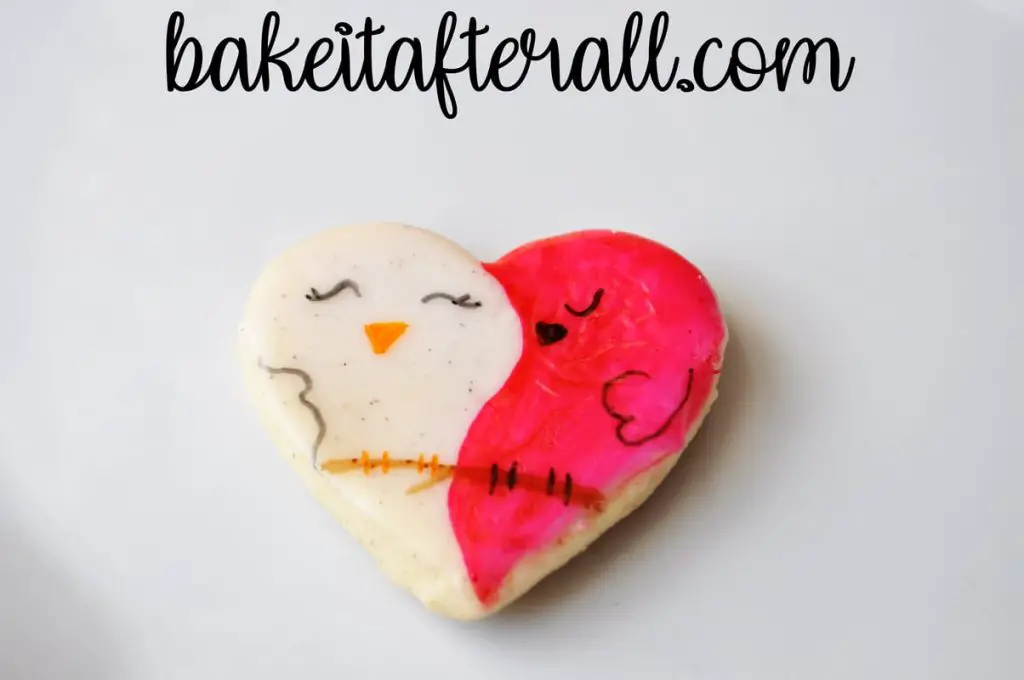
I saw this idea for "love birds" on Pinterest but with royal icing, so I tried to recreate it using painted food coloring and food coloring markers.
Calligraphy on Cookies
My neighbor taught me how to write in a calligraphy type style on paper, so I tried that on some cookies that were not painted yet. First, you write in all lowercase in cursive.
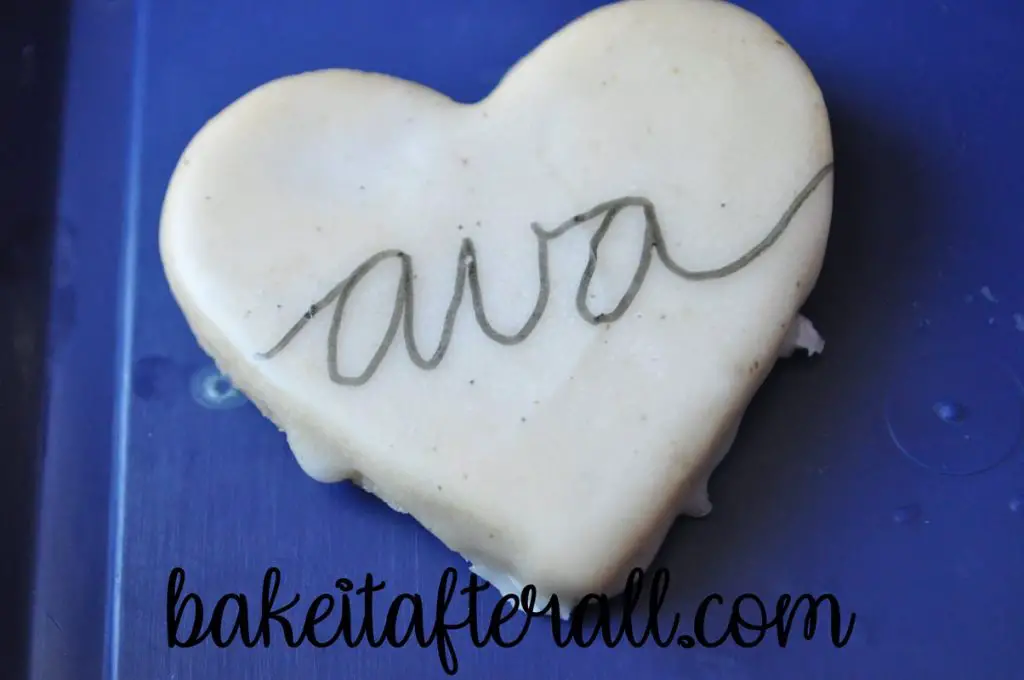
Next, on all of the downstroke motions you made when writing the first time, do another stroke next to it to make a small space between the two lines. Basically, any time you moved your marker in the downward motion, go back and add this second line.
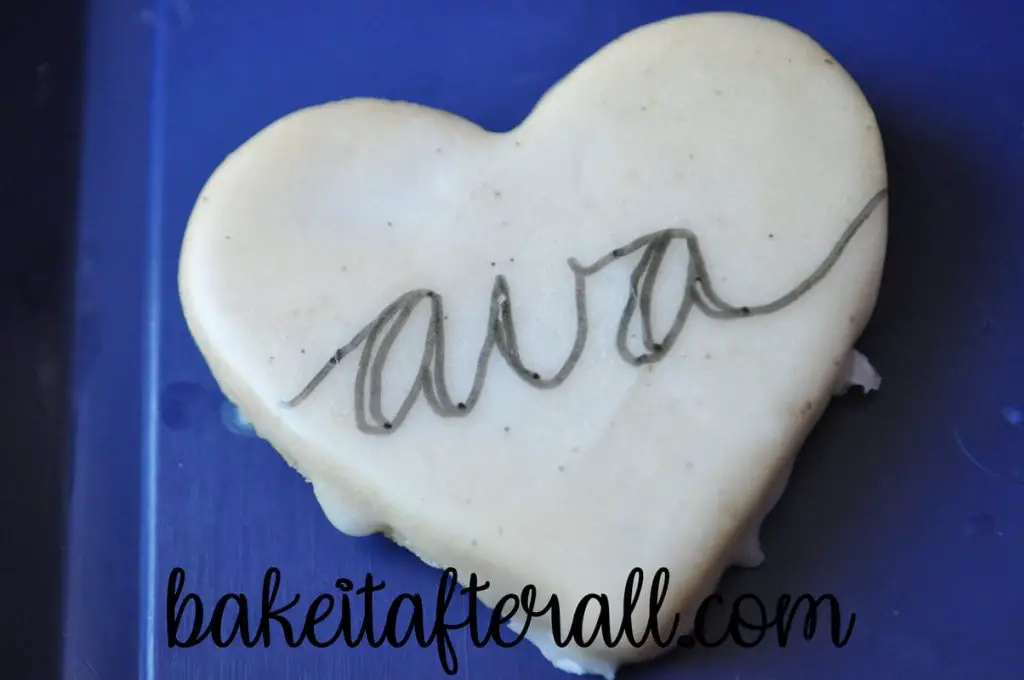
Last, color in those spaces created with the second line. That's it!
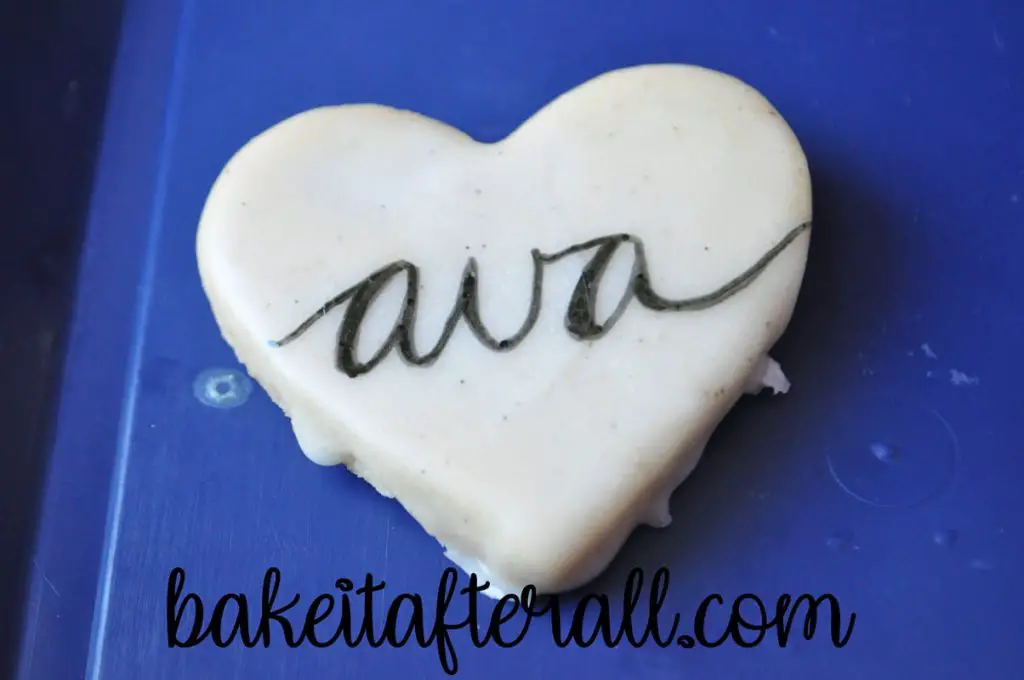
After the painted cookies have fully dried, you can do the same calligraphy on top. I splattered this one with gold luster dust after I did the writing.

You can see how shiny it is in the sunlight.


For this "BE MINE" cookie reminiscent of a conversation heart candy, I painted a gold luster dust suspension on the cookie and allowed it dry. Then I painted on the pink hearts and wrote the text.

Silhouettes on Cookies
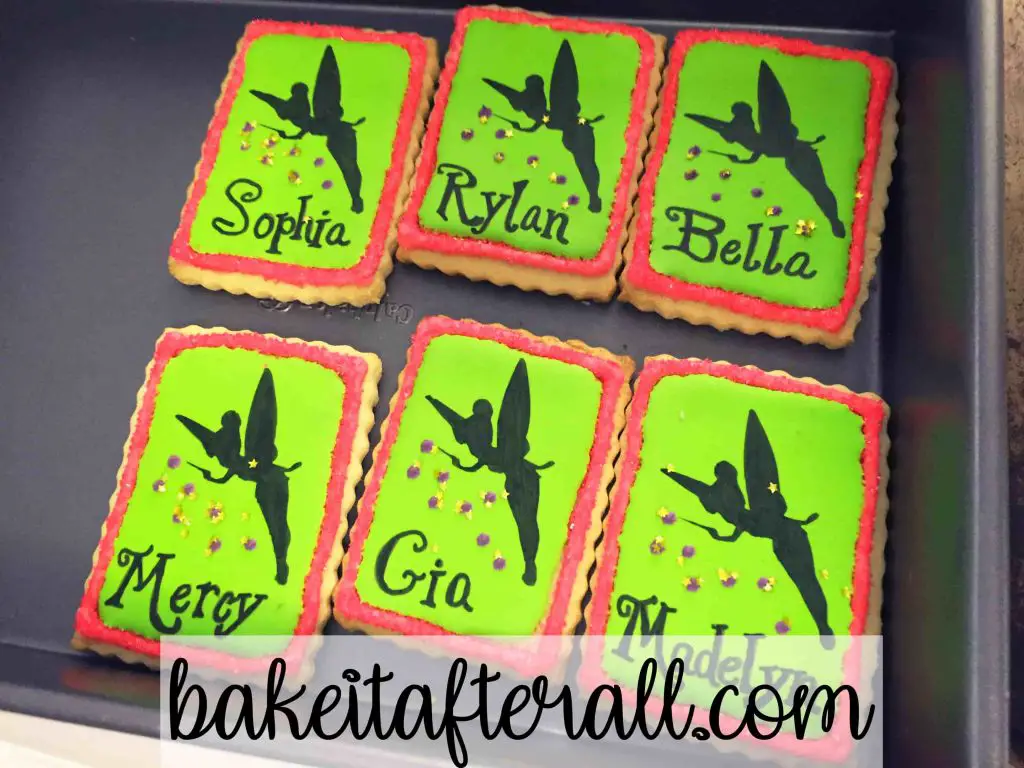
I have used these markers to make silhouette Tinkerbell cookies that were a favor at Ava's birthday party several years ago. I cut a Tinkerbell silhouette out of white cardstock with my Silhouette machine. Then I placed the stencil over each cookie and colored in with a black food coloring marker.
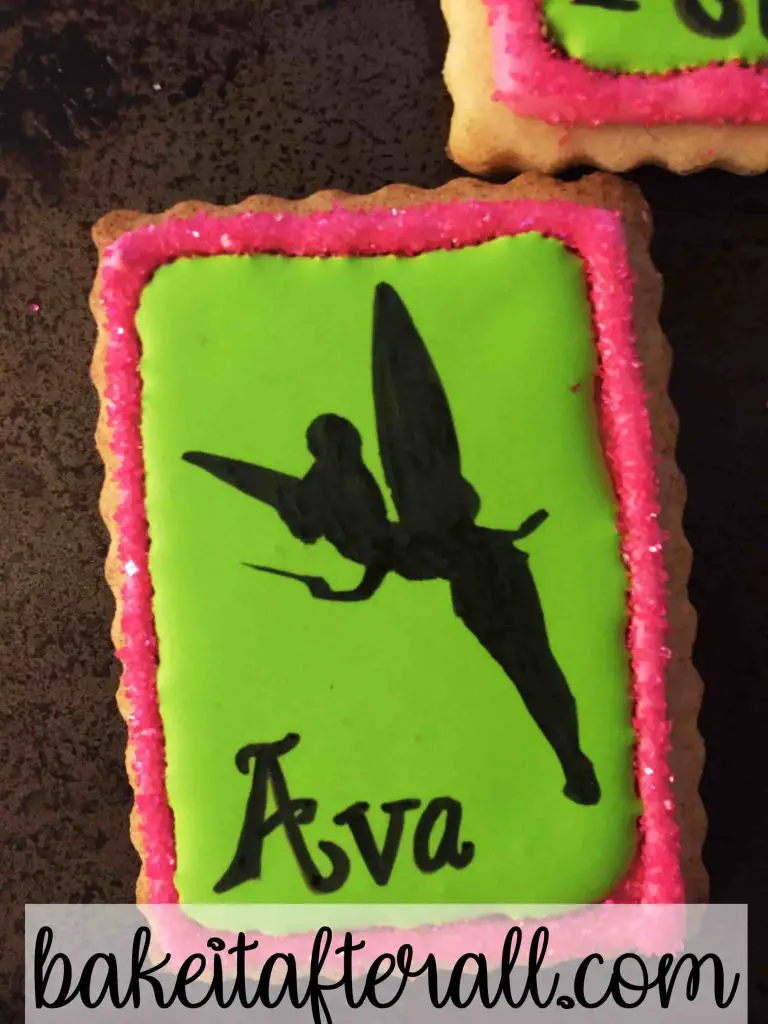
For the lettering, I typed out all of the names of Ava's friends attending the party in a Word document using the Tinkerbell font and printed out the paper. I eyeballed the lettering while writing the names on the cookies. Finally, I decorated them with gold edible stars to represent pixie dust coming out of Tink's wand.
All of these techniques can be used on royal icing as well. Be sure to visit my Royal Icing page for more details.
Royal Icing Details
You can add royal icing details on top of gold or watercolor painted cookies. For a Nutcracker themed party, I decorated snowflake iced shortbread cookies.
Storage
Finished cookies can be stored at room temperature in an airtight container for several days, although these cookies are best eaten within 1 to 2 days after baking.
The cookies can be packaged in treat bags for gifts.

Roll Out Cookie Dough Recipes
Cookie Recipes:
Roll Out Sugar Cookies
Vanilla Shortbread Cookies
Icing Recipes:
Simple Icing (egg free)
Royal Icing
Looking for More Decorated Cookies?
Check out these other decorated cookies:
Painted Rainbow Cookies
Sugar Cookie Gender Reveal
Penelope Bird Cookies
Butterfly Sugar Cookies with Royal Icing
Butterfly and Dragonfly Sugar Cookies with Royal Icing
Snowflake Gingerbread Cookies
Brown Sugar and Spice Winter Mitten Cookies
St. Patrick’s Day Cookies
Bridal Shower Sugar Cookies with Royal Icing
Baby Shower Sugar Cookies with Royal Icing
Halloween Sugar Cookies with Royal Icing
Pastel Christmas Sugar Cookies with Royal Icing
Easter Cookies with Royal Icing
📖 Recipe

Painted Watercolor Cookies
Equipment
- toothpicks
- plastic transfer pipette
- food grade paintbrushes
- small dishes or paint palette
Ingredients
- 1 batch shortbread cookies or sugar cookies iced with untinted simple icing or royal icing (see note)
- Everclear (high proof grain alcohol, see note)
- food coloring liquid or gel
- colored or gold luster dust
- edible food coloring markers (optional)
Instructions
For Colored Cookie Paint:
- Pour a few tablespoons of alcohol into a small dish.
- Place a small amount of food coloring gel into the well of a paint palette or small dish. Add a few drops of alcohol to the well and mix with a food grade paintbrush until the color is mixed evenly. Add more drops if the color is too intense, or more food gel if the color is not dark enough. The alcohol will evaporate quickly, so if the color is too dilute, you can wait a bit for the alcohol to evaporate and the volume of liquid to decrease.

- Paint the surface of your icing as desired. You may paint the entire surface for a uniform look, do stripes, letters, designs or patterns. You can do an ombre effect by starting at one end of the cookie right after dipping the paintbrush in the coloring and then feather it out working your way across the cookie.
- Rinse your brush in a small dish of water and dry off with a paper towel before using another color paint, or use a new paintbrush for each color.
For Rose Gold Cookie Paint:
- Dilute pink food gel with the alcohol as described above and add some gold luster dust to the mixture.
- Paint on cookie as desired. You may add any color luster dust to your colored liquid.
For Gold Luster Dust Paint:
- To apply dry gold luster dust, simply tap out a small amount into a dish or paint palette. Use a food grade paintbrush to add the dust to the surface of the icing. This will give you a bit of shimmer but won't be as intense as a wet application of luster dust. You can do this with any color luster dust.

- For the most intense gold color, dissolve the gold luster dust in a few drops of alcohol. Mix it well with a paintbrush. You may need to add more dust or alcohol to get a nice suspension. If your gold dust is too dilute, it won't transfer much color to your icing. If it's too concentrated, it will be dry and won't spread nicely on the icing. This method works for any color luster dust.

- Paint entire surface of cookie, stripes, designs, or use the liquid gold to create gold splatters.
For Gold Splattered Cookies:
- You may want to add a few more drops of alcohol to your gold suspension to make it more fluid. Dip your paintbrush into the liquid, then press it on the side of the dish or palette well to allow the excess to run off.
- Hold your paintbrush in one hand about 6 inches above the cookie, parallel to your work surface. Then, use the index finger on your other hand to tap on the paintbrush in strong, quick motions to create a splatter. Make sure to have your cookie away from the other cookies, as the splatter tends to travel.
For Calligraphy or Handwriting on Cookies:
- Use an edible food coloring marker to write on the surface of the cookie after the paint or luster dust has completely dried.
- For calligraphy, write in all lowercase in cursive.

- On all of the downstroke motions you made when writing the first time, do another stroke next to it to make a small space between the two lines. Basically, any time you moved your pen in the downward motion, go back and add this second line.

- Color in those spaces created with the second line.

- You may splatter the cookie with a luster dust suspension after writing, if desired.
To Store the Cookies:
- Allow cookies to dry completely. Store in a single layer in an airtight container at room temperature for up to 1 week.
- For longer storage, freeze in a single layer. Thaw by removing the cookies from the freezer and allowing them to come to room temperature.

Leave a Reply