Sesame Street Birthday Party
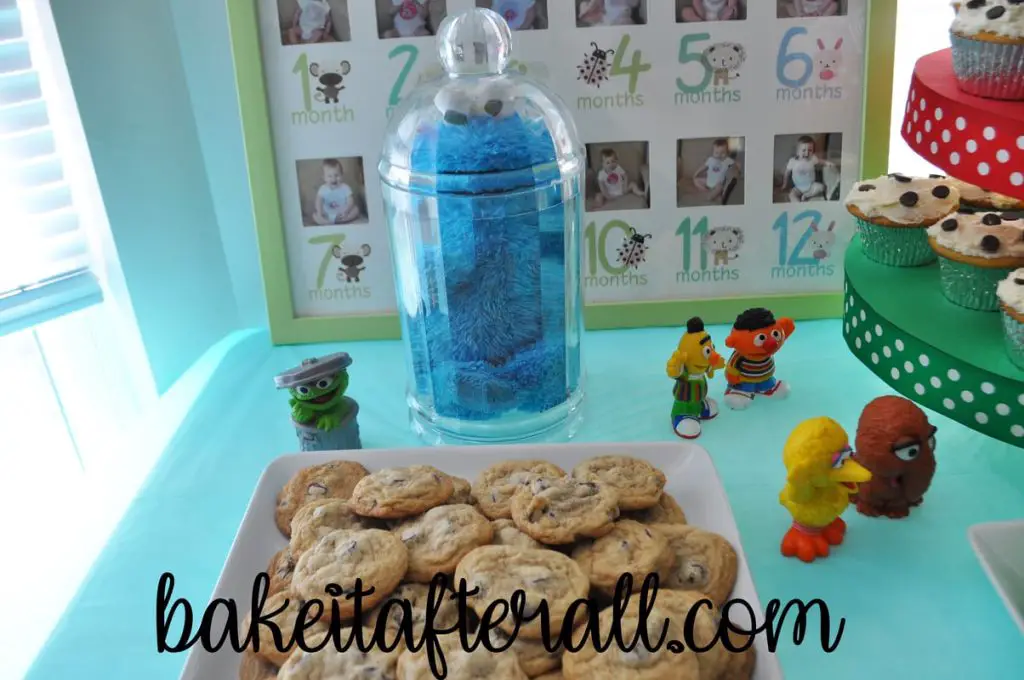
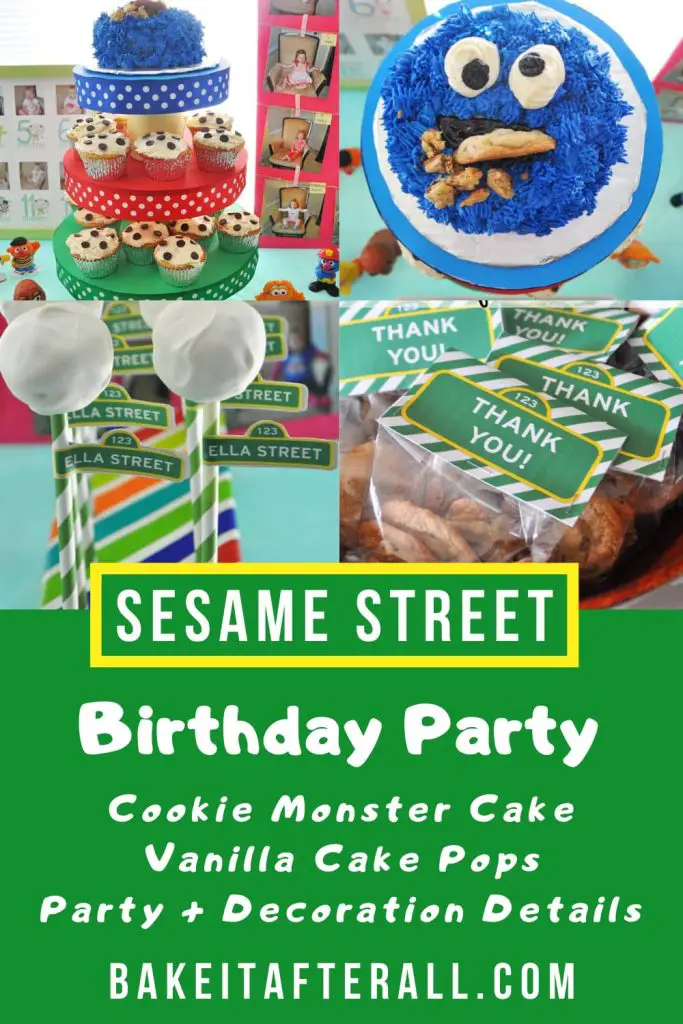
A Sesame Street Birthday Party perfect for an Elmo and Cookie Monster loving toddler! The Sesame Street Dessert Table features a Cookie Monster Cake, Chocolate Chip Cookie Cupcakes, and Vanilla Cake Pops.
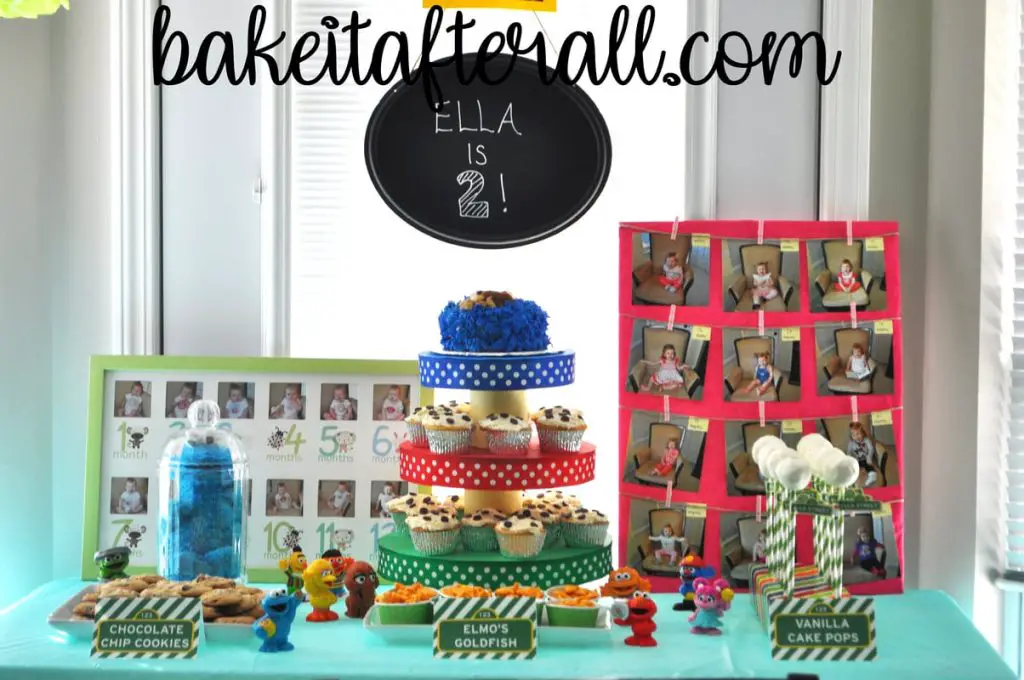
Around the time of her second birthday, Ella loved Sesame Street, and particularly Cookie Monster. She received a talking Cookie Monster toy as a baby that she could feed pretend cookies and he would thank her for the cookies. She spent countless hours playing with this toy, and I think it solidified her love for Cookie Monster. That and the fact that she loved eating cookies herself!
After having just thrown Ava’s Cinderella Birthday Party two months prior, it was important to me to make Ella feel just as special. I was pregnant with my third at the time, and I knew that life was about to get turned upside down for little Ella. I anticipated that I would have very little time once the new baby came (wow, was I right!). Ella is now 6, but I still have fond memories of this party, and I’m so glad I can finally document it properly.
Sesame Street Birthday Party Invitations
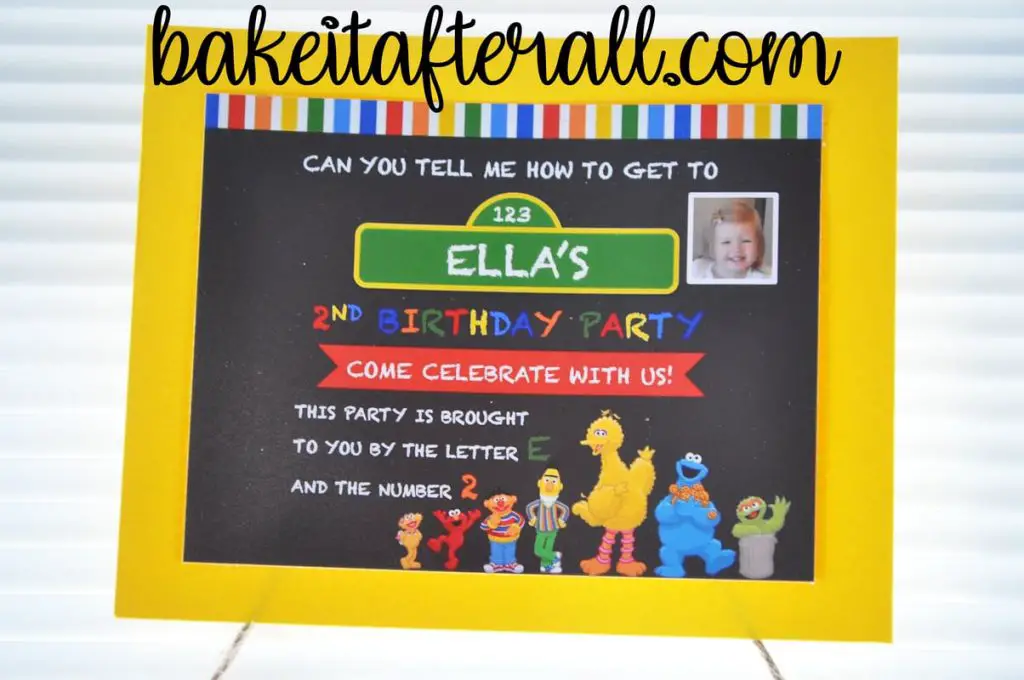
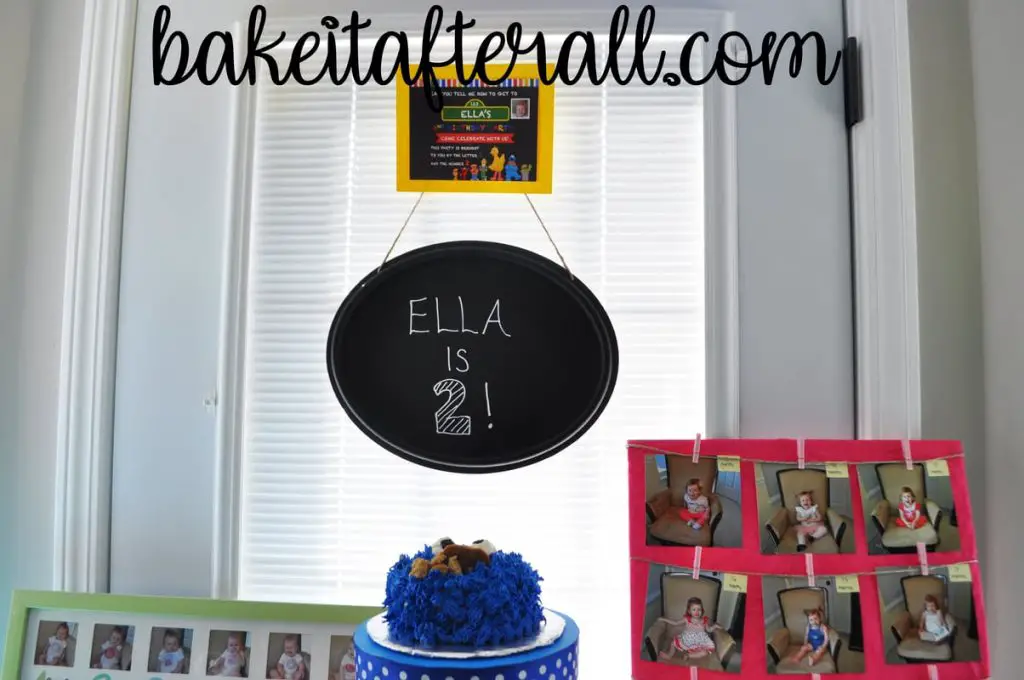
Although I generally send out Evites for the girls’ birthday parties, I like to make a custom image file to upload to the top of the Evite to communicate the theme ahead of time. This also allows me to print out the invitation for the girls’ baby books. I have C.R. Gibson 5 year baby books that have a place to write about each birthday through age 5. I printed this invitation on white cardstock and mounted it to solid yellow cardstock to display this invitation at the party above the dessert table.
Sesame Street Birthday Party Decorations
Door Decoration
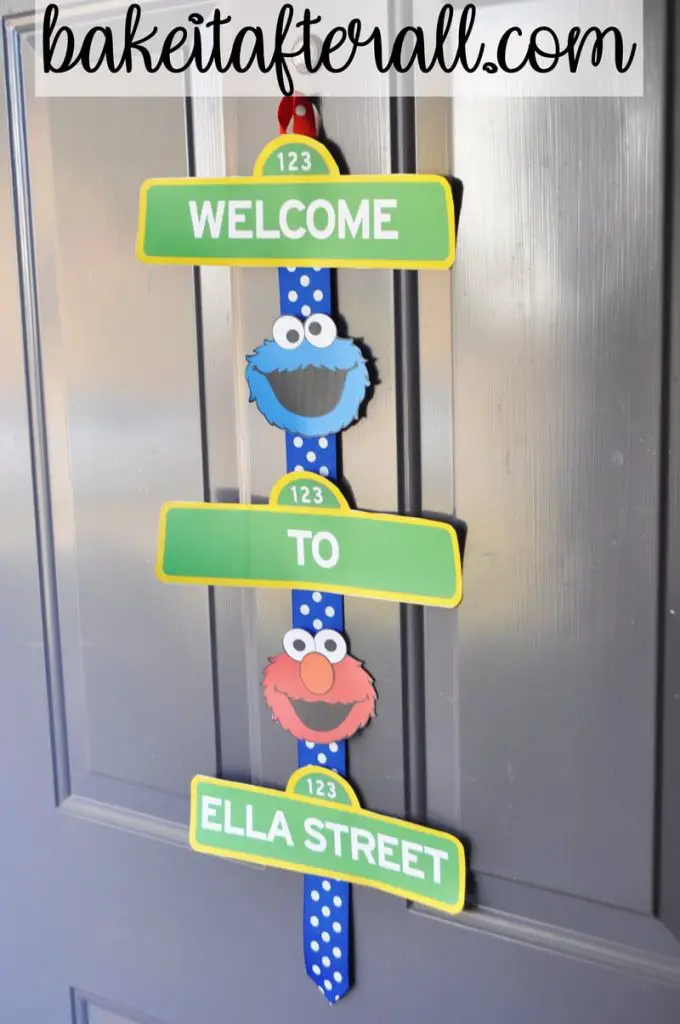
To welcome guests to the party, I made this door hanger for the front door. I found inspiration for many of the party printables on Etsy, but I designed the printables on my own in Powerpoint and printed them on white cardstock, then cut them out by hand. The printables for this Sesame Street Door Decoration were mounted to solid colored grosgrain ribbon with white polka dots. I also used this ribbon for the DIY Cupcake Stand on the dessert table.
Disposable Party Supplies
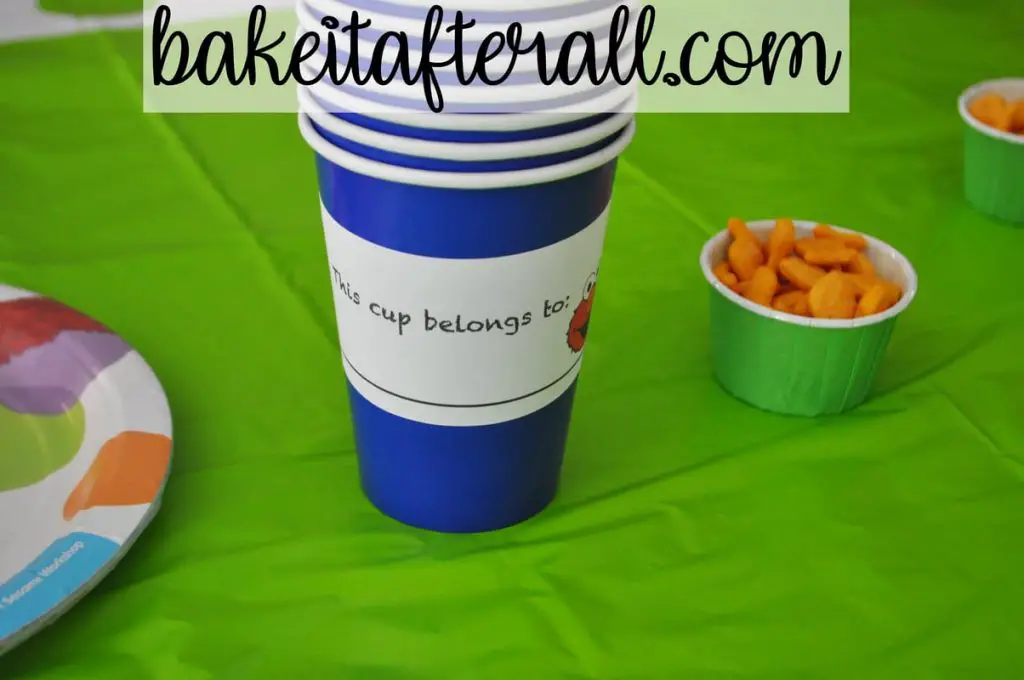
I wanted to have cups for the kids that could be labeled with their names to keep track of their drinks. At parties, I always place a Sharpie next to disposable cups for this purpose. I made these cup labels in Word using a free template from Avery and printed them on adhesive Avery labels. Then I just peeled them off of the backing and stuck one on each paper cup. I put a crayon out for the parents to write their child’s name on the cup.
I found these cute Elmo plates locally and got enough for the kids table. They were on the smaller side, so I got larger, plain plates for the adults.
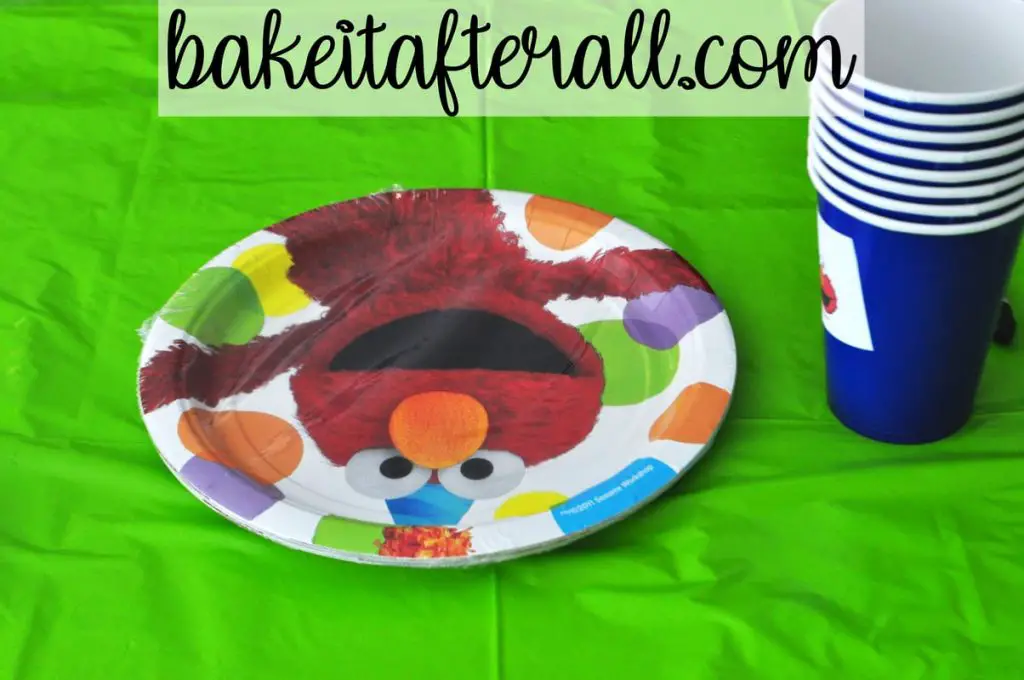
Table Decorations
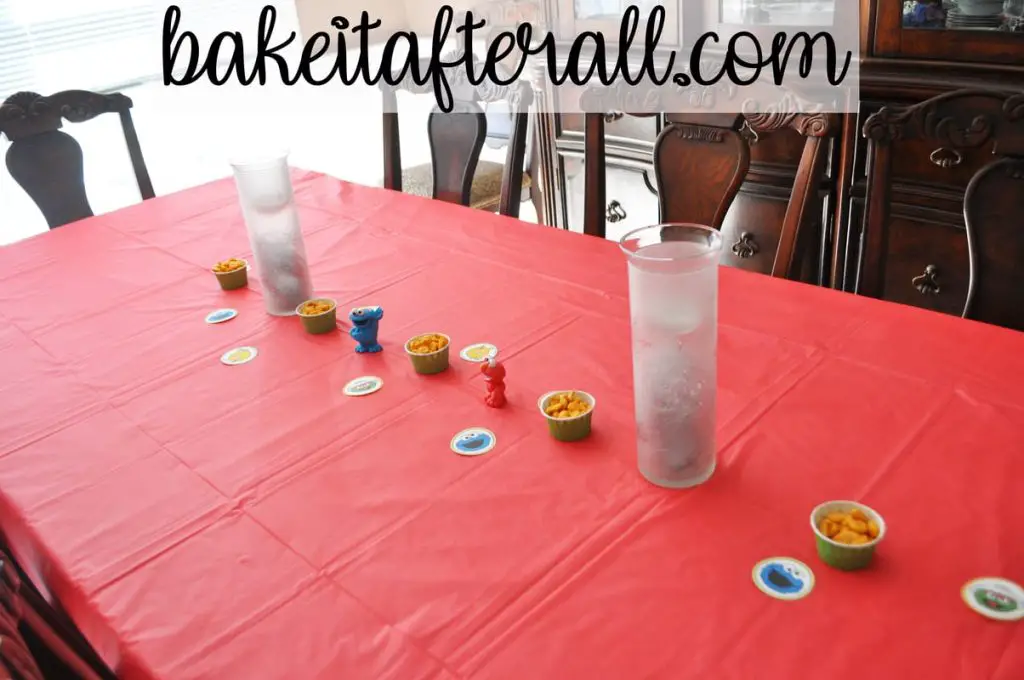
I always decorate our kitchen table as the “kids table.” This encourages guests to seat their children in the breakfast room. Not only do the kids get to sit together, the flooring under the kitchen table is much easier to clean than the carpet in our dining room! I found a Sesame Street themed disposable tablecloth for the kids table.
As I mentioned in my Cinderella Birthday Party post, I love using disposable tablecloths to add a lot of color to a kids’ party in a budget-friendly way. It also minimizes clean up because all of the mess and crumbs can just be folded up inside the tablecloth and thrown away.
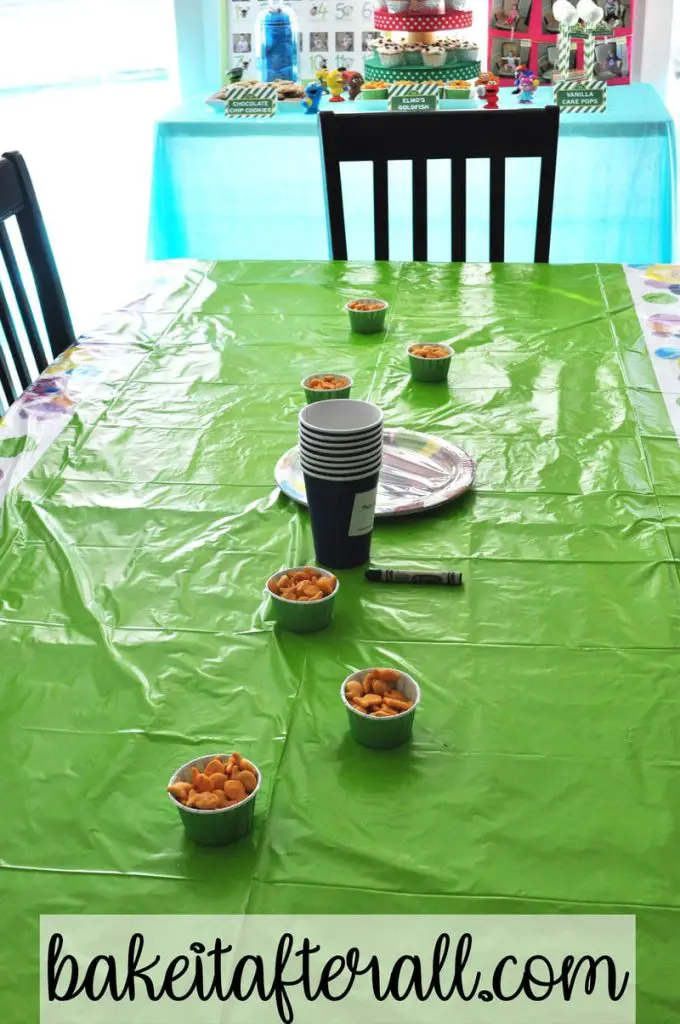
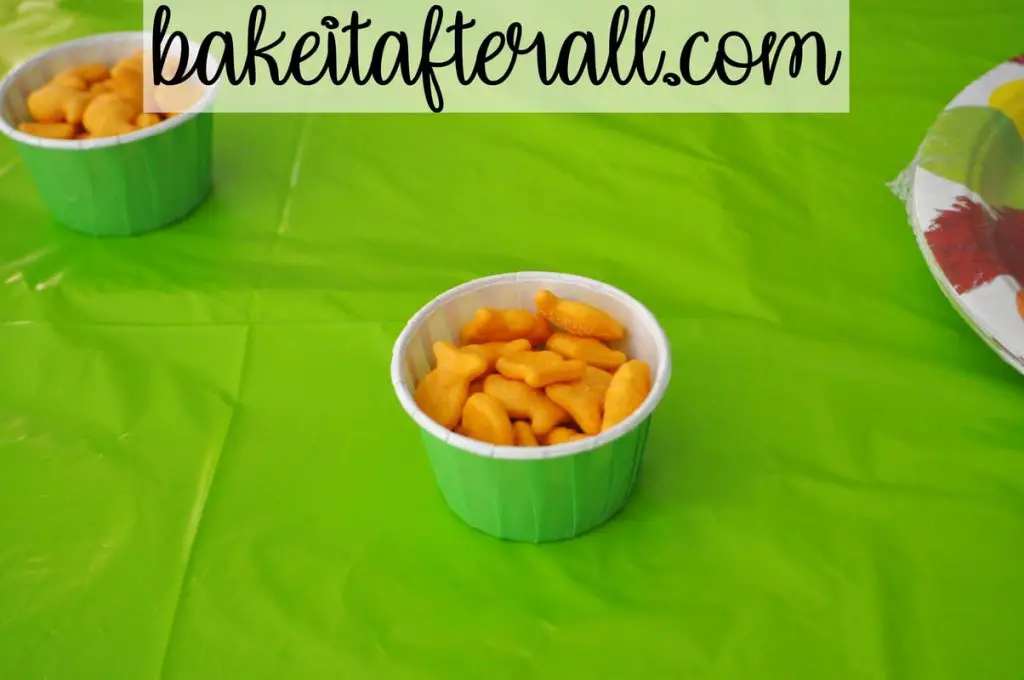
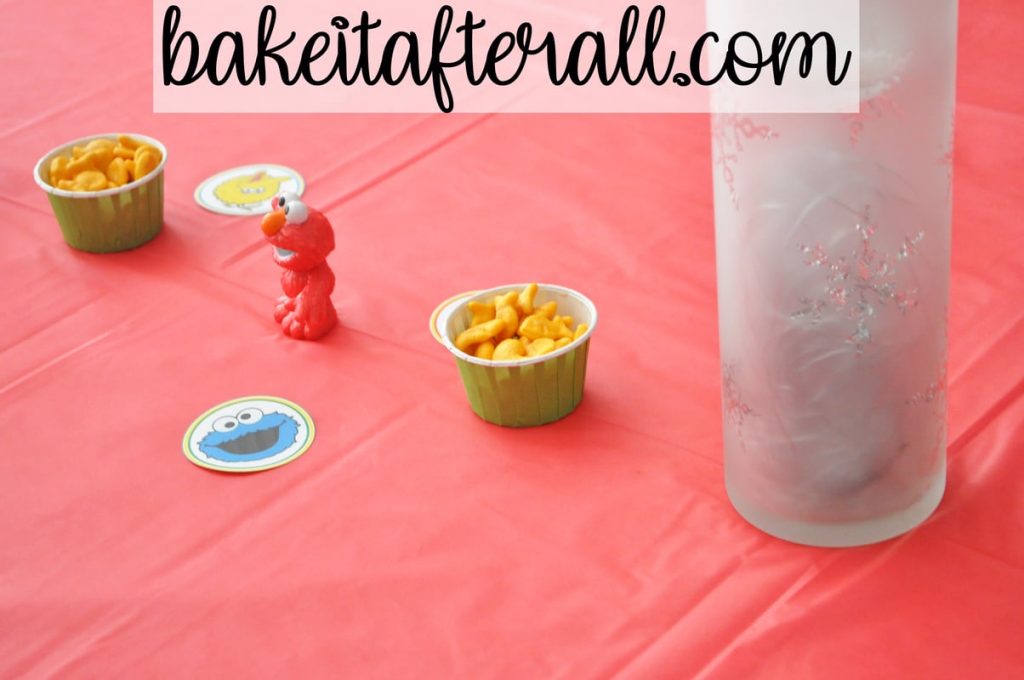
Elmo’s goldfish Dorothy inspired the small green treat cups filled with goldfish crackers that I used to decorate the tables. My kids go crazy for goldfish crackers, so I though these would go over well with the other kids at the party.
I made little circular printables that I printed on white cardstock and then cut using a circular craft punch. I used this same method to make the cupcake decorations at Ava’s Daniel Tiger Birthday Party.
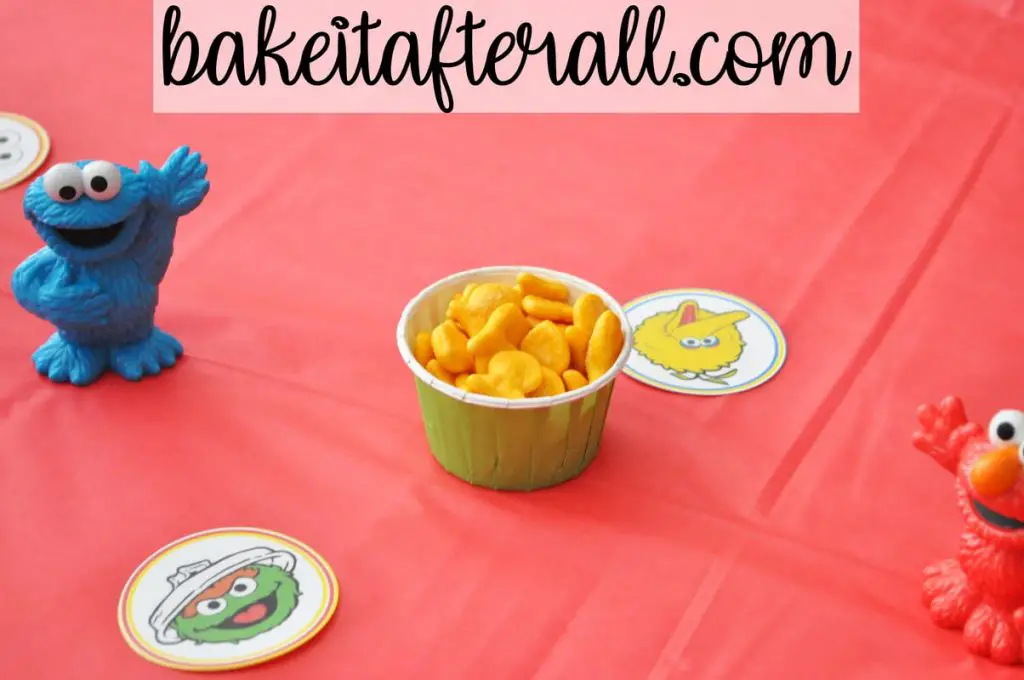
We already had little Sesame Street figures, so I used them to decorate the tables and dessert table. I like using toys we already have laying around to decorate!
Tissue Paper Poufs
I saved the tissue paper poufs from Ava’s Daniel Tiger Birthday in a clean trash bag, hoping to use them at another party. That’s exactly what I did to decorate above the Sesame Street Dessert Table!

I’ve used tissue paper poufs to decorate at a number of parties, such as Ava’s Penelope Bird First Birthday Party. It’s a very inexpensive, easy way to incorporate color into your party decorations and also to decorate the space above a dessert table or serving area. I use small, clear command hooks attached to the ceiling and suspend the tissue paper poufs from the hooks with clear fishing line. The poufs appear to float above the table.
Chalkboard Sign
I used this little chalkboard sign I already had from the Target dollar spot to write, “Ella is 2!” with a chalk marker. I assumed a chalk marker would wash off the way chalk does, but I have not had luck with that. The chalk marker gives nice crisp lettering, but I have to repaint over the chalkboard with chalkboard paint afterwards. I don’t mind since I have a bottle of chalkboard paint, but it’s just something to consider.
Sesame Street Birthday Party Food
I kept it super simple for the food at this party. Having a 2 year old and a 4 year old, being 6 months pregnant, and making the decorations and desserts for the party left me with little extra time. Ella’s favorite food was pizza, so we ordered a bunch of pizzas. Our family parties are typically pitch-in style where family members offer to bring food, so I had someone bring a salad and someone else bring toasted ravioli. If you don’t know what toasted ravioli are, you should look into them 🙂
Ella is a major fruit fan, was then and still is. My sister is known for her beautiful fruit creations, as you can see from our Kids Tea Parties and Ava’s Cinderella Birthday Party. She did not disappoint with this adorable Elmo face fruit tray!
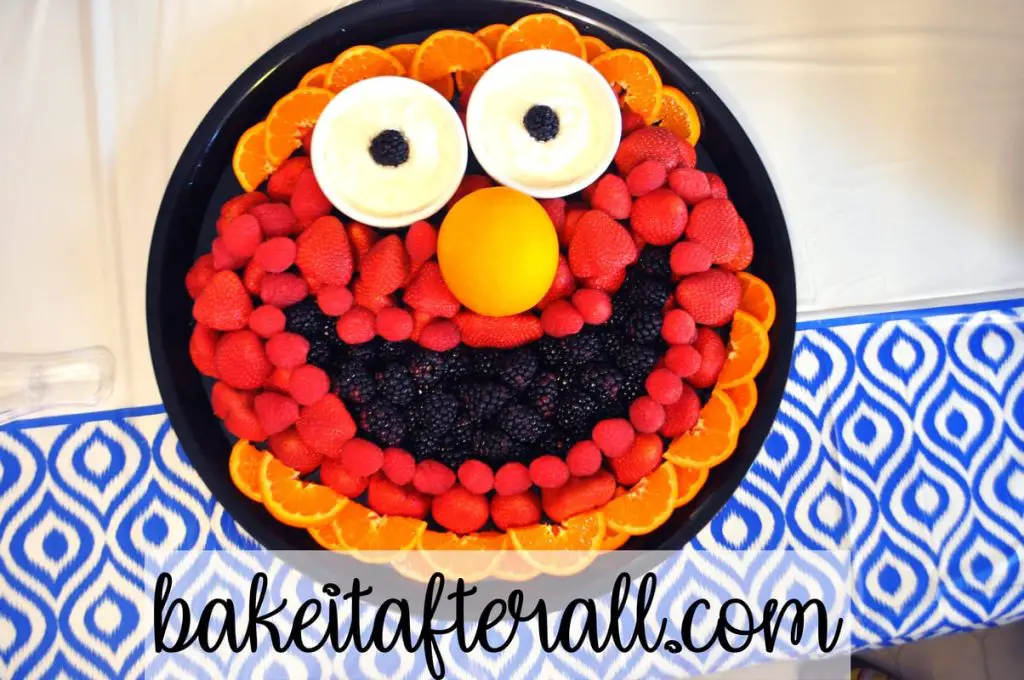
She used fresh raspberries and strawberries for the red of Elmo’s fur, fresh blackberries for his open mouth, an orange for his nose, two bowls of Marshmallow Fruit Dip for his eyes, and a fresh blackberry for each pupil. Orange slices provided a decorative border. As you can imagine, for a fruit-loving child like Ella, this fruit tray was a dream come true!
Sesame Street Birthday Party Dessert Table
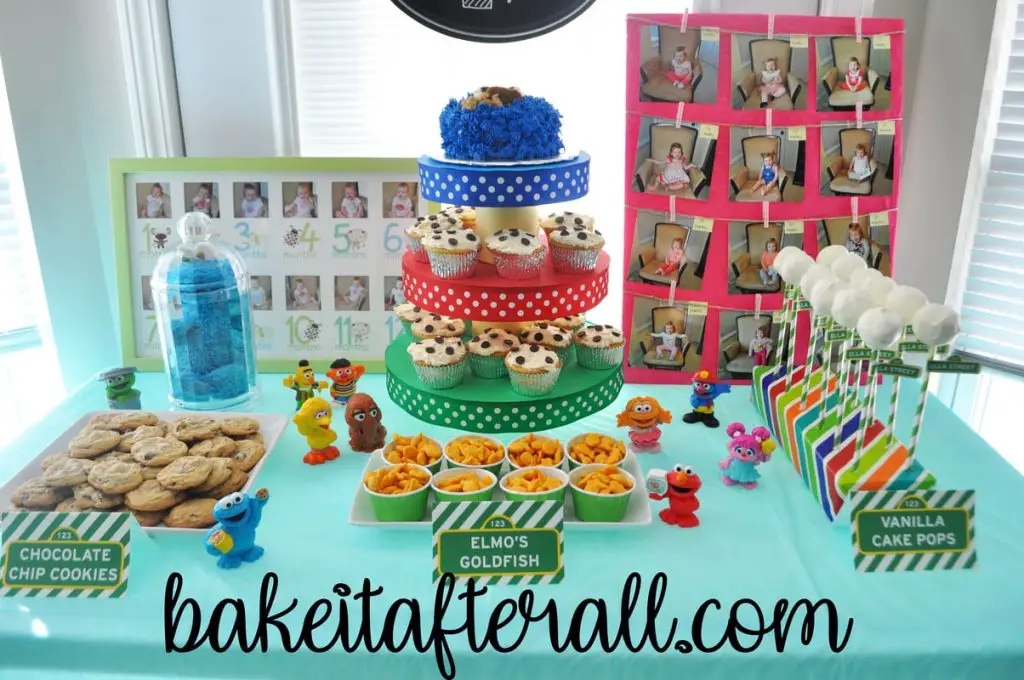
In looking for Sesame Street Birthday Party ideas, I found a lot of inspiration from Pinterest. I always create a secret board for the girls’ birthday parties so family won’t see the ideas ahead of time! I pulled my favorite ideas from a bunch of different sources. Given that this was over 4 years ago, I will do my best to link the appropriate sources.
Elmo’s Goldfish Crackers
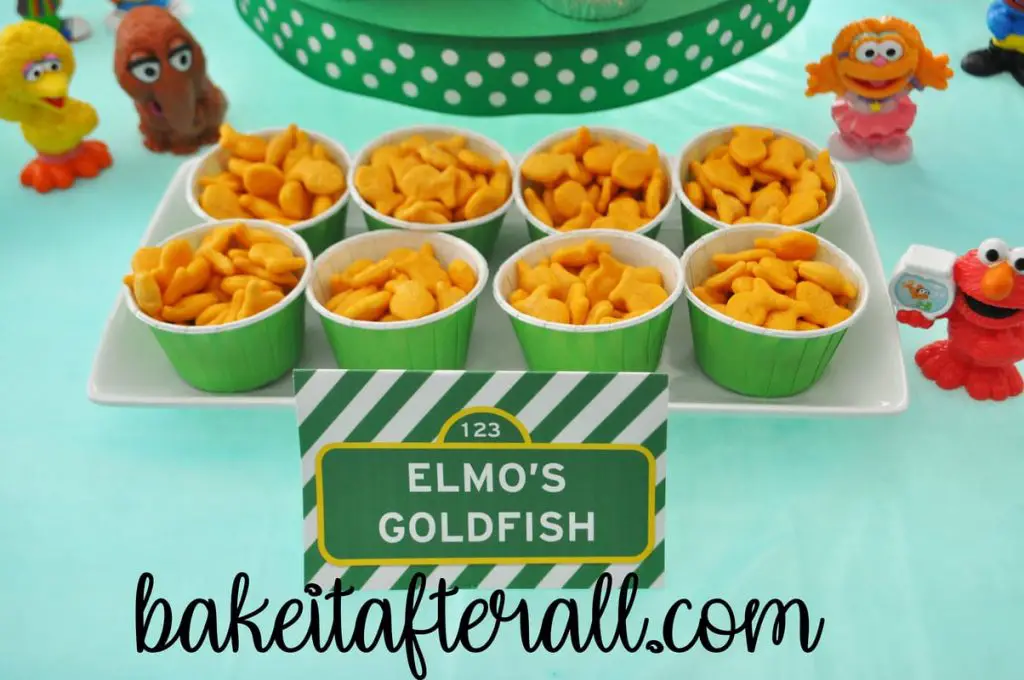
This snack was inspired by Elmo’s pet goldfish “Dorothy.” These are the same candy cups filled with goldfish crackers from the kids table. An easy to grab snack that kids love!
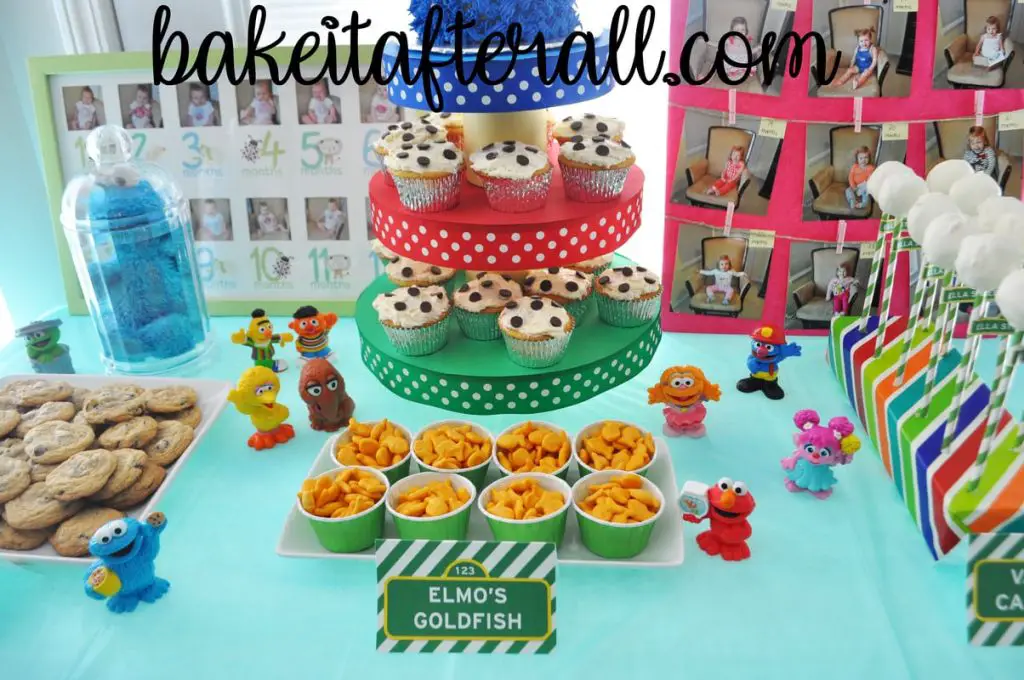
Cookie Monster’s Chocolate Chip Cookies
Most people know that chocolate chip cookies are Cookie Monster’s favorite. I needed a chocolate chip cookie for the Cookie Monster Cake and Sesame Street Party Favors, so I made 2 batches of classic chocolate chip cookies using the recipe on the back of the Ghirardelli semisweet chocolate chips package. The recipe is similar to Nestle Toll House, so a good, classic chocolate chip cookie.
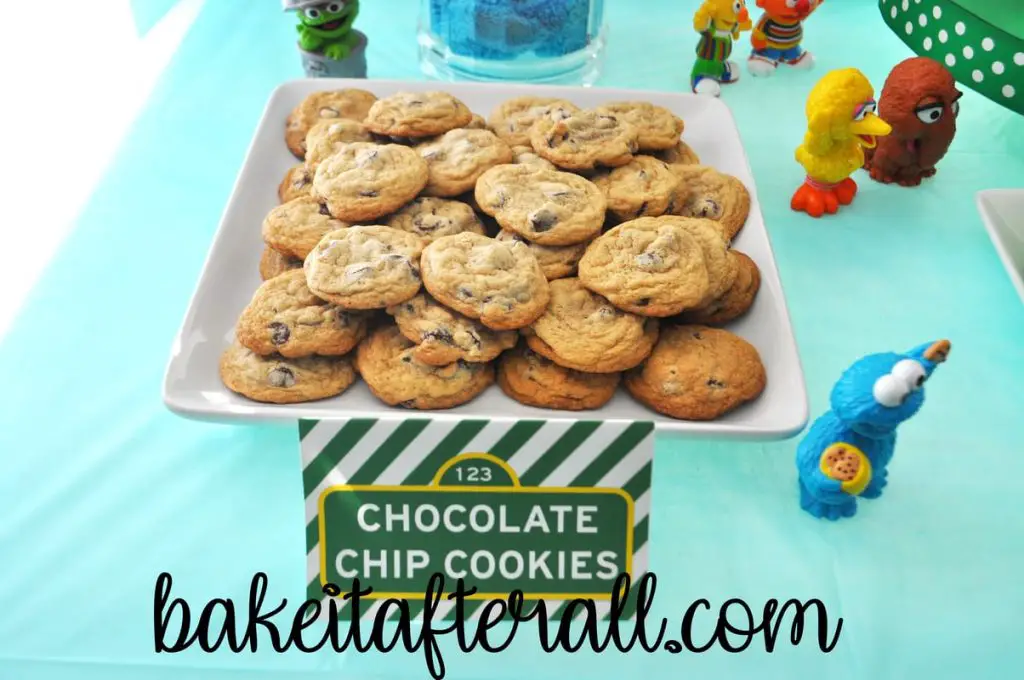
Cookies are perfect for a dessert table because guests can just go up and grab one during the party. This reasoning also applies to the cake pops and the goldfish snack cups.
I pinned this idea of having Cookie Monster trapped in a jar to prevent him from getting to the cookies. It was from a college humor website. We already had this stuffed Cookie Monster toy, so I thought this would be a funny addition to the dessert table.
DIY Cake Pop Stand and Sesame Street Cake Pops
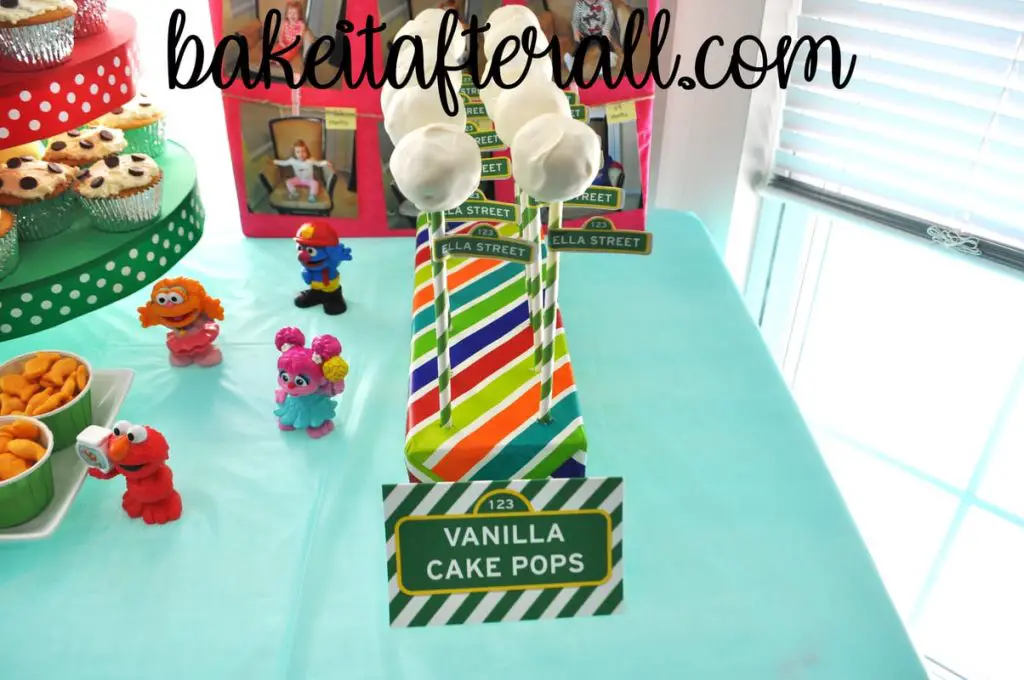
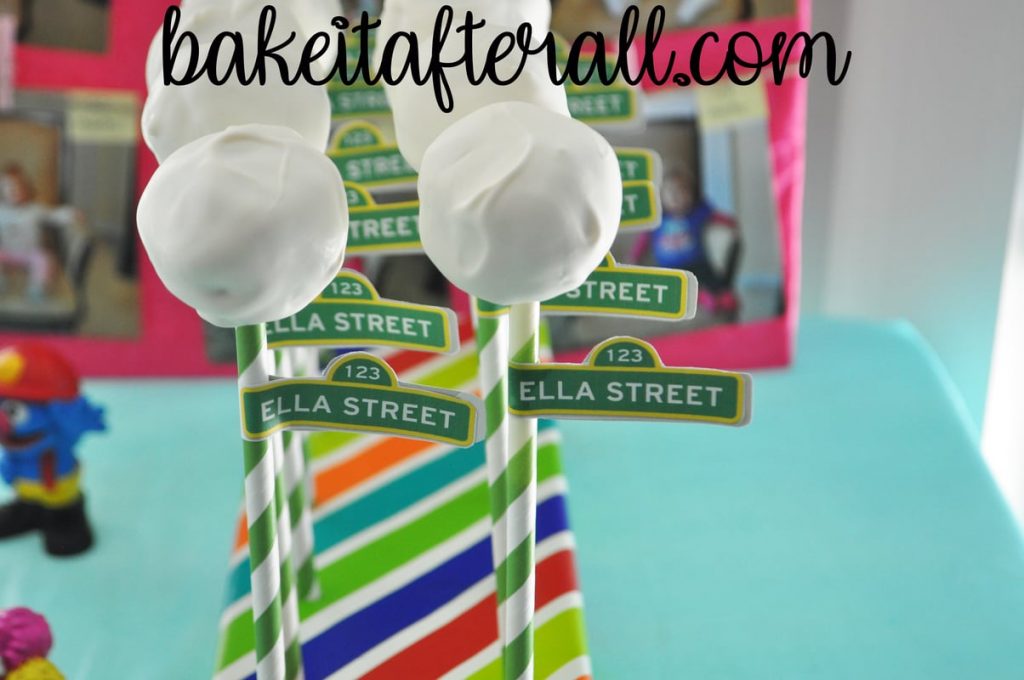
I got the idea for these cake pops on Kara’s Party Ideas. The cake pops mimic the light post street sign on Sesame Street. I think they are so cute and love that they can be customized with your child’s name!
DIY Cake Pop Stand
To make the DIY Cake Pop Stand, I covered a rectangular piece of styrofoam from a craft store in brightly colored wrapping paper. I then poked holes where I wanted the cake pops to be so I had them evenly spaced. This DIY Cake Pop Stand can be reused over and over for other parties. I recovered it with some decorative tissue paper for my cousin’s baby shower (details coming soon!). I still have this block and have even used it this past fall for another party.
Sesame Street Cake Pops
As I did for Ava’s FROZEN Birthday Party, I planned out how many mixes of cake I would need to account for some cake pops. As I’ve mentioned in previous posts, I like to take advantage of boxed cake mixes to save time when I’m having a big party with multiple desserts and decorations. I recommend Duncan Heinz brand of cake mix. I used classic yellow cake mixes for the Vanilla Cake Pops, the Chocolate Chip Cookie Cupcakes, and the Cookie Monster Cake.
For the Vanilla Cake Pops, I baked the cake in a cake pan then let it cool. Then, using food safe vinyl gloves, I crumbled the cake and squished it together into balls. If your cake is a little dry, you can add some frosting like Easy Vanilla Buttercream to get it to stick together better. The cake mix brand I use is so moist it doesn’t require the buttercream.
Coating the Cake Pops
To cover the cake pops, I have the best luck with white chocolate bark or white chocolate wafers made for chocolate fountains. I find these melt much easier than plain white chocolate or white chocolate chips and are less prone to seizing up.
If given a choice, I’d rather work with regular chocolate over white chocolate any day. It tastes better in my opinion and is so much easier to work with; however, some projects require white chocolate to achieve a desired look. For my sister’s Bridal Shower Dessert Table, I needed the Oreo Truffles and Cake Balls to be white to go with the color palette of the shower. For Ava’s FROZEN Birthday Party, I wanted to stick to white and blue colors, so I coated the Cake Balls in white chocolate.
These Vanilla Cake Pops are meant to look like a street lamp post from Sesame Street, so I wanted a white cake pop to represent the light. First I melted the white chocolate, then I dipped the tip of a green and white swirl paper straws into the melted white chocolate and pushed it into the ball of cake. I made sure it went about 3/4 of the way into the cake ball to ensure it would be secure. I let those set for a while in the refrigerator to allow the chocolate to harden. Then, using the straw as the handle, I carefully rolled each cake ball into the melted white chocolate, then placed a few at a time into tall glasses, cake pops facing up, to allow them to set.
Street Sign Stickers
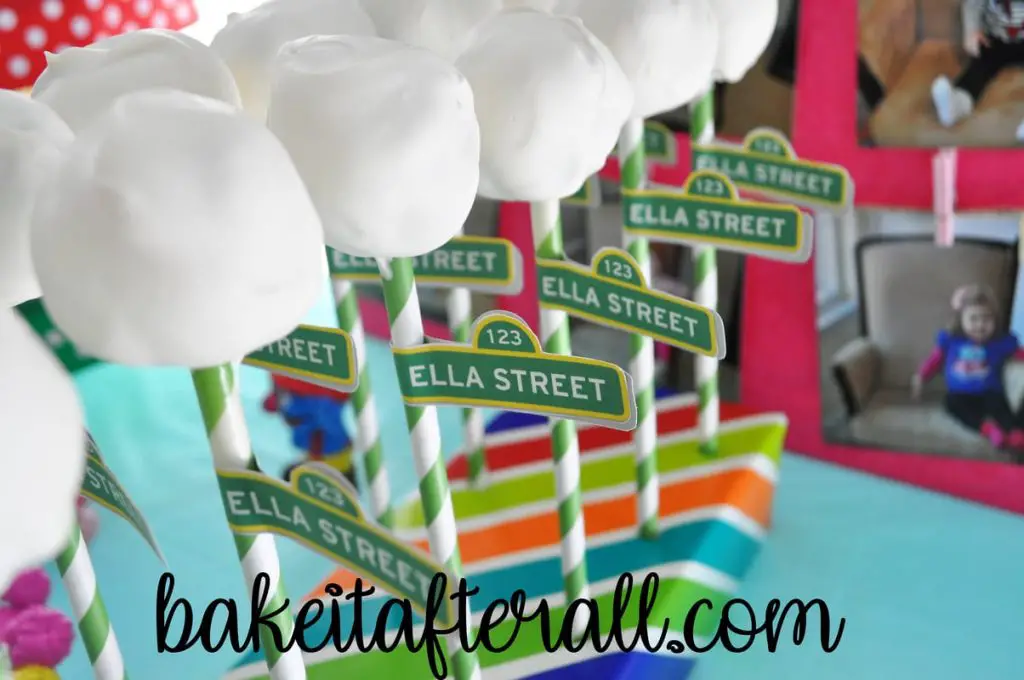
To make the street signs, I designed the street sign as a mirror image in Powerpoint and printed them on full sheet adhesive labels. Then I cut around each one, peeled off the backing, and wrapped the middle around the straw, adhering each side of the sign together. I love these full sheet labels. It’s basically printable sticker paper, so I use them to make custom stickers for party favors and decorations.
DIY Cupcake Stand and Chocolate Chip Cookie Cupcakes
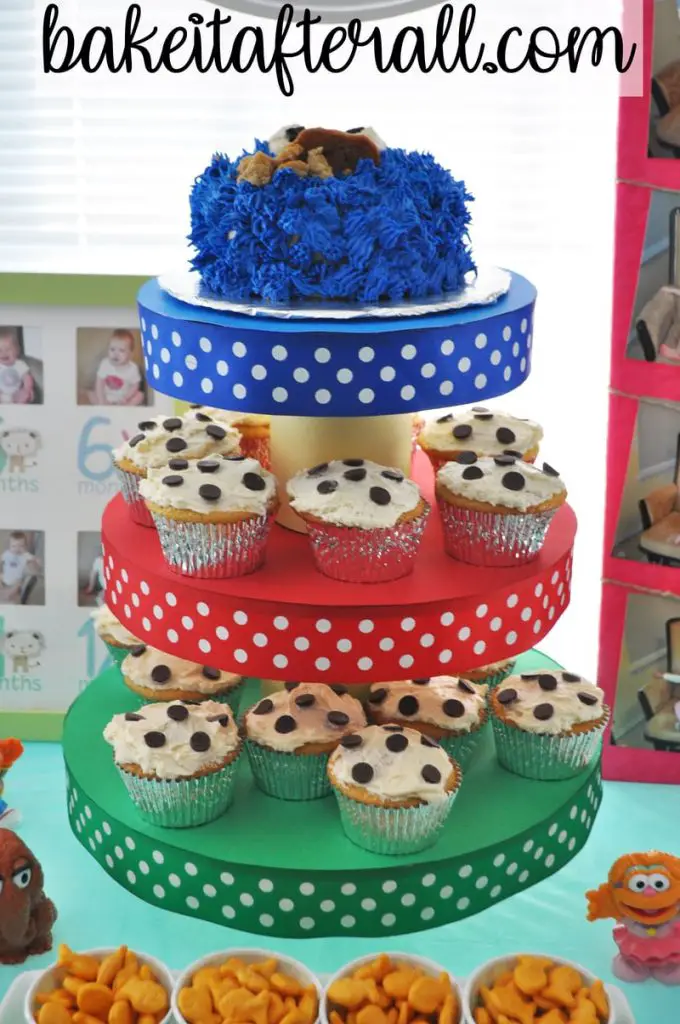
DIY Cupcake Stand
Many years ago, I saw a tutorial on Annie’s Eats (now Everyday Annie) for how to make this easy cupcake stand. It’s super simple and just requires cardboard cake circles in 3 sizes (2 of each in 8-inch, 10-inch, and 12-inch), some colored 12×12-inch pieces of cardstock, ribbon, 2 cans of food, some styrofoam discs, and a hot glue gun with hot glue sticks.
The styrofoam discs glued together form the base. I used light yellow cardstock to wrap around the base and canned goods so it didn’t distract from the bright colors of each tier of the stand. Each round tier consists of 2 cardboard cake circles glued together for stability. You can trace the cardboard cake circles on cardstock with a pencil, then cut them out. The cardstock is glued to the top of the cardboard circles. The canned goods are rolled in cardstock and secured with either glue or clear tape.
You can then assemble the stand in the order from bottom to top: styrofoam disks, 12 inch circle, can, 10 inch circle, can, 8 inch circle. Then you just glue on ribbon to the edge of each cardboard circle so the ribbon lines up with the top of the cardboard and hangs down into the next tier of the cupcake stand.
The great thing about this DIY Cupcake Stand is that it brings a lot of color to the party and is completely customizable for your theme. I loved the color scheme and pattern Annie used for her son’s birthday cupcake stand so much that I went with something similar for mine.
The DIY Cupcake Stand can be disassembled and redone for your next party. In fact, my sister and I repurposed this very cupcake stand for our cousin’s baby shower, using different colored cardstock and ribbon to fit the theme of that party. Details on that shower coming soon!
Chocolate Chip Cookie Cupcakes | Cookie Monster Cupcakes
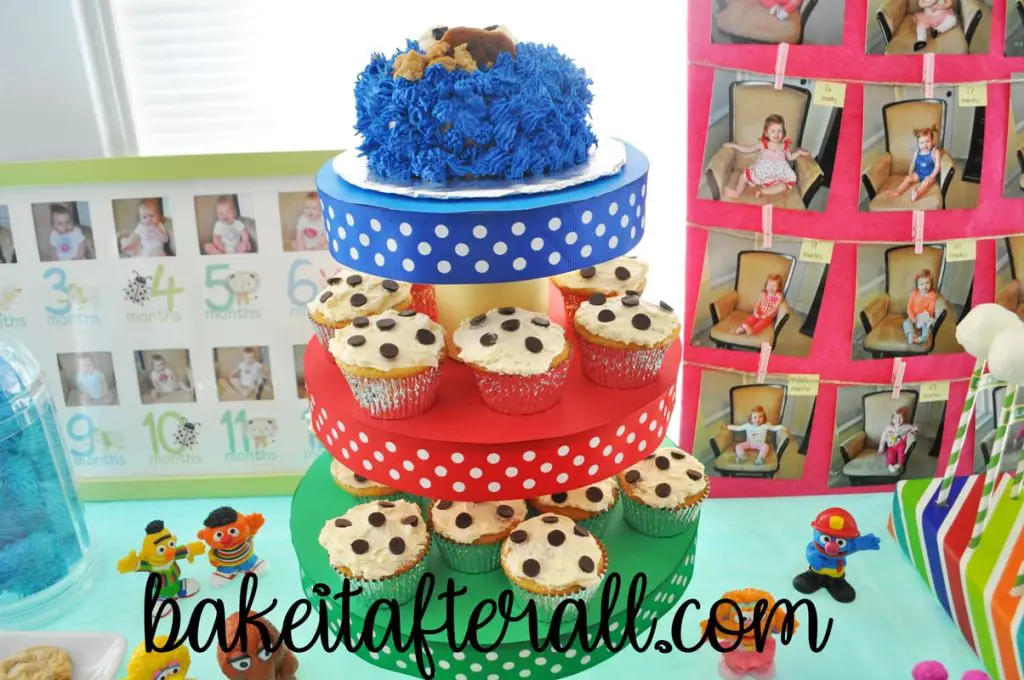
Because of the number of guests and large quantity of cupcakes needed, I decided to go with a very simple decoration for the cupcakes. I displayed what I could on this stand, but I had extra trays of cupcakes off to the side for the rest of the guests.
These are the easiest Cookie Monster Cupcakes to make, but I think they are so cute and fit with the theme. While they aren’t specific to Cookie Monster, the fact that they look like chocolate chip cookies fits perfectly since Cookie Monster almost exclusively goes for chocolate chip cookies! I dedicated some of the time saved to making the decorative Cookie Monster Cake for the top of the cupcake stand.
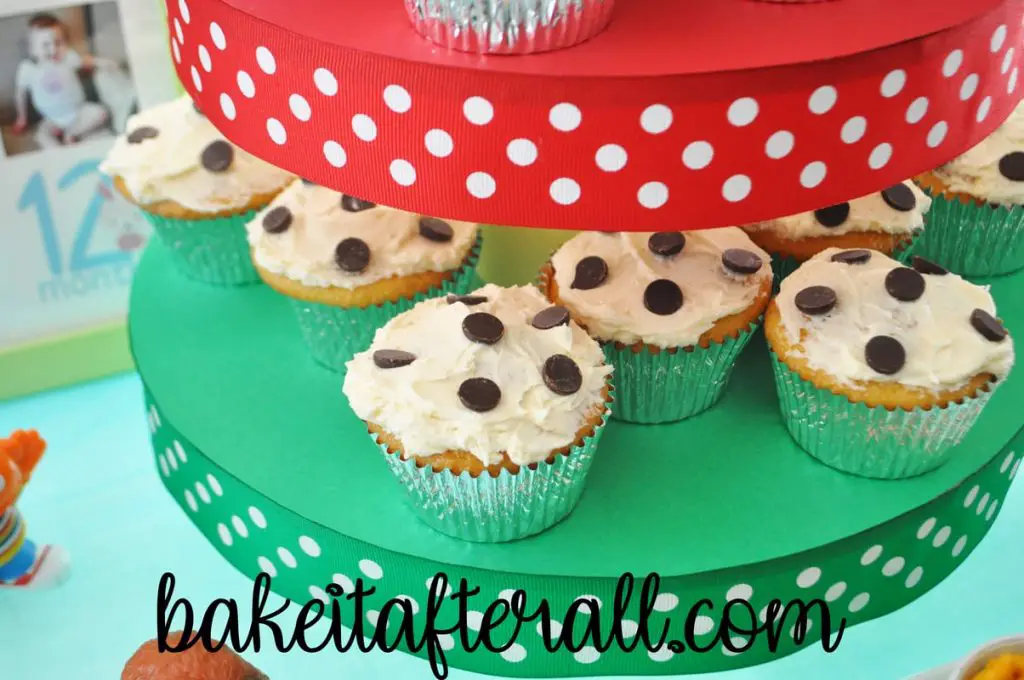
As I said above in the Vanilla Cake Pops section, I made multiple boxes of Duncan Heinz classic yellow cake mix for the cupcakes, for the cake pops, and for the Cookie Monster Cake below. I frosted the cupcakes rustically with untinted Easy Vanilla Buttercream using a small icing knife. Then I added Ghirardelli semisweet chocolate chips to the top to mimic chocolate chip cookies.

Cookie Monster Cake
I made this small Cookie Monster Cake as a decoration for the top of the cupcake stand. While I did not use it for this purpose, it would make a perfect Cookie Monster Smash Cake for a first birthday party! Alternatively, the same design could be applied to a large cake to feed a crowd, although Cookie Monster might need a larger cookie for a bigger mouth!
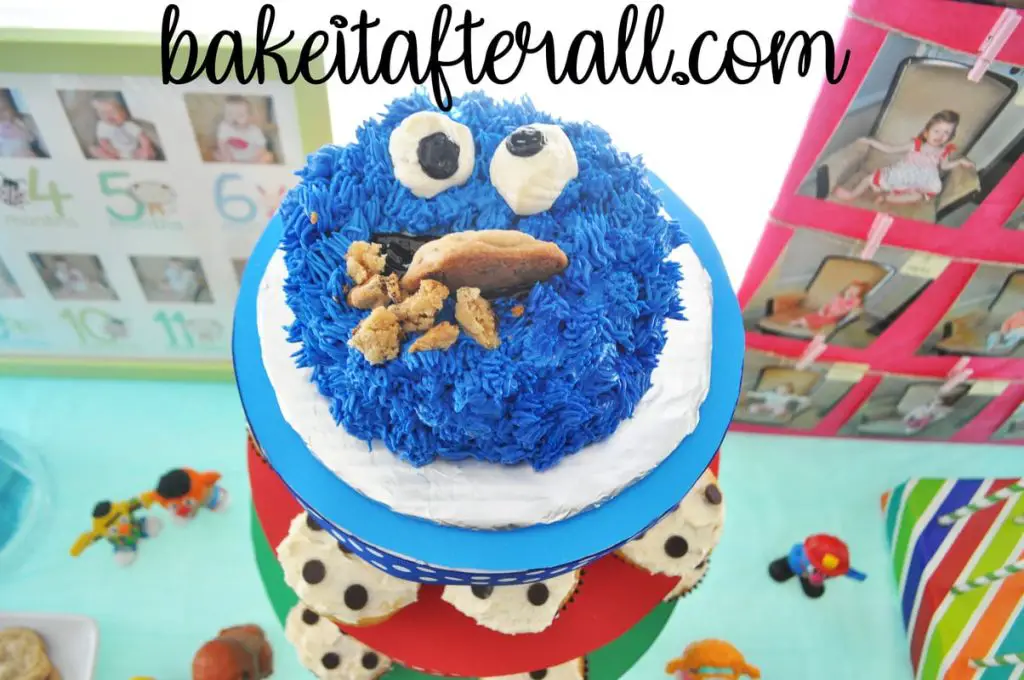
I had the idea for this small Cookie Monster Cake saved from Pinterest, but it’s just a photo with no link to a site, so I am unable to credit the original source.
For the base of the cake, I trimmed down an 8-inch cardboard cake circle to be about 7-inches in diameter then covered it in aluminum foil. When making the Chocolate Chip Cookie Cupcakes, I poured the extra batter from the cake mixes into two small, round dishes that measured approximately 5-inches in diameter.
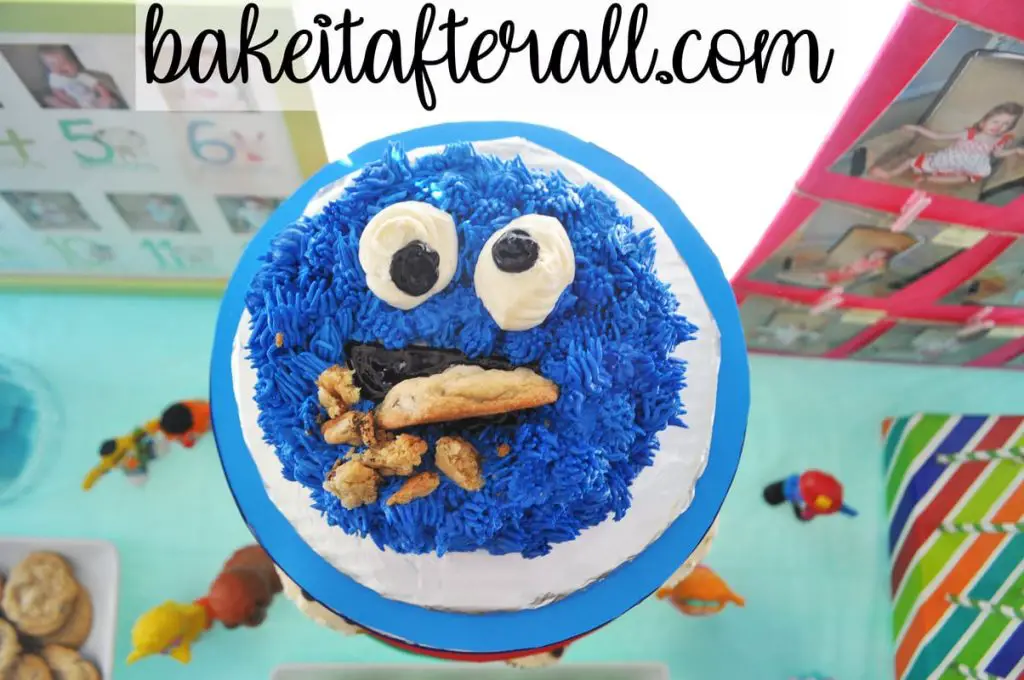
Once the cakes were baked and cooled, I added Easy Vanilla Buttercream in between the cake layers and on the entire cake as a crumb coat. Next, I added Cookie Monster’s mouth using store bought black frosting. When I need a small amount of black when decorating, I typically purchase a small tube of black frosting or black decorating gel. It takes a lot of brown and black food coloring to achieve a true black color unless you’re starting with dark chocolate frosting, so it’s a big time saver for me to buy the black frosting already made.
After adding the mouth, I tinted Easy Vanilla Buttercream with blue food gel to get a nice bright blue. Then I used a Wilton grass tip with a disposable pastry bag to make the fur. It’s essentially the same method to make the fur as you would to pipe stars in a section of cake: squeeze the frosting close to the surface of the cake then pull away as you release the pressure from the frosting bag.
You can see in this picture the imperfect job I did adding the fur. I don’t think anyone but me noticed!
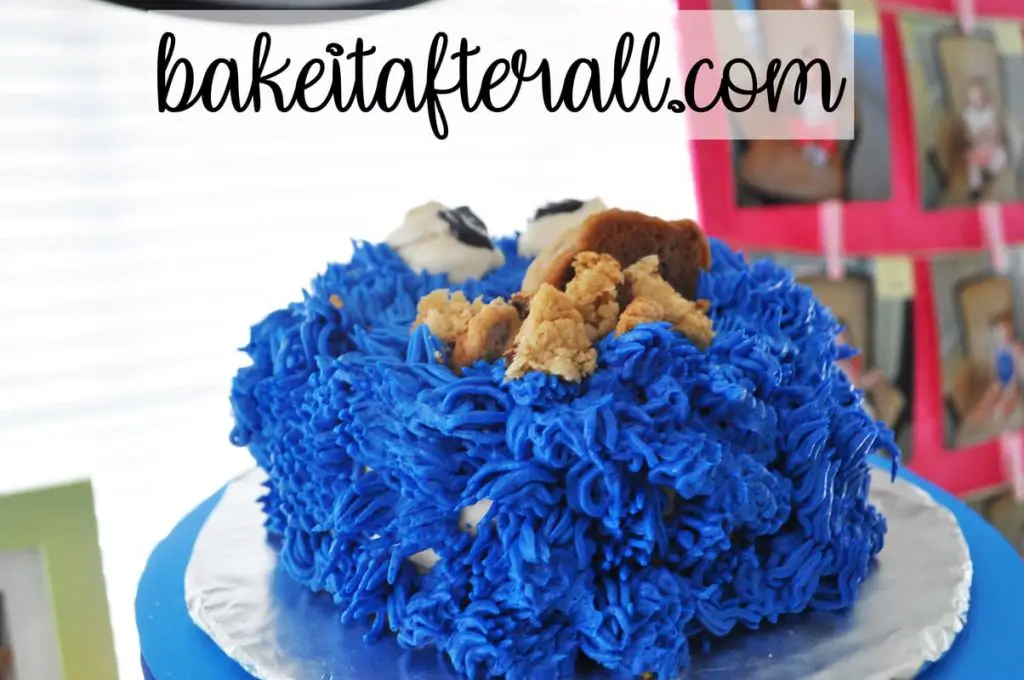
I piped big circles of untinted Easy Vanilla Buttercream for Cookie Monster’s eyes, then added dots of purchased black frosting for his pupils. Since Cookie Monster is googly eyed, the pupils are in different spots on each eye.
The final step was breaking one of the chocolate chip cookies in half to stick in his mouth, and adding some crumbles of cookie underneath his mouth to represent the haphazard way Cookie Monster eats cookies!
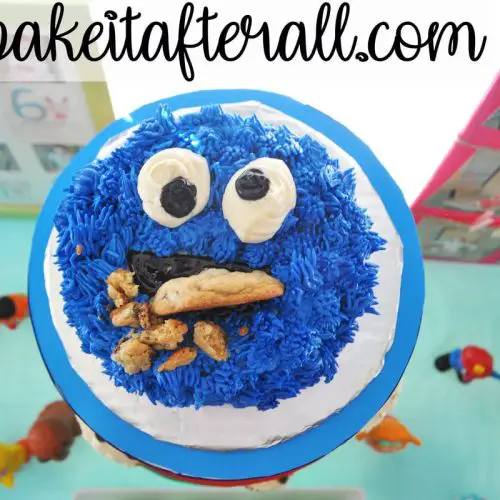
Cookie Monster Cake
Equipment
- two 5-or 6-inch round pans
- disposable pastry bag
- plastic coupler
- grass piping tip
Ingredients
- 1 cake mix, prepared into batter (flavor of choice)
- 2 batches Easy Vanilla Buttercream (see note, or frosting of choice)
- bright blue food coloring gel
- store bought black frosting
- 1 chocolate chip cookie (small to medium in size, homemade or store bought)
Instructions
- Butter and flour two round 5- or 6-inch round pans, or use a baking spray like Pam for Baking.
- Prepare cake batter according to package directions and pour into the prepared pans until 2/3-full. Use the rest of the batter for cupcakes, such as the Chocolate Chip Cookie Cupcakes. Bake the small cakes according to package directions, reducing baking time to account for their smaller size.
- Once cakes are baked, cool for 10 minutes, then invert onto a cooling rack to remove from pans. Cool to room temperature.
- Place 1 cake layer on top of a cake stand or cardboard cake circle. Place strips of waxed paper underneath the bottom edges of the cake to protect the cake stand/circle from frosting during decorating. Frost the top of the cake with buttercream then add the second layer on top and cover completely with buttercream to serve as crumb coat.
- Use black frosting to pipe a filled half circle for Cookie Monster's mouth.
- Set aside a small portion of untinted buttercream that you will use to make Cookie Monster's eyes later. Tint the remaining buttercream with blue food coloring gel to achieve a nice bright blue color. Fill a disposable pastry bag fitted with a grass tip with the blue frosting. To pipe the fur, squeeze the frosting close to the surface of the cake then pull away as you release the pressure from the frosting bag. Repeat over the entire surface of the cake, taking care to go around Cookie Monster's mouth.
- Break a chocolate chip cookie in half to stick in his mouth, and add some crumbles of the other half of the cookie underneath his mouth to represent the haphazard way Cookie Monster eats cookies.
- Carefully remove waxed paper strips from underneath the cake and discard the paper. Store cake in refrigerator until several hours prior to serving. Allow cake to come to room temperature before eating.
Notes
Sesame Street Birthday Party Favors
As I’ve mentioned before, I like to do a party favor when I can. For my sister’s Bridal Shower, I did packaged decorated Sugar Cookies with Royal Icing. While I love how adorable decorated sugar cookies are, they can be overly sweet for some people. For this party, I wanted a favor that was on theme but super delicious and would appeal to both kids and adults.
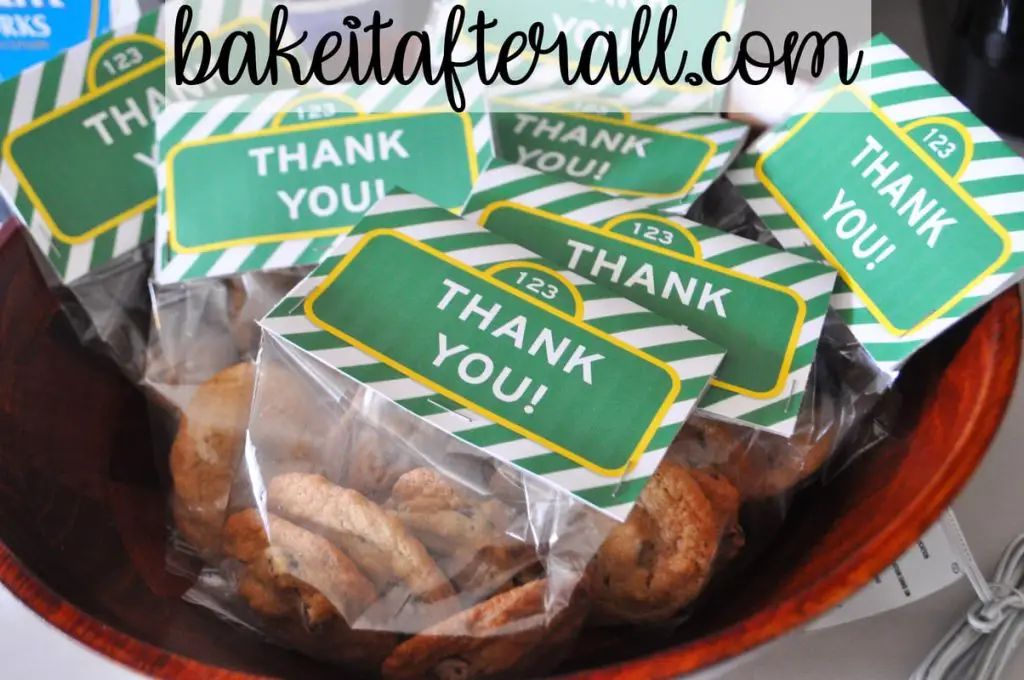
I made extra Ghiradelli chocolate chip cookies and placed them in clear favor bags. I made these “Thank You” printables in Powerpoint and printed them on white cardstock, then cut them out, folded them in half, and stapled them onto the bag. This secured the label but also sealed the bags closed to keep the cookies fresh. These went over very well with the guests! Who wouldn’t want to take home a bag of homemade chocolate chip cookies?!
Sesame Street Birthday Party Attire

The birthday girl, in her “It’s all about Me” Elmo shirt. Never a more appropriate time to wear this than at her Sesame Street Birthday Party! Ella’s signature fashion style since she was a toddler was putting on skirts (or tutus!) underneath her skirts and dresses, which she did for this outfit.
This was such a fun party to plan, and I can’t wait to share more party ideas soon!
Looking for More Party Ideas?
Check out these other parties and party dessert ideas:
Under the Sea Birthday Party
Mermaid Ice Cream Birthday Cake
Bridal Shower Dessert Party
Penelope Bird Cake and Cookies
Daniel Tiger Cake and Birthday Party
Winter Wonderland 1st Birthday Party
Very Hungry Caterpillar 1st Birthday Party
Very Hungry Caterpillar Cupcake Cake
Thomas the Train Smash Cake
FROZEN Cake and Birthday Party
Cinderella Cake and Birthday Party
My Little Pony Unicorn Ice Cream Cake
Rainbow Brownie Ice Cream Sandwiches
Oreo Truffles Gender Reveal
Cupcake Gender Reveal