
These adorable Polar Bear Cake Pops are perfect for a teddy bear birthday party or baby shower. They are actually rather easy to make following these simple steps!

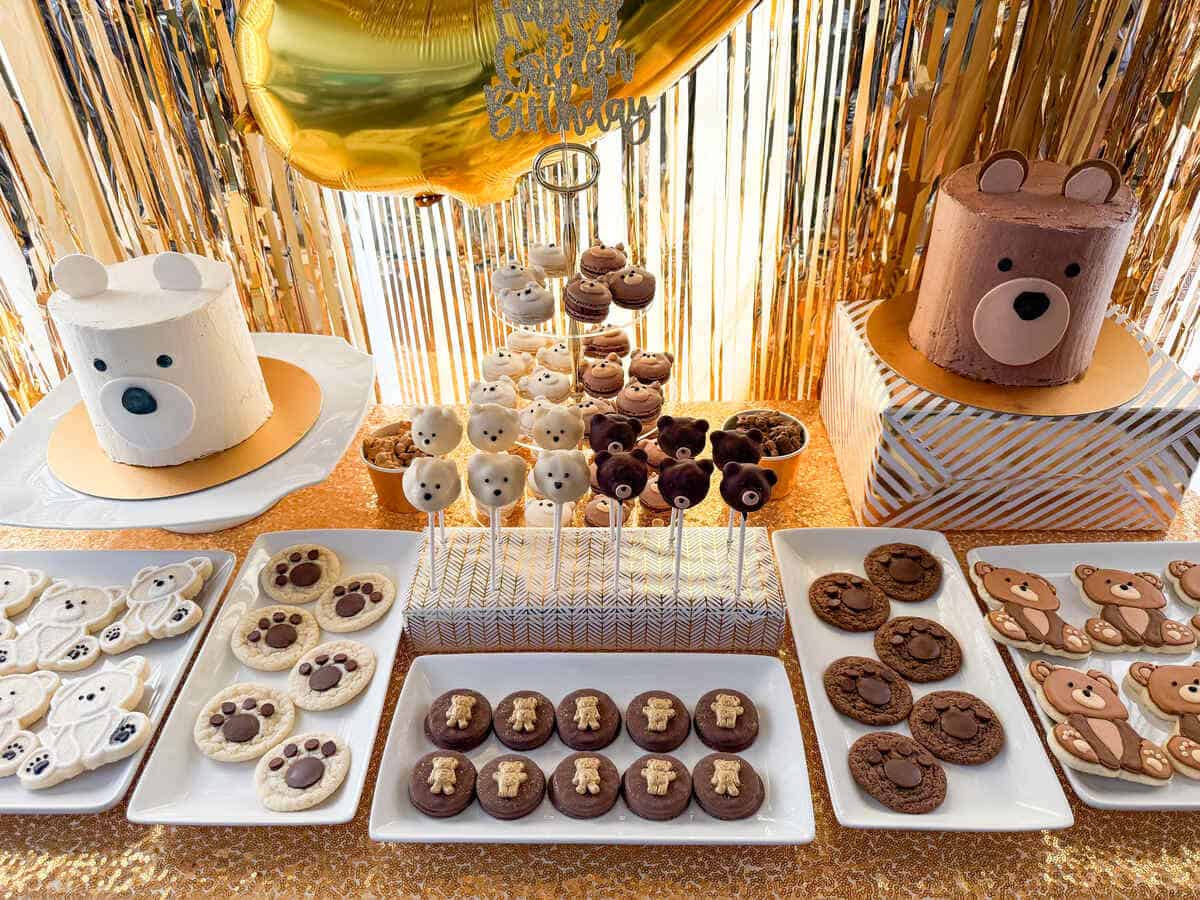
I made these Polar Bear Cake Pops for my daughter's Golden Teddy Bear Birthday Party, alongside dark chocolate Teddy Bear Cake Pops. They were so cute displayed side by side on the dessert table, in addition to the other treats like Golden Teddy Bear Chocolate Covered Oreos, Easy Polar Bear Cookies, Polar Bear Paw Cookies, and Chocolate Bear Paw Cookies.
I was inspired by Celebrate Creativity's adorable cake pops. She was able to find Valentine M&M's to use for the ears and snout, similar to using M&M's for the Teddy Bear Cake Pops.
Unfortunately, those were no longer in stores when I was making these, so I made little royal icing transfers instead. I also tried free-forming the dough, which I ultimately preferred.
I followed the basic method outlined in my Easy Cake Pops recipe. These cake pops were a huge hit and actually ended up being all of my daughters' favorite dessert at the party!
LOVE POLAR BEARS? CHECK OUT THESE NUT FREE POLAR BEAR MACARONS, EASY POLAR BEAR CUPCAKES, POLAR BEAR COOKIES AND POLAR BEAR PAW COOKIES!
Jump to:
Supplies
- Easy Royal Icing, optional for ears and nose
- disposable piping bags
- plastic tip coupler, optional
- small round piping tip, such as #5, optional
- one 8-inch cake, prepared from a boxed mix or homemade
- store bought or homemade frosting, such as Easy Vanilla Buttercream
- white candy melts
- cake pop sticks
- black icing powder or white royal icing with black royal icing gel
I prefer to use vanilla cake to make sure the white coating candy will completely cover. If you use chocolate cake, you may have to dip them twice.
For homemade cake, my family preferred Sugar Spun Run's Vanilla Cake in a blind taste test compared to other vanilla cake recipes.
I have compared Ghirardelli white chocolate melting chips to Wilton White Candy Melts. I prefer the candy melts for cake pops because they are easier to work with and don't seize up as easily.
I have also used white chocolate made for chocolate fountains, based on the recommendation from a friend who owns her own cake business, and find that works well.
Royal Icing Transfers
For some of the cake pops, I used small circles of dried royal icing for ears and a nose. You can decide which of the shapes of faces you like best and whether you need to make these.
These are called royal icing transfers, and they are made using the same method as these Royal Icing Snowflakes.
First, prepare flood consistency Easy Royal Icing and add it to a disposable piping bag fitted with a small round tip or with the tip of the bag snipped off.
Pipe drops of icing that measure approximately ½-inch in diameter onto waxed paper.
Allow the icing to dry for several day at room temperature before carefully removing from the paper.
The royal icing transfers can be stored at room temperature in an airtight container for several weeks, perhaps even months.
Mix and Shape the Cake Pops
I only used one 8-inch round cake to make these because I had a lot of other desserts. Just the one cake makes 18 cake pops.

If you have two layers, you can easily double this recipe and use two 8-inch cakes, or save one of the layers for this Easy Boston Cream Pie.
You can use any homemade or store bought frosting. I used Easy Vanilla Buttercream.
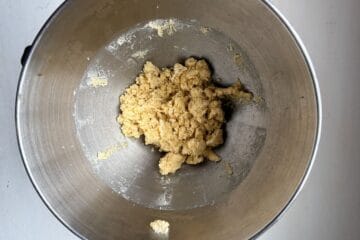
Break the cooled cake into pieces and put them in the bowl of a stand mixer with a paddle attachment. Process to the cake into crumbs on low speed, then add the buttercream and mix until just incorporated.

Wearing food safe nitrile gloves, scoop a ball of dough and roll it in your hands until it is round. I like to use a 1-inch dough scoop.

Repeat until all of the cake has been formed. Then it's time to shape the cake.
I compared 3 methods for shaping the polar bear faces. For the first one, I used the royal icing circles for the ears and nose, just by pressing the circles into the cake.

These cake pops ended up looking a little more cutesy and cartoon-ish.

I also tried shaping the nose with cake but adding the royal icing ears.

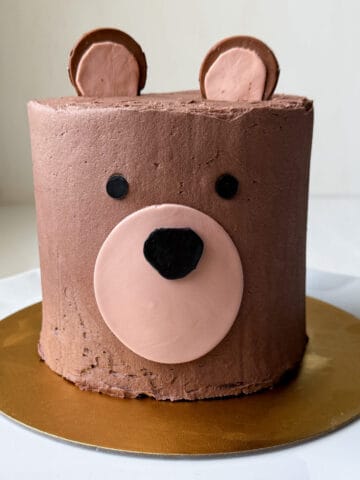
Lastly, I shaped the ears and nose with the cake, not using any of the royal icing circles. I prefer this last method because I think the cake pops look more realistic.

My daughter actually preferred the first method that used the circles for ears and snout because she thinks it's cuter! It really depends on what look you're going for.

Chill the balls of cake for at least 4 hours or freeze for at least 30 minutes.
Coat the Cake Pops
Place a small amount of candy melts in a bowl. Melt them in the microwave at 50% power for 30 second intervals, stirring after each interval, until melted and smooth.
Dip the end of the cake pop stick, about ¼- to ½-inch, in the melted white candy melts and then insert it into the bottom of each head. Refrigerate them for 1 hour to set the candy.
Once the sticks are set, place about a cup of candy melts in a tall glass or mason jar. Melt them just as you did before. You want the melted candy to be deep enough that you can submerge then entire cake.
When I dip cake pops, I try to let as much of the melted candy run off and sort of swirl and shake the cake pop to get the excess off.
Then, I placed them snout side up on a piece of waxed paper. If you have a nice holder and can stand them up, that's fine too. I don't worry about it as much when I have a defined front of the cake pop, like a face.
At this point, I like to move the cake pops around one or two times by lifting with the stick. This prevents the coating from pooling around the bottom of the cake pop.
The waxed paper will look messy when you're finished, but that's ok. Refrigerate the cake pops until the coating is completely set.
After the white chocolate is set, carefully peel the cake pops off the waxed paper and move them to a clean cake pan to store them refrigerated.
Final Decorations
I used to tint Easy Royal Icing with brown food coloring gel and then add black to achieve the proper color, but now I purchase black royal icing powder that just requires water. It saves me a lot of time and food coloring!
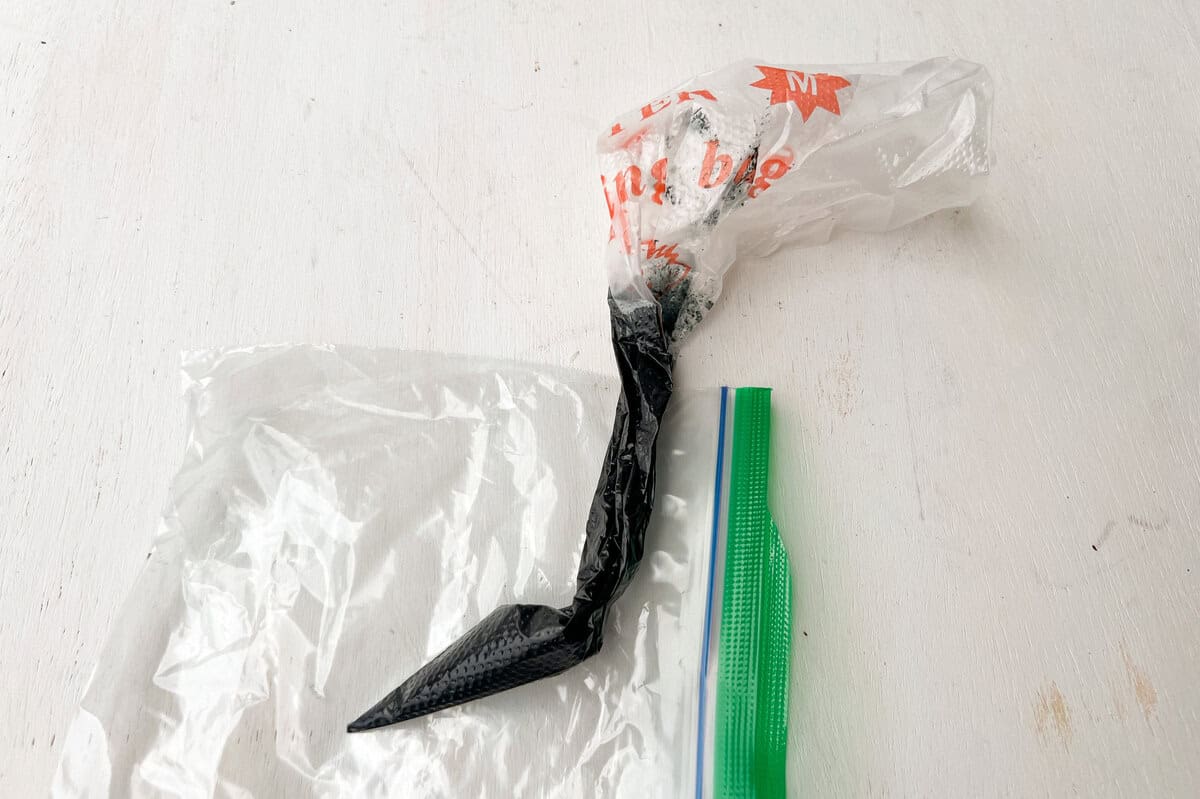
Mix up a small amount of black royal icing and transfer it to a disposable piping bag fitted with small round tip, such as a #5, or with the tip of the bag cut off.
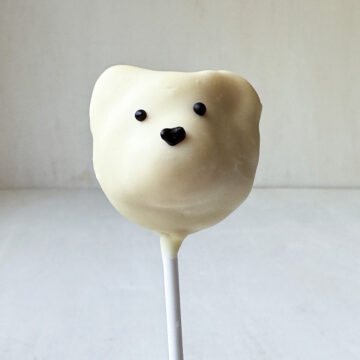
Pipe two small dots for eyes and a heart-shape for the nose on the face of each polar bear. Lay the cake pops down on waxed paper, face up, to allow the icing to set.
If you're packaging the cake pops, make sure that the icing is completely dry before packaging.
Storage
Store the cake pops in the refrigerator for up to 1 week or in the freezer for up to 3 months, for best quality.
If freezing, chill the cake pops in the refrigerator before freezing to help prevent the coating from cracking. Freezing does risk cracking the coating chocolate.
Allow chilled or frozen cake pops to come to near room temperature before serving.
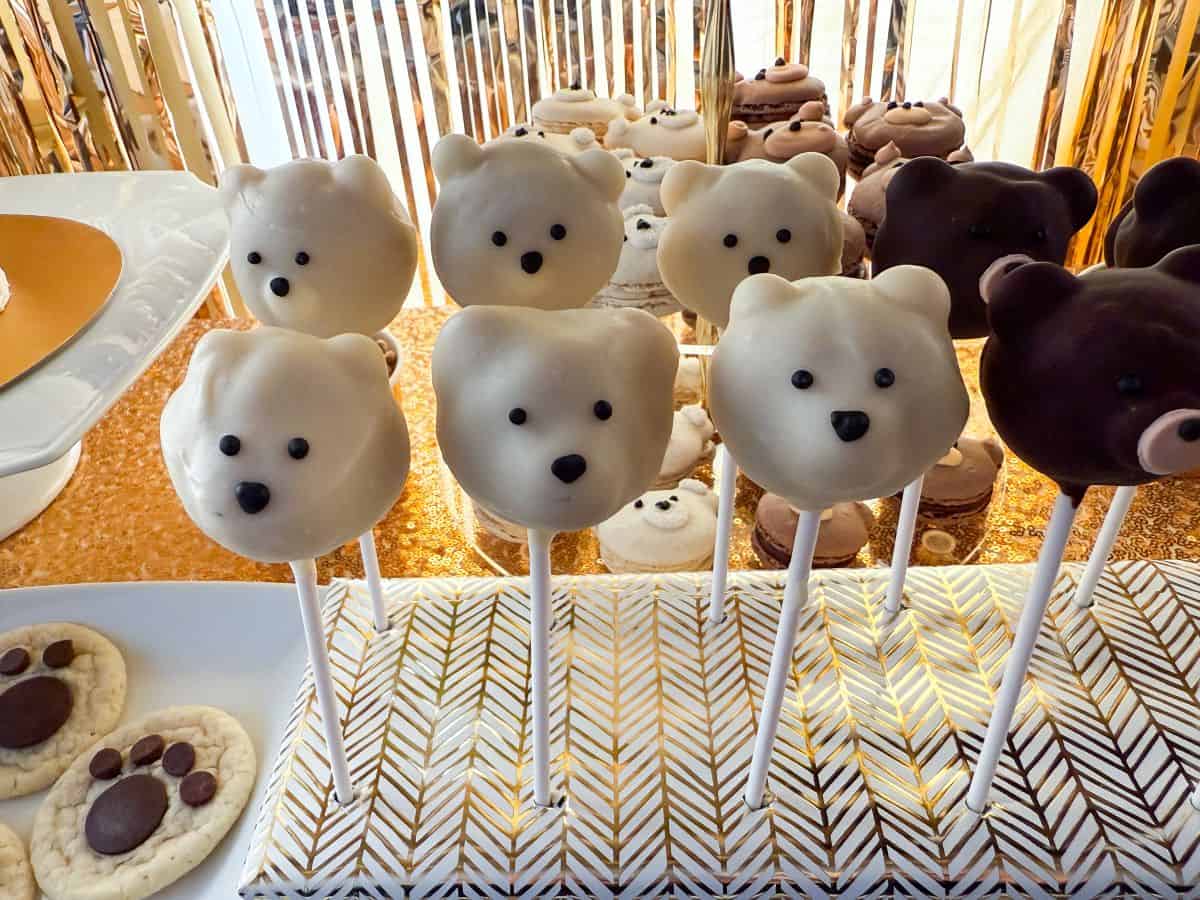
Cake Pop Display
I made this cake pop holder years ago and just change out the wrapping to fit the theme of the party. You can see it at this Sesame Street Birthday and for the Apple Cake Pops at this Snow White Birthday Party.
For this Golden Teddy Bear Party, I wrapped it in shiny gold wrapping paper. I placed the Polar Bear Cake Pops on the left side and Teddy Bear Cake Pops on the right.

Gluten Free Option
Use your favorite gluten free cake mix or homemade cake recipe. For cake mix, I prefer King Arthur brand of gluten free cake mixes.
📖 Recipe
Polar Bear Cake Pops
Equipment
- disposable piping bags
- Plastic tip coupler optional
- Small round piping tip, such as #5 optional
- 18 Cake pop sticks
Ingredients
- Easy Royal Icing (optional, for ears and nose)
- 1 8-inch cake (prepared from a boxed mix or homemade)
- ¼-½ cup store bought or homemade frosting (such as Easy Vanilla Buttercream, see note)
- white candy melts
- black icing powder or white royal icing with black royal icing gel
Instructions
Royal Icing Circles
- Prepare flood consistency Easy Royal Icing and add it to a disposable piping bag fitted with a small round tip or with the tip of the bag snipped off.
- Pipe drops of icing that measure approximately ½-inch in diameter onto waxed paper.
- Allow the icing to dry for several day at room temperature before carefully removing from the paper.
- These decorations can be stored at room temperature in an airtight container for several weeks, perhaps even months.
Mix and Shape the Cake Pops
- Break the cooled cake into pieces and put them in the bowl of a stand mixer with a paddle attachment. Process to the cake into crumbs on low speed, then add the buttercream and mix until just incorporated. Add more buttercream if needed to get the mixture to stick together.
- Wearing food safe nitrile gloves, scoop a ball of dough and roll it in your hands until it is round. I like to use a 1-inch dough scoop. Repeat until all of the cake has been formed.
- Add royal icing circles for two ears and a nose to each cake ball, only add the ears and shape the snout by hand, or shape the ball into the polar bear head shape without using the royal icing circles.

- Chill the balls of cake for at least 4 hours or freeze for at least 30 minutes.
Coat the Cake Pops
- Place a small amount of candy melts in a bowl. Melt them in the microwave at 50% power for 30 second intervals, stirring after each interval, until melted and smooth.
- Dip the end of the cake pop stick, about ¼- to ½-inch, in the melted white candy melts and then insert it into the bottom of each head. Refrigerate them for 1 hour to set the candy.
- Once the sticks are set, place about a cup of candy melts in a tall glass or mason jar. Melt them in the microwave at 50% power for 30 second intervals, stirring after each interval, until melted and smooth.. You want the melted candy to be deep enough that you can submerge then entire cake.
- Holding the stick, submerge the cake into the melted candy until it reaches the level of where the stick meets the cake. Carefully lift the cake out of the candy and let the melted candy run off, gently swirling and shaking the cake pop to get the excess off.
- Place them snout side up on a piece of waxed paper. Move the cake pops around one or two times by lifting with the stick. This prevents the coating from pooling around the bottom of the cake pop. The waxed paper will look messy when you're finished, but that's ok. Refrigerate the cake pops until the coating is completely set.
- After the white chocolate is set, carefully peel the cake pops off the waxed paper and move them to a clean cake pan to store them refrigerated.
Final Decorations
- Mix up a small amount of black royal icing and transfer it to a disposable piping bag fitted with small round tip, such as a #5, or with the tip of the bag cut off.

- Pipe two small dots for eyes and a heart-shape for the nose on the face of each polar bear. Lay the cake pops down on waxed paper, face up, to allow the icing to set.
- If you're packaging the cake pops, make sure that the icing is completely dry before packaging.

Leave a Reply