
These Easy Polar Bear Cookies can be made with a few simple steps. They have a soft powdered sugar glaze and minimal royal icing details to keep them soft to bite.
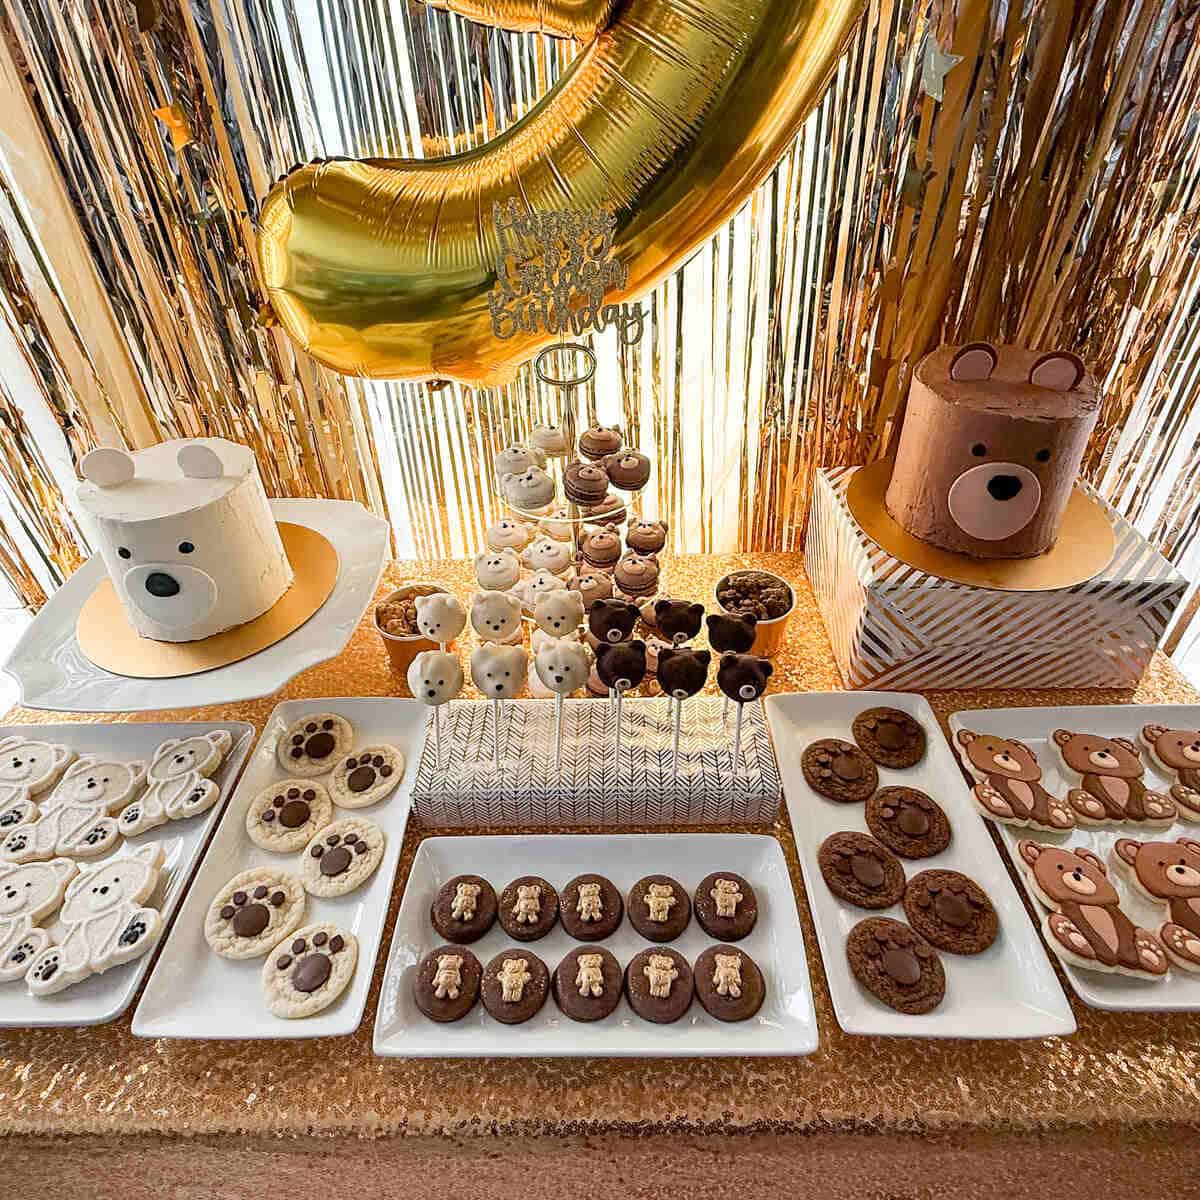
I made these Polar Bear Cookies for my daughter's Golden Teddy Bear dessert table, where one side of the table featured polar bear treats and the other side teddy bear treats. These paired with the Teddy Bear Cookies with Royal Icing.
While I love to make royal icing cookies because of the endless design possibilities, I find them to be a bit too hard and too sweet for my taste. I love using a powdered sugar glaze that keeps the cookies soft, but it's harder to do intricate designs on cookies using glaze.
For these Snowflake Cookies, I used a combination of glaze and royal icing, which allowed for a soft, not too sweet cookie that still had the detail and aesthetic I desired.
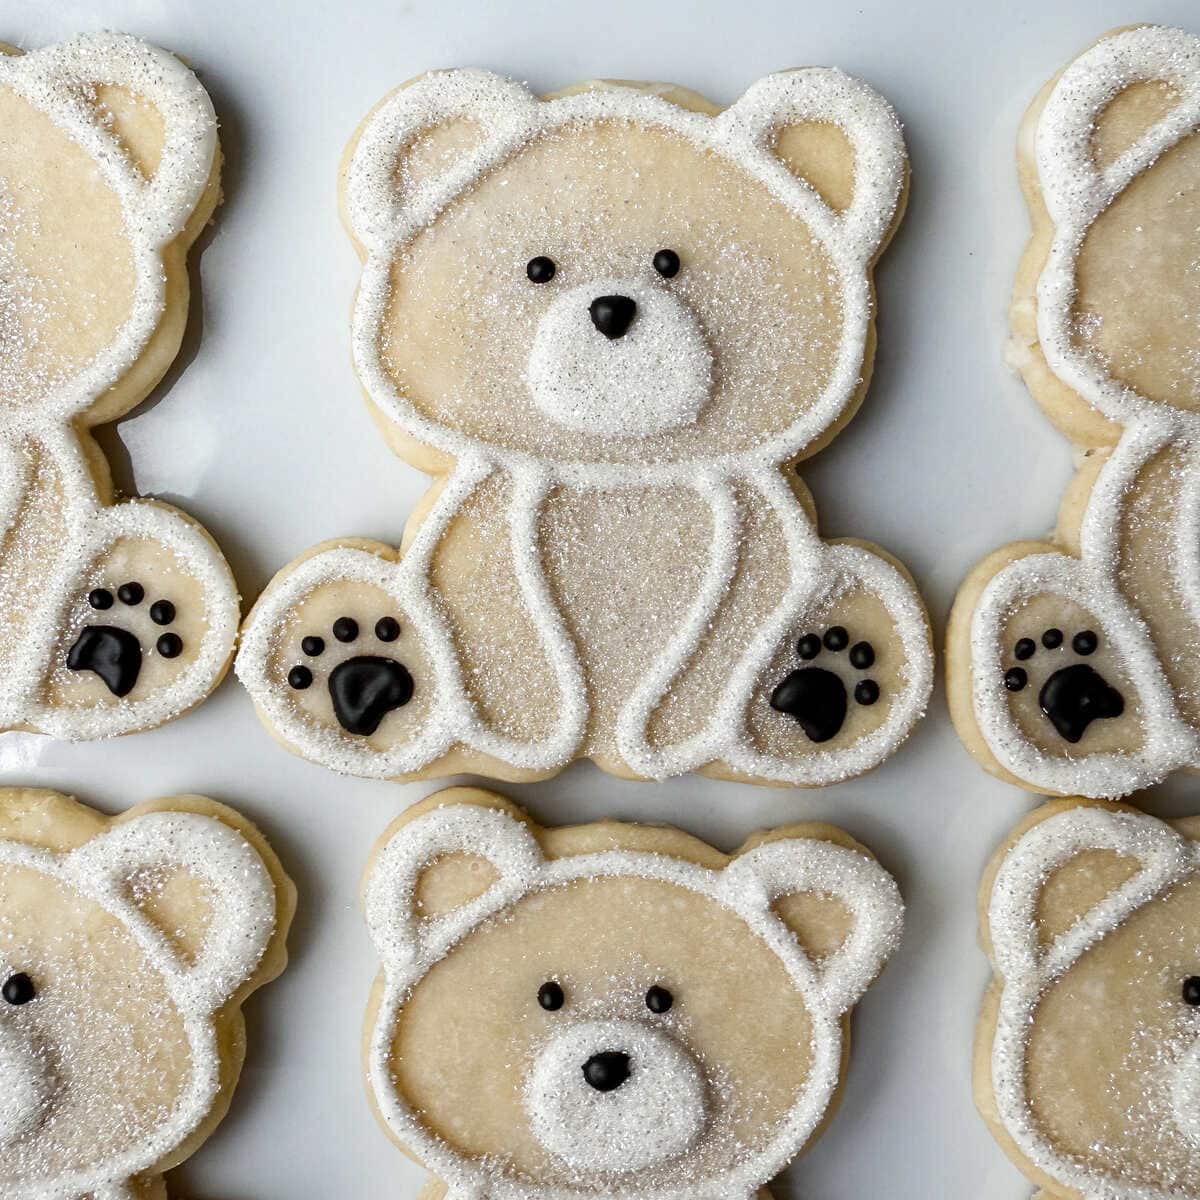
Because these cookies are polar bears, I decided to use a white icing glaze to cover the cookie and only add royal icing for the outline details. This results in a softer cookie that isn't overly sweet.
I loved how these cookies turned out! The little black details on the paws were my favorite part.
Other treats on the dessert table included Polar Bear Cake, Nut Free Polar Bear Macarons, Polar Bear Paw Cookies, Chocolate Bear Paw Cookies, Golden Teddy Chocolate Covered Oreos, Polar Bear Cake Pops, Teddy Bear Cake Pops and a Teddy Bear Cake.
Jump to:
Supplies
- your favorite shortbread cookie or cut out sugar cookie dough
- ¼-inch wooden dowel rods
- rolling pin
- bear cookie cutter
- powdered sugar
- milk
- clear vanilla extract
- Easy Royal Icing
- disposable piping bags
- plastic tip coupler
- small round piping tip, such as #2 and #5
- white sparkling sanding sugar, Great Value brand recommended
- black royal icing powder or black food coloring gel
Bake the Cookies
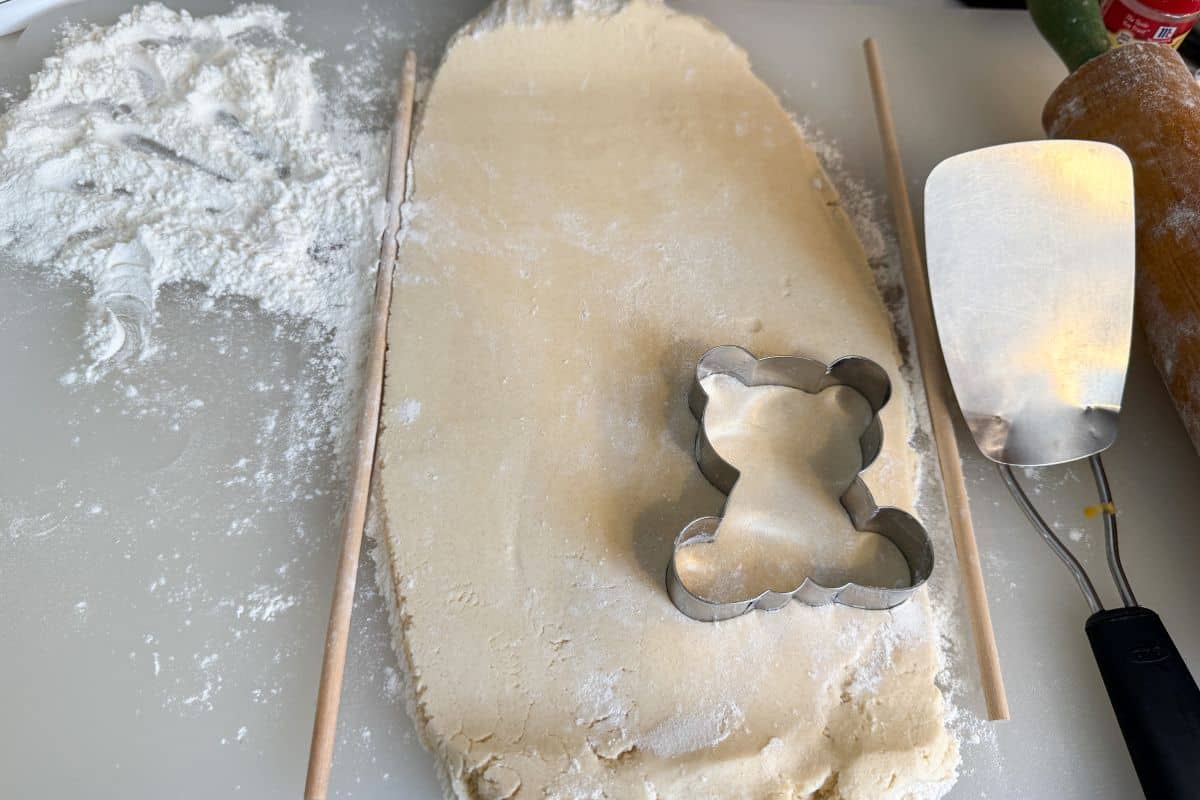
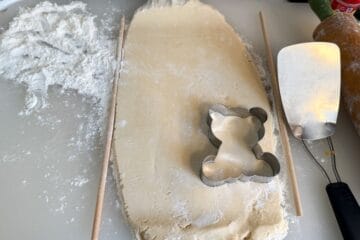
To begin, flour a work surface like a cutting board or mat. Roll the dough out to ¼-inch thickness. I use ¼-inch diameter wooden dowel rods as guides for my rolling pin on each side of the dough to ensure an even thickness.
Cut the dough with a bear cookie cutter.
Place the cut dough shapes on parchment paper lined cookie sheets. Bake the cookies, one tray at a time, for 5-7 minutes, until baked through but not brown.
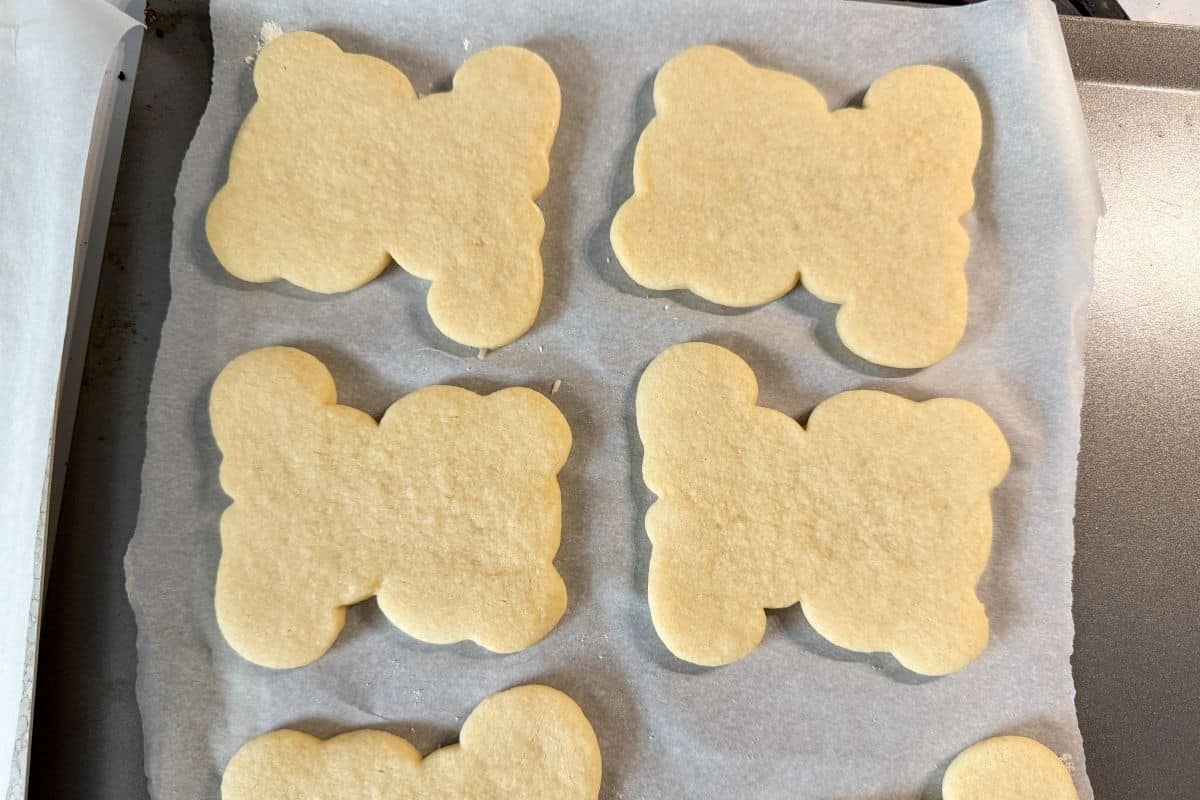
Remove cookie sheet from the oven and allow cookies to cool for 1 to 2 minutes before removing them to a wire rack, then cool completely before glazing.
Glaze the Cookies
Mix together the powdered sugar, milk, and clear vanilla extract. Using clear vanilla extract will keep the color of the icing white. You can use any kind of clear extract, such as almond, rum, or coconut.
I like to stir the icing together with a small silicone spatula to avoid introducing bubbles. You can let the icing sit for a minute so bubbles rise and then pop them with the spatula.
You an add more milk or powdered sugar to achieve a dippable consistency.
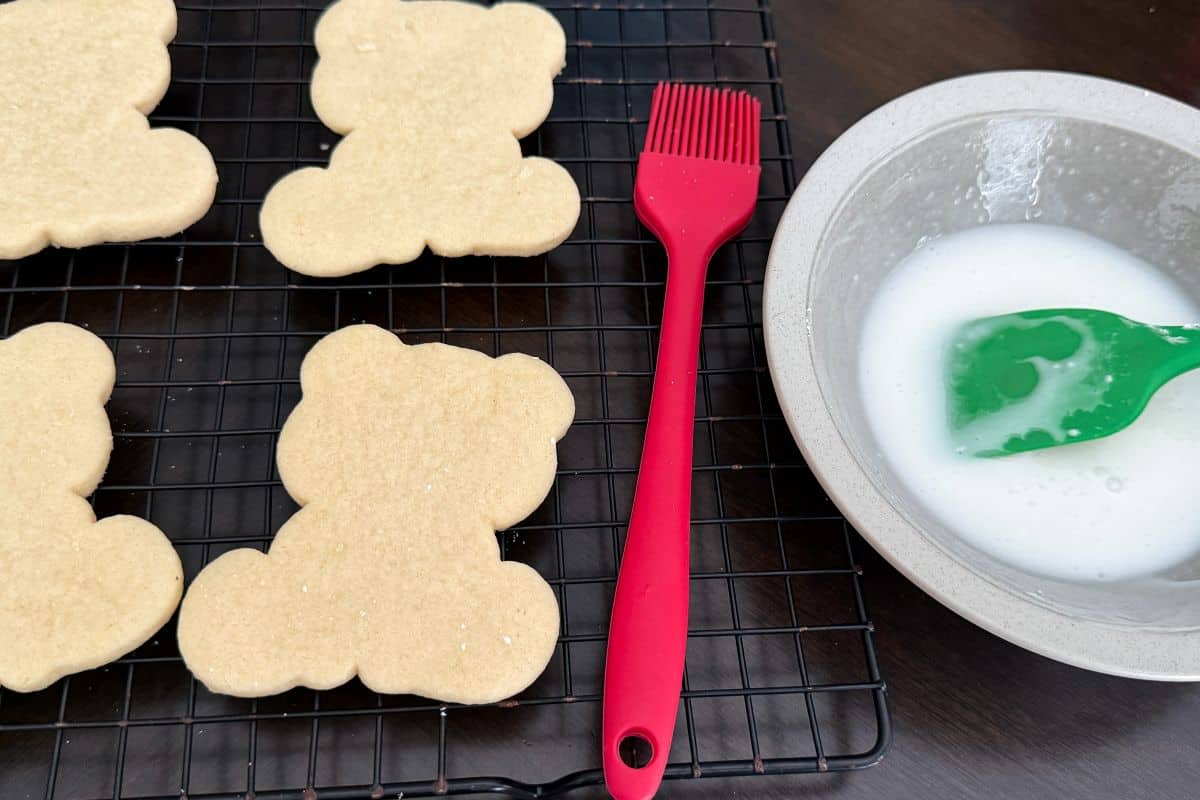
Brush on the glaze with a silicone pastry brush or turn the cookie over and dip into the glaze. Use the brush or a toothpick to pop any bubbles.
Allow the glaze to dry before adding the royal icing.
Add the Royal Icing Outline
Mix up outline consistency royal icing. Add the icing to a disposable piping bag fitted with a small round tip, such as a #2 or #5, using a plastic tip coupler, if desired.
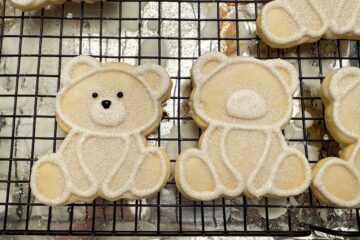
Pipe the outline of the bear, as shown here, and an oval snout. I made the outline around the ears thicker to define the outer ear versus inner ear.

Immediately after piping, sprinkle white sparkling sanding sugar onto the wet icing so it will stick.
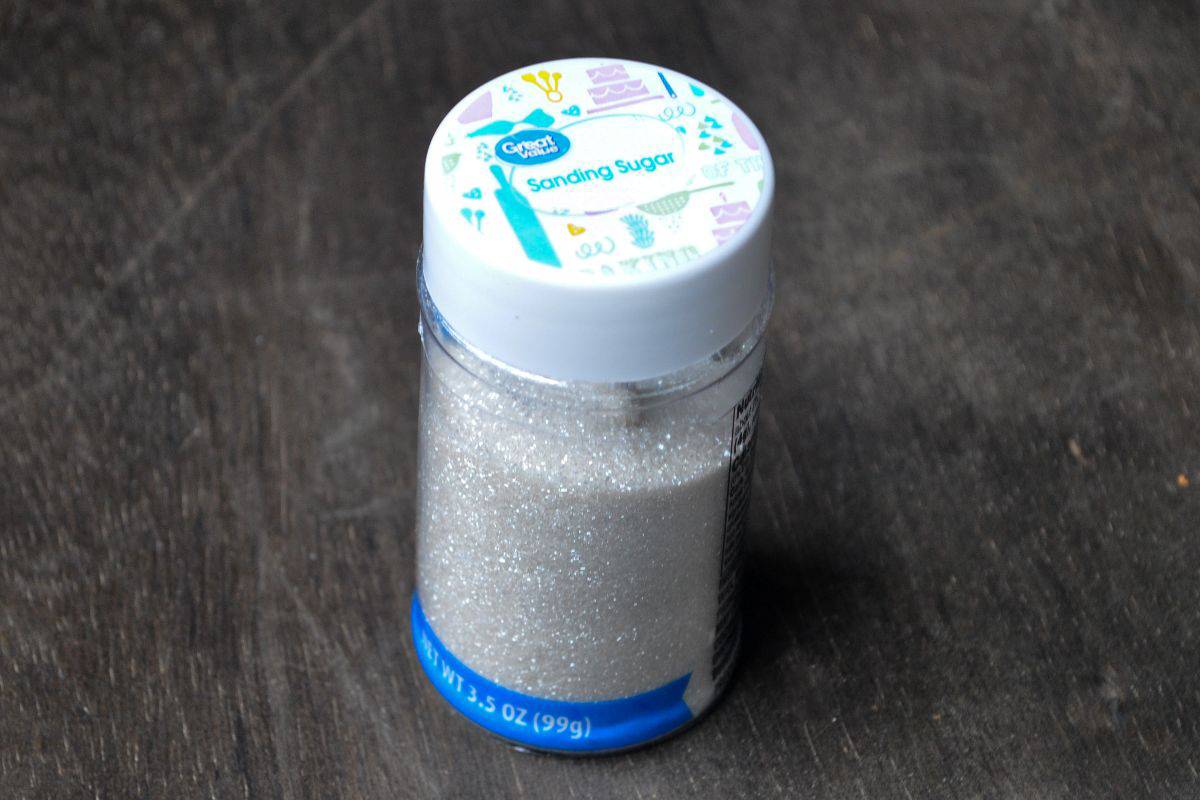
Allow the icing to dry, then shake or brush off the excess sanding sugar.
Add Final Details
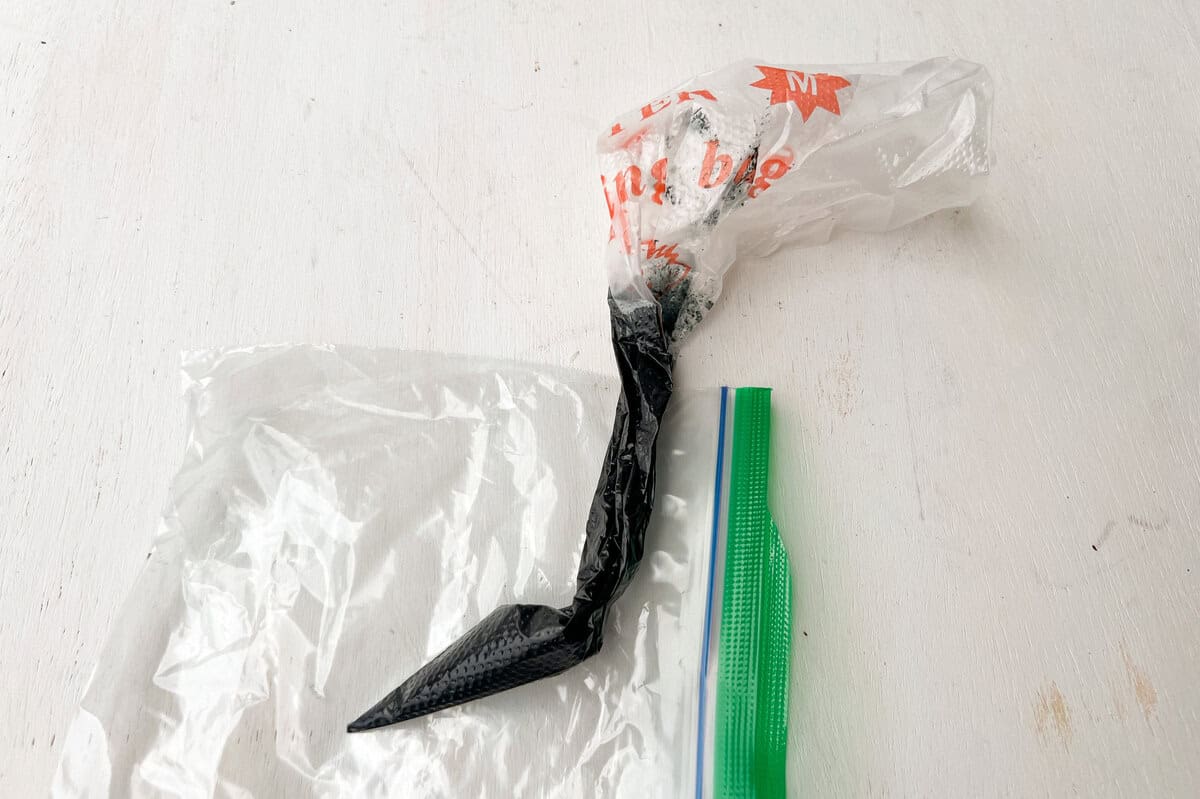
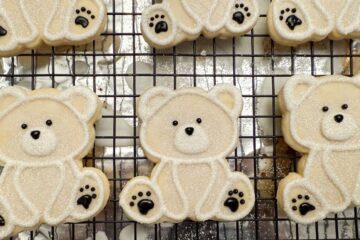
Mix up the black royal icing to outline consistency and place it in a disposable piping bag. Snip off a very small opening and push some icing through onto a paper towel to make sure the icing is ready to pipe.
Pipe on two eyes, a nose, and the paws. While actual polar bears have 5 toes, I was only able to fit 4, just like on these Easy Polar Bear Paw Cookies.

Allow the royal icing to dry completely before storing.
Storage
Store the cookies in a single layer in an airtight container at room temperature. If you need to stack them, use a piece of aluminum foil to separate the layers to prevent grease transfer from underneath the top cookie onto the design of the bottom cookie.
Gluten Free Option
You can make Iced Vanilla Shortbread Cookies using a gluten free 1 to 1 baking flour, such as Bob's Red Mill, in place of all purpose flour. This produces a more fragile, crumbly cookie, but the flavors are identical.
📖 Recipe

Easy Polar Bear Cookies
Equipment
- 2 ¼-inch wooden dowel rods
- 1 Rolling Pin
- 1 bear cookie cutter
- disposable piping bags
- Plastic tip coupler
- small round piping tip, such as #2 and #5
Ingredients
- 1 batch cookie dough from your favorite shortbread cookie or cut out sugar cookie recipe (see note)
For the Icing Glaze.
- 2 cups powdered sugar
- ¼ cup milk
- ½ teaspoon clear vanilla extract (or other clear extract like almond, rum or coconut)
For Decorating:
- Easy Royal Icing (see note)
- white sparkling sanding sugar (Great Value brand recommended)
- black royal icing powder or black food coloring gel
Instructions
Bake the Cookies:
- Preheat oven to 350°F or temperature indicated in your chosen cookie dough recipe. Line 2 cookie sheets with parchment paper.
- Flour a cutting board or mat. Roll the dough out to ¼-inch thickness. It is helpful to use ¼-inch diameter wooden dowel rods on each side of the dough as guides for the rolling pin to ensure an even thickness.
- Cut the dough with a bear cookie cutter.
- Place the cut dough shapes on parchment paper lined cookie sheets. Bake the cookies, one tray at a time, for 5-7 minutes, until baked through but not brown.

- Remove cookie sheet from the oven and allow cookies to cool for 1 to 2 minutes before removing them to a wire rack, then cool completely before glazing.
Glaze the Cookies:
- Place a wire rack over a parchment or waxed paper lined cookie sheet or work surface.
- Mix together the powdered sugar, milk, and extract. Using clear extract will keep the color of the icing white. Stir the icing together with a small spatula to avoid introducing bubbles. You can let the icing sit for a minute so bubbles rise and then pop them with the spatula. You can add more milk or powdered sugar to achieve a dippable consistency.

- Brush on the glaze with a silicone pastry brush or turn the cookie over and dip into the glaze, allowing the excess to run off. Use the brush or a toothpick to pop any bubbles.
- Allow the glaze to dry before adding the royal icing.
Add the Royal Icing Outline:
- Mix up outline consistency royal icing. Add the icing to a disposable piping bag fitted with a small round tip, such as a #2 or #5.
- Pipe the outline of the bear and an oval snout. You can make the outline around the ears thicker to define the outer ear versus inner ear. Immediately after piping, sprinkle white sparkling sanding sugar onto the wet icing so it will stick.
- Allow the icing to dry, then shake or brush off the excess sanding sugar.
Add the Final Details:
- Mix up the black royal icing to outline consistency and place it in a disposable piping bag. Snip off a very small opening and push some icing through onto a paper towel to make sure the icing is ready to pipe.

- Pipe on two eyes, a nose, and the paws. While actual polar bears have 5 toes, you may only be able to fit 4.
- Allow the royal icing to dry completely before storing.


Leave a Reply