
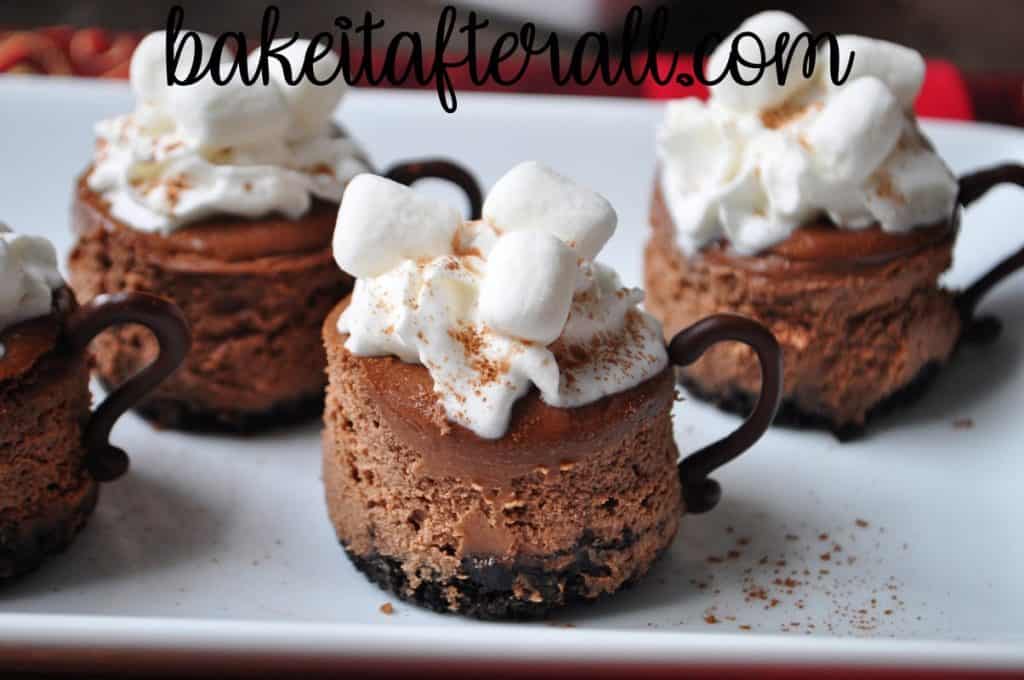
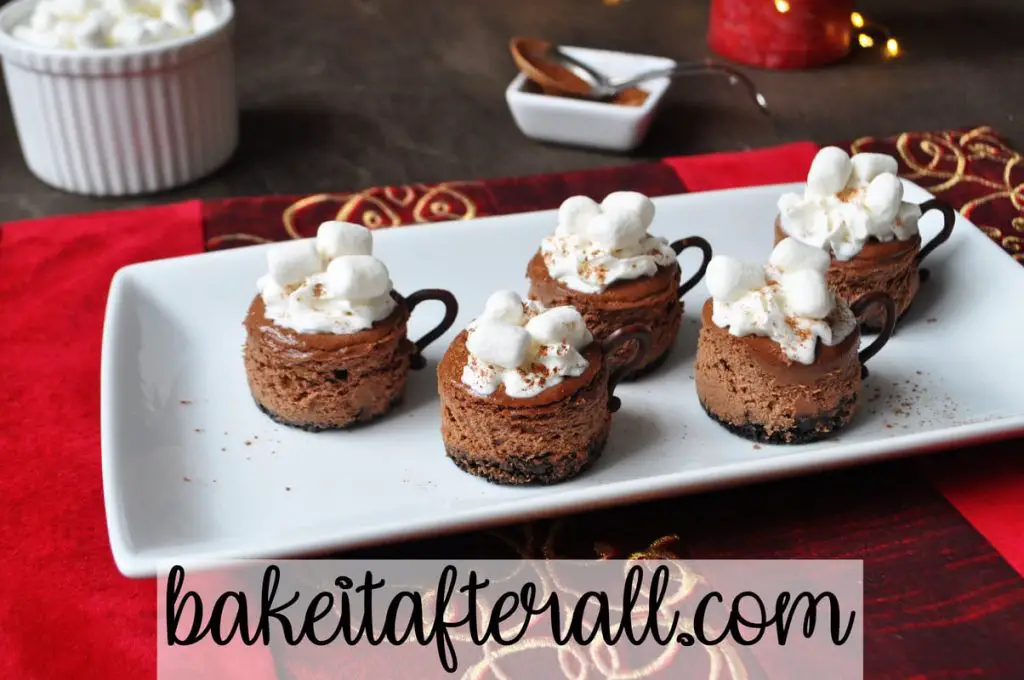
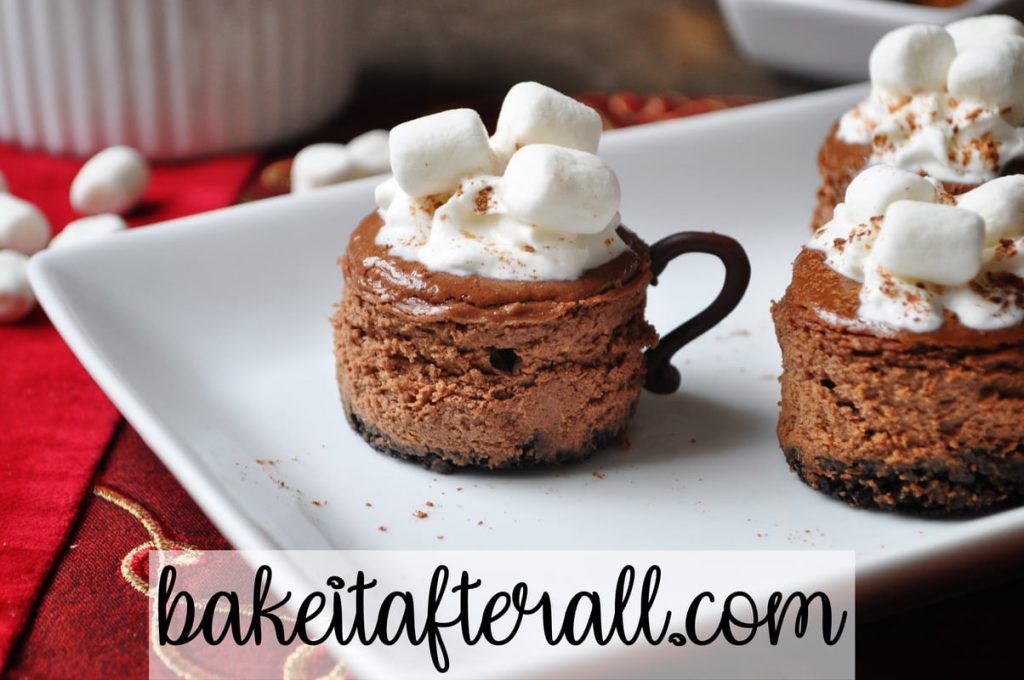
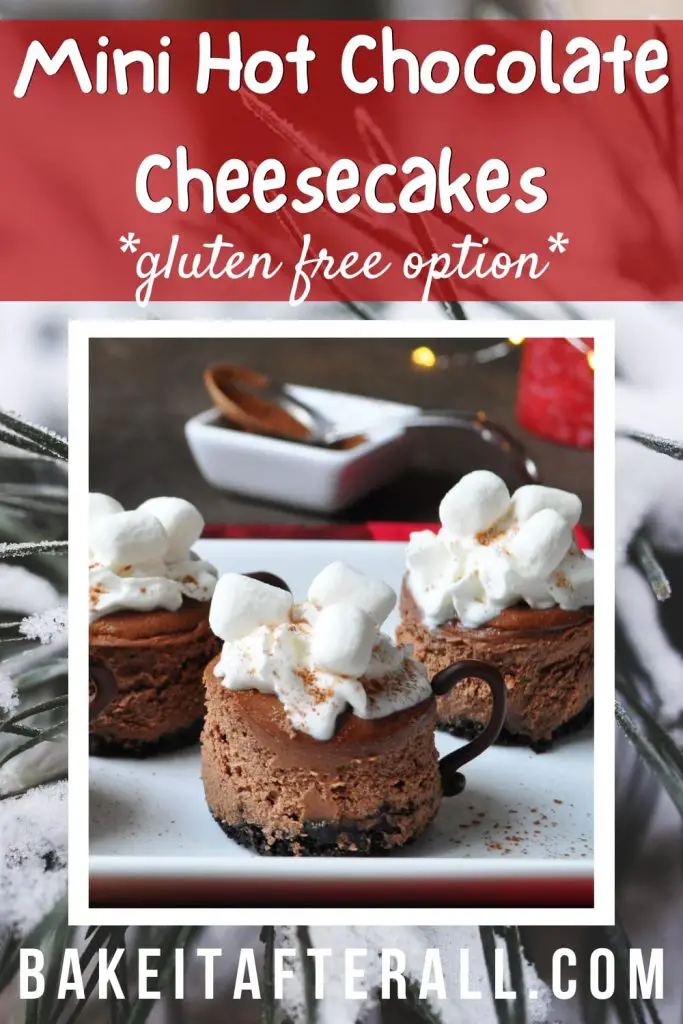
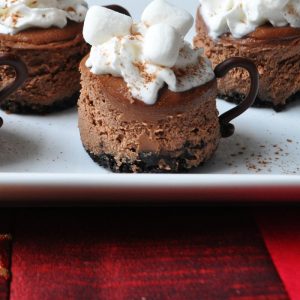
Mini Hot Chocolate Cheesecakes have a smooth chocolate filling and a chocolate cookie crust, then decorated to look like hot cocoa mugs! These mini desserts are perfect for both kids and adults at holiday tea parties and get togethers.
My mom found this recipe many years ago in a magazine. She knew I would love it, so she removed the page from the magazine and gave it to me. Years passed, life got busy, and I never made them. These have been on my list of things to make for so long. I finally made them recently, and they are so good and so adorable!
The crust is a basic chocolate sandwich cookie crust which can be easily adapted to gluten free. The filling is a very basic chocolate cheesecake filling - just 4 ingredients!
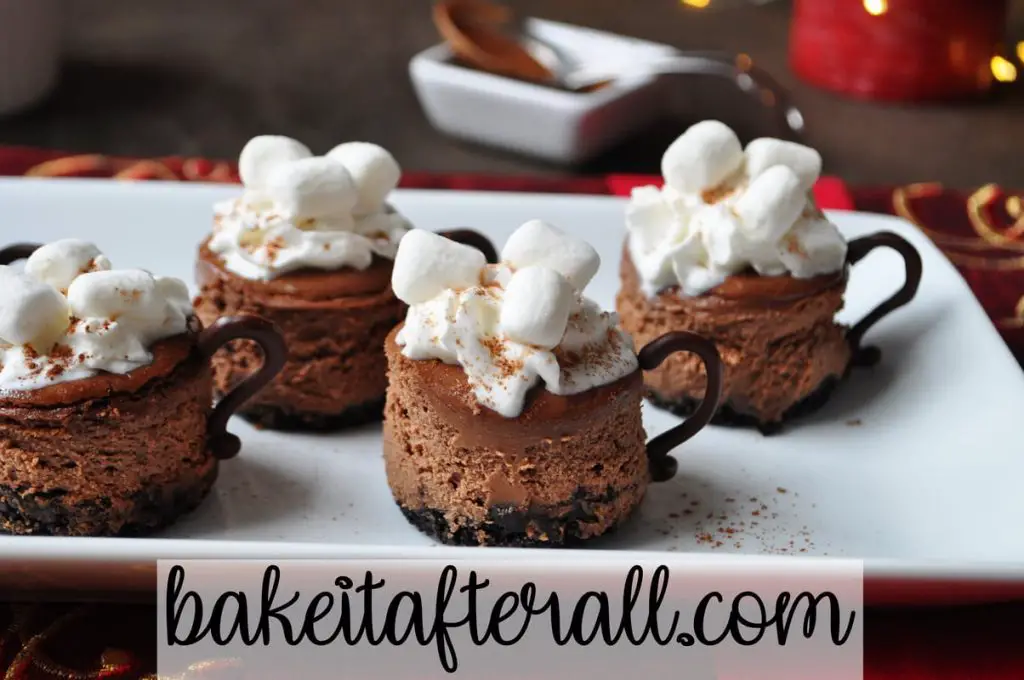
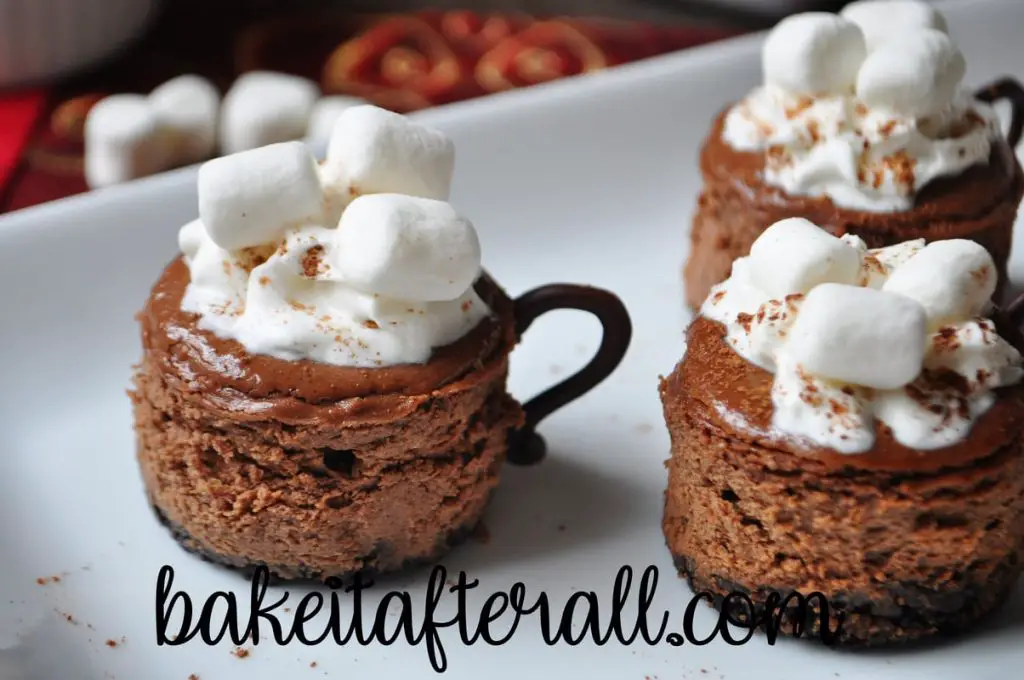
The chocolate handles are very simple to make, and they transform these mini cheesecakes into a dessert that looks just like a tiny mug of hot cocoa!
My girls LOVED these. I think they would be perfect for a holiday or winter Kids' Tea Party!
These could also be dressed up for the holidays with some crushed peppermint on top of the whipped cream! If you swap this filling recipe with the filling from the Mini Mocha Cheesecakes, you'd have Peppermint Mocha Cheesecakes!
Jump to:
For the Cheesecakes
These cheesecakes have just a few simple ingredients.
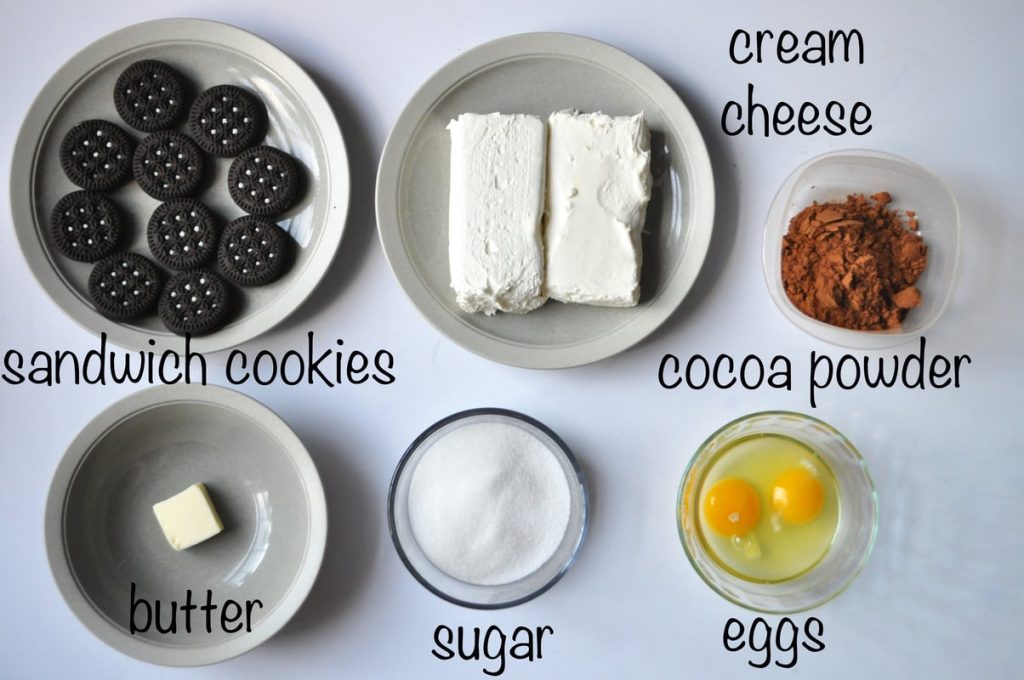
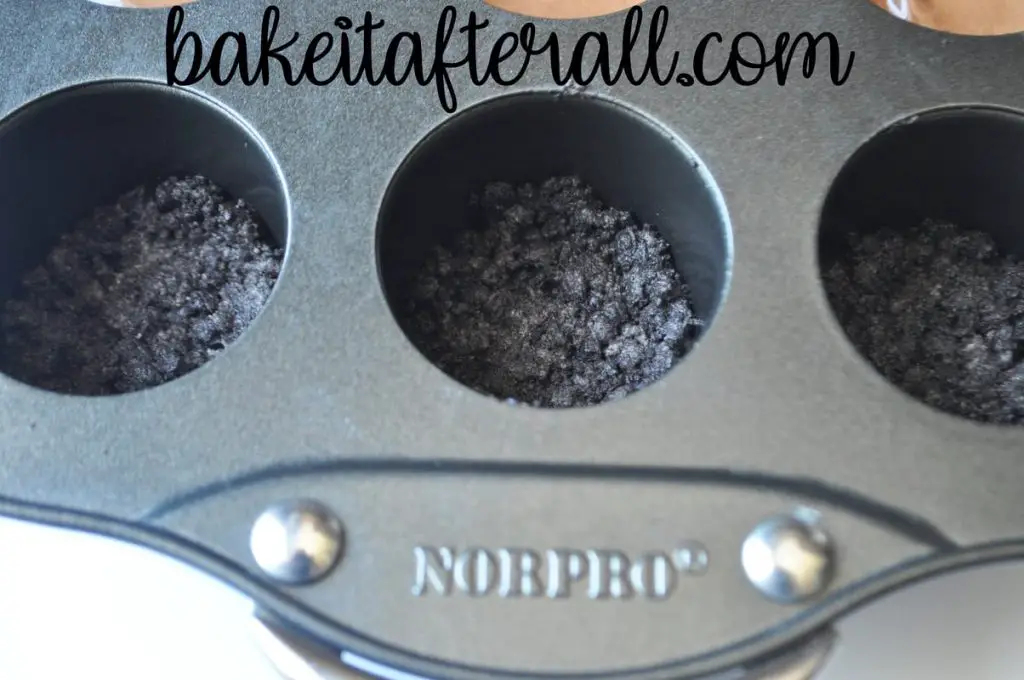
The crust consists of only crushed chocolate sandwich cookies, such as Oreos or gluten free cookies, and melted butter. The crust is pressed into each well of a mini cheesecake pan.
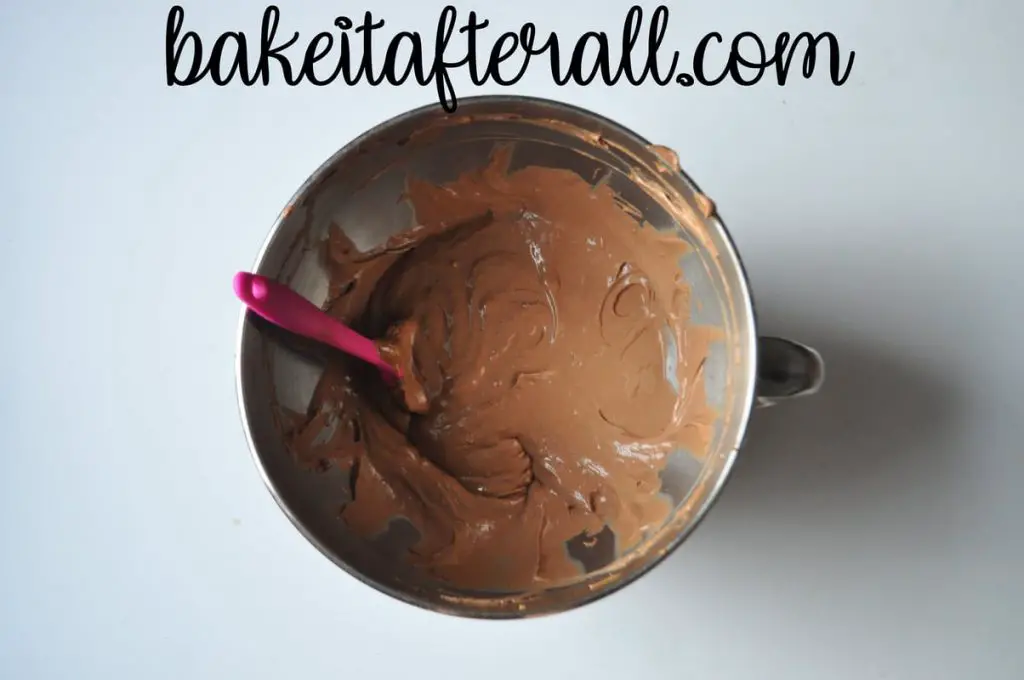
The crust is baked until fragrant then set aside to cool. The cheesecake filling is made with cream cheese, sugar, eggs, and a cocoa powder. If you're feeling adventurous, you could use the filling from the Mini Mocha Cheesecakes, which has coffee and espresso powder!
The filling is divided among the wells of the mini cheesecake pan, then baked until set.
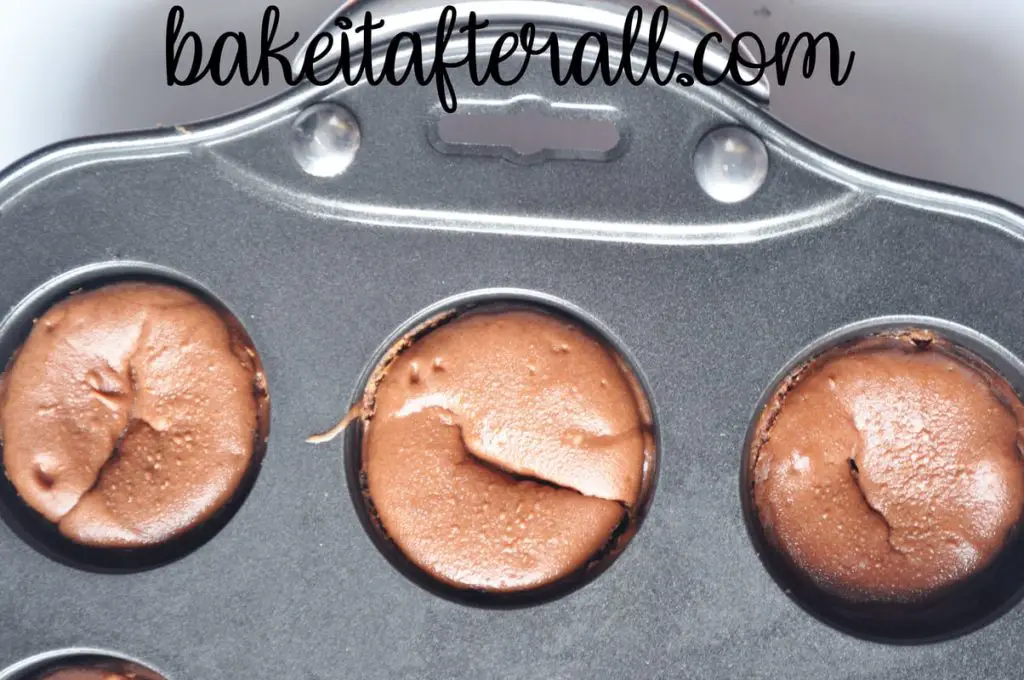
These little cracks and creases don't matter. You'll be covering them up with whipped cream and marshmallows!
Choosing a Cheesecake Pan
If you do not own a mini cheesecake pan, you may use a mini muffin pan and follow the same instructions or use a standard muffin pan. These will take longer to bake. I highly recommend using cupcake liners if not using a mini cheesecake pan. The mini cheesecake pan has removable bottoms that allow you to push the cheesecakes up and out of the pan. They would be very hard to remove from a muffin pan without liners. Once baked, you can take the cheesecakes out of the pan and remove the liners for a more polished look.
Hot Chocolate Decorations
In order to make the cheesecakes looks like little cups of hot chocolate, you'll need to make the handles. The easiest way to do this is to take a piece of parchment paper or waxed paper. Fold it in half, then unfold it. Use a dark permanent marker, such as a black Sharpie, and draw a handle shape repeatedly below the fold of your paper. I always make extras in case some break.
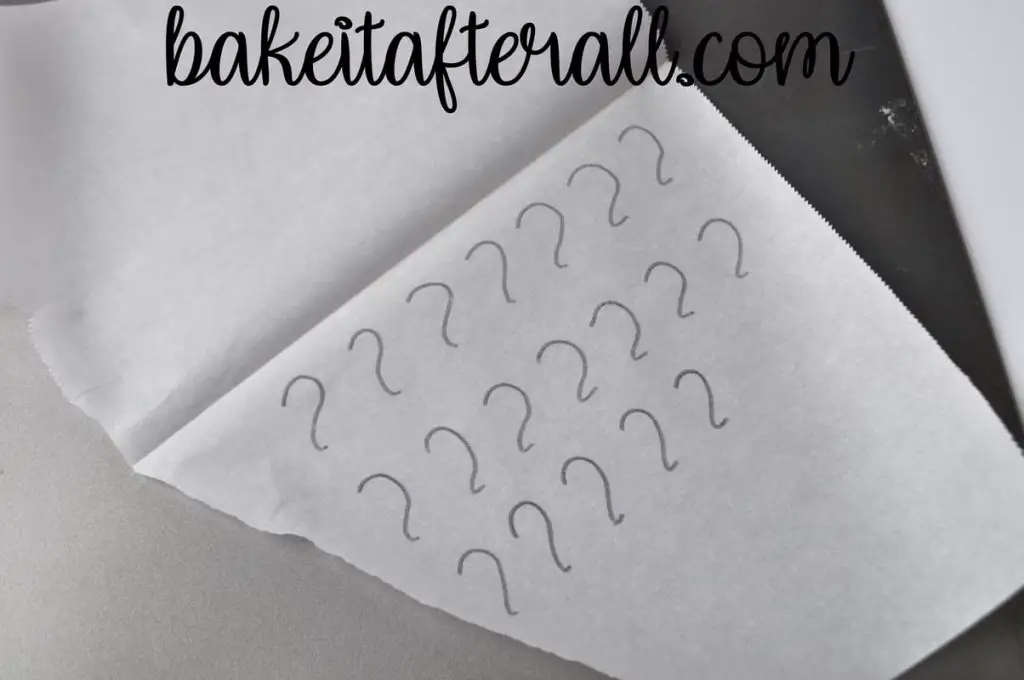
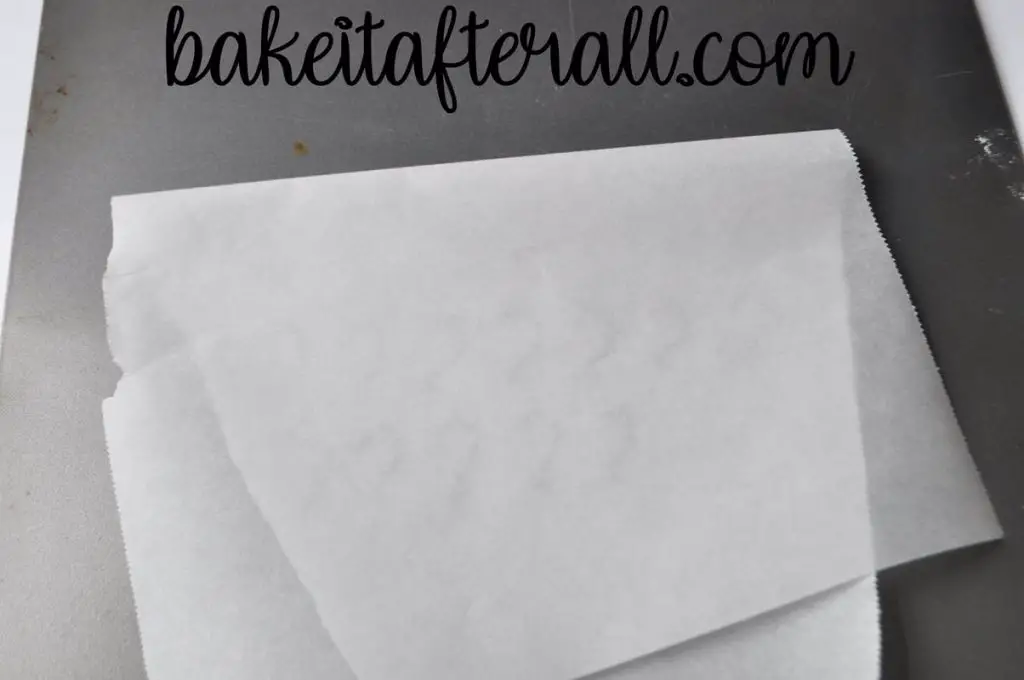
Fold the paper again over the marker shapes so you can see them through the top sheet of paper. You could also just use 2 small pieces of parchment or waxed paper rather than folding, but folding the paper helps keep the shapes lined up and in place.
Melt the chocolate in the microwave at 50% power in 30-second intervals, stirring between each interval. Once fully melted, transfer it to a disposable piping bag with a plastic coupler and round metal tip (such as a Wilton #5). If you do not have these materials, you may use a gallon sized resealable plastic bag with the tip of a corner cut off. The easiest way to fill these bags is to put it inside a tall drinking glass and fold the top of the bag over the edges of the glass.
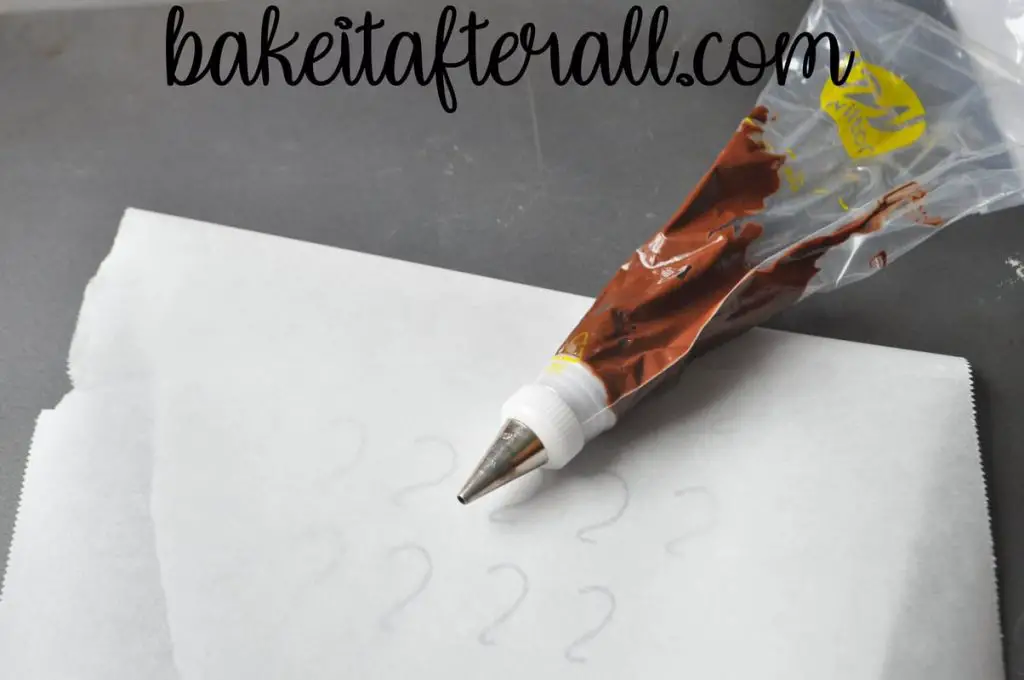
Once your melted chocolate is in your bag, trace the handle shapes on top of the parchment. I did a few more just to make sure I would get a nice set of 12.
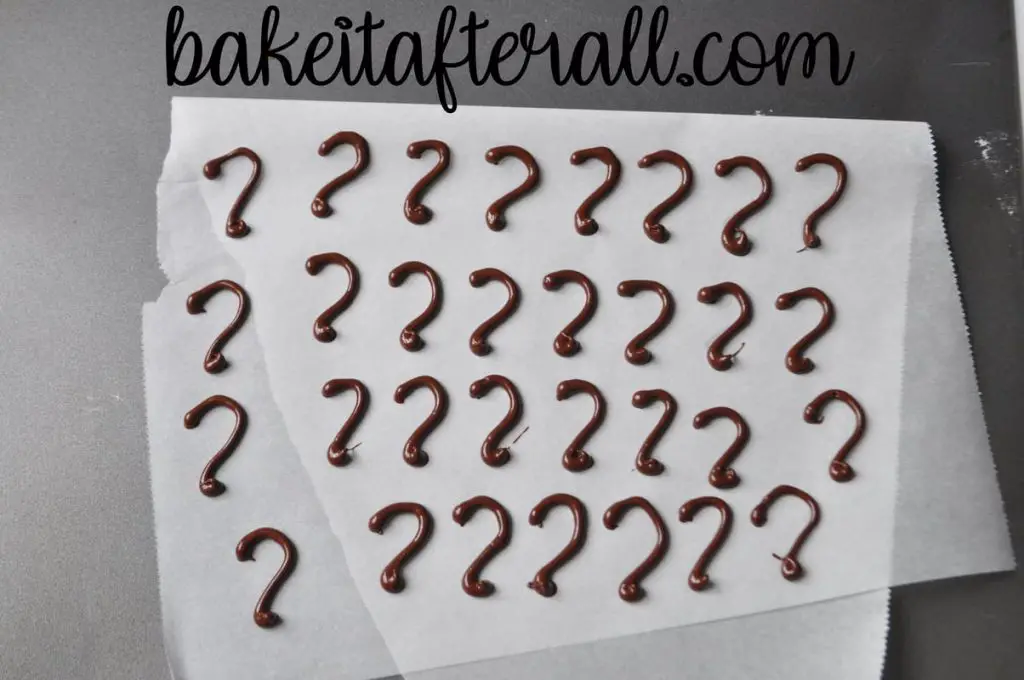
You can let these set up at room temperature or pop them in the refrigerator or freezer to speed up that process.
Assembling the Mini Cheesecakes
If you're using a mini cheesecake pan, press up from the bottom of each well to remove the cheesecakes from the pan. Then carefully pry off the bottom from each cheesecake. You may need to use a thin plastic knife for this part if they are sticking to the crust. I prefer to use a plastic knife rather than metal so I don't scratch the finish of the nonstick pan.
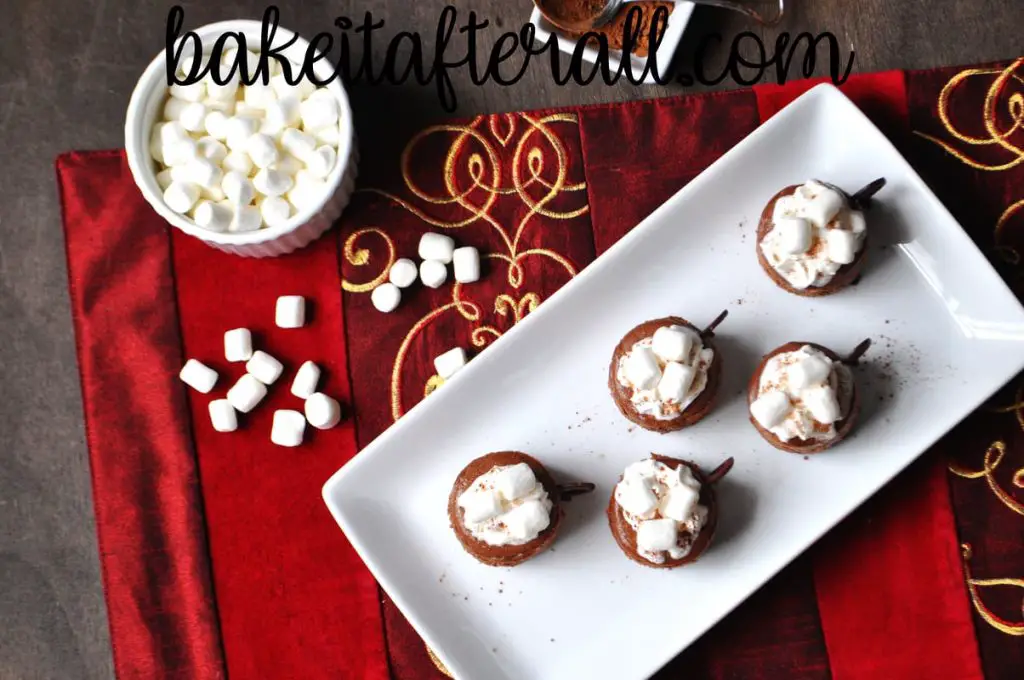
To decorate, carefully remove the chocolate handles from the parchment or waxed paper and gently press one into the side of each cheesecake. Top the cheesecakes with whipped cream, a few mini marshmallows, and dust with some cocoa powder, if desired.
Gluten Free Option
Use gluten free chocolate sandwich cookies such as Glutino in place of Oreos.
Looking for More Mini Desserts?
Check out these mini dessert recipes:
Mini Red Velvet Cheesecakes
Bailey's Irish Cream Mini Cheesecakes
Mini Mocha Cheesecakes
Mini New York Cheesecakes
Black Bottom Caramel Pumpkin Cheesecake Bites
Mini Pumpkin Cheesecakes
Pumpkin Spice Magic Bar Minis
Mini Pina Colada Cheesecakes
See my Best Mini Cheesecake Recipes for everything you'd ever like to know on mini cheesecakes!
Looking for More Cheesecake Recipes?
Check out my favorite cheesecakes:
Godiva Chocolate Cheesecake {Cheesecake Factory Copycat}
Bailey's Irish Cream Cheesecake
S'more Cheesecake Bars
Cherry Chocolate Cheesecake Bundt Cake
Red Velvet Cheesecake
Red Velvet Cheesecake Brownies
Chocolate Pumpkin Cheesecake Bars
Pumpkin Chocolate Cheesecake Bars
📖 Recipe
Mini Hot Chocolate Cheesecakes
Equipment
- mini cheesecake pan
- parchment or waxed paper
- black permanent marker
- disposable pastry bag or resealable gallon sized bag
Ingredients
For the Crust:
- 10 Oreos, finely crushed (or gluten free sandwich cookies)
- 1 tablespoon butter, melted
For the Filling:
- 16 ounces cream cheese (2 packages)
- ½ cup sugar
- ¼ cup cocoa powder
- 2 eggs
For the Decorations:
- 2 ounces semisweet chocolate (melted)
- whipped cream
- mini marshmallows
- cocoa powder
Instructions
- Preheat the oven to 325 degrees F. If using a mini cheesecake pan, the pan is ready as is. If using a mini or standard muffin pan, line each well with a paper or aluminum foil cupcake liner.
Make the Crust:
- Mix together the cookie crumbs and melted butter, then divide equally among the 12 wells of a mini cheesecake or mini muffin pan. Press down evenly.
- Bake for 8 minutes and set aside to cool.
Make the Filling:
- In the bowl of a stand mixer or in a large bowl using a hand mixer, beat together the cream cheese, sugar, and cocoa powder until well blended. Add in the eggs, 1 at a time, mixing on low speed after each addition until blended.
- Divide the filling batter equally by spooning over the cooled crusts.
- Bake for 15 to 25 minutes depending on the size of the wells. Cool completely.
- Refrigerate for at least 2 hours. Decorate before serving.
Prepare the Chocolate Handles:
- Fold a piece of parchment or waxed paper in half. Open it up, then use a black permanent marker to draw handle shapes below the fold of the paper. Refold the paper and set aside.

- Melt the chocolate at 50% power in 30-second intervals, stirring between each heating interval, until just melted.
- Transfer the melted chocolate to a disposable piping bag with a plastic coupler and small metal tip or to a resealable gallon sized plastic bag with a corner cut off.
- Pipe the chocolate into handle shapes onto the paper by tracing the black lines. Allow the chocolate to set. You may refrigerate or freeze it to speed up this process.
Decorate the Cheesecakes:
- To remove the cheesecakes from a mini cheesecake pan, carefully press up from the bottom of each well. Then, gently pry off the removable bottom from each crust. If using a muffin pan, remove the liners from the cheesecakes and discard.
- Carefully remove the chocolate handle shapes from the parchment or waxed paper and press one handle into the side of each mini cheesecake.
- Top the cheesecakes with whipped cream, mini marshmallows, and a dusting of cocoa powder.

Tina says
These are adorable! Perfect for a cold winter weekend.