
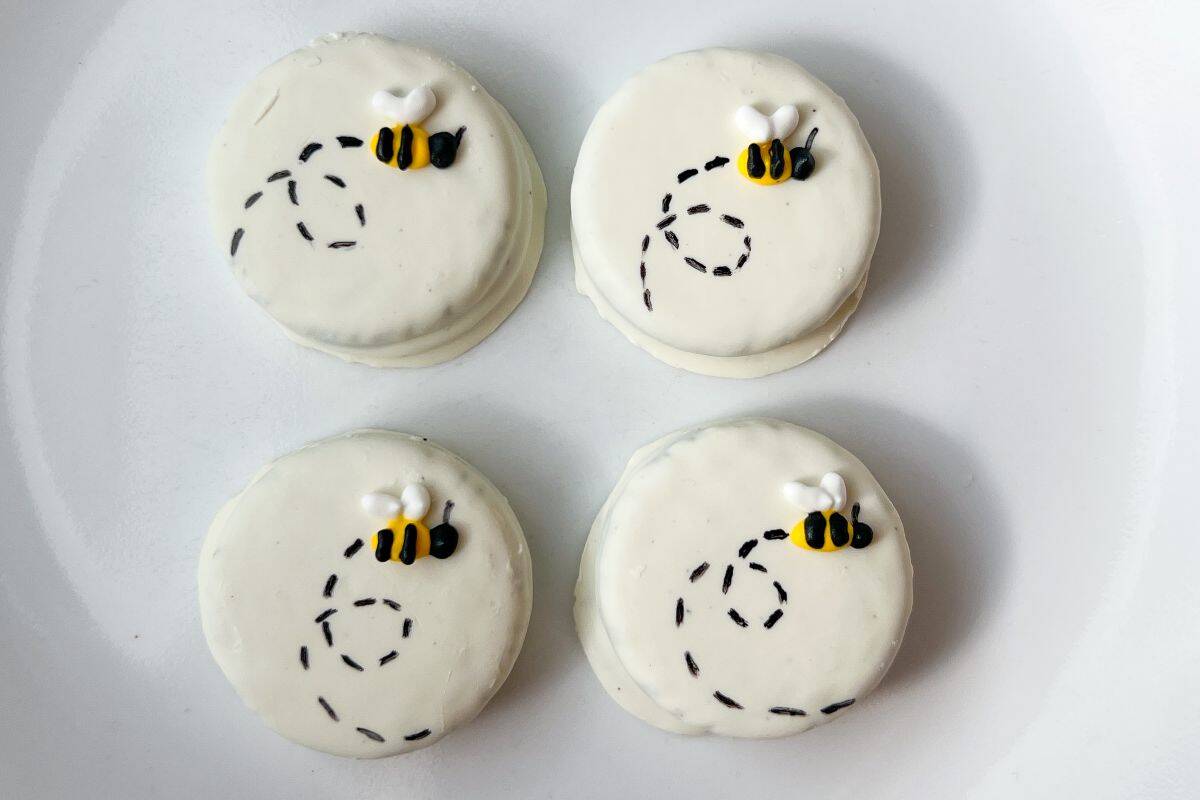
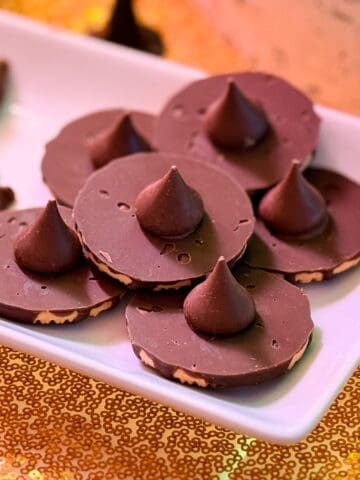
Bumble Bee Oreos are a no bake dessert with a cute royal icing bee and black dashed bee path. They are fitting for a Winnie the Pooh party or a bee themed party.

For my daughter's Winnie the Pooh and Piglet Birthday Party, I made these cute Bumble Bee Oreos. I always like to include a few semi-homemade desserts to save time, and these were so easy to make!
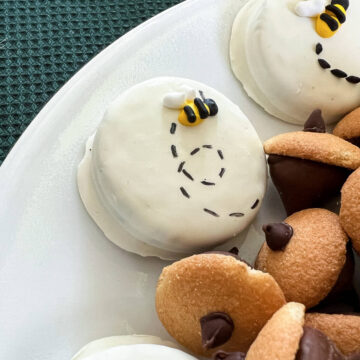
I served them on a white plate as the border around No Bake Chocolate Acorn Cookies.

I made these Oreos at the same time as these Beehive Cookies so I could pipe all of the bees at once. Piglet Cookies and Winnie the Pooh Cookies completed the set.

Jump to:
Supplies
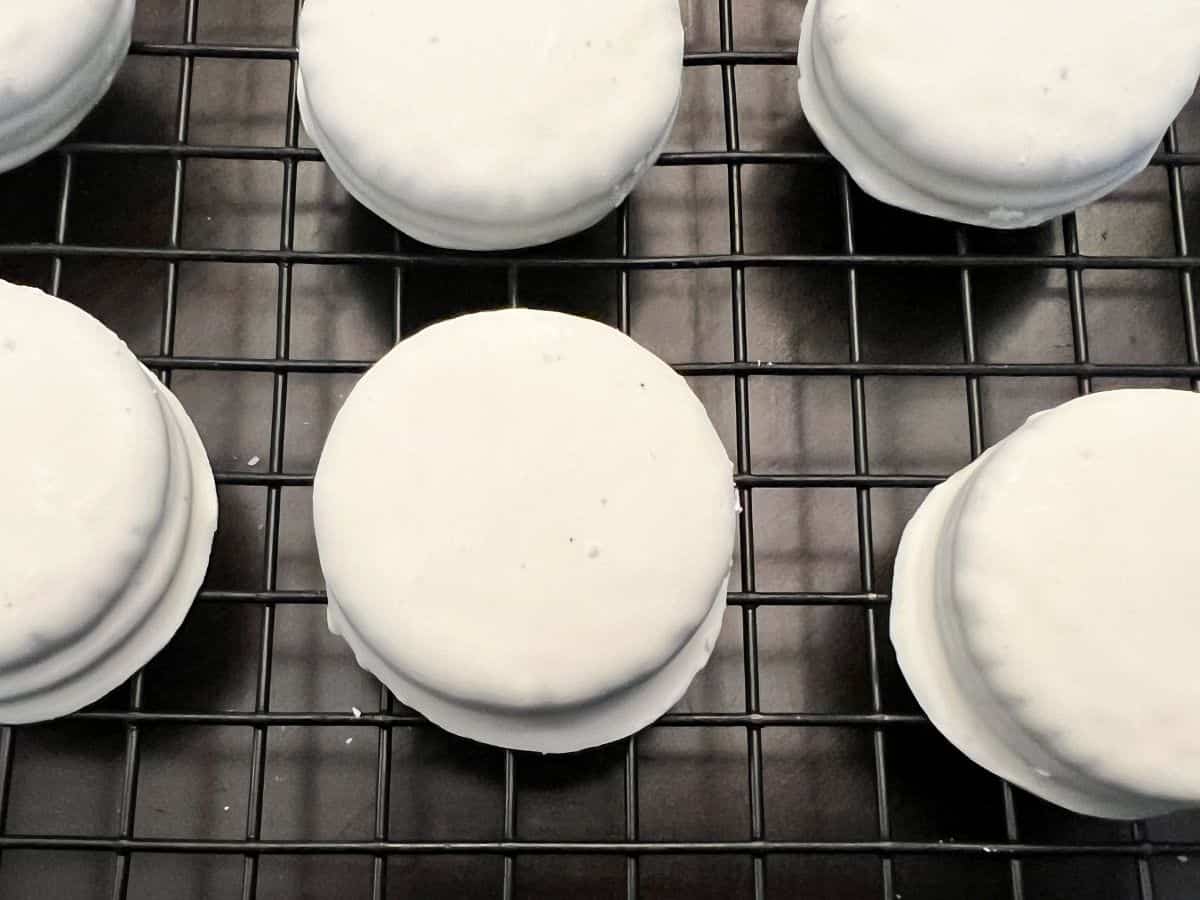
- white fudge covered Oreos
- Easy Royal Icing
- black royal icing powder or black food coloring gel
- yellow and black food coloring gel
- disposable piping bags
- piping bag holders, optional, or tall drinking glasses
- small round piping tips, like #2
- plastic tip couplers, optional
- black food coloring pen or marker, such as FooDoodlers
- thin food safe paintbrush, optional
I like using White Fudge Oreos because they are a blank canvas for any design or color scheme. Even drizzling some stripes of colored candy melts can transform them into a dessert that fits your theme, just like I did with these chocolate covered graham crackers.
I have had variable luck finding White Fudge Oreos in stores, depending on the time of year. It seems like they are more popular around the holidays. Since they are Oreos, they last a long time, so I recommend buying them when you see them and saving them for when you need them!
I now prefer buying black royal icing powder rather than making it myself from the white stock royal icing. I find it takes a ton of food coloring gel, which is expensive, and it adds an extra step. If I'm decorating with royal icing, it's usually because I'm preparing for a party, so I can use all the time savers I can get!
If you want to make your own black royal icing, I recommend starting by adding brown food coloring gel to your white icing, then adding black to achieve the color you desire.
Pipe the Bee Body and Wings
Make piping consistency royal icing in untinted white, yellow, and black. Add the icings to disposable piping bags fitted with small round tips, like #2, or just snip off a tiny amount of the tip.
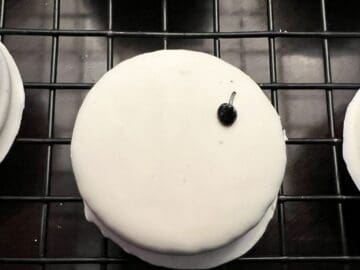
To start, I used a black food coloring pen to draw a single antenna where the face of the bee would be.
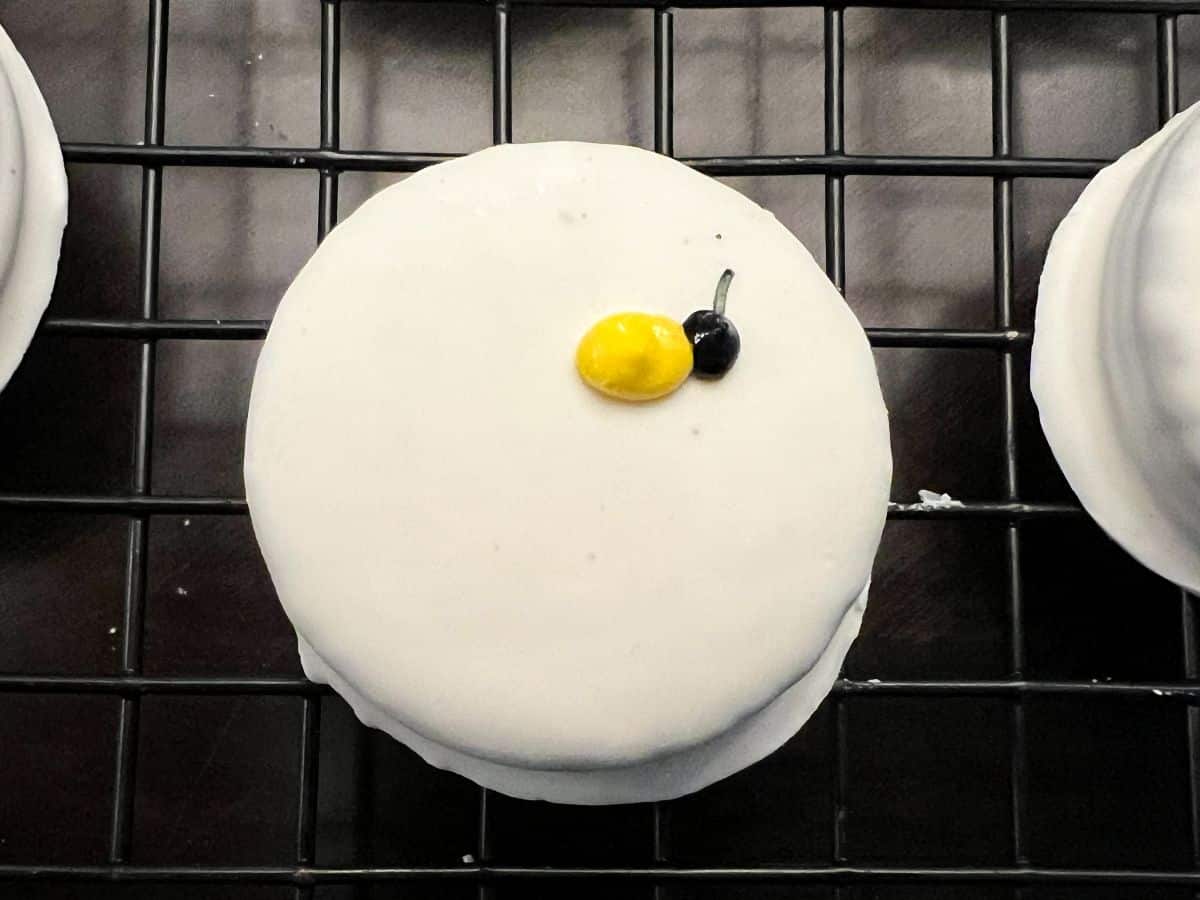
Then I piped a dot of black royal icing to make the bee's head.

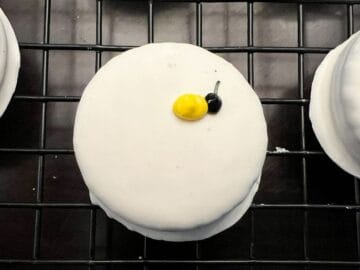
To the left of the head, I piped an oval of yellow to represent the bee's body.
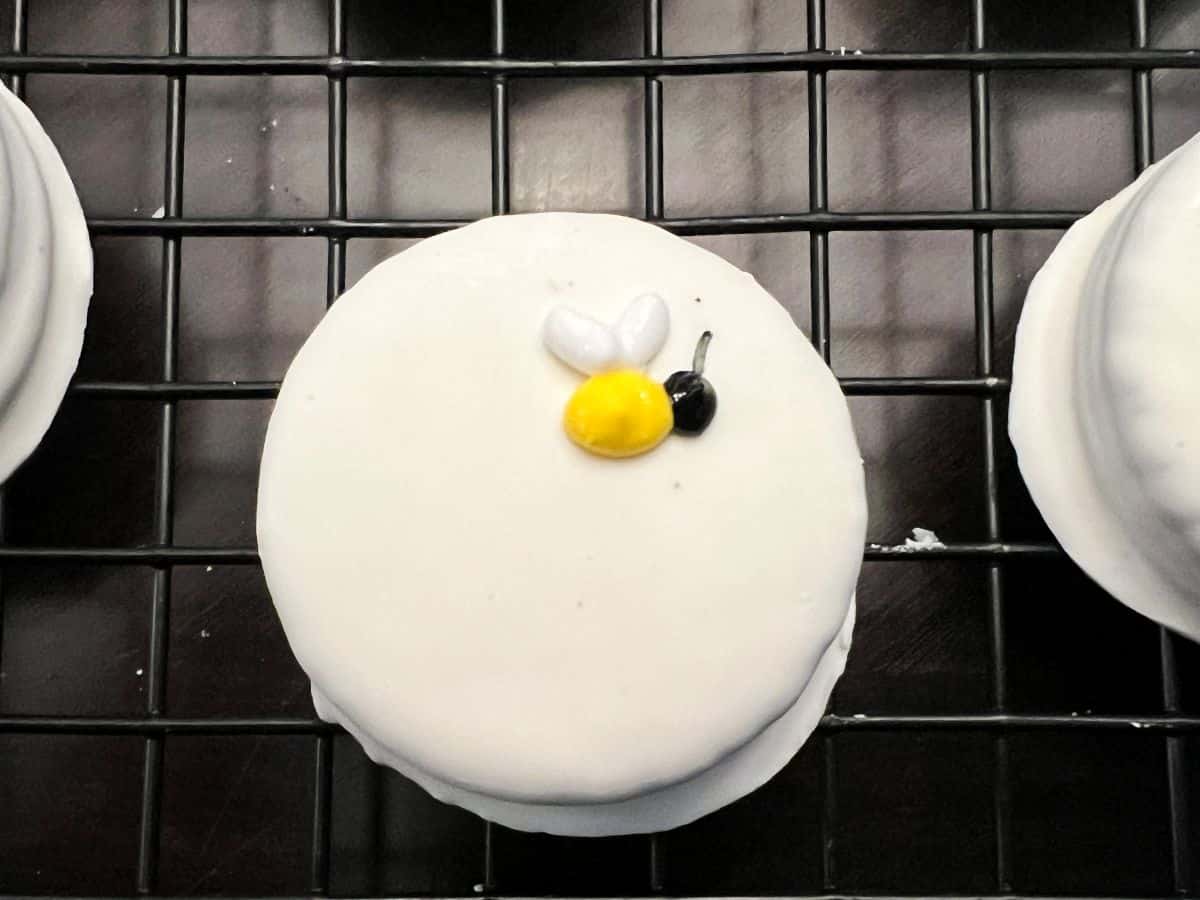
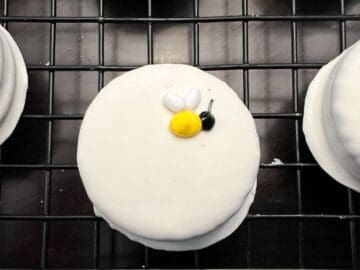
Next I piped on two white wings on top of the yellow body.
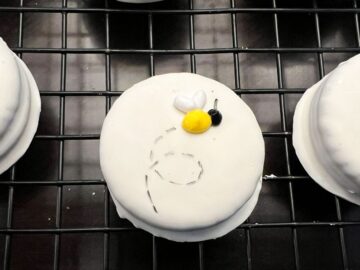
Add the Bee Path
If you're careful, you can add the bee path immediately after piping the bee. If you're afraid you might smudge the bee, you can wait until the icing has set before adding the bee path. The royal icing will take about 24 hours at room temperature to fully dry, depending on the humidity in your work space.
I first tried using the black edible pen to make the path. Due to the waxy coating on the Oreo, this was not as successful as I had hoped. These markers work best on royal icing.

I tried piping on the dashed lines with the black royal icing, and that made dashes thicker than I wanted. My final solution was to use a very thin food grade paintbrush and carefully brush on the dotted lines using Super Black food coloring gel, straight from the bottle (not diluted).

This seemed to work well, although an edible marker would be the easiest way to go, so perhaps a marker with a thicker tip would be better, or I just needed to use a brand new marker, as mine had been used for several other projects!

Add the Bee Stripes
Once the yellow body has dried, you can add the black stripes. I piped on two thin, vertical black stripes on the yellow body.
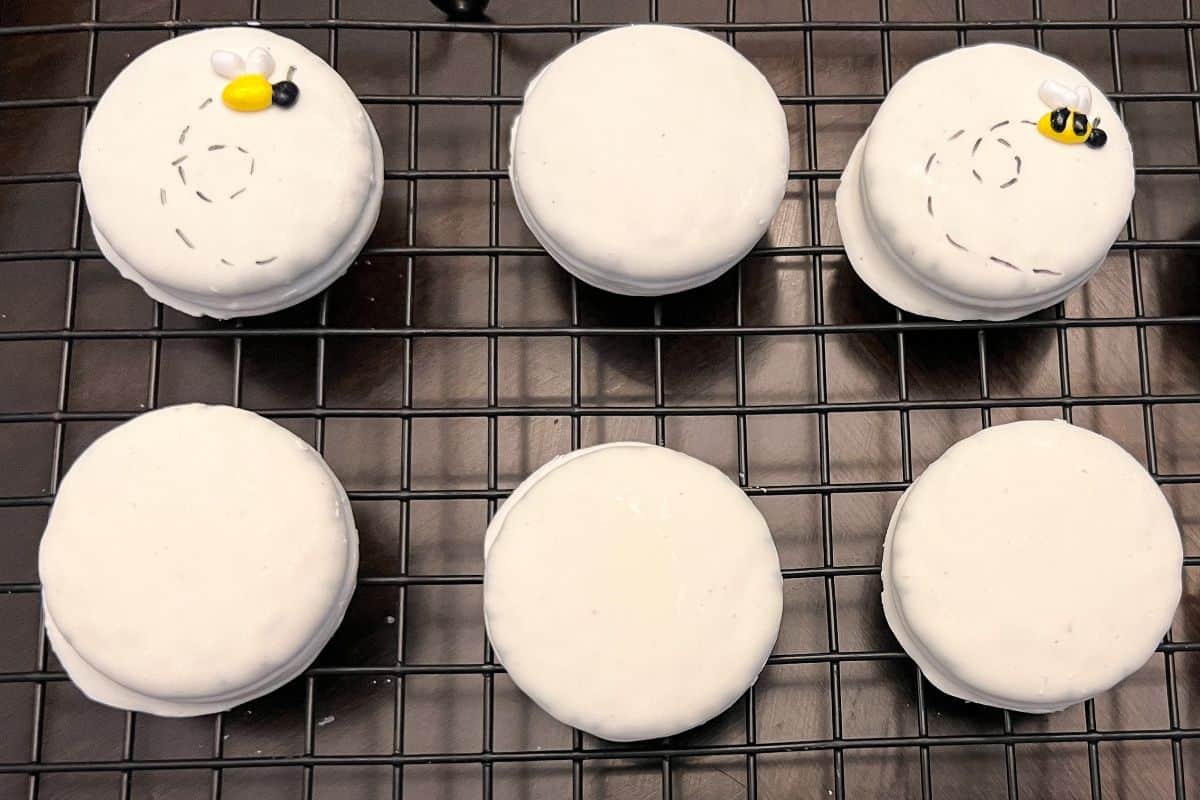
Allow the icing to dry completely, about 24 hours, before stacking.
Storage
Store the cookies at room temperature in an airtight container. Since we just added a design to a fully coated Oreo, these should last as long as the date on the package indicates.
Gluten Free Option
You may not be able to find store bought gluten free White Fudge Oreos. In that case, you can dip gluten free Oreos into melted white candy melts, just like with Cake Pops, and let them set up on waxed paper before adding the bees.
📖 Recipe
Bumble Bee Oreos
Equipment
- disposable piping bags
- piping bag holders, optional, or tall drinking glasses
- small round piping tips, like #2
- plastic tip couplers, optional
- black food coloring pen or marker, such as FooDoodlers
- thin food safe paintbrush, optional
Ingredients
- 1 package white fudge covered Oreos
- Easy Royal Icing (see note)
- black royal icing powder or black food coloring gel
- yellow and black food coloring gel
Instructions
Prepare the Royal Icing
- Make piping consistency royal icing in untinted white, yellow, and black.
- Add the icings to disposable piping bags fitted with small round tips, like #2, or just snip off a tiny amount of the tip.
Pipe the Bee Body and Wings
- Use a black food coloring pen to draw a single antenna where the face of the bee will be.
- Pipe a dot of black royal icing at the bottom of the antenna to make the bee's head.
- To the left of the head, pipe a yellow oval to represent the bee's body.
- Pipe two white wings on top of the yellow body.
- Allow the icing to dry at room temperature. You can add the bee path immediately or after the icing has dried completely.
Add the Bee Path
- Use a black edible marker, black royal icing in a disposable piping bag with a small round tip, or black food coloring gel with a thin food safe paintbrush to draw a dotted line bee path from the side of the cookie to the back of the bee's body. You can do a straight path or have it make a circle or two.
Add the Bee Stripes
- Once the yellow body has dried, you can add the black stripes. Pipe two thin, vertical black stripes on the yellow body.

- Allow the icing to dry completely, about 24 hours, before stacking or packaging.


Leave a Reply