
This Wizard of Oz Birthday Cake is a Mocha Cheesecake decorated with buttercream and cardstock silhouettes to resemble the characters walking down the yellow brick road toward Emerald City.

When my oldest daughter asked me for a Mocha Cheesecake for her Nutcracker Birthday, I initially could not envision how I would be able to appropriately decorate a cheesecake.
I ended up using cardstock cut outs and adding some additional buttercream and royal icing transfer elements, but essentially it was clear that it was a cheesecake with a few decorations on top.
I think my middle daughter saw me rise to the challenge and decided to up the game by asking for a Mocha Cheesecake decorated with a Wizard of Oz theme. We sat down and looked at some ideas on Pinterest, and she kept gravitating toward elaborate designs that are best done with traditional sponge cakes and fondant.
It finally dawned on me that I could just cover the cheesecake with buttercream as if it were a traditional cake, and then proceed with decorating how I normally would.
Upon initially seeing this Wizard of Oz cake, most people would not realize that there's a cheesecake inside!

We opted for a simple design to recreate the characters from the Wizard of Oz walking on the yellow brick road toward the Emerald City. The sides of the cake feature the poppy fields.
This ended up working out very well, and my daughter was thrilled with it!
CHECK OUT THESE WIZARD OF OZ RUBY RED CAKE POPS!
Jump to:
Materials
- 1 cake or cheesecake
- 2 batches Easy Vanilla Buttercream
- Yellow, green, pink and red food coloring gels, preferably red no-taste gel
- Small offset icing spatula
- Disposable piping bags
- Plastic tip couplers
- Grass icing tip
- Small flower tips
- White sugar pearls
- Black, light green and dark green glitter cardstock
- Toothpicks
- Scotch tape
- Green rock candy on a stick
- Rainbow swirl lollipops
Bake the Cake
My daughter wanted a Mocha Cheesecake for her cake, but you can use any cheesecake or traditional store bought or homemade cake. Some of our favorite cheesecakes include this Godiva Chocolate Cheesecake, Bailey's Irish Cream Cheesecake or Red Velvet Cheesecake.
This Classic Chocolate Layer Cake is a great one.
This is how the cake started out before I decorated it.

I started by adding the buttercream.
Decorate with Buttercream
The first step is to make the yellow brick road. To do this, tint some buttercream with yellow gel food coloring.
Spread on the yellow buttercream using a small offset icing spatula. Make it as smooth as you can, and don't worry about the boundaries because you will cover those with buttercream grass.
Refrigerate the cake to chill the buttercream. Once the buttercream is cold, take a sharp paring knife and drag it through the buttercream to make a brick pattern.
The easiest way to do this is to make many evenly spaced, horizontal parallel lines across the buttercream and then come in and make offset vertical lines to create the individual bricks.
Once the brick pattern is in place, tint some buttercream green and use a grass tip to pipe on the fields over the entire exposed cake so that only the yellow brick road shows.

Next, tint some buttercream with pink food gel and some with red food gel. Red no-taste gel is preferred.
Use small flower tips to pipe on the "poppies" in random spots in the "grass."
If desired, place a white sugar pearl in the center of each of the pink poppy.

Now the cardstock and candy.
Make the Cardstock Silhouttes
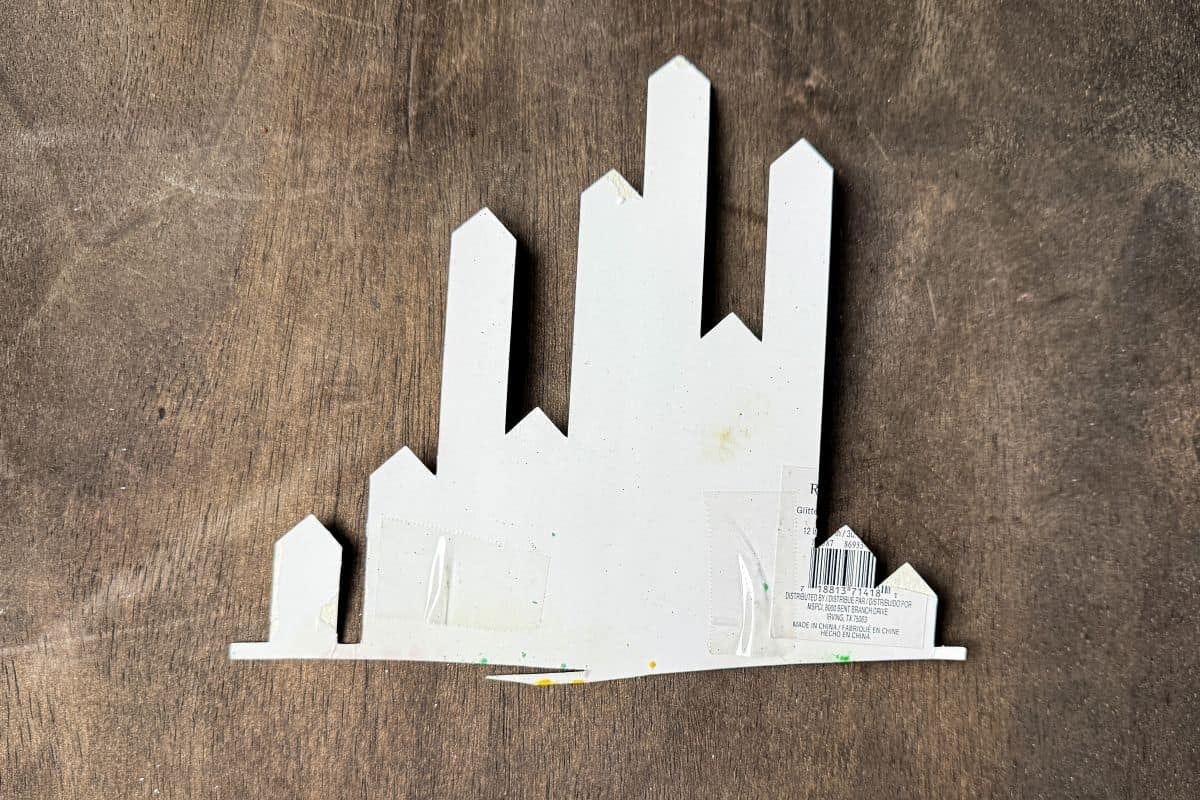
I found a silhouette image of the Wizard of Oz characters (and Toto too!) using Google Images. I also found a silhouette of Emerald City that I thought I could use with two shades of green glitter cardstock.
I ended up re-using the Emerald City for this Wicked Birthday Cake.

I have a Silhouette cutting machine, so I put these designs in the software and cut out the characters out of black glitter cardstock: the Scarecrow, the Tin Man, Dorothy, and the Cowardly Lion linked arm in arm. For Emerald City, I used light and dark green cardstock.
I also cut out an "8" using red glitter cardstock that reminded me of Dorothy's ruby slippers.
If you do not own a silhouette, I'm sure there are cake toppers for sale on Etsy that would give you a similar look.
After the pieces were all cut, I taped toothpicks to the back bottom of each one so they could be inserted into the decorated cake.
Add the Cardstock Picks and Candy
In order to give the cake dimension, I placed the Emerald City design toward the back of the cake, as if it were far off in the distance.
I used two pieces of green rock candy on sticks, broke off the little ball at the end, and stuck them into the cake in front of the Emerald City cardstock.
Next, I took two rainbow swirl lollipops and placed them a little closer to the front of the cake, at about the mid point.

Then, I placed the black silhouette figures toward the front of the cake, across the yellow brick road as if they were walking down toward Emerald City, with the black facing the front of the cake.

I put little Toto just a big in front of the line of characters to give a little more depth.

Because this is a cheesecake, it should be stored in the refrigerator until a little before serving.
📖 Recipe

Wizard of Oz Birthday Cake
Equipment
- 1 Small offset icing spatula
- disposable piping bags
- plastic tip couplers
- Grass icing tip
- Small flower tips
- Cardstock silhouette of Wizard of Oz characters and Emerald City attached to toothpicks
Ingredients
- 1 cake or cheesecake
- 2 batches Easy Vanilla Buttercream
- Yellow, green, pink and red food coloring gels (preferably red no-taste gel)
- White sugar pearls
- 2 Green rock candy on a stick
- 2 Rainbow swirl lollipops
Instructions
Decorate with Buttercream
- The first step is to make the yellow brick road. To do this, tint some buttercream with yellow gel food coloring.
- Spread on the yellow buttercream using a small offset icing spatula. Make it as smooth as you can, and don't worry about the boundaries because you will cover those with buttercream grass.
- Refrigerate the cake to chill the buttercream.
- Once the buttercream is cold, take a sharp paring knife and drag it through the buttercream to make a brick pattern. The easiest way to do this is to make many evenly spaced, horizontal parallel lines across the buttercream and then come in and make offset vertical lines to create the individual bricks.
- Tint some buttercream green and use a grass tip to pipe on the fields over the entire exposed cake so that only the yellow brick road shows.

- Tint some buttercream with pink food gel and some with red food gel.
- Use small flower tips to pipe on the pink and red "poppies" in random spots in the "grass."

- If desired, place a white sugar pearl in the center of each of the pink poppy.
Add the Cardstock Picks and Candy
- Place the Emerald City design toward the back of the cake, as if it were far off in the distance.
- Break the little wooden ball off the end of two pieces of green rock candy. Stick them into the cake, candy side up, close to the Emerald City cardstock.
- Take two rainbow swirl lollipops and place them a little closer to the front of the cake, at about the mid point.

- Place the black silhouette figures toward the front of the cake, across the yellow brick road as if they were walking down toward Emerald City, with the black facing the front of the cake.

- Put Toto just a bit in front of the line of characters to give a little more depth.

Leave a Reply