
These Personalized Tinkerbell Cookies with Royal Icing are the perfect favor for a Tinkerbell Birthday Party! This step by step tutorial will show you exactly how to make them.

For my oldest daughter's 6th Birthday, she had a friend party at a local tea house. She wanted the theme of her birthday to be Tinkerbell. At the time, she loved the Disney Tinkerbell movies.
I didn't have many options for executing this theme, as we didn't need to decorate at the tea house, so we decided that a decorated sugar cookie favor would be the best way for her to convey the theme.
I took inspiration from other cookie creators on Pinterest with doing a Silhouette of Tinkerbell sprinkling pixie dust with her wand.
In my experience, children love a cookie with their name on it, so I wanted to personalize the cookies for each guest using a Tinkerbell font.
I loved how these cookies turned out and so did my daughter and her friends!

Jump to:
Supplies
- Cut Out Sugar Cookies or Shortbread Cookies, cut with a rectangular cutter or fluted edge
- Easy Royal Icing
- hot pink, yellow, green, and purple food coloring gel
- hot pink sanding sugar
- disposable piping bags
- toothpicks or scribe tool
- Silhouette cutting machine
- white cardstock
- black edible food coloring marker, such as FooDoodlers
- gold Wilton edible stars
Bake the Cookies
To begin, you will need to choose a cookie cutter and cookie recipe. For decorated sugar cookies, my go to is these Cut Out Sugar Cookies. More recently, I have been using Vanilla Shortbread Cookies because they are not as sweet so pair well with the very sweet royal icing.
It's especially important when making royal icing cookies that you make your cookies a little thicker and roll your dough out very evenly. I use ¼" dowel rods or rolling pin guides to make sure my dough is an even thickness.

Not only does this ensure even coverage of the icing, but it also helps the cookies to bake evenly.
The number of batches of cookies you'll need to make highly depends on the size of your cookies. With some shapes, I only get 10-12 cookies in a single batch, with smaller shapes, I get many more.
Be prepared to make more than 1 batch of cookies if you need more than about 10 cookies. For this particular party, I needed about 25 cookies, so I made 2 batches of dough and that was enough.
For this design, I wanted a rectangular shape but also wanted a fluted edge. I do not have a cookie cutter like this, but I do have an old hand-me-down fluted edge that I used to make this design on the edges. This set of cookie cutters would work similarly.
Ice the Cookies
This recipe for royal icing makes a lot, so you shouldn't need more than 1 batch for this size project. One batch was plenty for me to do 25 cookies.
I have more detailed instructions for outlining and flooding with royal icing in this Butterfly Sugar Cookie post.
For my design, I chose a bright pink outline with a bright green interior.
First, add small amounts of warm water to a bowl with some of the stock royal icing to achieve a pipeable consistency for outlining. Tint this icing bright pink. Transfer to a disposable piping bag and snip off the tip.
Outline the border of each cookie in the pink icing, then immediately shake on the pink sanding sugar while the icing is wet and shake off the excess sugar. Repeat with all of the cookies.

Allow the outline to dry for at least 1 hour before flooding. Don't worry if some of the sugar sticks to the cookie because it will get covered with the flood icing in the next step.

To flood, add small amounts of warm water to a bowl of stock royal icing to achieve a flood consistency icing. Tint with yellow and green food coloring to make a bright yellow-green icing. Transfer the icing to a disposable piping bag and cut off the tip.
Flood the icing inside the border. Use a toothpick or a scribe tool to guide the icing to the edges and swirl the icing to remove any bubbles.
Allow this icing to dry completely, around 18 to 24 hours, before drawing the silhouettes and names on the cookies.
Make the Stencil
I use my Silhouette Portrait to cut stencils out of plain white cardstock. I try to find a "free for personal use" image on Google images that suits my design.
In this case, I wanted Tinkerbell to be sprinkling pixie dust so her wand needed to be visible. I also wanted it to be very clear from the silhouette that this was indeed Tinkerbell because nothing else on the cookie is Tinkerbell-specific except for the font.

Apply the Silhouette
Make sure your iced cookies have had at least 18 to 24 hours to dry before proceeding to this step. Otherwise, when you press on the surface of the cookie with the marker, you will make indentations in the nice, smooth icing.
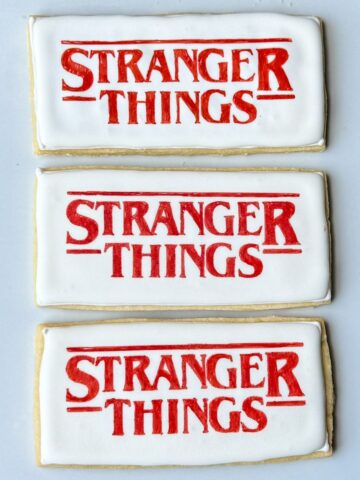
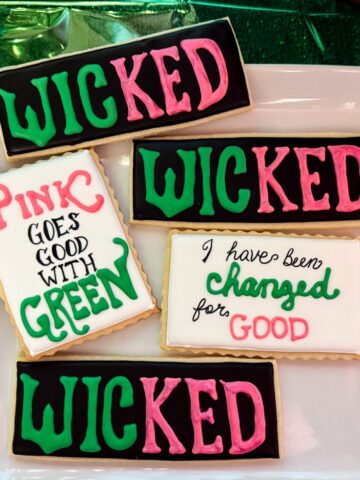
I wanted the Tinkerbell silhouette to be black, so I chose a black edible marker. I like to do this by using the stencil to trace the outline of the shape on the cookie, then remove the stencil and color inside the outline using the marker.
For the lettering, I wanted to use the Tinkerbell font. The best way I could figure to do this was to type out each guest's name in a Word document, then print them out at the approximate size I would need for the cookies.
Then, I drew the letters freehand while looking at my printed example.

I wasn't sure how well this would work, but I was really happy with how these turned out!

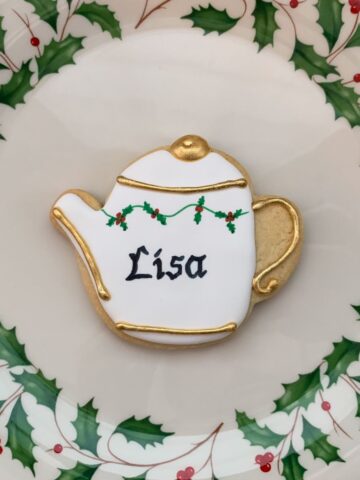
I liked this technique so much that I also used it for these Personalized Holiday Teapot Cookies.
Add the Pixie Dust
For the pixie dust, I chose to put some dots of purple royal icing and sprinkle them with gold Wilton edible stars. I love these little stars, and they come in both gold and silver.
I have used them for Unicorn Sugar Cookies, Rainbow Unicorn Cake, Starbucks Cheesecake, a Nutcracker Birthday Cake, a Galaxy Cake, on cream puffs, and many more baking projects.
Tint some outline consistency royal icing with purple food coloring gel and transfer it to a disposable piping bag with the tip cut off. Pipe little dots of purple underneath Tink's wand.
Immediately sprinkle the gold edible stars on the wet icing so they stick. You can use a toothpick or scribe tool to press the stars into the icing to help them adhere better.

Let the cookies dry once more just to make sure everything is set before packaging.

You can store them in a single layer in an airtight container while they dry. I do not recommend stacking royal icing cookies, as the grease from the top cookie can get on the royal icing of the bottom cookie and interfere with the design.

Package the Cookies
I like to put cookie favors in clear treat bags and tie them with a ribbon. Usually, I will add a little typed note from my child thanking her friend for coming to the party.
For these cookies, I designed the note in PowerPoint using the Tinkerbell font and the same silhouette I used for the stencil. I printed the notes on white cardstock, cut them to size, and punched a heart-shaped hole in the top before threading the ribbon to tie them around the treat bags.

Gluten Free Option
You can make Cut Out Sugar Cookies or Vanilla Shortbread Cookies using a gluten free 1 to 1 baking flour, such as Bob's Red Mill, in place of all purpose flour.
The dough may be slightly drier depending on the humidity, so you may need hold back a little of the flour and only add it in if needed. The gluten free flour produces a more fragile, crumbly cookie, but the flavors are nearly identical.
📖 Recipe

Personalized Tinkerbell Cookies with Royal Icing
Equipment
- fluted edge rectangular cutter
- disposable piping bags
- toothpicks or scribe tool
- Silhouette cutting machine
- white cardstock
Ingredients
- 2 batches dough from Cut Out Sugar Cookies or Shortbread Cookies (see note)
- 1 batch Easy Royal Icing (see note)
- hot pink, yellow, green and purple food coloring gel
- hot pink sanding sugar
- black edible food coloring marker (such as FooDoodlers)
- gold Wilton edible stars
Instructions
Bake the Cookies:
- Roll the cookie dough to ¼" thick and cut with cookie cutter of your choice.

- Bake cookies according to your recipe's instructions and allow to cool to room temperature.
Ice the Cookies:
- Add small amounts of warm water to a bowl with some of the stock royal icing to achieve a pipeable consistency for outlining. Tint this icing bright pink. Transfer to a disposable piping bag and snip off the tip.
- Outline the border of each cookie in the pink icing, then immediately shake on the pink sanding sugar while the icing is wet and shake off the excess sugar. Repeat with all of the cookies.

- Allow the outline to dry for at least 1 hour before flooding. Don't worry if some of the sugar sticks to the cookie because it will get covered with the flood icing in the next step.

- To flood, add small amounts of warm water to a bowl of stock royal icing to achieve a flood consistency icing. Tint with yellow and green food coloring to make a bright yellow-green icing. Transfer the icing to a disposable piping bag and cut off the tip.
- Flood the icing inside the border. Use a toothpick or a scribe tool to guide the icing to the edges and swirl the icing to remove any bubbles.
- Allow this icing to dry completely, around 18 to 24 hours, before drawing the silhouettes and names on the cookies.
Apply the Silhouette:
- Use a cutting machine to cut a cardstock stencil of Tinkerbell holding a wand.

- Type out each child's name in Word or PowerPoint using the Tinkerbell font. Print these out on copy paper.
- Place the stencil on top of the cookie. Trace the outline of the shape on the cookie using a black edible marker, remove the stencil and color inside the outline. Repeat with all of the cookies.
- Use the same black edible marker to draw the letters of each name freehand while looking at the printed example.

Add the Pixie Dust:
- Tint some outline consistency royal icing with purple food coloring gel and transfer it to a disposable piping bag with the tip cut off. Pipe little dots of purple underneath Tink's wand.
- Immediately sprinkle the gold edible stars on the wet icing so they stick. Use a toothpick or scribe tool to press the stars into the icing to help them adhere better.

- Let the cookies dry completely before packaging. They can be stored in a single layer in an airtight container while they dry.


Leave a Reply