
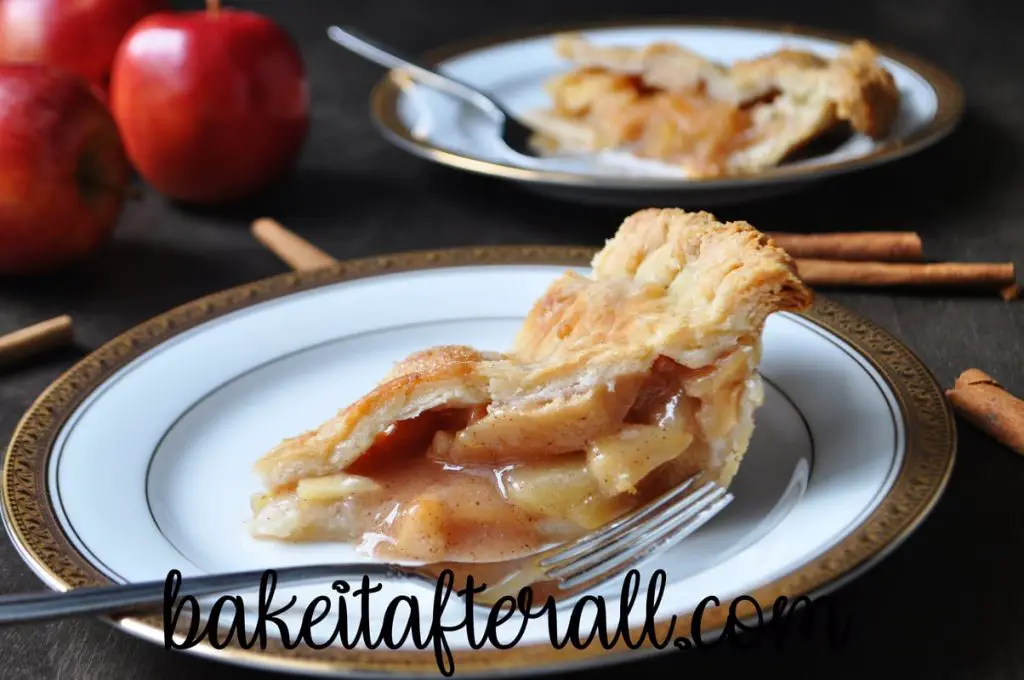
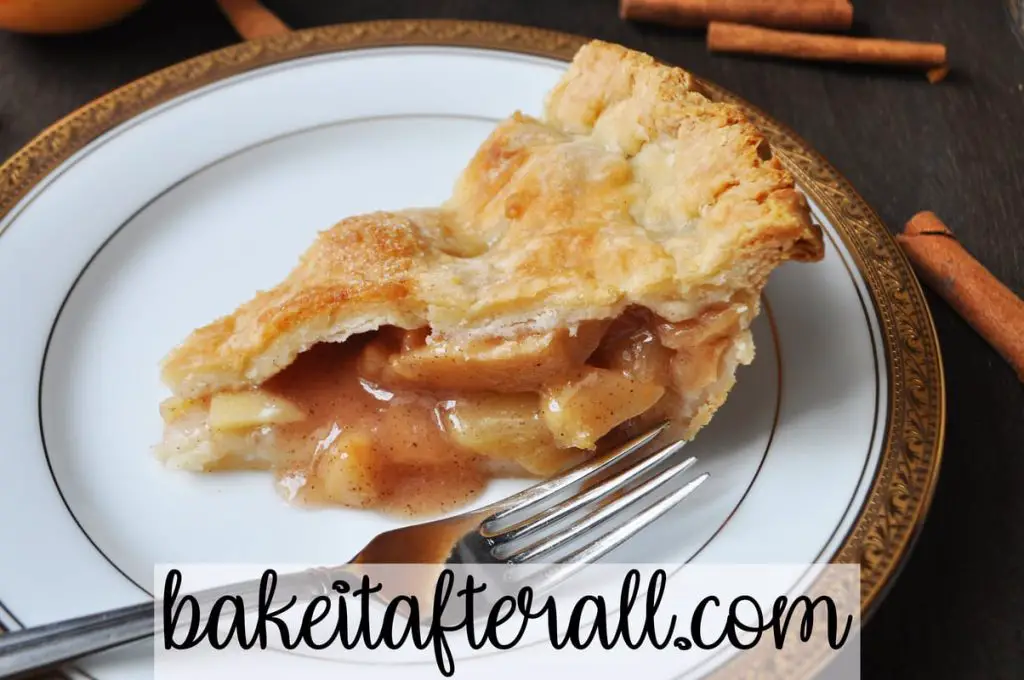
Classic Apple Pie is a great basic recipe that is perfect for fall baking. With warm cinnamon spiced apples and a flaky buttery crust, this pie is everything you look for in a traditional apple pie.
Fall is my favorite season. Although fall does not officially start until later in September, I usually start getting out my fall decorations on August 31. I know that is a little early for some people, but now that we are past Labor Day, I think it's fair game to start thinking about fall baking.

If July is all about peaches and August is all about blueberries, then September is all about apples. I can't believe I've never posted a Classic Apple Pie recipe before!
I have shared the Apple Crumble Pizza Pie recipe, which is one of our favorites, but each fall I have to make a traditional apple pie. The girls have come to associate early fall with apple pie baking, almost as much as they look forward to homemade Apple Cider Doughnuts.
SAVE YOUR LEFTOVER PIE DOUGH FOR CINNAMON SUGAR PIE DOUGH COOKIES!
Jump to:
Pie Crust Recipe
I use my favorite all butter pie dough for all of my fruit pies. I've recently shared how I adapted this recipe to make a gluten free pie crust.
In my post on Fresh Peach Pie, I show some tips for rolling out the gluten free pie dough, as it is more fragile than traditional pie dough.
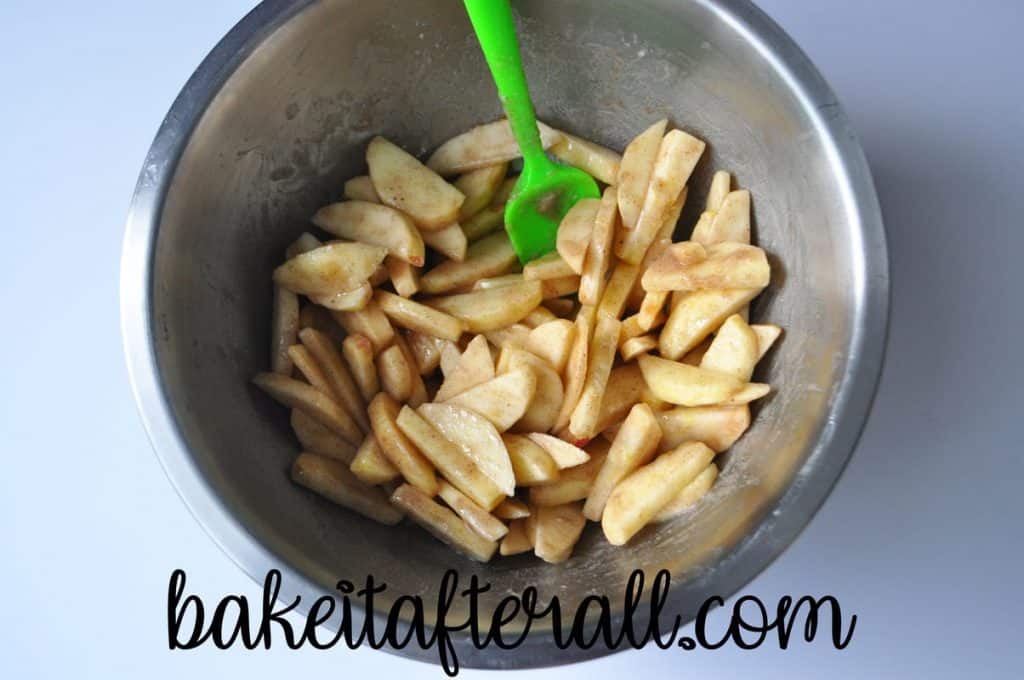
Apple Pie Filling
For the filling, I combine apple pie recipes from my Betty Crocker Cookbook and from America's Test Kitchen Complete TV Show Cookbook.
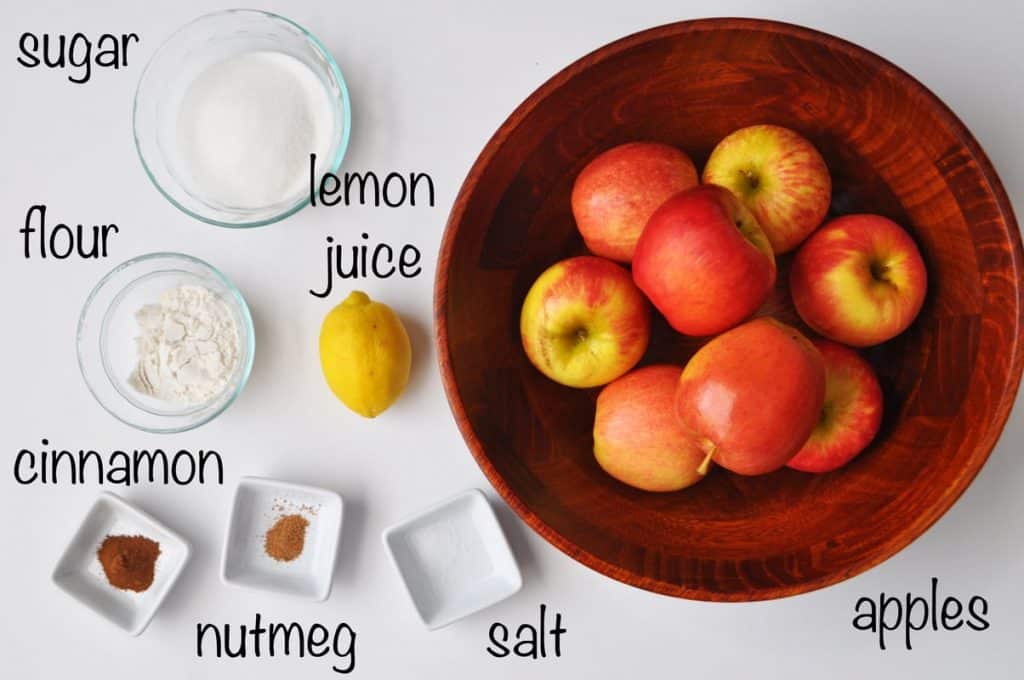
I like to keep the filling ingredients simple. Sugar for sweetness, flour for thickener, and to give some seasonal flavor: cinnamon and nutmeg. A bit of lemon juice adds some brightness, and a little salt helps balance the sweet.
What kind of apples to use for apple pie filling?
Most cookbooks recommend using tart apples for apple pie. You'll even hear people refer to apples as "pie apples" and "eating apples." Typically a more tart apple like Jonathan or Granny Smith is recommended for pie. Some recipes suggest a mixture of tart and sweet apples.
I tend to lean toward using the kind of apples you like to eat. When we go apple picking, we mainly get Golden Delicious, and I've had success using these apples in apple pie. I've also used Fuji apples for pies, and they're delicious. Although both of these varieties are sweeter apples, I don't usually notice too much of a difference. My advice is not to stress about the type of apple. Use what you have or what you like!
If you use an apple with a firmer flesh, you may need to bake your pie longer to soften the apples. You can cover the pie with aluminum foil to prevent the crust from getting too brown.
Assembling the Pie
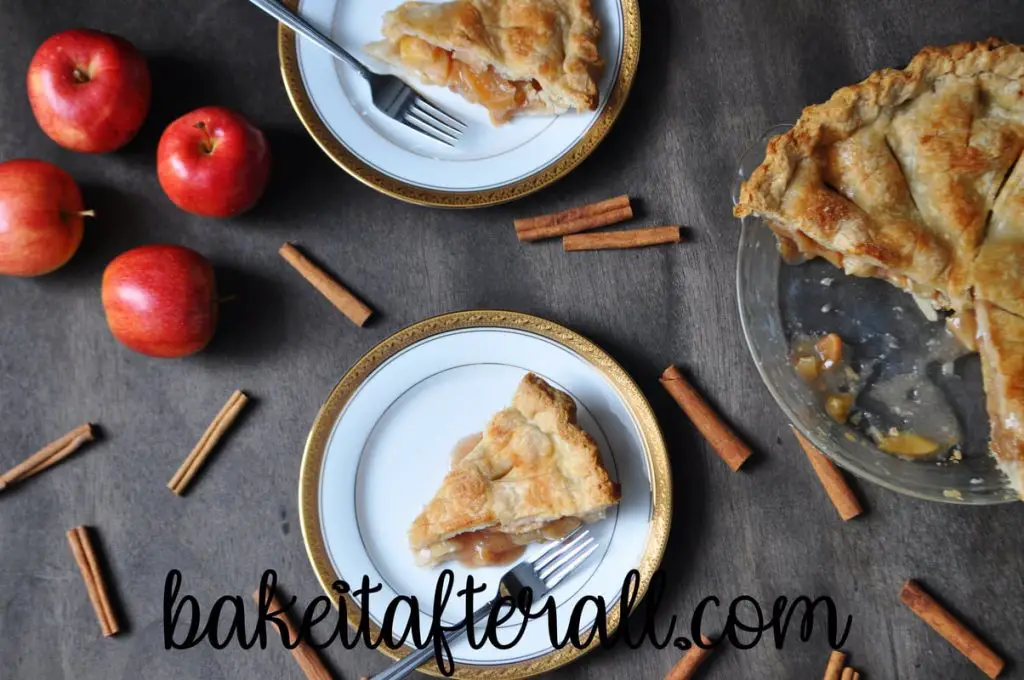
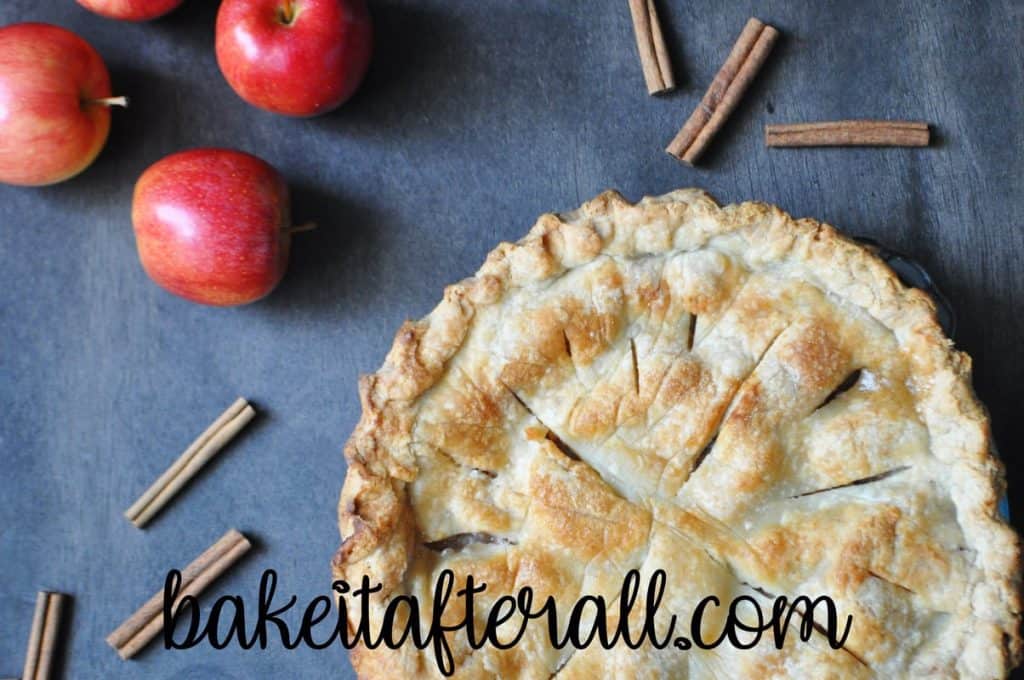
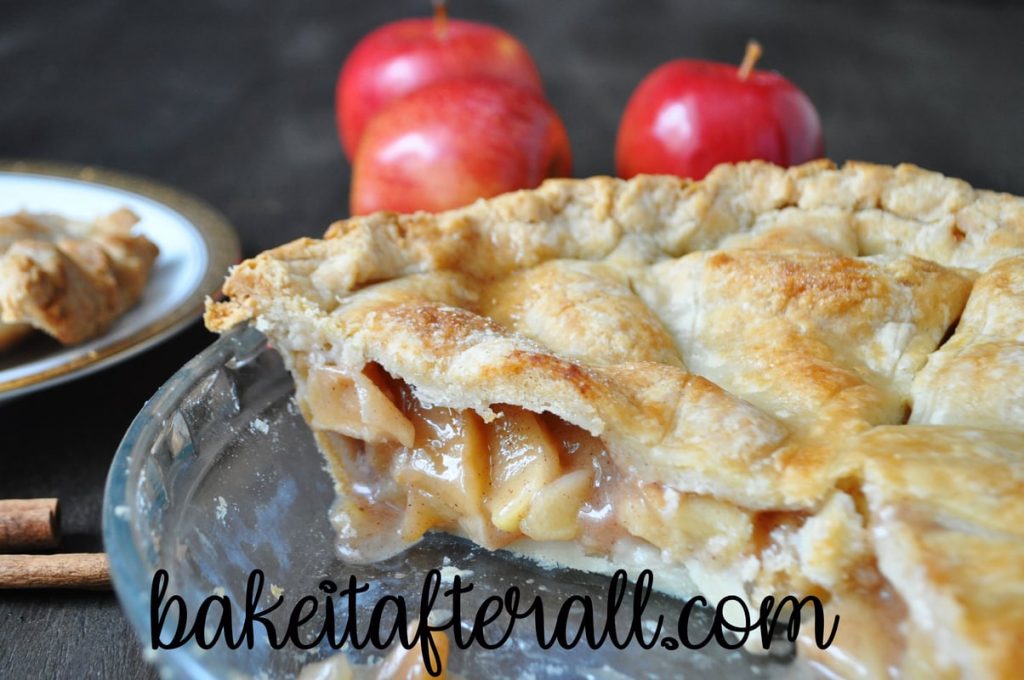
The apple filling is placed inside a pastry-lined pie plate. I like to use a glass pie plate so that I can monitor how the bottom crust is baking. I could have even added more apples to this pie, but I ran out of apples!
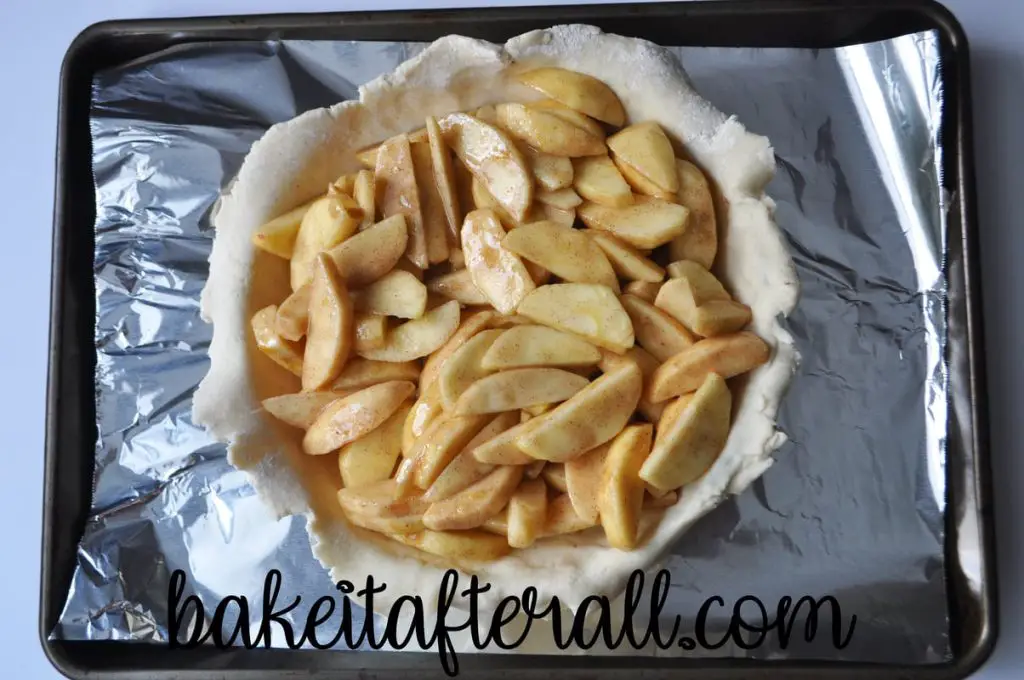
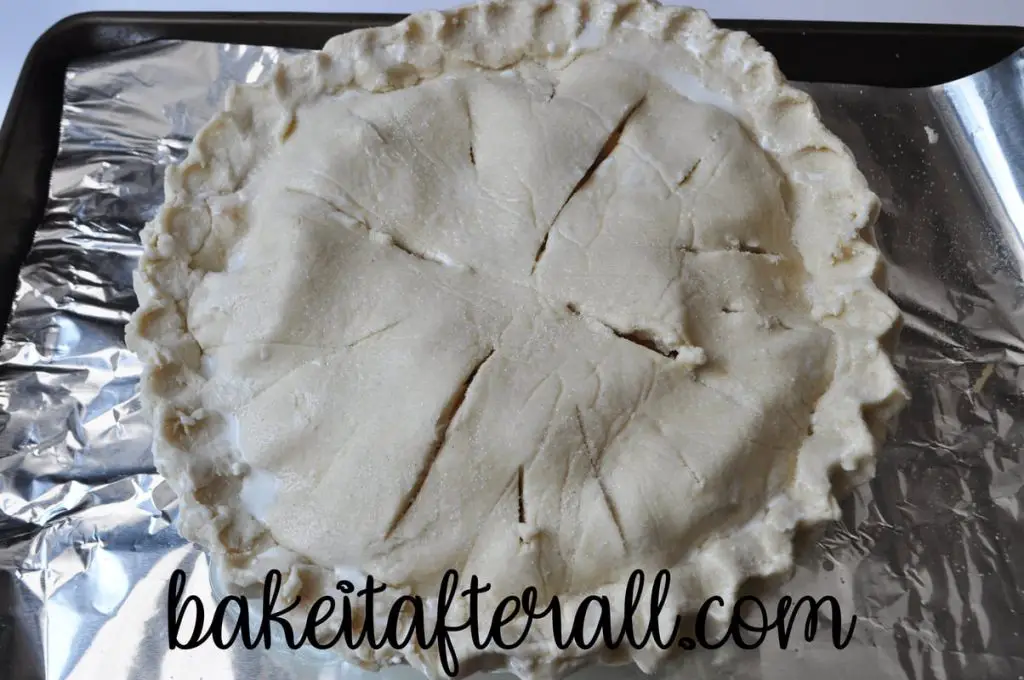
The top crust is added, edges are sealed and fluted, and slits cut into the top crust to vent. Then the top crust is brushed with water or cream using a pastry brush and sprinkled with sugar.
How to Bake the Perfect Pie
I have one major tip for baking the perfect pie: foil is your friend. My favorite way to bake a perfect pie is to use an aluminum foil ring. This ring allows you to adjust how the inner versus outer crust is baked. At this point, you can make a decision: 1) add the foil ring from the start and remove it once the inner crust has browned or 2) add the foil ring after the outer crust has browned.
I usually start off with the foil ring on and remove it later. Lately, I've had some trouble with the foil sticking to my gluten free pie crust. I even tried adding a little nonstick cooking spray to the foil and it still stuck. For this reason, I suggest baking the pie for at least a little bit before adding the foil ring if you are using a gluten free crust. I don't remember having this issue with traditional pie crust.
The best part about the foil ring is that you can remove it and add it back if needed. Often I will remove it and then realize that I'd like the inner crust to be a little more brown, so I just add it back.
Top Crust Baked Before Bottom Crust
One major benefit of using a glass pie plate is that you can see the color of your bottom crust and know whether it is properly browning. Sometimes the entire top crust is nice and brown, but you can tell that the bottom crust is not done. What to do? Remember, foil is your friend!
Add a piece of foil loosely over the entire top of the pie and move the pie to the lowest rack in your oven. This will focus the heat to the bottom of the pie and prevent the top from further browning. You don't want to cover the pie tightly with the foil. We want a crispy top crust. We do not want the steam from the apples to soften that beautiful, flaky crust!
Gluten Free Option
To make an entirely gluten free apple pie, use this all butter gluten free pie crust recipe for the crust and substitute a gluten free flour in place of all purpose flour in the apple pie filling. I like to use Bob's Red Mill Gluten Free 1 to 1 Baking Flour.
📖 Recipe

Classic Apple Pie
Equipment
- 9-inch pie plate
Ingredients
For the Filling:
- ½ cup sugar
- ¼ cup flour (all purpose or gluten free)
- ¾ teaspoon ground cinnamon
- ¼ teaspoon ground nutmeg
- ¼ teaspoon of salt
- 6 cups thinly sliced peeled apples (approx. 6-8 medium)
- 1 tablespoon lemon juice
- 2 tablespoons firm butter (if desired)
For the Crust:
- pie crust for a double crust pie (see note)
- 2 teaspoons water (or cream )
- 1 tablespoon sugar
Instructions
- Heat oven to 425°F. Line a baking sheet with aluminum foil and set aside.
- Roll out the bottom crust dough and fit into a 9-inch pie plate. Roll out the top crust and set aside.
- In a large bowl, combine the sugar, flour, cinnamon, nutmeg, and salt.½ cup sugar, ¼ cup flour, ¾ teaspoon ground cinnamon, ¼ teaspoon ground nutmeg, ¼ teaspoon of salt
- Stir in the apple slices and lemon juice.6 cups thinly sliced peeled apples, 1 tablespoon lemon juice
- Transfer the filling mixture into the pie plate lined with the bottom crust. Cut butter into small pieces and sprinkle over apples.2 tablespoons firm butter
- Cover the apples with the rolled top crust. Seal the edges of the pie and flute the crust using your index finger on one hand and your thumb and index finger on your other hand. Cut slits in the top crust to vent.
- Use a pastry brush to brush water or cream over top pastry and sprinkle with sugar.2 teaspoons water, 1 tablespoon sugar
- Cover the edges of the crust with a ring of aluminum foil to protect the outer crust from browning too quickly. Alternatively, you may start to bake the pie and add the aluminum foil ring when the outer crust looks brown. (See note).
- Place pie plate onto the aluminum-lined baking sheet and plate into oven.
- Bake 40 to 50 minutes or until crust is golden brown and and juices begin to bubble through the slits. This may take longer for apples with a firmer flesh. Once the center of the top crust has started to brown, remove the foil ring and allow the outer crust to brown. If the outer crust begins to brown faster than the inner crust, replace foil ring and continue to bake until the inner crust is properly baked. You may completely cover the top crust with foil if the crust is finished but the apples need more time to soften.
- Remove pie and cool for at least 2 hours before serving.


Emily Minor says
Oh my goodness. This apple pie recipe has now been adopted by our family every fall. I used my gala apples and made the gluten free pie crust referenced in the recipe. The crust was so flaky and buttery and better than any traditional pie crust. (Using crisco grosses me out). Working with gluten free dough takes patience for sure, but the final product was worth it. Thanks for sharing another delicious recipe, Meghan!