
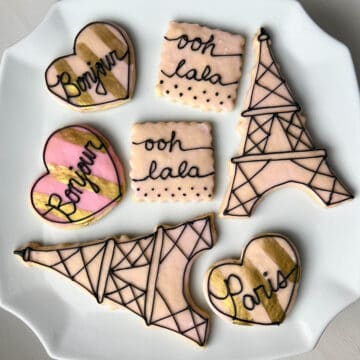
These Paris Themed Cookies are shortbread cookies glazed with thin icing and minimal royal icing details so the cookies stay soft. The Eiffel Tower, "Bonjour," "Paris" and "ooh la la" designs are perfect for a Parisian Cafe Birthday Party.

My daughter asked for a Parisian Cafe Birthday Party for her 10th birthday. She loves all things French just like I do!
For the dessert table, she knew she wanted some decorated cookies.

I had received an Eiffel Tower cookie cutter as a gift many years ago and never really had an occasion to use it, but this was the perfect opportunity.

We also decided to include cookies with the words, "Paris," "Bonjour" and "ooh la la."
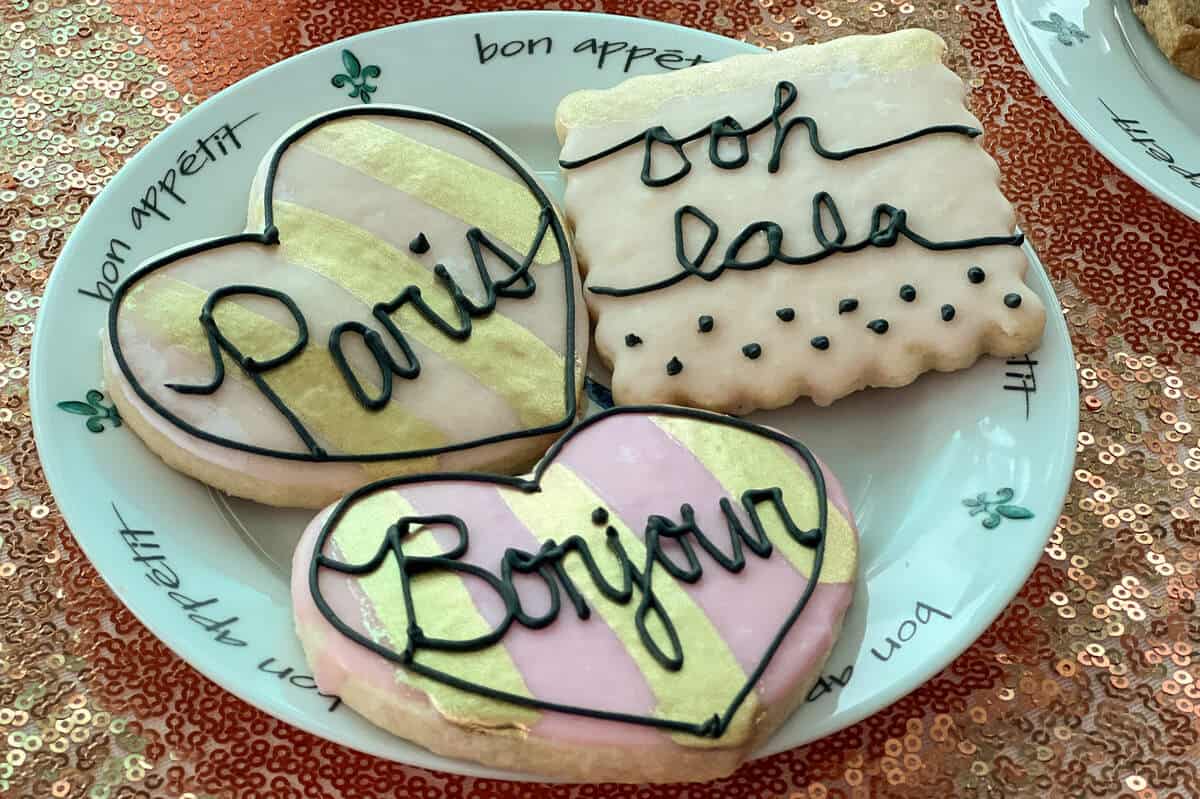
Rather than cookies fully covered in royal icing, which I find to be hard and overly sweet, I opted for a technique I developed when making my Snowflake Cookies, where a simple soft glaze is applied to the cookie before royal icing is piped minimally. This keeps the cookies soft and not too sweet.

I have since used the same approach for Easy Polar Bear Cookies, Diamond Gem Cookies and Butterfly Cookies.
I also wanted to incorporate the gold painting technique from my Painted Watercolor Cookies post.

We all loved these cookies so much! Not only are they beautiful, but they tasted great too.

Jump to:
Supplies
- 2 batches of your favorite shortbread or sugar cookie dough
- heart and Eiffel Tower shaped cookie cutters, scalloped edge cutter
- cookie glaze (powdered sugar, milk, vanilla extract)
- pink food coloring liquid or gel
- toothpicks
- black royal icing powder
- disposable piping bags
- small round tip, such as #2 or #3, optional
- plastic tip coupler, optional
For the edible gold paint:
- Gold luster dust
- Paint palette dedicated to food
- Food grade paintbrush
- Disposable transfer pipette
- Everclear or vodka
I purchase my gold luster dust locally, but I have heard good things about the gold luster dust from Truly Mad Plastics.
Make the Cookies
Roll the dough to an even thickness on a floured surface. I use wooden dowel rods that are ¼-inch in diameter as rolling pin guides.

Many years ago, I received a large Eiffel Tower cookie cutter as a gift. This was the perfect opportunity to use it. I also cut out some heart shapes and made some squares using a metal scalloped edge.
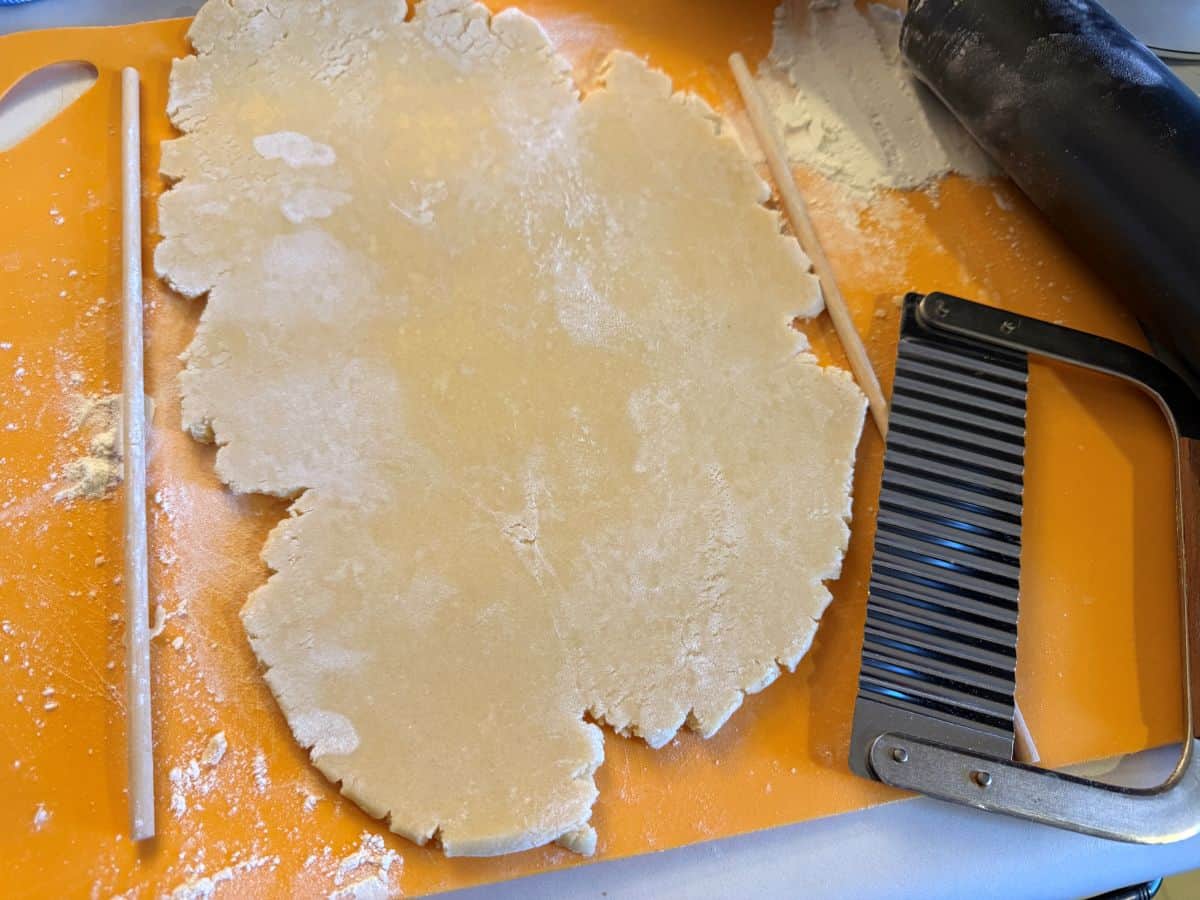
Once the dough has been cut into shapes, bake the cookies according to your recipe's instructions. I recommend grouping the same shapes on a single cookie tray because the different sizes require different amounts of time to bake.
Allow the cookies to cool to room temperature before glazing.
Glaze the Cookies
For this cookie set, I made some of the cookies light pink and some dark pink.
To make the glaze, stir together the ingredients carefully so as not to introduce too many bubbles.
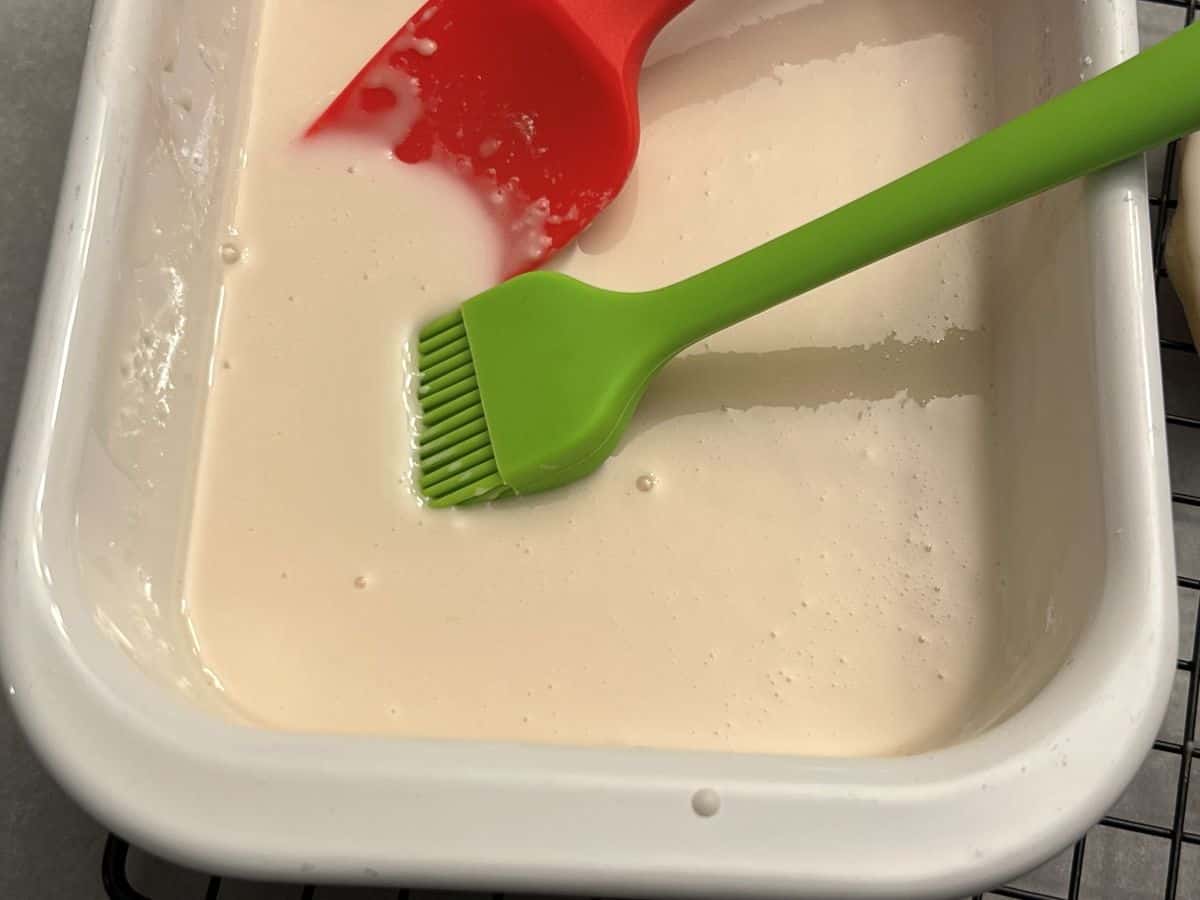
Divide the glaze into 2 bowls, with about ¼ of the glaze in one bowl and ¾ of the glaze in the other.
To make the light pink glaze, add a very small amount of liquid pink food coloring to the bowl with ¾ of the glaze. Carefully mix until completely incorporated. Be careful to just add a small amount of coloring.
This is why I recommend using a liquid food coloring instead of a gel, as the gels tend to be very intense color. If you only have gel, just put a tiny amount on the tip of a toothpick to add to the glaze.
To the bowl with ¼ of the glaze, add a little more pink food coloring or gel and mix completely to make a bright pink glaze.
Cover both bowls with moistened paper towels to prevent the icing from crusting.
I glazed some of the hearts in the bright pink and some in the light pink. I also used the light pink for the scalloped edge square and Eiffel Tower shaped cookies.
Place one cookie face down in the glaze and dip it. Then, lift it out of the glaze, let the glaze run off of the cookie and place it on a rack to allow the glaze to set. Alternatively, use a pastry brush to brush the glaze onto the cookies.
Pop any bubbles with a toothpick. Repeat the glazing step with all of the cookies.
Allow the icing glaze to dry at room temperature until set, at least a few hours.
If you want to allow them to dry overnight, place them in a single layer in an airtight container after the icing has partially set.
Paint with Edible Liquid Gold
I have a detailed tutorial for painting cookies with an edible gold luster dust suspension in my Gold Painted Cookies and Painted Watercolor Cookies posts.
Briefly, add some edible gold dust powder to the well of a food safe paint palette.
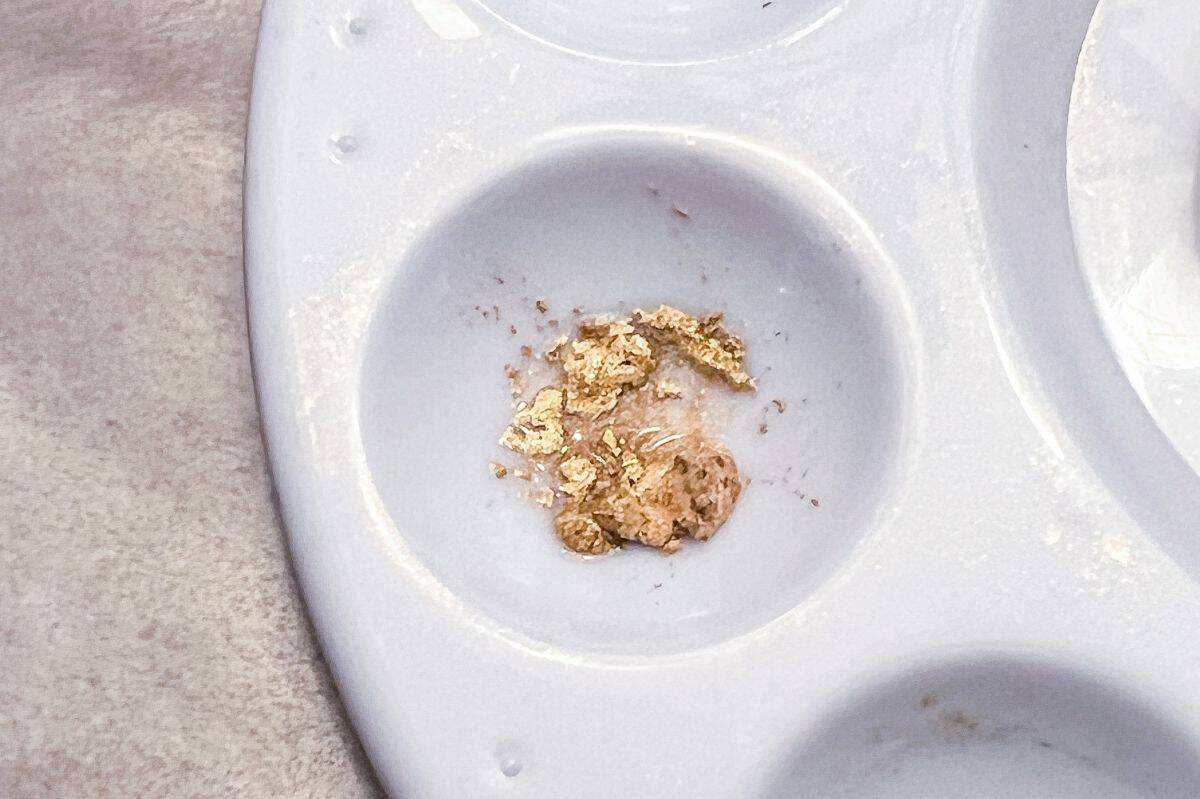
Add a few drops of clear alcohol, like Everclear or vodka, to the dust. I use a disposable transfer pipette to transfer the alcohol from a small bowl to the well of the palette.
While I have also tried vodka and clear extract, I have the best luck with Everclear due to the high alcohol percentage. It evaporates very quickly so it does not create pits in the icing.
Mix the gold into the alcohol with a food safe paintbrush to create a gold suspension. For these cookies, I used a wide brush in order to create thick stripes on the cookies.
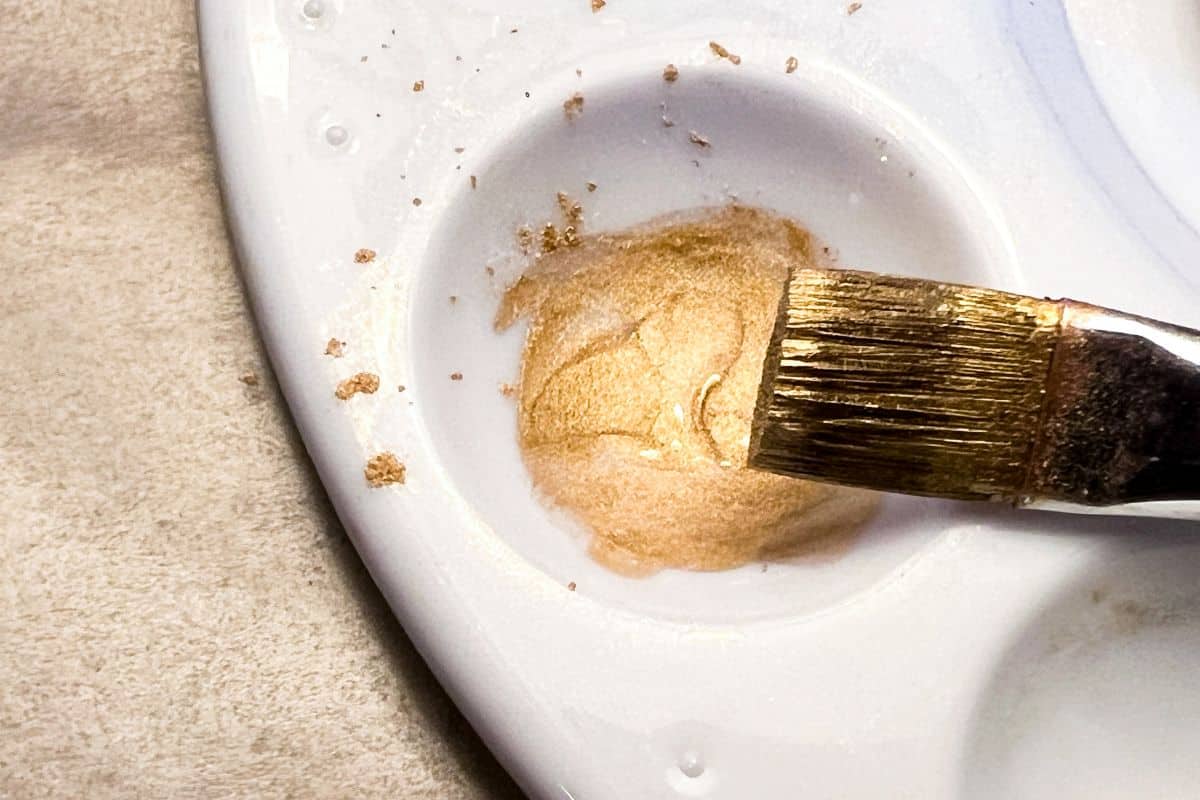
Once the suspension is well mixed, allow the excess to run off of the paintbrush. Then, carefully brush wide vertical lines across the heart shaped cookies. I did 3 lines, but this will depend on the thickness of your paintbrush and the size of your cookies.
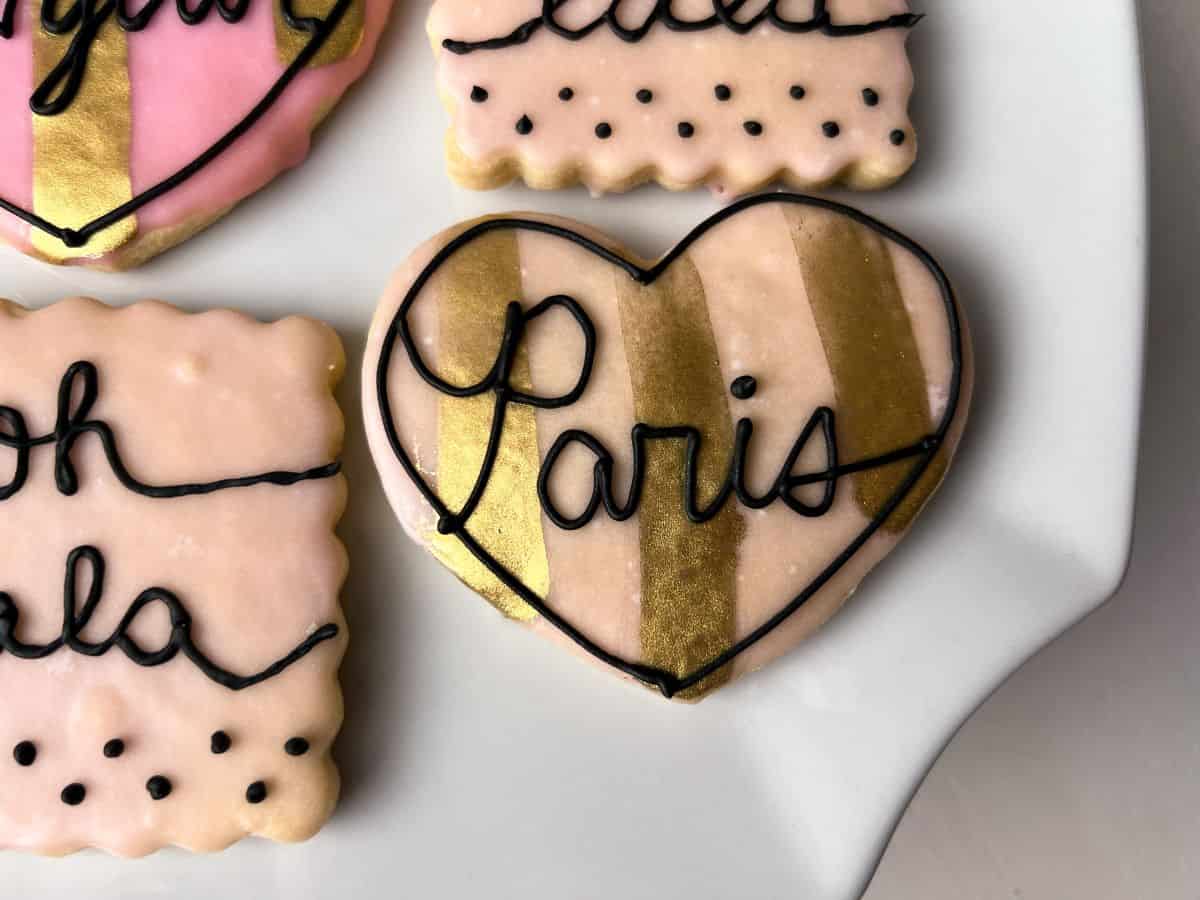
Allow the gold to dry before storing the cookies or adding the royal icing details. The alcohol evaporates quickly.
If storing, keep the cookies in a single layer in an airtight container. Stacking them can disrupt the design. If you must stack them, I recommend using aluminum foil between the layers.
Add Royal Icing Details
In the past, I have tinted white royal icing black using black food coloring gel. It takes a lot of food coloring gel and patience. I now buy black royal icing powder. I love this powder because it only requires water and can be made instantly. This saves me a ton of time when I have a bunch of other desserts and crafts to make for a party.
If you use black icing powder, place some of the powder into a small bowl. Add small amounts of warm water and stir until the icing is a pipeable consistency.
If you prefer to make black icing from white royal icing stock, add about a half cup of the base icing to a small bowl. Add small amounts of warm water to the icing to thin it slightly so it is a pipeable consistency, then add black food coloring gel to achieve a rich black color.
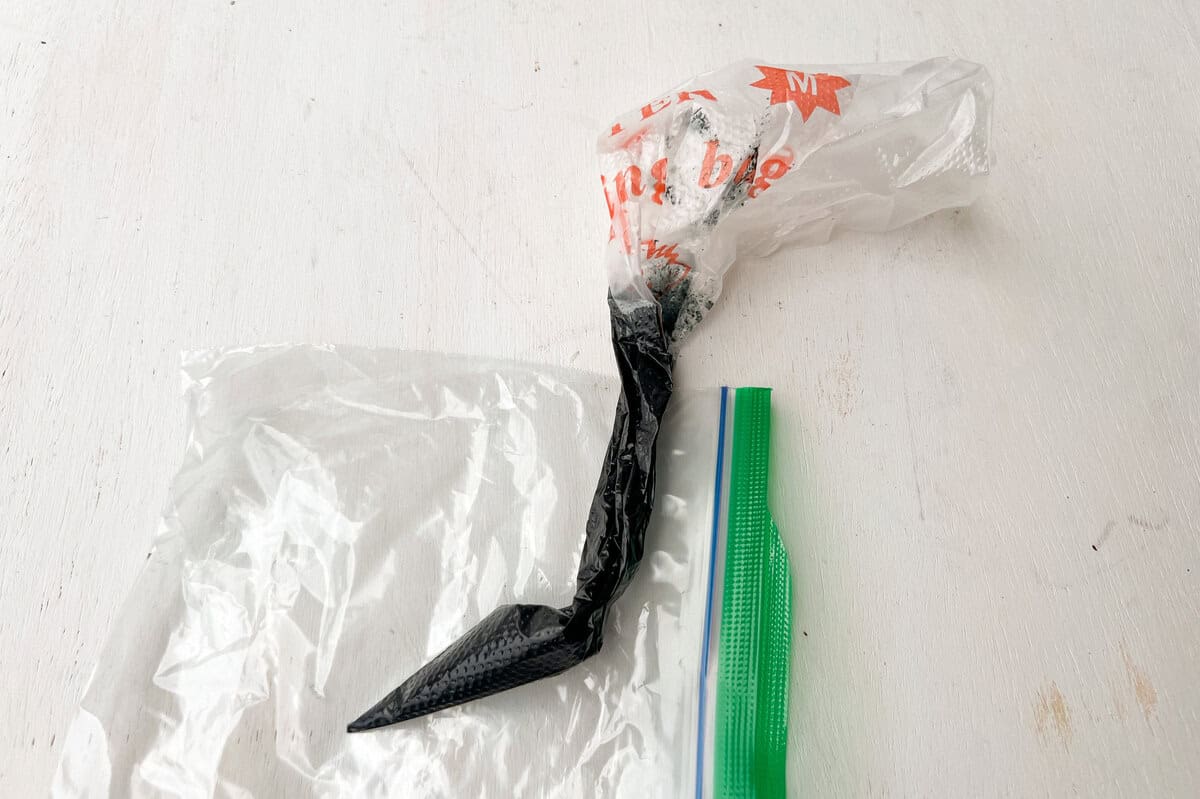
Transfer the icing into a disposable piping bag fitted with a #2 or #3 tip. A tip coupler is helpful for securing the tip on the bag. It also allows you easily to switch tips if the #2 tip is too small and you want to bump it up to a #3 or even a #5.
Alternatively, you can cut off a very small opening in the tip of a disposable piping bag. Start with a small opening because you can always cut a little more to make the opening larger if it is too small.
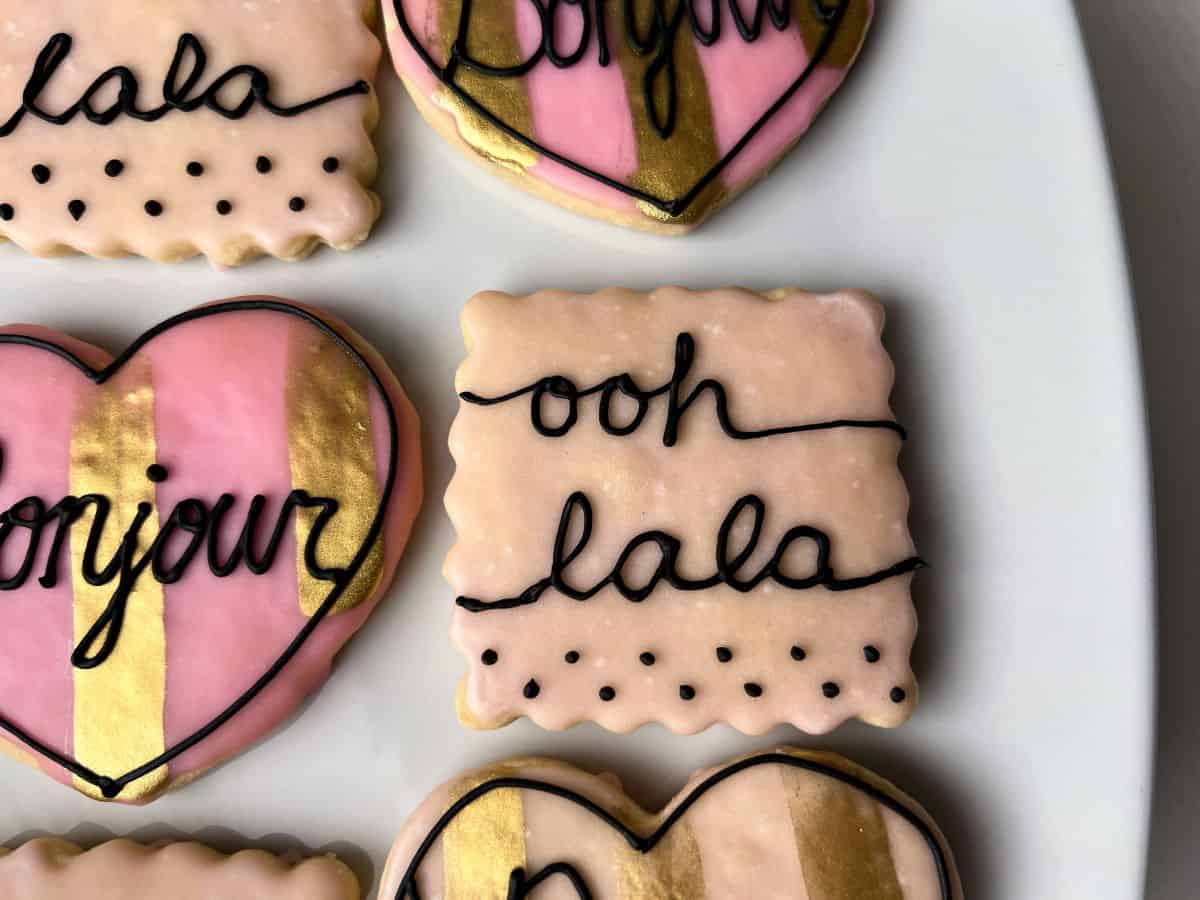
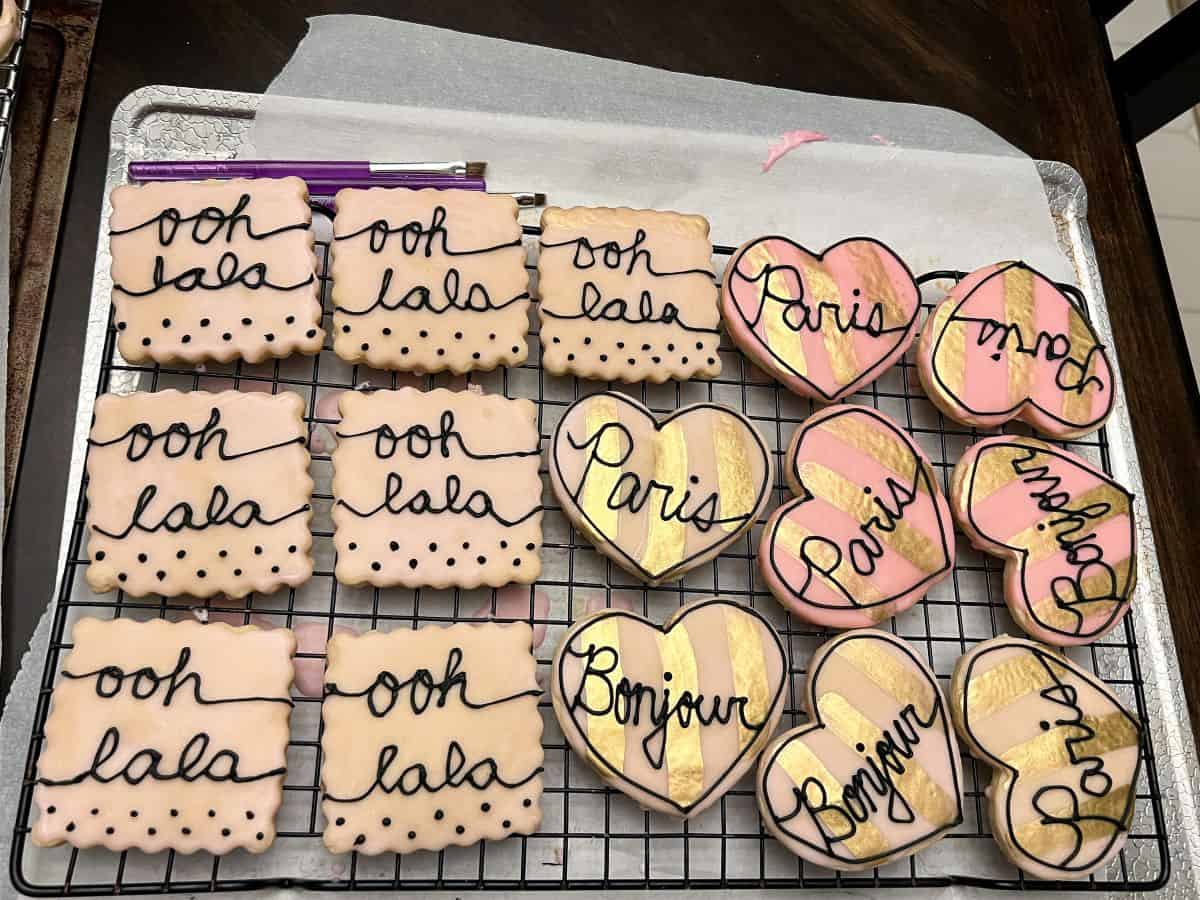
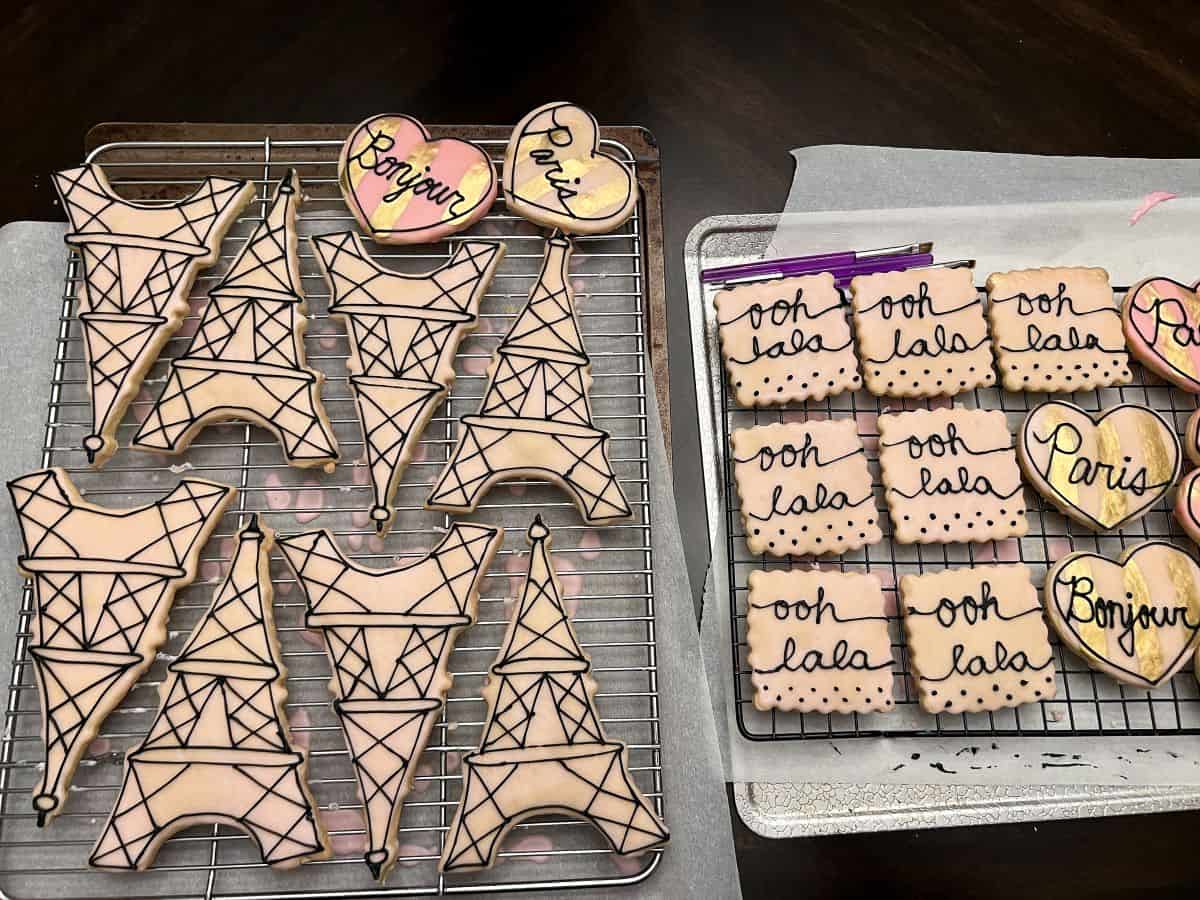
For the "ooh la la" cookies, use the light pink, square, scalloped edge cookies. Pipe the words in cursive, extending the first and last letters to the edges of the cookies. Pipe polka dots in two rows at the bottom of the cookie.
For half of the heart shaped cookies, pipe an outline of the heart. Then, write the word, "Bonjour" in cursive, connecting the first and last letters to the outline.
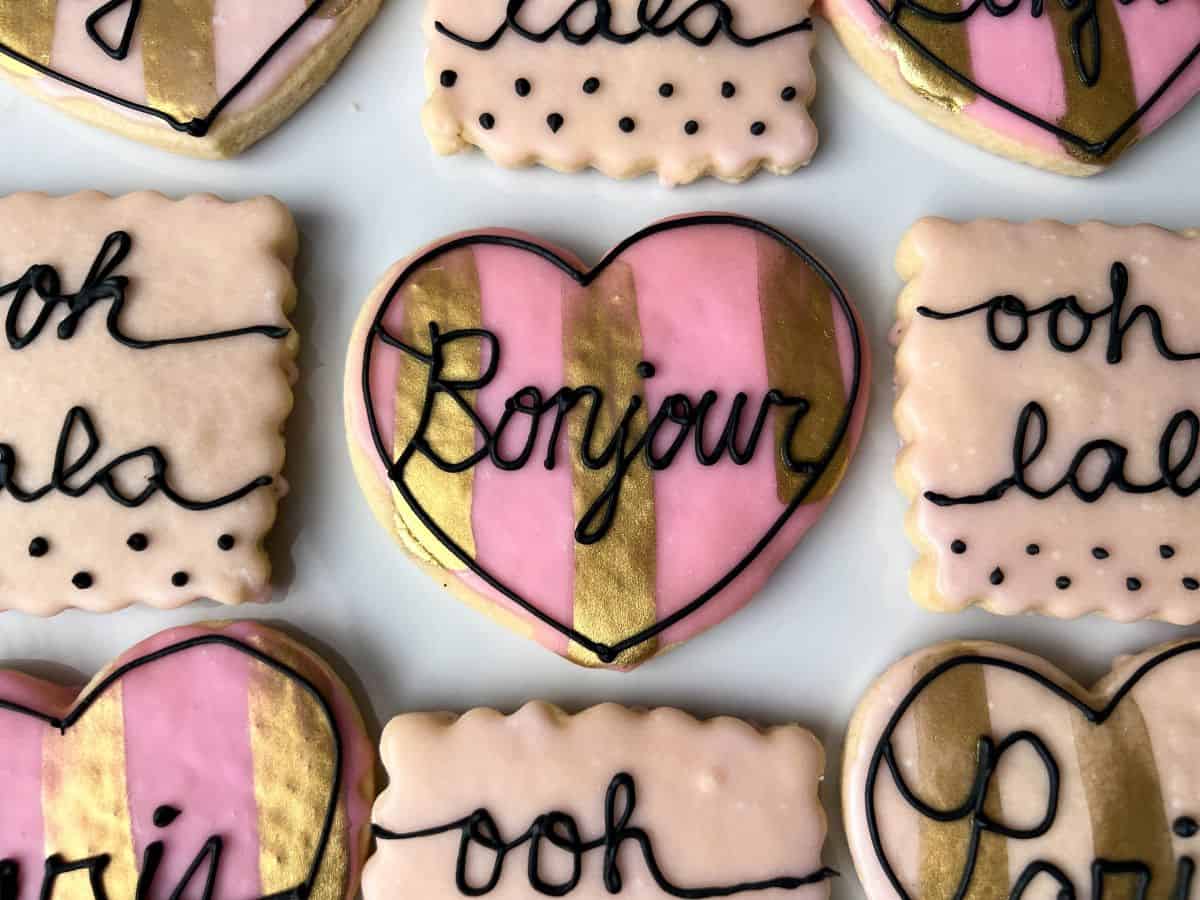
For the other half of the heart shaped cookies, repeat this process with the outline but pipe the word "Paris" inside.
I piped these black details on the Eiffel Tower. I have highlighted the steps in yellow on the following photos.
First, pipe the circle at the top of the tower with a small line on top and thin oval shapes for the first and second platforms.
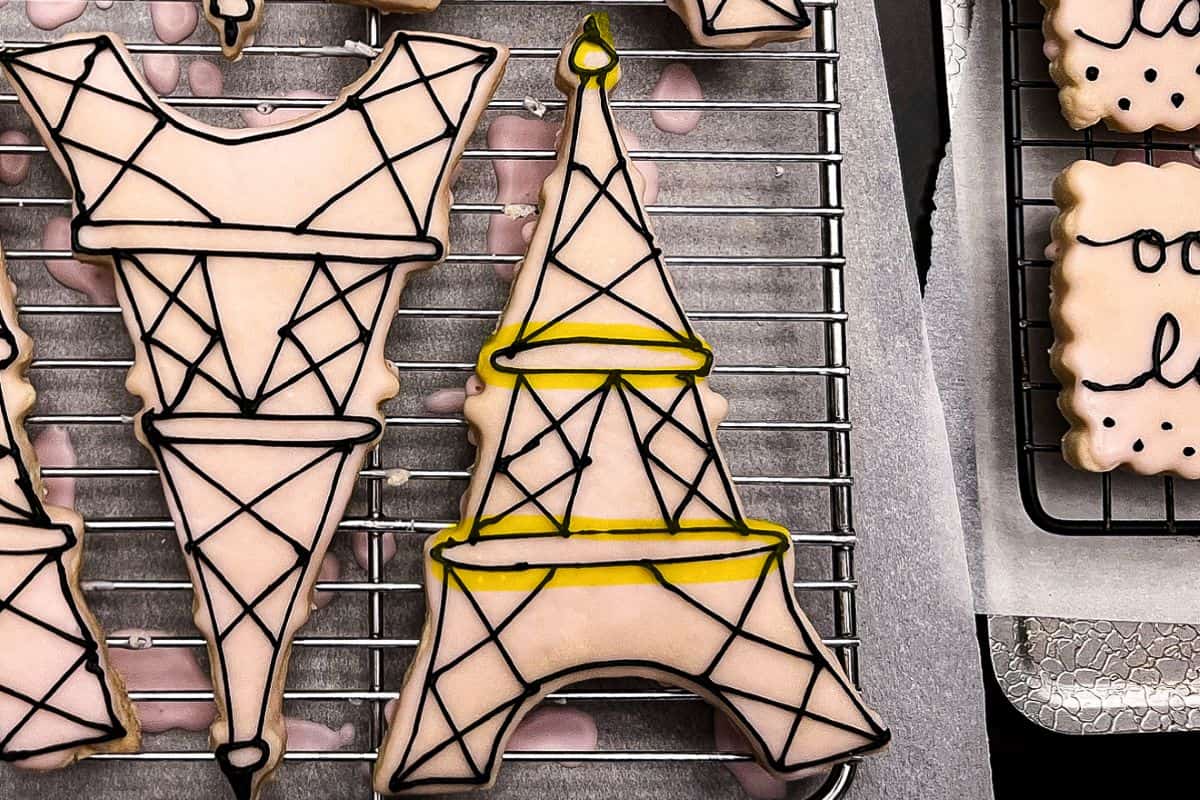
Next, pipe lines to connect each side of the top platform to the circle on top, 4 lines to connect the two platforms, and the outline of the bottom of the tower.
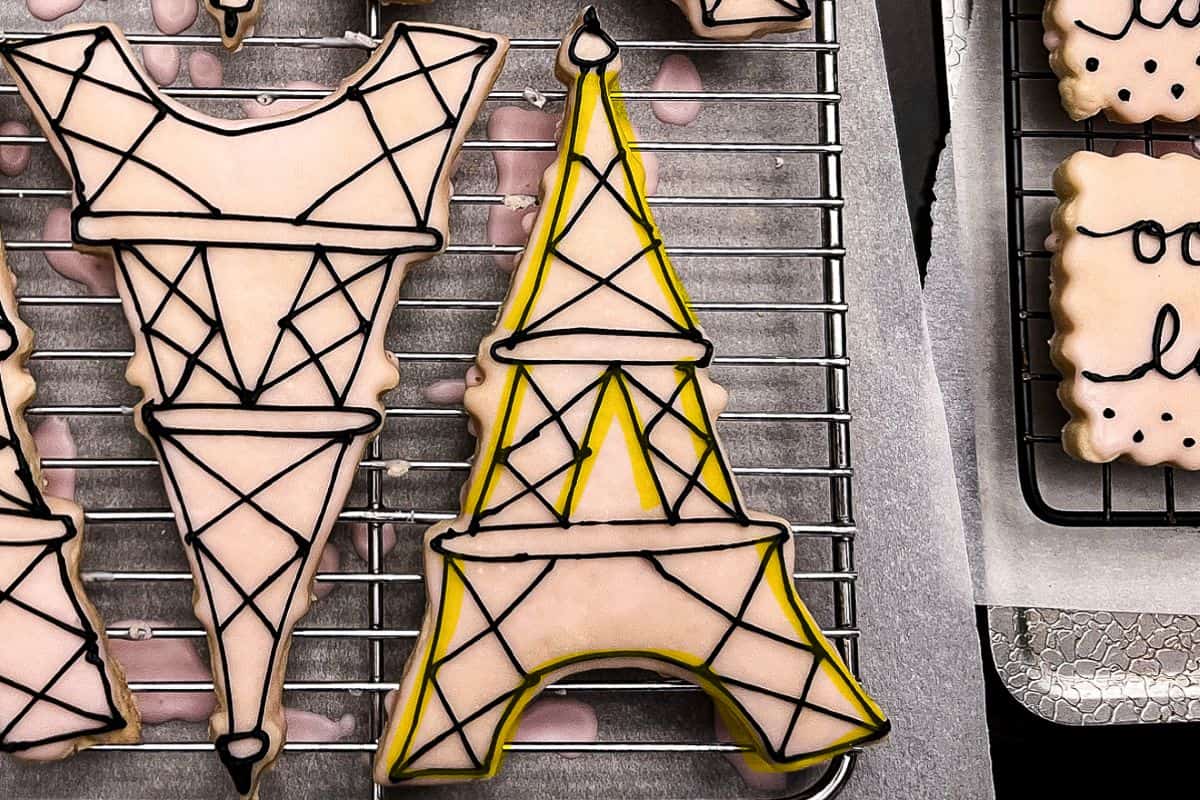
Last, pipe two X's in the top section, two X's in each section between the top and bottom platforms, and two X's on each side of the area below the bottom platform.
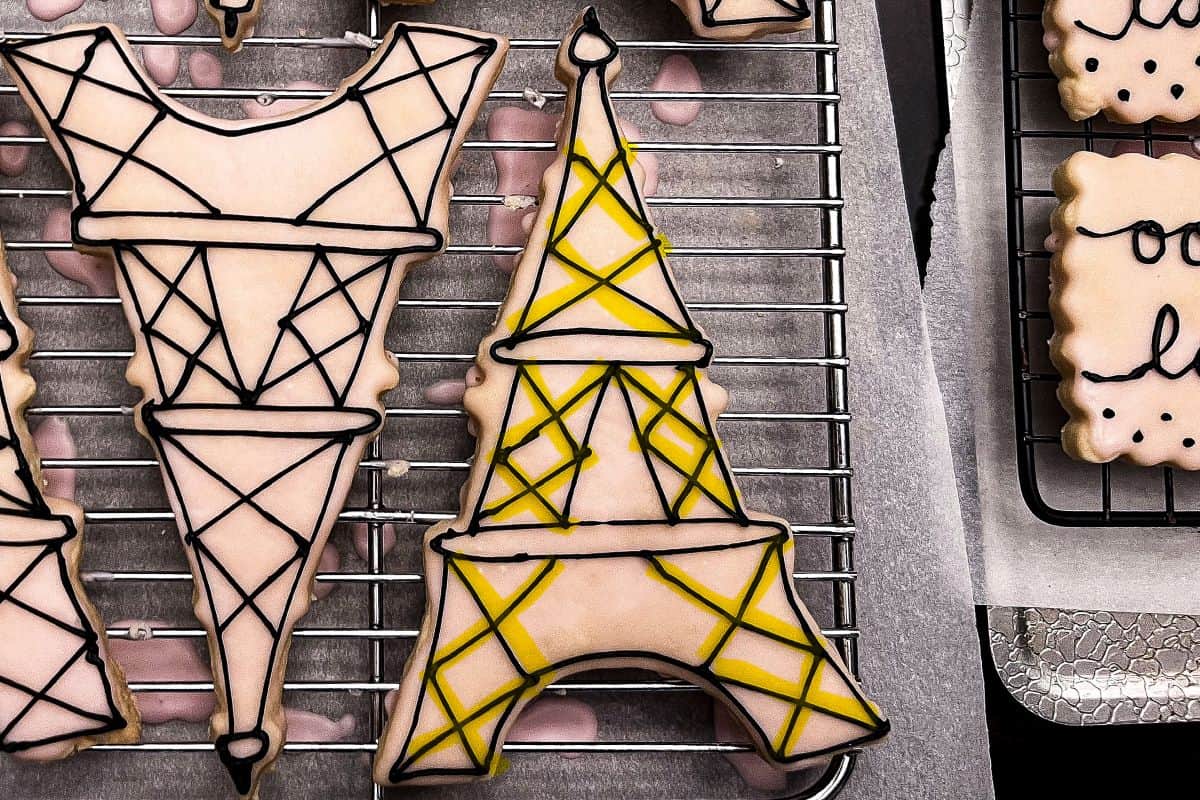
Repeat the piping on all of the Eiffel Tower cookies. Set the cookie aside on a baking rack to allow the icing to dry.
Storage
Ideally, the cookies should be stored in a single layer in an airtight container at room temperature. If you must stack the cookies, place a layer of aluminum foil in between them. If you use waxed paper or even parchment paper, you risk the grease from the top cookie discoloring the design on the cookie below.
In my experience, these Shortbread Cookies get stale faster than Sugar Cookies. Plan to serve the shortbread within 1-2 days of making. For the sugar cookies, plan to serve anywhere from 1-5 days of making.
Technically, you could freeze these cookies in a single layer in an airtight container. I always worry about freeze/thaw affecting the texture of the cookie, but the design should be ok as long as they are not stacked.
Gluten Free Option
Use your favorite gluten free sugar cookie or shortbread cookie recipe. I typically use a gluten free measure for measure flour, like Bob's Red Mill, in place of all purpose flour in cookie recipes. The resulting cookies are more crumbly than those made with all purpose flour, but they taste the same. This is often the nature of gluten free cookies.
Because they are more fragile, be extra careful taking them off of the cookie sheet. To add the glaze, you'll want to carefully brush it on or pour it over the top rather than picking up the cookie to dunk in a bowl of glaze.
📖 Recipe
Paris Themed Cookies
Equipment
- heart and Eiffel Tower shaped cookie cutters, scalloped edge cutter
- toothpicks
- disposable piping bags
- small round tip, such as #2 or #3 optional
- Plastic tip coupler optional
- Paint palette dedicated to food
- food grade paintbrush
- disposable transfer pipette
Ingredients
- 2 batches shortbread or sugar cookie dough
For the Glaze:
- 2 cups powdered sugar
- ¼ cup milk
- ½ teaspoon clear vanilla extract or other clear extract (like almond rum or coconut)
- pink food coloring liquid or gel
For Decorating:
- edible gold luster dush
- Everclear or vodka
- black royal icing powder
Instructions
Make the Cookies
- Preheat oven to 350°F or temperature indicated in your chosen cookie dough recipe. Line 2 cookie sheets with parchment paper.
- Flour a cutting board or mat. Roll the dough out to ¼-inch thickness. It is helpful to use ¼-inch diameter wooden dowel rods on each side of the dough as guides for the rolling pin to ensure an even thickness.
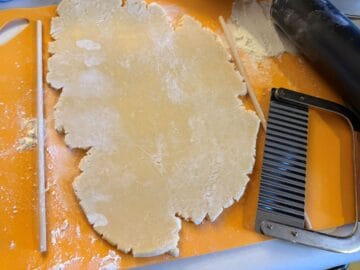
- Cut the dough with a heart cookie cutter, an Eiffel Tower cookie cutter, and into squares using a scalloped edge cutter.
- Transfer all of the heart shapes onto one cookie tray and all of the scalloped squares onto the other tray. Bake one tray at a time according to your recipe's instructions. I recommend grouping the same shapes on a single cookie tray because the different sizes require different amounts of time to bake. The Eiffel Tower shapes can be baked on one of the cookie sheets after another shape has baked and the tray has cooled, or you can use a third tray if you have one.
- Remove cookie sheet from the oven and allow cookies to cool for 1 to 2 minutes before removing them to a wire rack, then cool completely before glazing.
Glaze the Cookies
- Place a wire rack over a parchment or waxed paper lined cookie sheet or work surface.
- Mix together the powdered sugar, milk and extract. Using clear extract will keep the color of the icing white so it can be easily tinted the correct color. Stir the icing together with a small spatula to avoid introducing bubbles. You can let the icing sit for a minute so bubbles rise and then pop them with the spatula. You can add more milk or powdered sugar to achieve a dippable consistency.2 cups powdered sugar, ¼ cup milk, ½ teaspoon clear vanilla extract or other clear extract
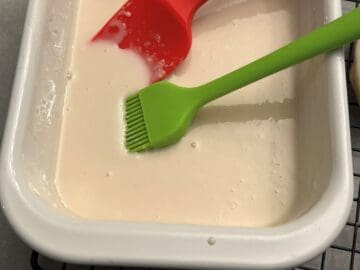
- Divide the glaze into 2 bowls, with about ¼ of the glaze in one bowl and ¾ of the glaze in the other.
- To make the light pink glaze, add a very small amount of liquid pink food coloring to the bowl with ¾ of the glaze. Carefully mix until completely incorporated. Be careful to just add a small amount of coloring. If you are using gel, just put a tiny amount on the tip of a toothpick to add to the glaze.
- To the bowl with ¼ of the glaze, add a little more pink food coloring or gel and mix completely to make a bright pink glaze.
- Cover both bowls with moistened paper towels to prevent the icing from crusting.
- Glaze half of the hearts bright pink and half light pink, as well as the scalloped edge square and Eiffel Tower in light pink. Place one cookie face down in the glaze and dip it. Then, lift it out of the glaze, let the glaze run off of the cookie and place it on a rack to allow the excess glaze to run off. Alternatively, use a pastry brush to brush the glaze onto the cookies.
- Pop any bubbles with a toothpick. Repeat the glazing step with all of the cookies.
- Allow the icing glaze to dry at room temperature until set, at least a few hours.
- If you want to allow them to dry overnight, place them in a single layer in an airtight container after the icing has partially set.
Paint with Edible Liquid Gold
- Add some edible gold dust powder to the well of a food safe paint palette.
- Use a disposable transfer pipette to place a few drops of clear alcohol, like Everclear or vodka, to the well with the gold dust.
- Mix the gold into the alcohol with a food safe paintbrush to create a gold suspension. For these cookies, I used a wide brush in order to create thick stripes on the cookies.

- Once the suspension is well mixed, allow the excess to run off of the paintbrush. Then, carefully brush wide vertical lines across the heart shaped cookies. I did 3 lines, but this will depend on the thickness of your paintbrush and the size of your cookies.
- Allow the gold to dry before adding the royal icing details or storing the cookies. The alcohol evaporates quickly.
- If storing, keep the cookies in a single layer in an airtight container. Stacking them can disrupt the design. If you must stack them, I recommend using aluminum foil between the layers.
Add Royal Icing Details
- If you use black icing powder, place some of the powder into a small bowl. Add small amounts of warm water and stir until the icing is a pipeable consistency.
- If you prefer to make black icing from white royal icing stock, add about a half cup of the base icing to a small bowl. Add small amounts of warm water to the icing to thin it slightly so it is a pipeable consistency, then add black food coloring gel to achieve a rich black color.
- Transfer the icing into a disposable piping bag fitted with a #2 or #3 tip. A tip coupler is helpful for securing the tip on the bag. It also allows you easily to switch tips if the #2 tip is too small and you want to bump it up to a #3 or even a #5. Alternatively, you can cut off a very small opening in the tip of a disposable piping bag. Start with a small opening because you can always cut a little more to make the opening larger if it is too small.

- For the "ooh la la" cookies, use the light pink, square, scalloped edge cookies. Pipe the words in cursive, extending the first and last letters to the edges of the cookies. Pipe polka dots in two rows at the bottom of the cookie.
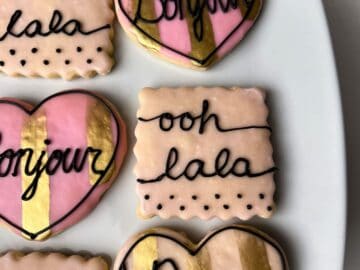
- For half of the heart shaped cookies, pipe an outline of the heart. Then, write the word, "Bonjour" in cursive, connecting the first and last letters to the outline.
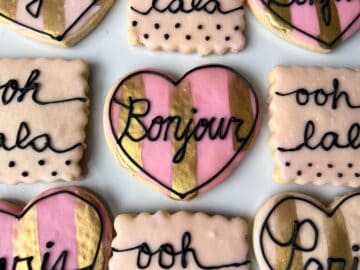
- For the other half of the heart shaped cookies, repeat this process with the outline but pipe the word "Paris" inside.
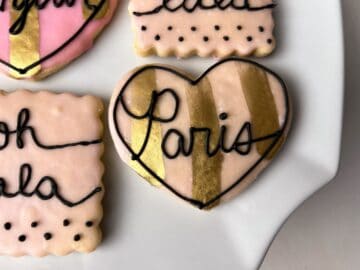
- To pipe the details on the Eiffel Tower cookies, first pipe the circle at the top of the tower with a small line on top and thin oval shapes for the first and second platforms.
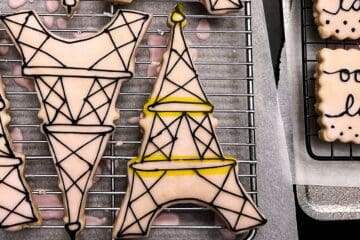
- Next, pipe lines to connect each side of the top platform to the circle on top, 4 lines to connect the two platforms, and the outline of the bottom of the tower.
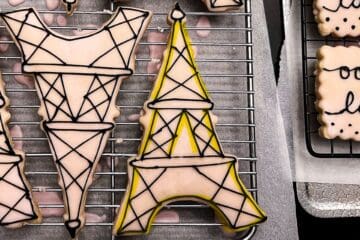
- Last, pipe two X's in the top section, two X's in each section between the top and bottom platforms, and two X's on each side of the area below the bottom platform.
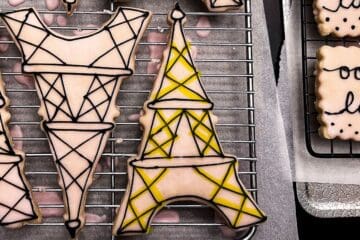
- Repeat the piping on all of the Eiffel Tower cookies. Set the cookie aside on a baking rack to allow the icing to dry.
Leave a Reply