
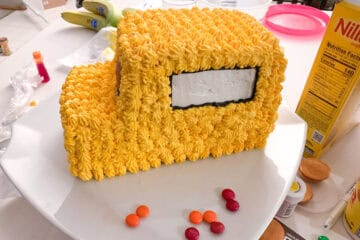
A School Bus Cake is a great way to celebrate the start of a new school year! This is the perfect after school snack on the first day of school!
Years ago when I was in a mom's group, a friend mentioned that she makes a School Bus Cake for her children on the first day of school each year. I thought this was the best idea and couldn't wait to make my first one when my oldest started Kindergarten!
I have since made many bus cakes, each year varying things a little differently. My final bus cake was when all three of my girls were riding the bus together for the first time.
My girls looked forward to this cake each year, and it made the first day of school even more special to share this cake with them as they told me the highlights of their first day.
CHECK OUT ALL OF MY BACK TO SCHOOL TREATS HERE!
Ingredients
- 1 boxed cake mix, prepared according to package directions for a 9x13-inch cake
- 4-5 batches Easy Vanilla Buttercream
- Yellow food coloring gel, like Wilton Lemon Yellow
- Store bought black frosting
- M&M's
- Chocolate covered mini donuts, like Hostess donettes
- Nilla Wafers
- Mini Nilla Wafers
- Edible food coloring pens, like FooDoodlers
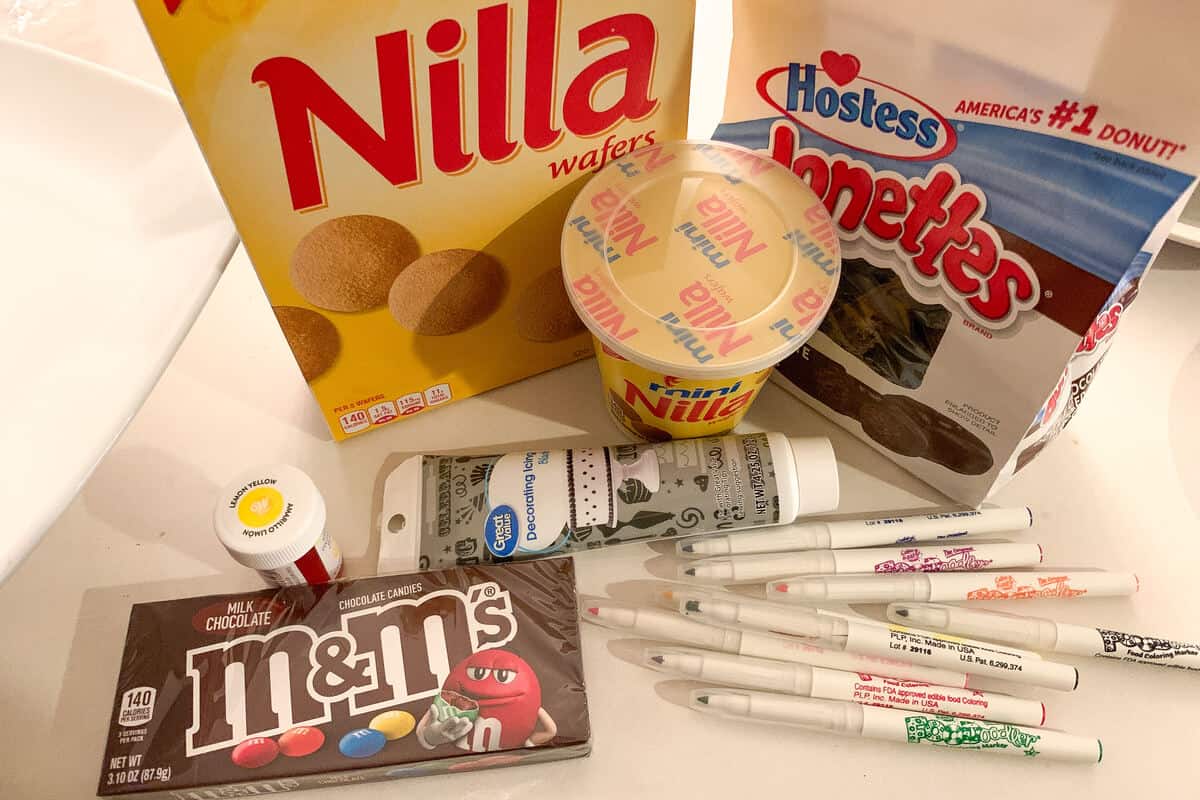
Note: I recommend getting chocolate donuts that are chocolate inside. One time I bought the chocolate coated vanilla donuts and had trouble with the chocolate coating flaking off and revealing the vanilla inside.
Materials
- Ruler
- Long serrated knife
- Large offset icing spatula
- Disposable piping bags
- Small round piping tip, such as Wilton #5
- Small star tip, like a Wilton #133 or a Wilton #21
Assemble the Cake
Before you begin, make sure you have your cake baked in a 9x13-inch pan and unmolded. I recommend using cake strips for even baking and using a baking spray like Pam for Baking so the cake comes out of the pan easily without breaking.
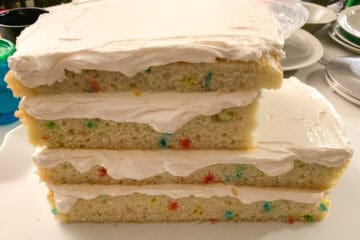
You can use any boxed cake you'd like. My girls love Funfetti cake, and I think it's a very "fun" pattern to use for a back to school cake.
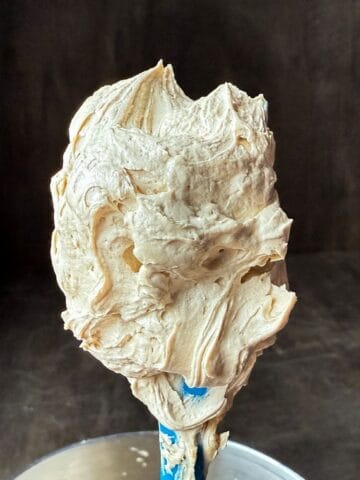
Also have your buttercream already prepared. I use Easy Vanilla Buttercream for all of my decorated cakes. It's quick to make, which is ideal if you run out and need to make an extra batch. This cake requires about 4 to 5 batches, depending on how thick you make the buttercream between the cake layers.
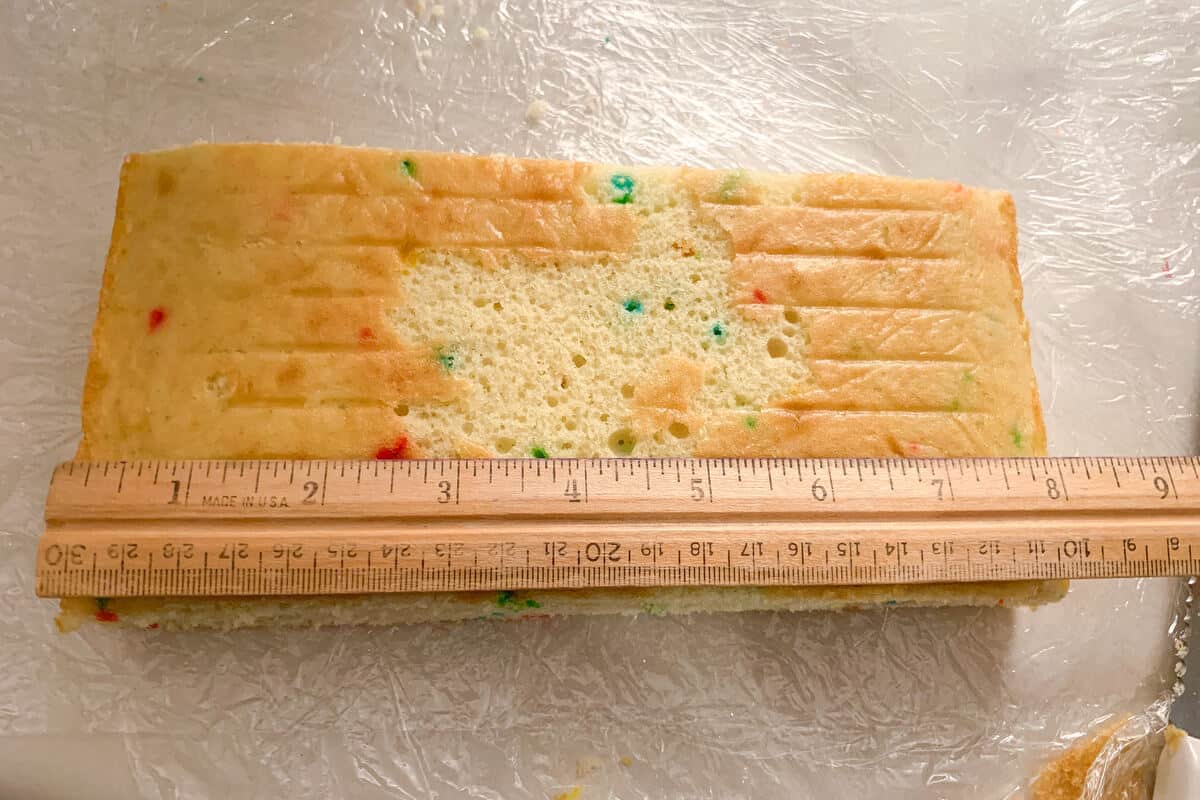
To assemble the cake, we're going to start by cutting the cake into pieces using a long serrated knife.
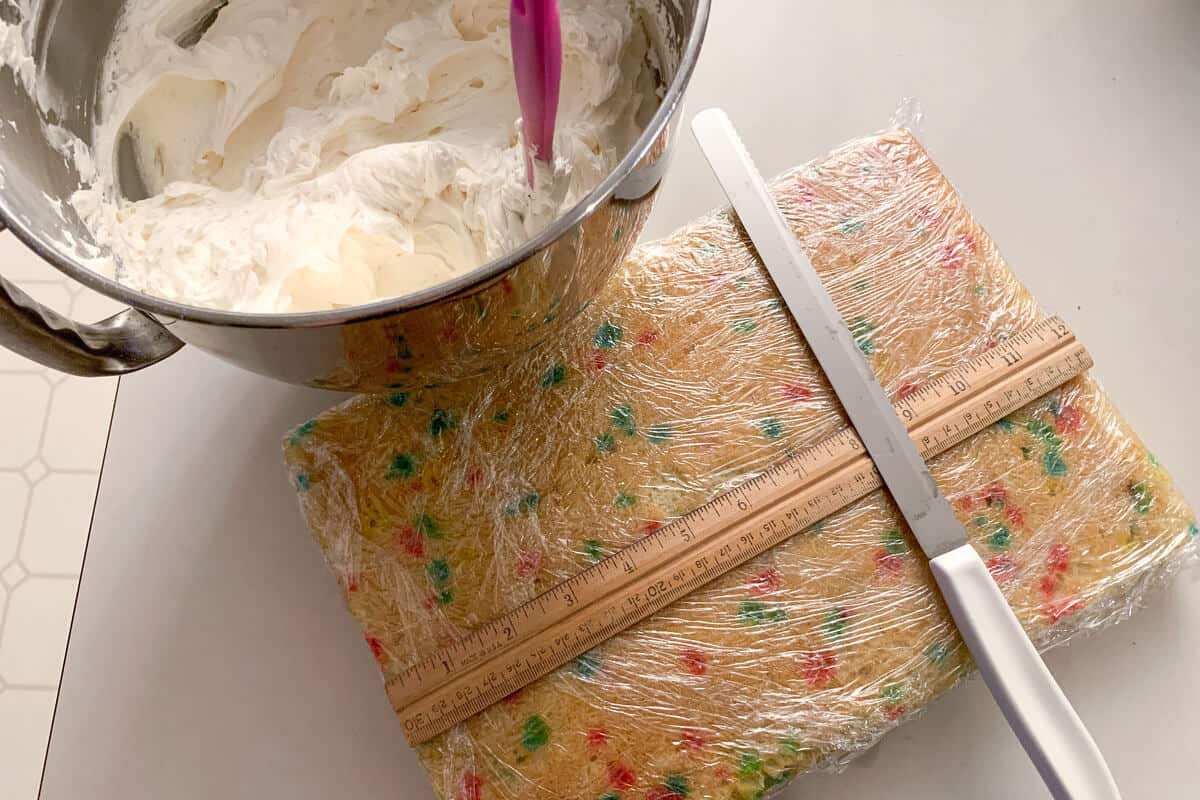
First, slice the cake into three rectangles that are about 4 inches wide and about 9 inches long (the shorter length of a 9x13-inch cake pan). This will vary depending on whether you cake shrunk a little during baking.
You want to have three equal size rectangles. If this requires a little trimming that's ok.
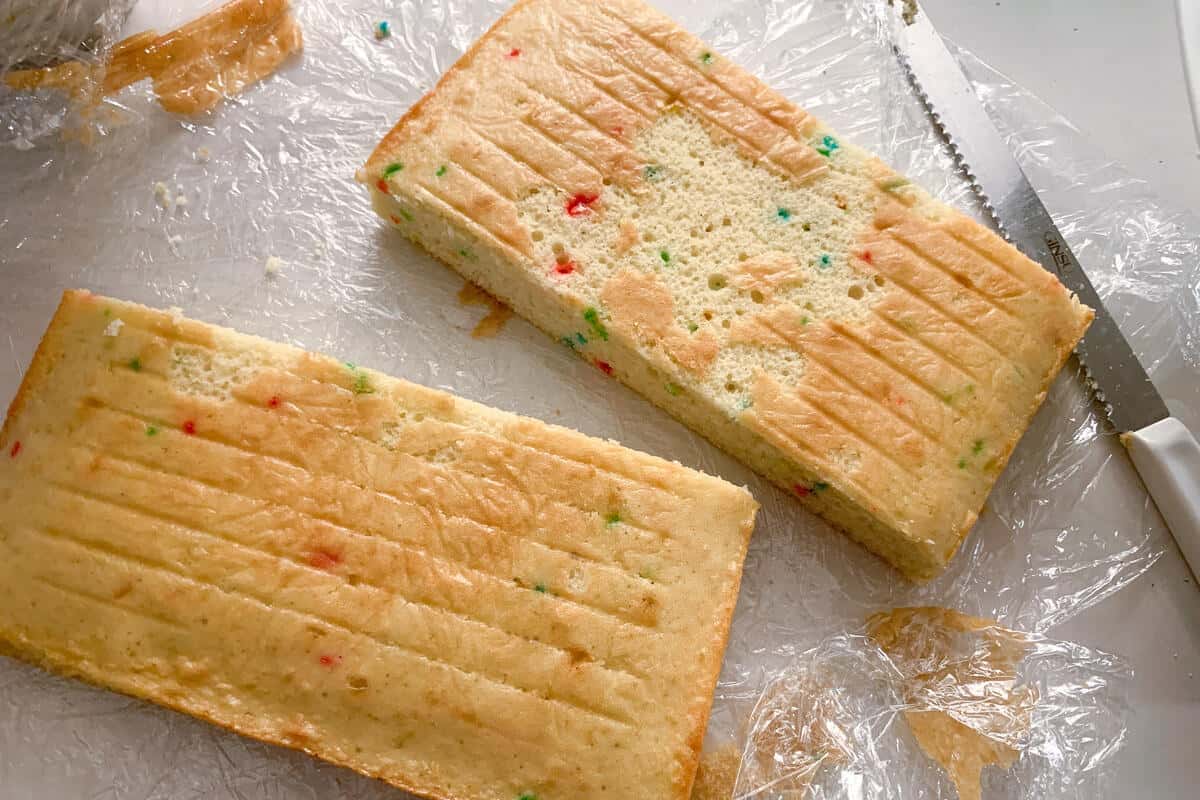
Take the center 4x9-inch rectangle and slice it into two pieces that are about ⅓ and ⅔ the length.
This will give you a pieces that roughly measure 4 inches by 5.5 inches and 4 inches by 2.5 inches.
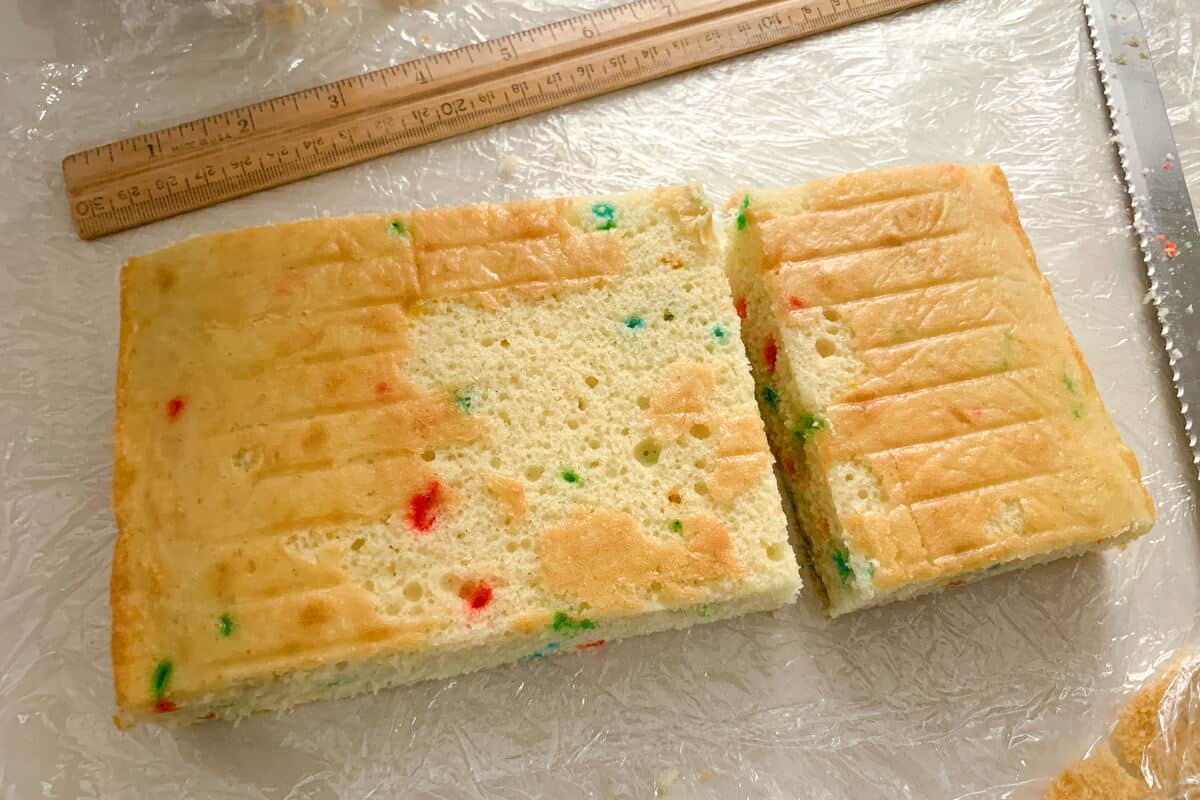
Hold the smaller piece upright and use the knife to split the piece in half so you have two thinner pieces that still measure about 4 inches by 2.5 inches.

Spread some buttercream on a cake platter and place one of the 4x9-inch rectangles on top and cover the top in a layer of buttercream.
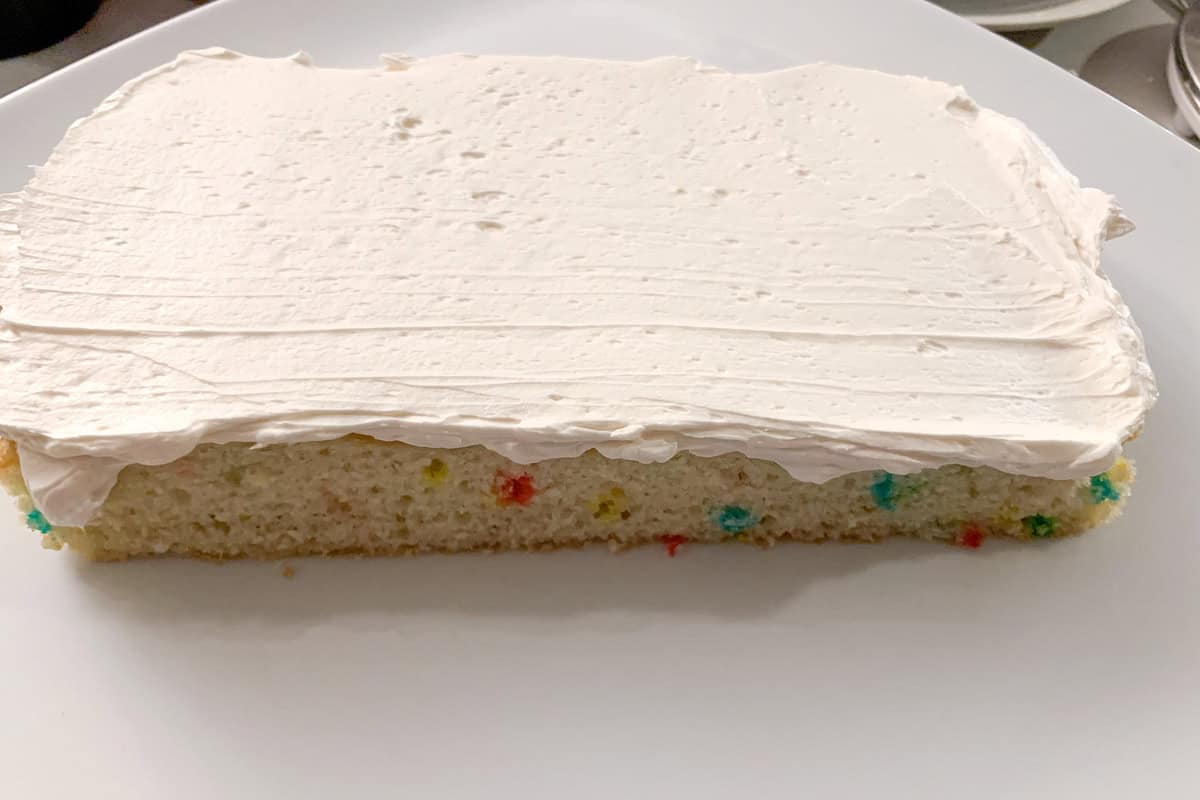
Place the second 4x9-inch layer on top and cover the top in buttercream.
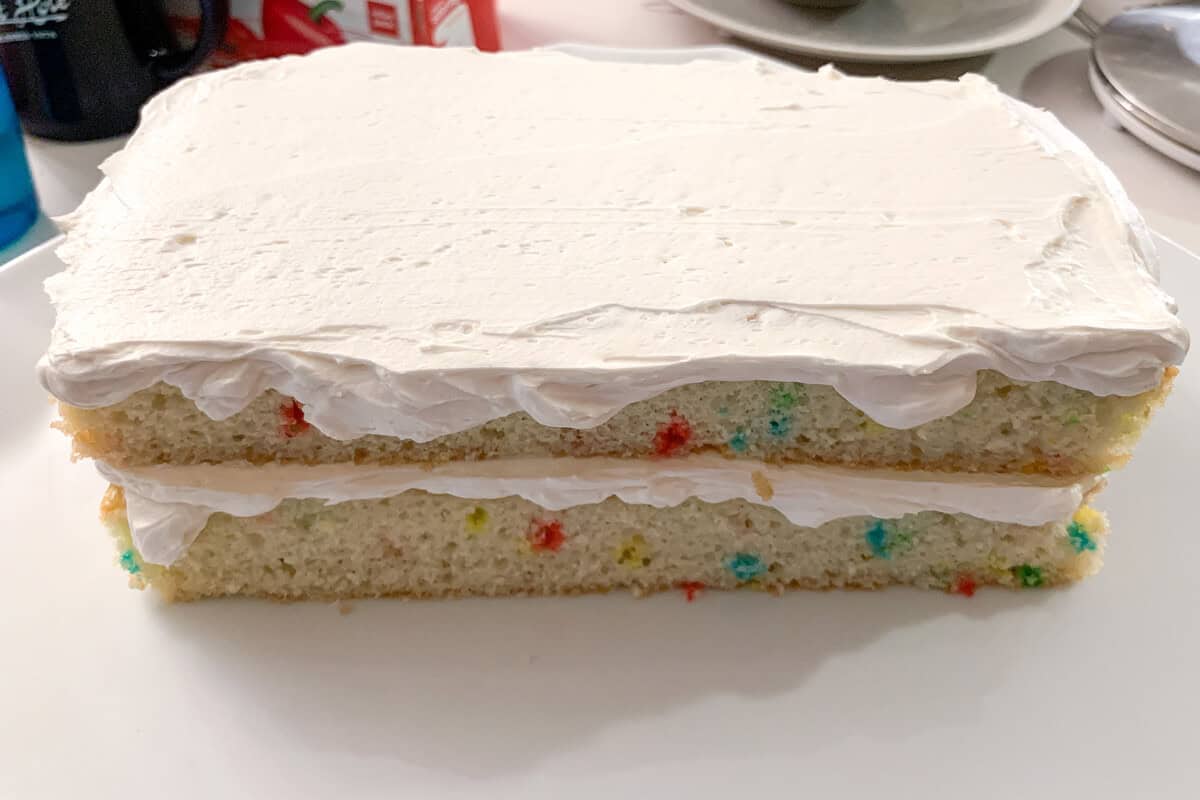
Place the 4x5.5-inch piece on top, flush on one side of the cake. Spread an even layer of buttercream on top. The add the two split 4x2.5-inch pieces to form a single thin layer. There may be a slight overhang of cake.
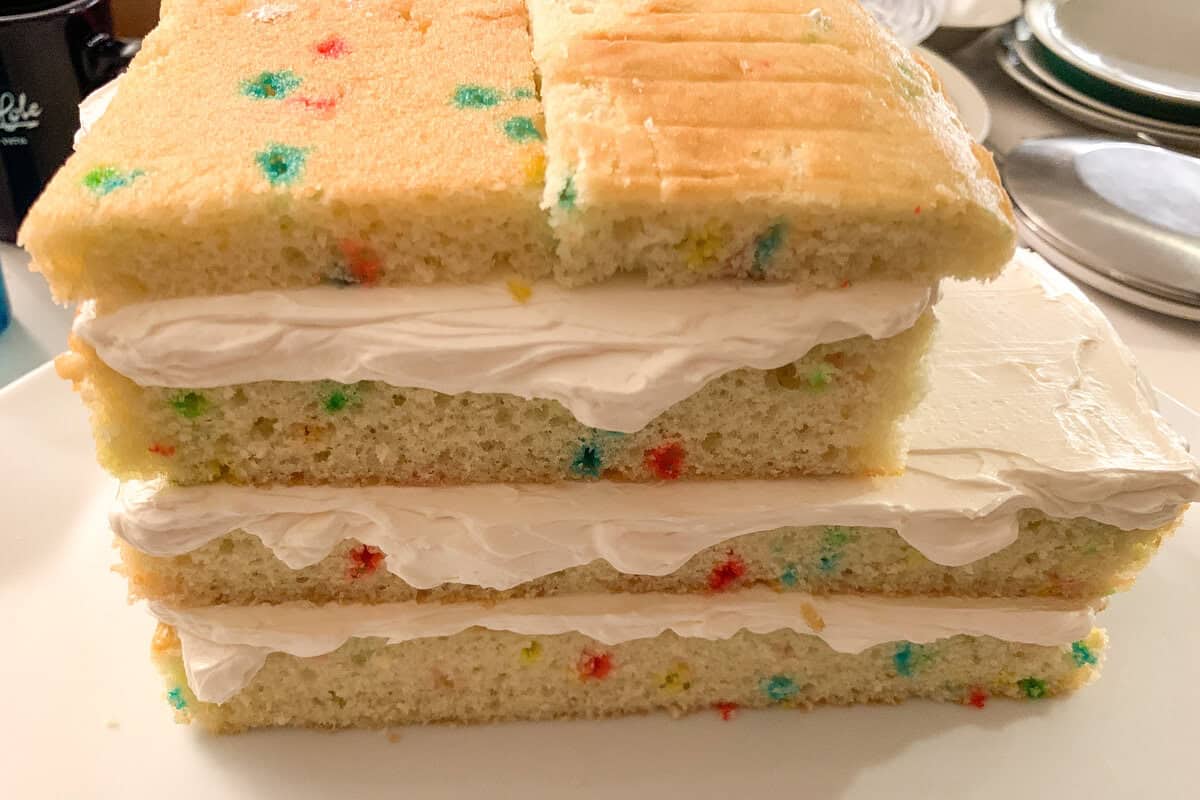
Add a layer of buttercream on top.

Then shape the cake with the knife if needed to form the shape of a bus. This may require cutting off an overhanging pieces of edges that do not line up.
Add a thick crumb coat over the entire surface of the cake with an offset icing spatula. This helps seal in the moisture.
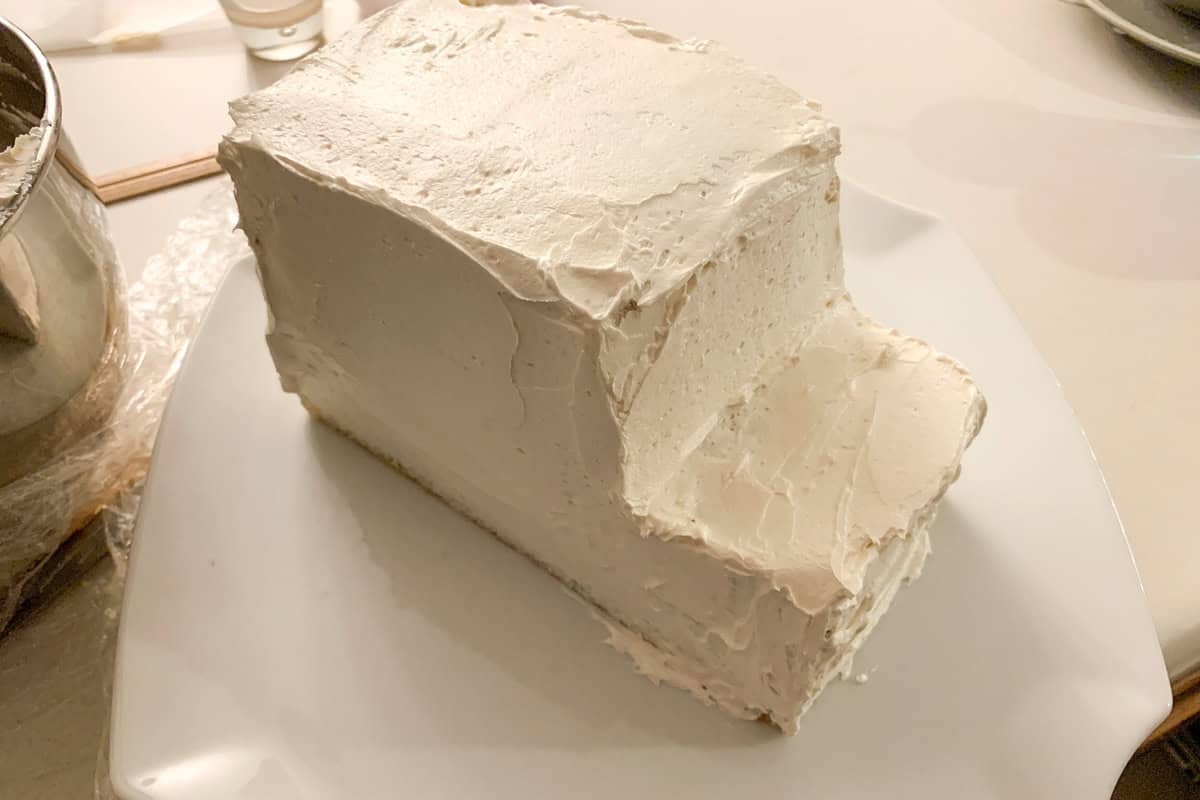
At this point you can pop in the cake in the refrigerator if you have room while you tint your buttercream and prepare the other materials for decorating.
Decorate the Cake
Tint the remaining vanilla buttercream with golden yellow food coloring gel. You want this to be a deep color like a school bus.
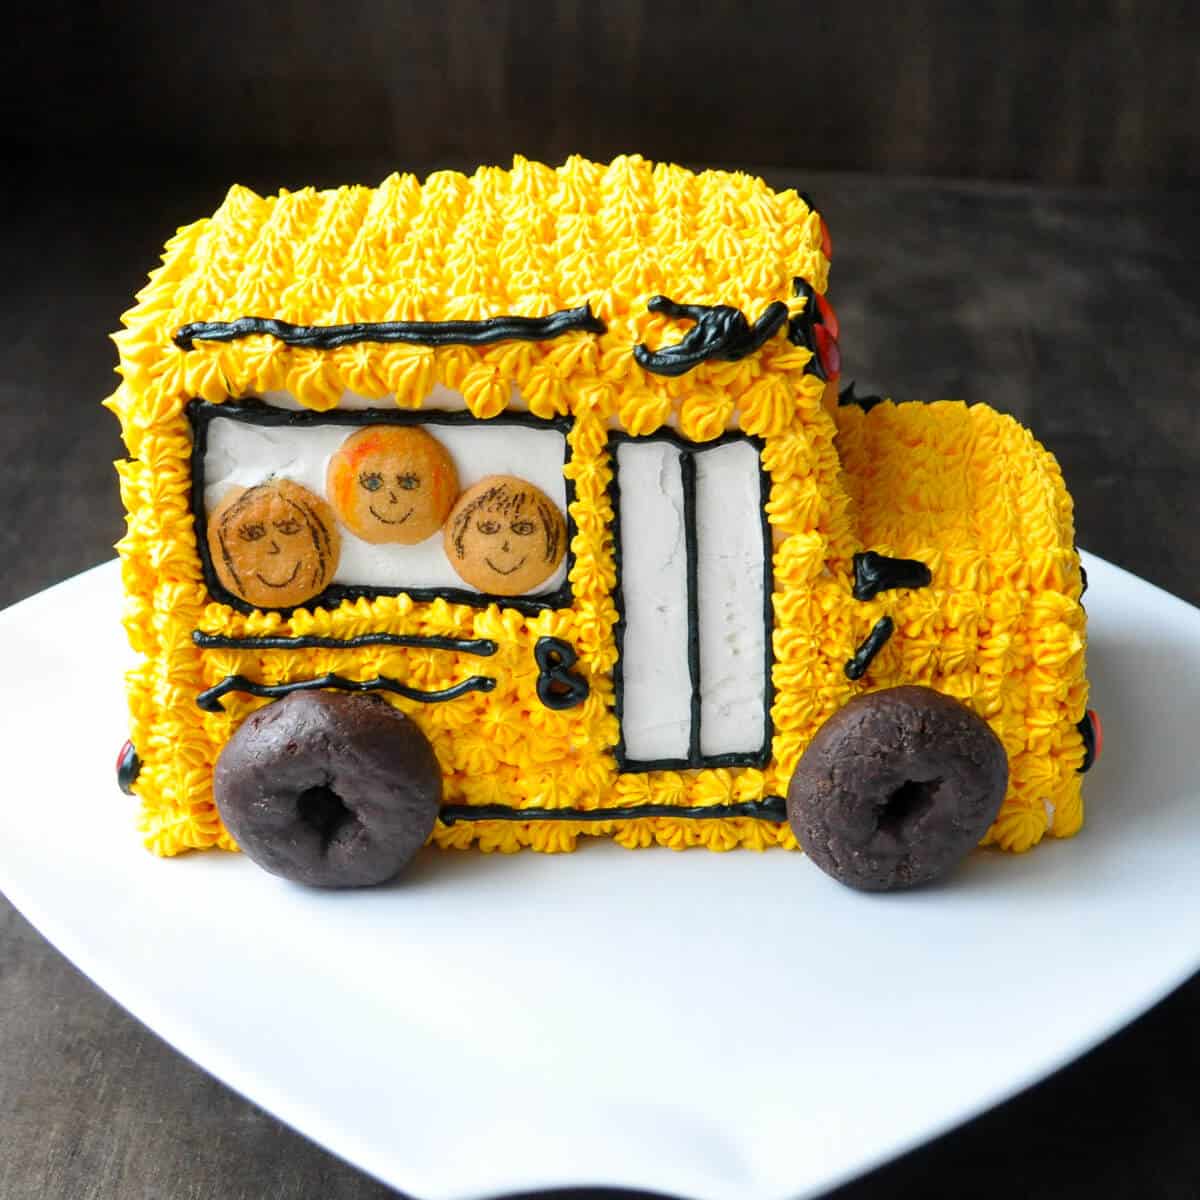
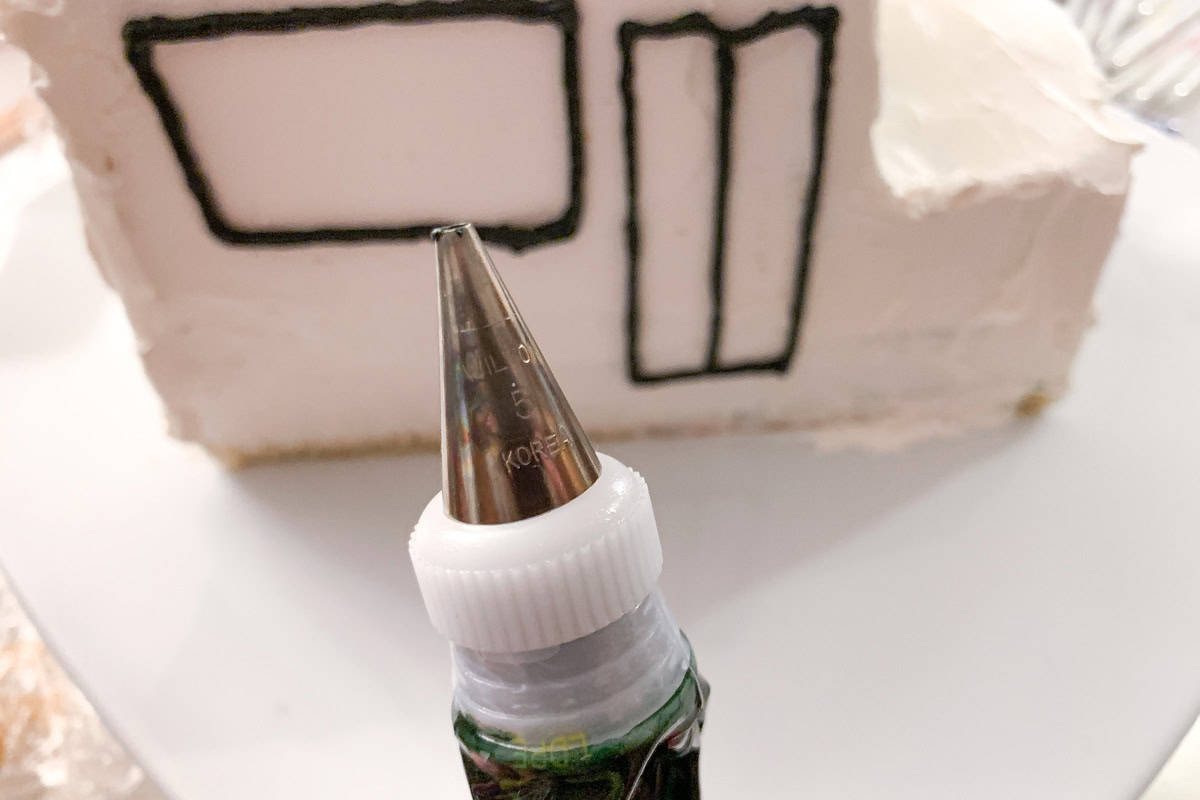
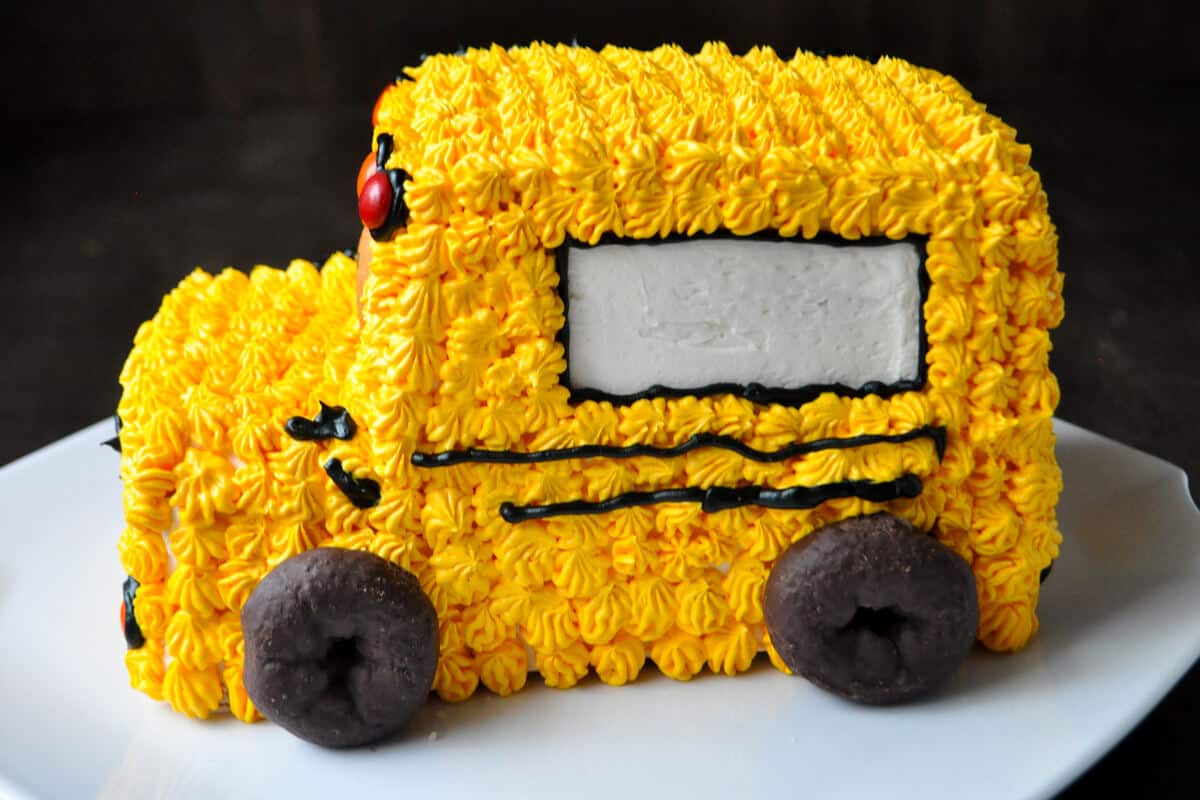
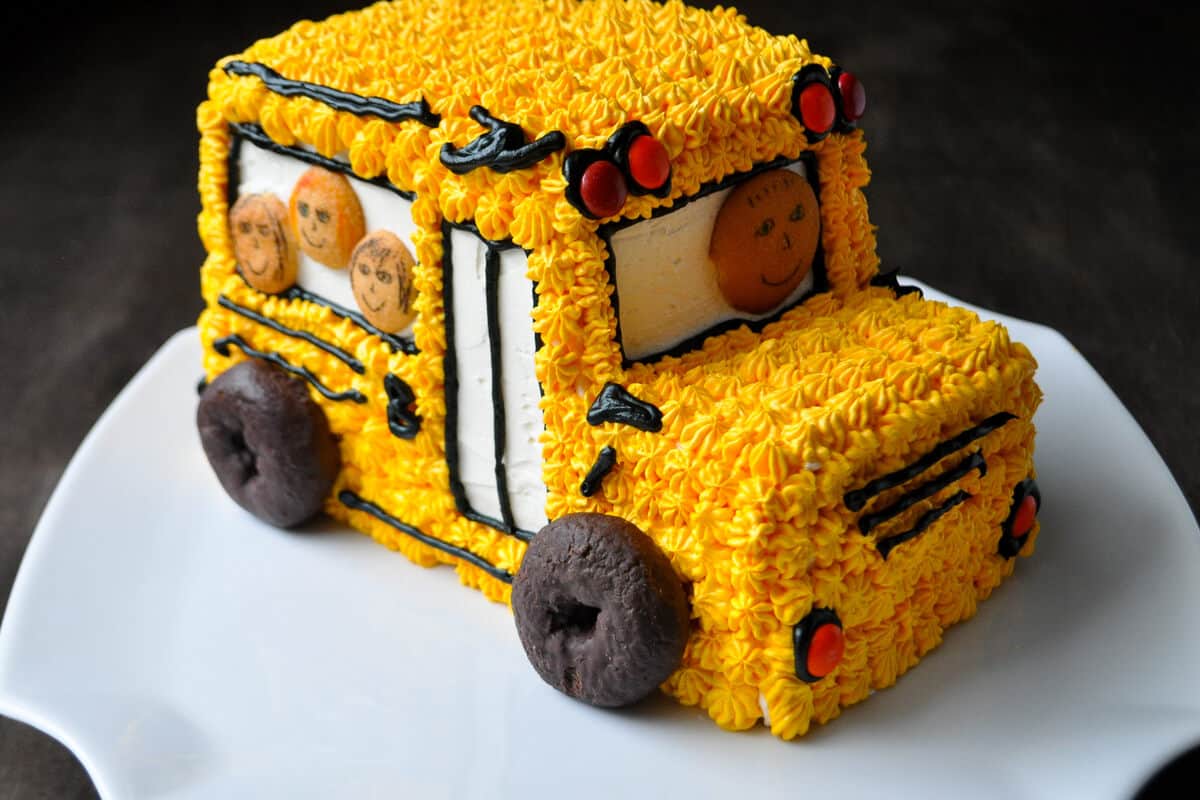
Fill a disposable piping bag fitted with a small round tip, such as Wilton #5, with black frosting. Use the black frosting to draw the windows and door on the bus. This includes the long double door near the front, a large rectangle on each side of the bus, and a large front window.
You can add a back window if you'd like.
Use food coloring pens to draw children's faces on the Mini Nilla Wafers and an adult face on a regular Nilla Wafer for the bus driver. Place those Nilla Wafers in the windows.
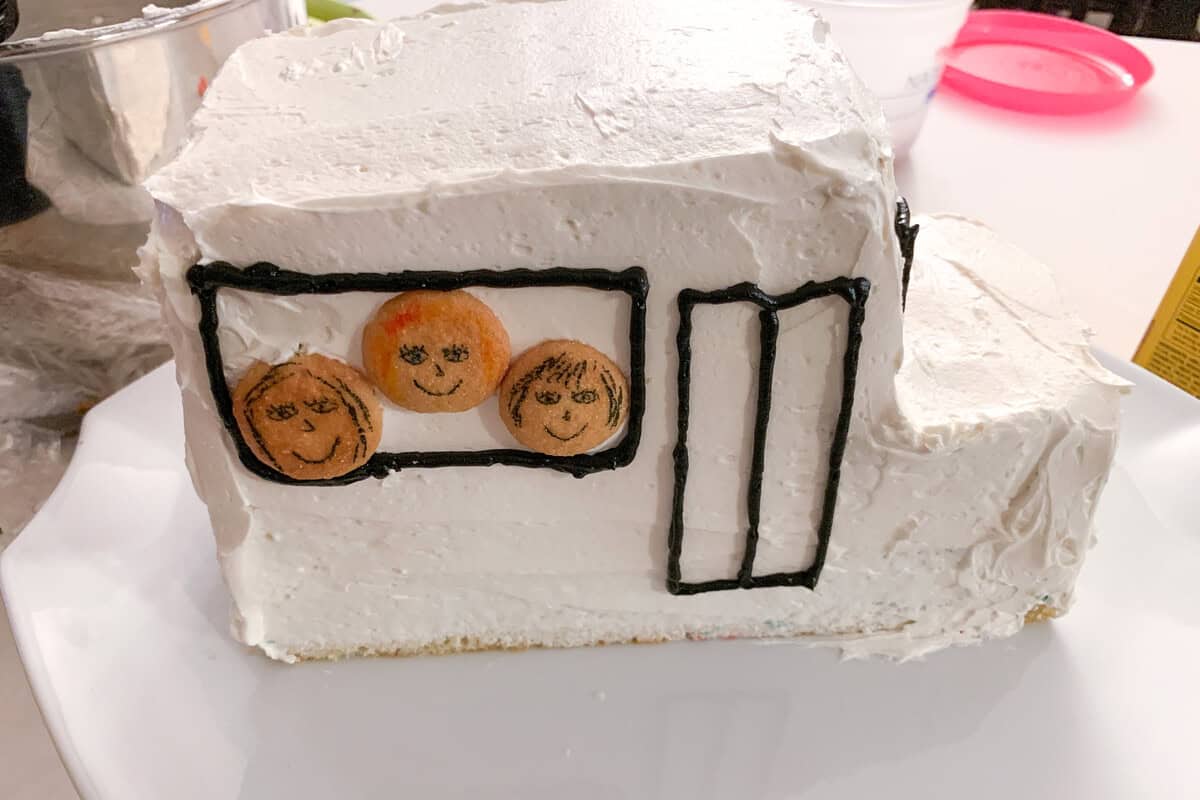
Place the yellow buttercream in a disposable piping bag fitted with a small star tip. Pipe stars all over the rest of the cake except for the windows.
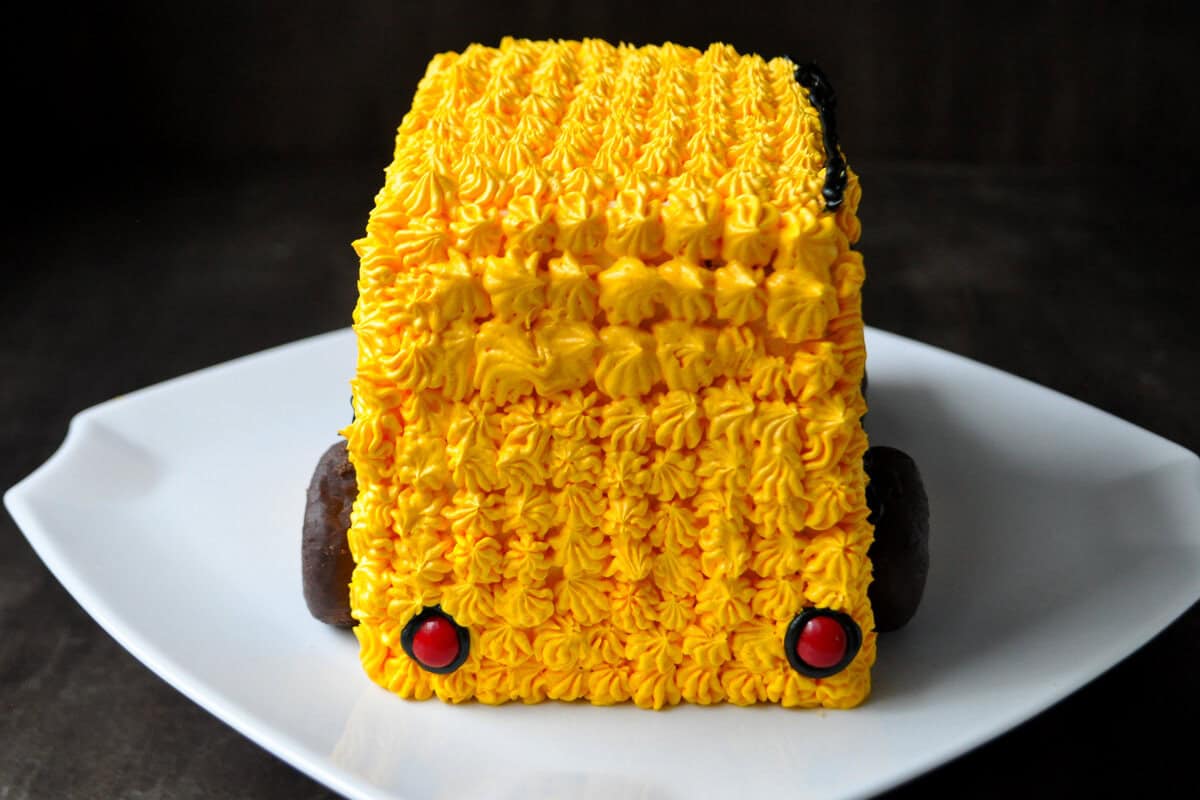
Place red and orange M&M's on the front and back of the bus to represent the lights.

Pipe black frosting around the M&M's to enhance the "lights."
Add two chocolate donuts on each side of the bus to represent the wheels.
Lastly, pipe on some black details on the sides and front of the bus, like lines underneath and above the side windows.
For a personal touch, you can add your child's bus number to the cake below the side window by the bus door.

Add some extra lines on the front of the bus to represent the grill.
Gluten Free Option
Use a gluten free cake mix or your favorite homemade gluten free cake. Use gluten free Vanilla Wafer cookies. If you're able to find mini donuts that are gluten free, you can use those, or consider using gluten free Oreos for the wheels. The vanilla buttercream is naturally gluten free.
📖 Recipe

School Bus Cake
Equipment
- Ruler
- Long serrated knife
- Large offset icing spatula
- disposable piping bags
- Small round piping tip, such as #5
- Small star tip
Ingredients
- 1 boxed cake mix (prepared according to package directions for a 9x13-inch cake)
- 4-5 batches Easy Vanilla Buttercream
- Yellow food coloring gel
- Store bought black frosting
- M&M's
- Chocolate covered mini donuts
- Nilla Wafers
- Mini Nilla Wafers
- Edible food coloring pens
Instructions
Assemble the Cake
- To assemble the cake, start by cutting the cake into 3 equal pieces using a long serrated knife. Each piece should measure approximately 4x9-inches.

- Take the center 4x9-inch rectangle and slice it into two pieces that are about ⅓ and ⅔ the length. This will give you a pieces that roughly measure 4 inches by 5.5 inches and 4 inches by 2.5 inches.

- Hold the smaller piece upright and use the knife to split the piece in half so you have two thinner pieces that still measure about 4 inches by 2.5 inches.

- Spread some buttercream on a cake platter and place one of the 4x9-inch rectangles on top and cover the top in a layer of buttercream.

- Place the second 4x9-inch layer on top and cover the top in buttercream.

- Place the 4x5.5-inch piece on top, flush on one side of the cake. Spread an even layer of buttercream on top. The add the two split 4x2.5-inch pieces to form a single thin layer. There may be a slight overhang of cake.

- Add a layer of buttercream on top.
- Shape the cake with the knife if needed to form the shape of a bus. This may require cutting off an overhanging pieces of edges that do not line up.
- Add a thick crumb coat over the entire surface of the cake with an offset icing spatula. This helps seal in the moisture.

- At this point you can pop in the cake in the refrigerator if you have room while you tint your buttercream and prepare the other materials for decorating.
Decorate the Cake
- Tint the remaining vanilla buttercream with golden yellow food coloring gel to achieve a deep color like a school bus.
- Fill a disposable piping bag fitted with a small round tip, such as Wilton #5, with black frosting. Use the black frosting to draw the windows and door on the bus. This includes the long double door near the front, a large rectangle on each side of the bus, and a large front window. Add a back window, if desired.

- Use food coloring pens to draw children's faces on the Mini Nilla Wafers and an adult face on a regular Nilla Wafer for the bus driver. Place those Nilla Wafers in the windows.

- Place the yellow buttercream in a disposable piping bag fitted with a small star tip. Pipe stars all over the rest of the cake except for the windows.
- Place red and orange M&M's on the front and back of the bus to represent the lights. Pipe black frosting around the M&M's to enhance the "lights."

- Add two chocolate donuts on each side of the bus to represent the wheels.

- Lastly, pipe on some black details on the sides and front of the bus, like lines underneath and above the side windows. Add some extra lines on the front of the bus to represent the grill. For a personal touch, you can add your child's bus number to the cake below the side window by the bus door.


T says
Recommending to remove gluten donuts off a gluten-free cake before serving is not appropriate as it creates cross-contamination for those with a major gluten intolerance. This is unacceptable and unsafe.
If you’re making this gluten free and can’t find gluten free donuts, gluten free Oreos exist and could do well as an alternative for wheels.
Meghan says
I agree, for someone with a severe gluten intolerance this would not be the best approach. I will add your suggestion of the GF Oreos to the post-thank you! I have a nut allergy, so I'm sympathetic to those with food allergies and sensitivities and would never want anyone to be harmed by a dessert.