
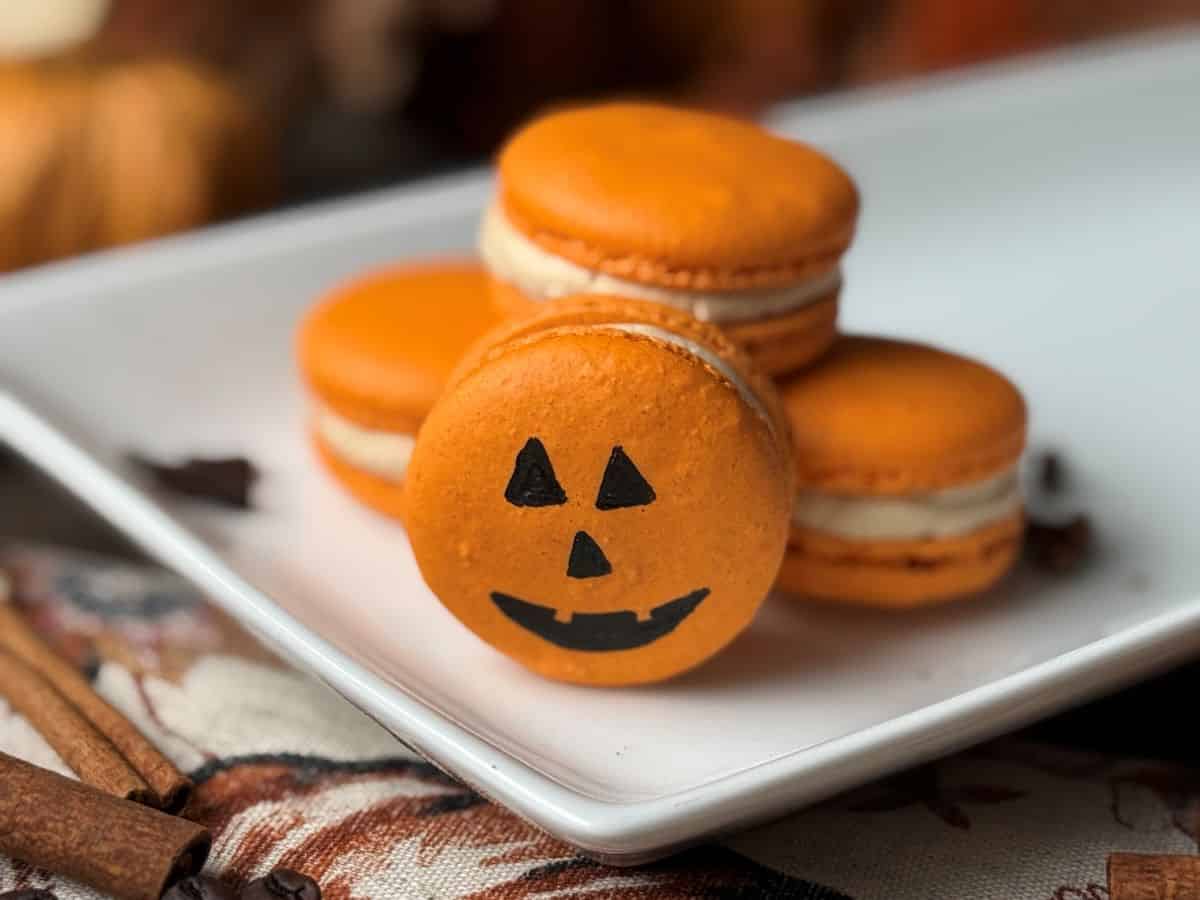
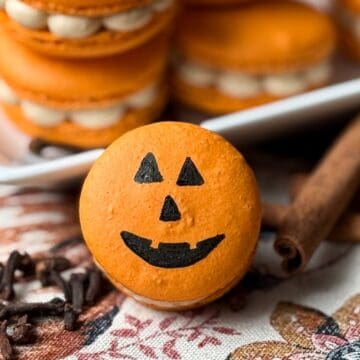
These Gluten Free and Nut Free Halloween Macarons feature Jack-O-Lantern faces painted on orange macarons shells with black food coloring gel.

After learning how to make a nut free version of French macarons, I wanted to make them for every holiday. There were so many cute ideas on Pinterest for Halloween macarons that I had trouble deciding on a design.
I was already making a batch of orange Nut Free Pumpkin Spice Latte Macarons, so I figured these would be cute with Jack-O-Lantern faces painted on them. This was reminiscent of chocolate chip Jack-O-Lantern faces on Pumpkin Pancakes.
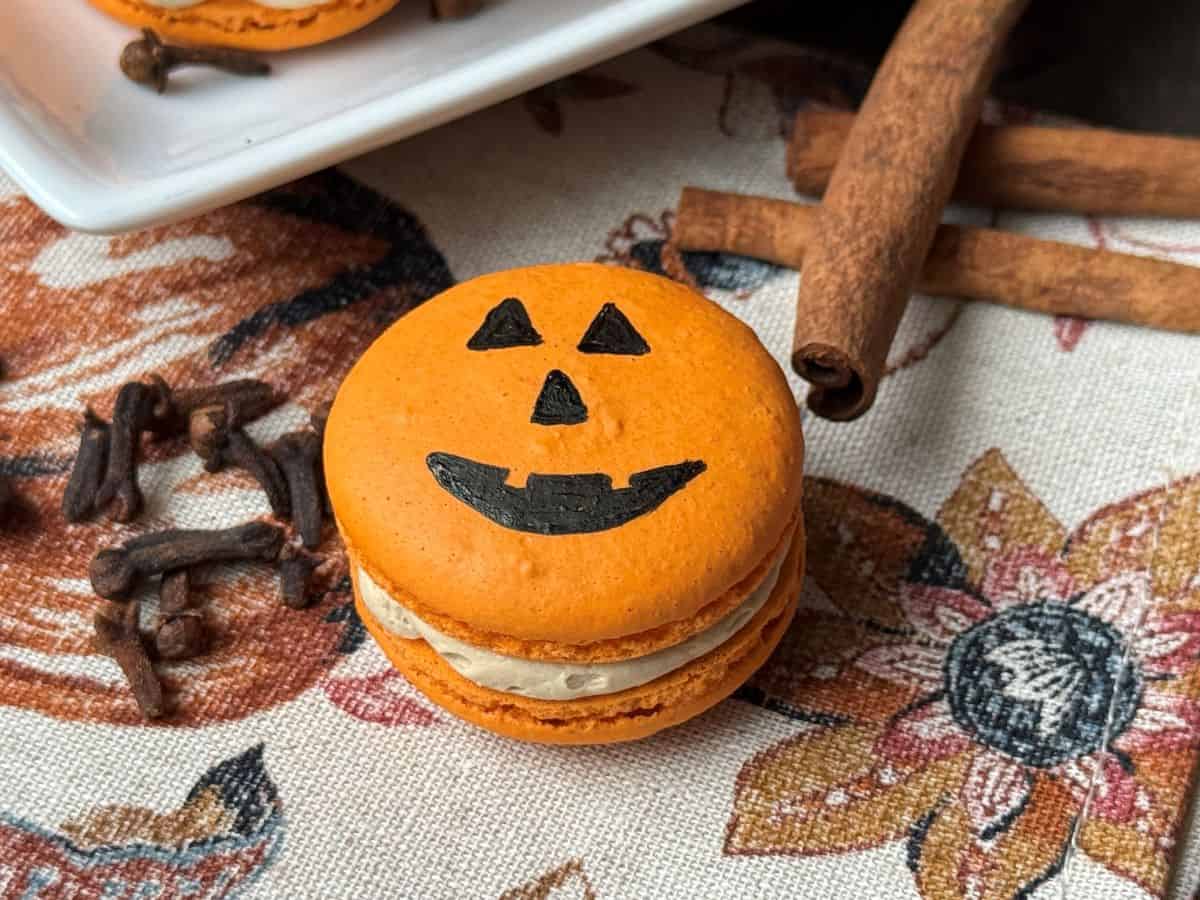
These turned out so cute! I kept the faces simple with a classic face, but you can really get creative here with the faces. This could even be a project for an older child to do. My girls love when I let them paint on cookies.
While I did these with Nut Free Pumpkin Spice Latte Macarons, you can fill them with any flavor of buttercream or fillings. For basic macarons, I use Easy Vanilla Buttercream. Easy Coffee Buttercream or Easy Chocolate Buttercream would also be delicious.
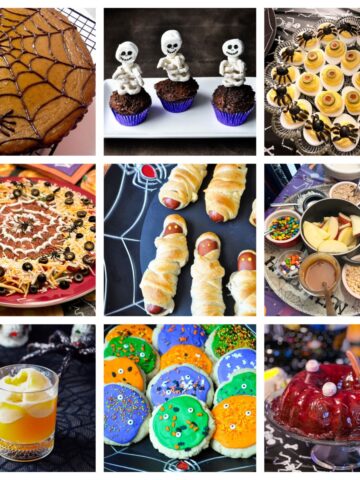
CHECK OUT ALL OF MY HALLOWEEN RECIPES HERE!
Supplies
Other than the ingredients, you will need:
- wire strainer or sifter
- wire whisk
- medium round tip like #12
- Plastic tip coupler
- Disposable piping bags
- Piping bag holders
- Digital kitchen scale
- 2 macarons mats
- 2 half sheet pans
- orange food coloring gel, such as Chefmaster
- black food coloring gel, such as AmeriColor Super Black
- food dedicated paint palette
- thin food safe paintbrush
Make the Shells
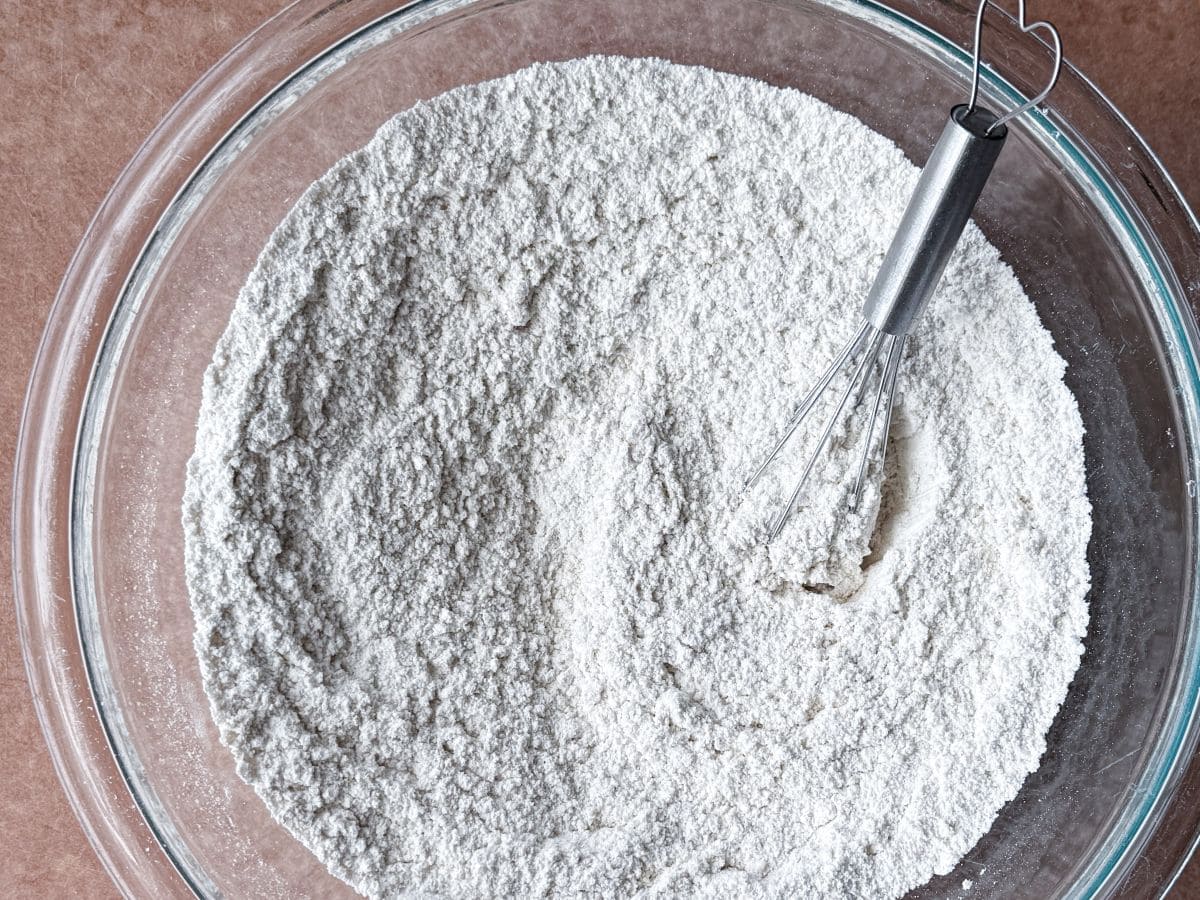
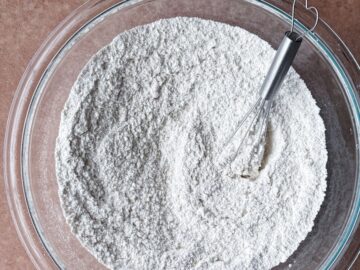
Begin by weighing the egg whites and dry ingredients on a digital kitchen scale. To make these macarons nut free, this recipe uses certified gluten free oat flour instead of the traditional almond flour that is used in classic French macarons.
Sift together the oat flour and powdered sugar.
Then, beat the egg whites on high in the bowl of a stand mixer fitted with the wire whisk attachment. Once the whites are frothy, add the cream of tartar and then slowly add the granulated sugar, one spoonful at a time.
Once the whites form soft peaks, you can add the orange food coloring gel. Keep in mind that the color will lighten as the whites continue to stiffen, but the batter will get slightly darker after the dry ingredients are incorporated.
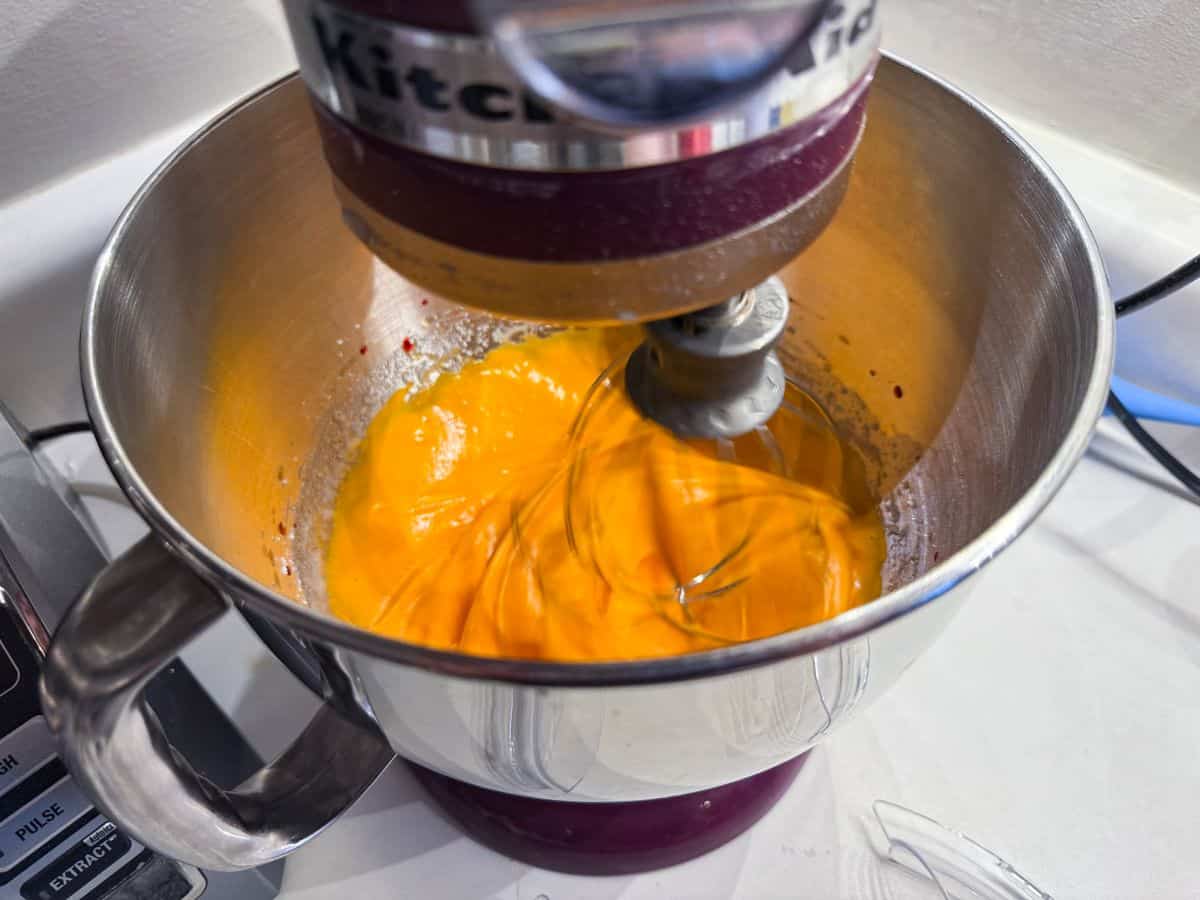
When the egg whites reach the stiff peak stage, they are ready for "macaronage," which is the process of folding the dry ingredients into the meringue.
If this is your first time making macarons, I highly recommend consulting America's Test Kitchen and Le Cordon Bleu to have visuals of what the batter should look like when it is finished. Keep in mind that these two sources use an almond flour batter, and this is an oat flour batter. With oat flour, you want to stop folding a little sooner or the batter will end up too runny.
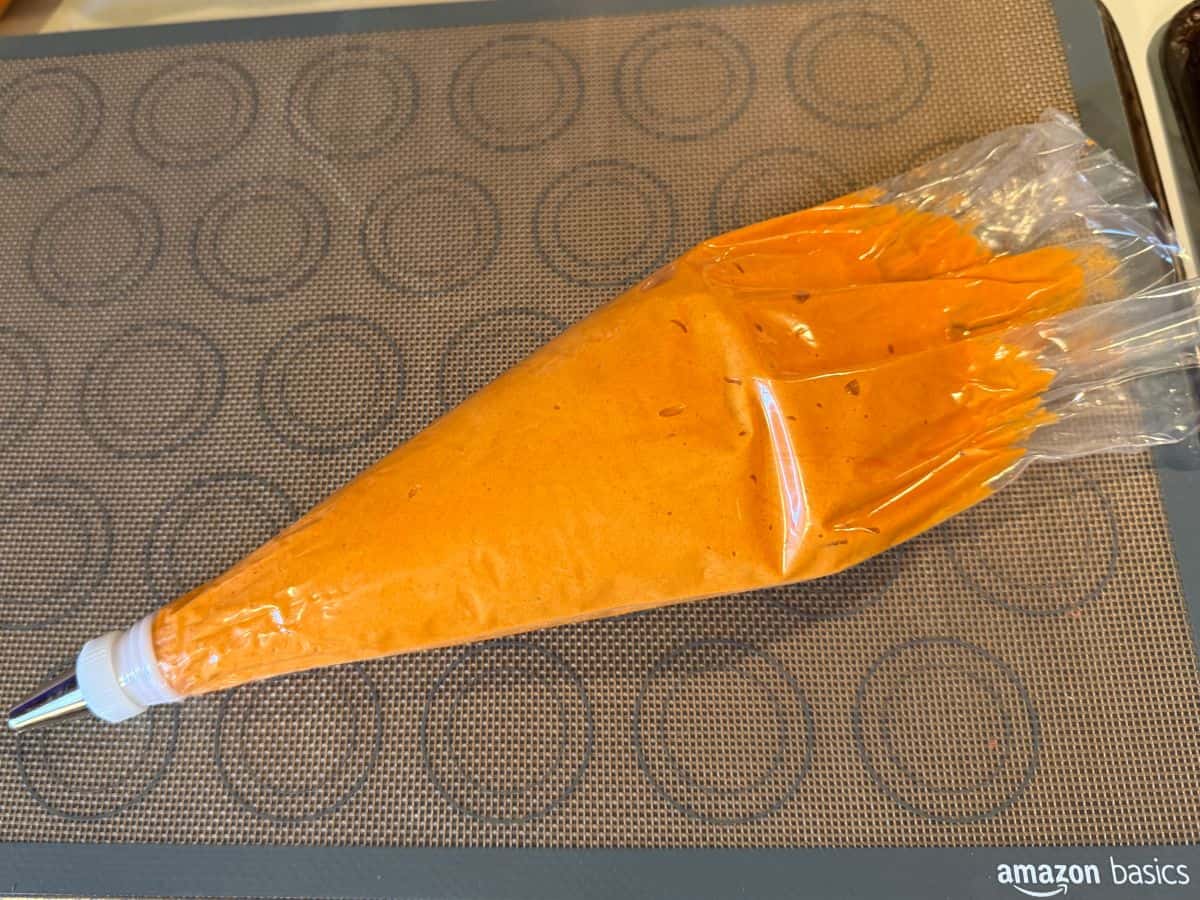
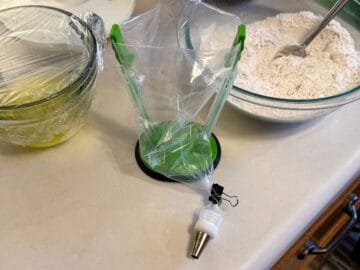
When the batter is ready, transfer it to a piping bag fitted with a medium round tip, like a #12. I use a plastic tip coupler to attach the tip and keep it secure and a piping bag holder to keep the bag upright and open. I also prefer to twist the bag above the tip and clamp it with a small binder clip to prevent the batter from flowing out before I'm ready to pipe it.
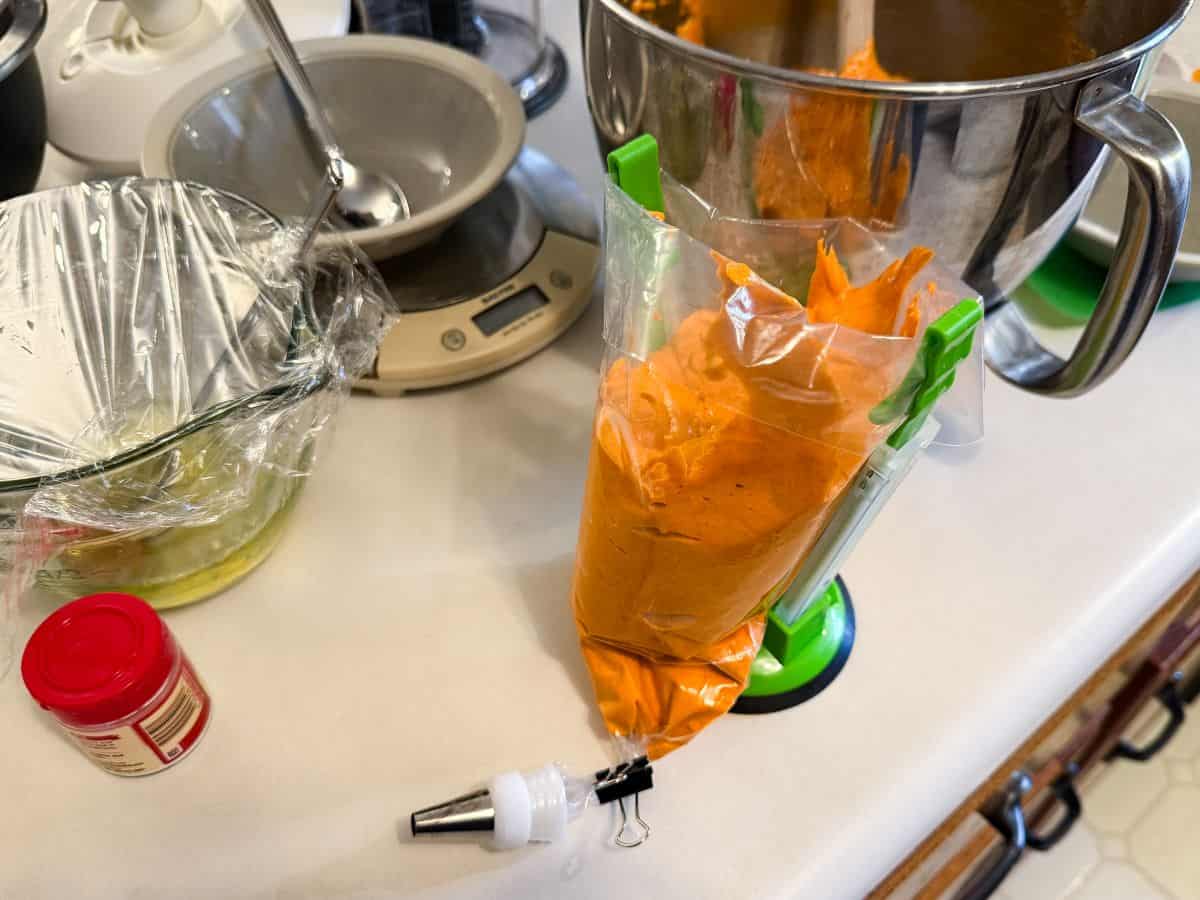
After all of the batter has been added to the bag, I remove the bag from the piping bag holder and remove the binder clip, pressing down on the batter to allow it to descend into the piping tip.
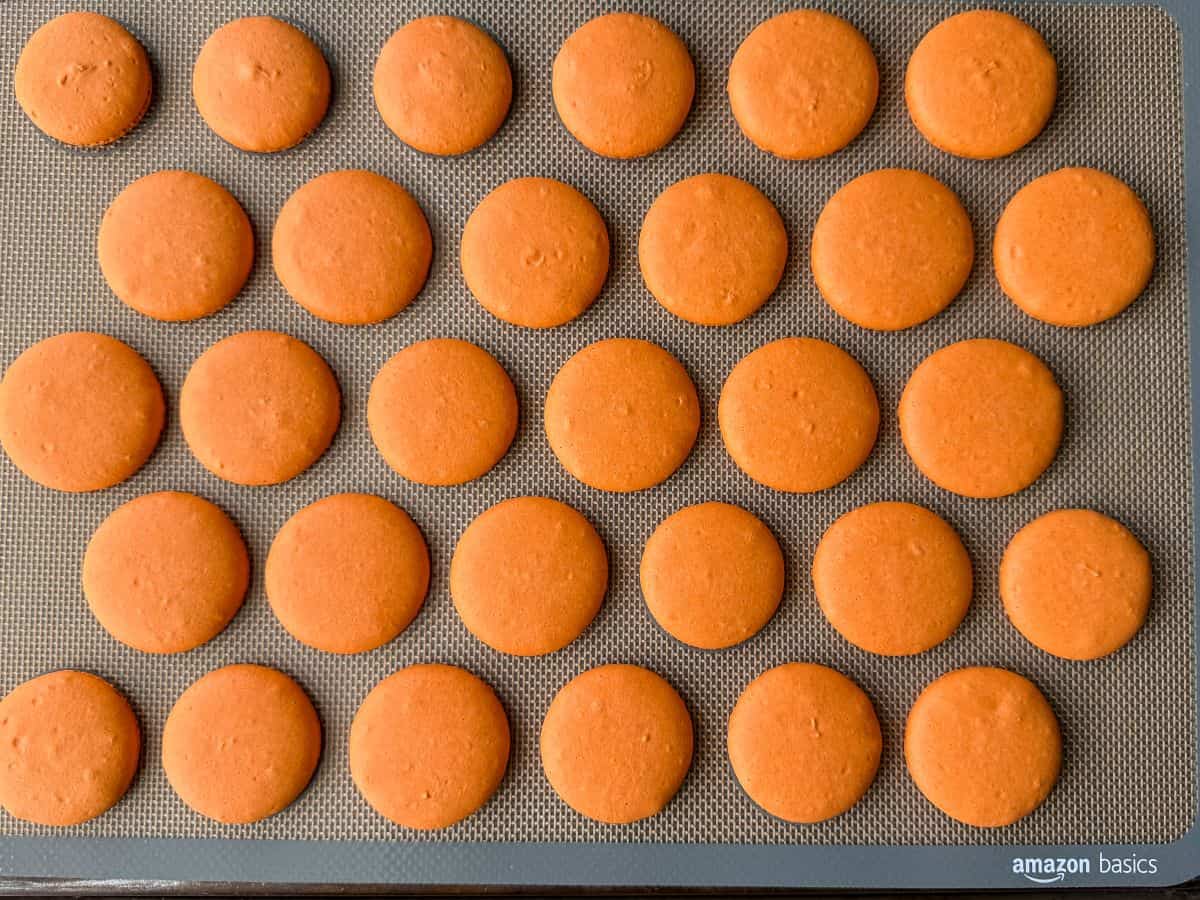
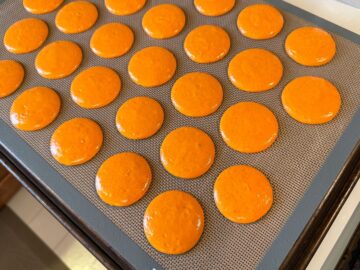
Next, I pipe circles of batter onto a macarons mat on an upside down half sheet pan. The reason I flip the sheet pan is to allow the mat to lay perfectly flat and not curve up on the edges.
After piping the first pan, I slam it down on the counter several times to allow any bubbles to rise to the surface. I pop those with a toothpick and use the toothpick to smooth the surface back over the hole created when the bubble pops.
Then, I repeat the process with the next tray. The batter needs to dry for about 40 minutes at room temperature before baking. This is a good time to preheat the oven and also prepare any fillings.

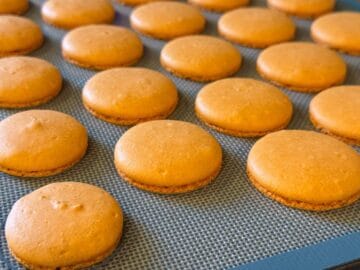
To bake the shells, I recommend baking just 1 tray at a time and rotating the tray half way through baking. Allow the shells to cool on the mat at room temperature before removing.
Fill the Macarons
Because macarons are sandwich cookies, first you want to pair up the shells to most closely match the size of the top and bottom shell. After the shells have been paired, they are ready to be assembled.
You can use the filling from the Pumpkin Spice Latte Macarons, which is an Easy Coffee Buttercream dam and spiced pumpkin puree center.

Alternatively, you can use Easy Vanilla Buttercream, Easy Coffee Buttercream, or Easy Chocolate Buttercream to cover the entire surface and skip the center filling.
Paint the Shells
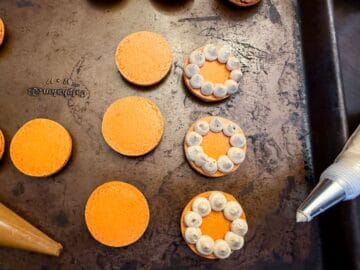
Place a drop of black food coloring gel, such as AmeriColor Super Black, into the well of a food dedicated paint palette.
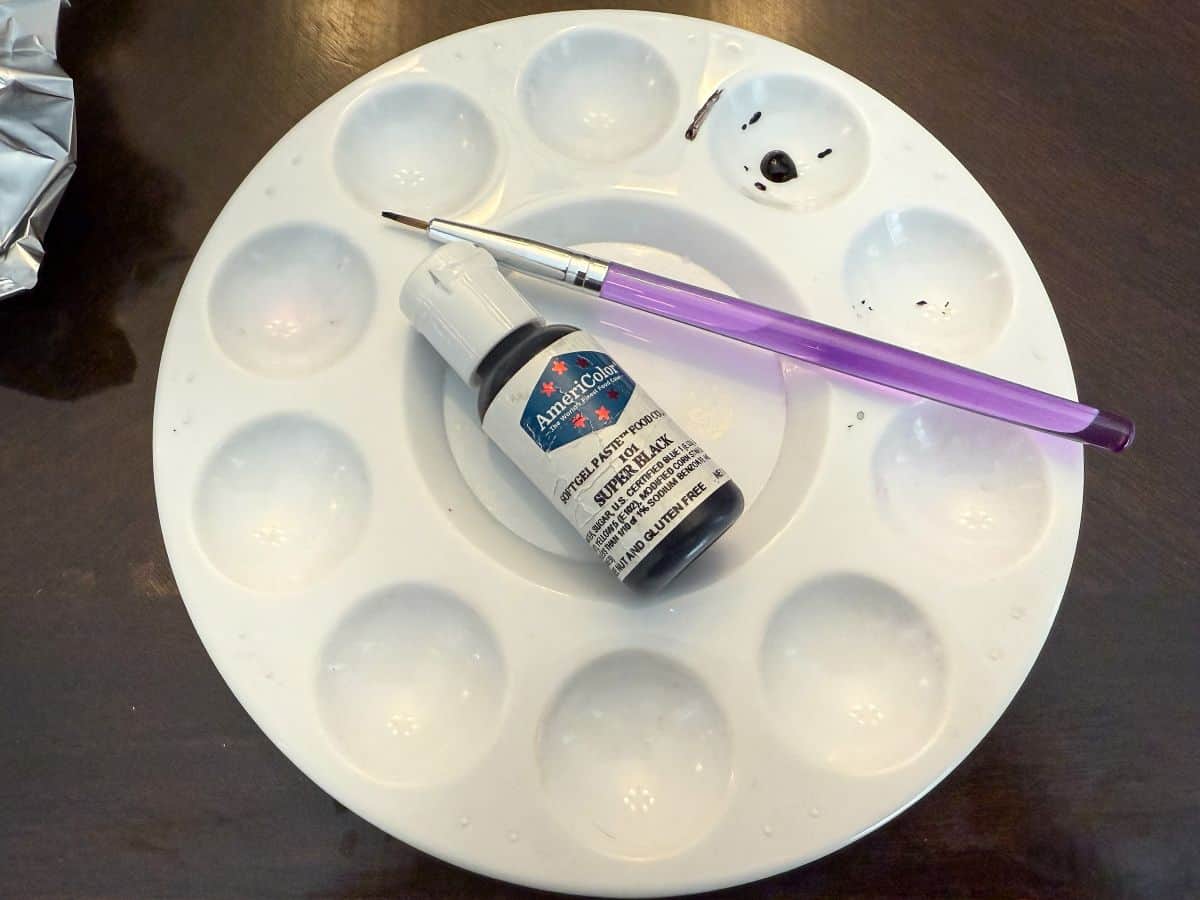
Dip a thin food safe paintbrush into the black food coloring gel and paint a Jack-O-Lantern face onto the top shell of each assembled cookie.
I find it easier to first paint the outline of the shape and then fill it in. For example, for the eye, I painted the outline of a triangle shape and then filled in the inside with more gel.
I kept the faces simple with a more classic Jack-O-Lantern look, but you can do any kind of faces that you prefer. This is a great opportunity to get creative and give some personality to the cookies.
Allow the gel to dry before storing the cookies.
Storage
Macarons should be stored in an airtight container in the refrigerator for at least 24 hours before enjoying to mature and improve in texture. I recommend storing them in a single layer to ensure that the food coloring gel does not smear or transfer.
Allow the cookies to come to room temperature before serving so the buttercream can soften.
Gluten Free Option
These cookies are naturally gluten free if you use a certified gluten free brand of oat flour. I like Bob's Red Mill brand of gluten free oat flour.
📖 Recipe
Nut Free Halloween Macarons
Equipment
- 2 macaron mats
- 2 half sheet pans
- toothpicks
- food dedicated paint palette
- food grade thin paintbrush
Ingredients
For the Macaron Shells:
- 126 grams oat flour
- 126 grams powdered sugar
- 100 grams egg whites at room temperature
- ¼ teaspoon cream of tartar
- 90 grams granulated sugar
- 1 teaspoon vanilla
- orange food coloring gel
For the Filling:
- 1 batch Easy Vanilla Buttercream (see note)
For the Decoration:
- black food coloring gel
Instructions
Prepare the Batter
- Prepare a piping bag fitted with a medium round tip, like a #12, or with the tip of the bag cut off. To make the bag easier to fill, use a bag holder. Twist the piping bag above the tip and secure with a small binder clip to prevent batter from flowing out during filling. Set aside.
- Sift together the oat flour and powdered sugar in a small bowl. Set aside.126 grams oat flour, 126 grams powdered sugar
- In the bowl of a stand mixer fitted with the whisk attachment, beat the egg whites on medium-high speed.100 grams egg whites at room temperature
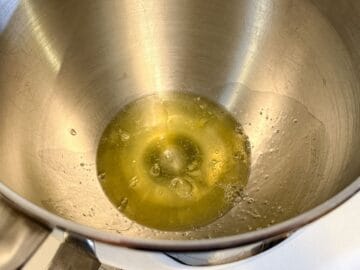
- Once the egg white are foamy, add the cream of tartar. Then, slowly add the granulated sugar, one spoonful at a time.¼ teaspoon cream of tartar, 90 grams granulated sugar
- Add the vanilla and food coloring and continue to beat until the meringue has formed stiff peaks.1 teaspoon vanilla, orange food coloring gel

- Remove the bowl from the mixer and carefully fold ⅓ of the flour mixture into the meringue. Then add the rest of the flour mixture. Continue folding and stirring until just before the figure 8 stage.
- Transfer the batter to the piping bag and pipe 1-inch circles onto the macaron mat or parchment with 1-inch circles drawn on the under side of the paper.
- Slam the tray on the counter several times to cause air bubbles to rise to the surface. Use a toothpick to pop any large bubbles and smooth batter over the hole.
- Allow the batter to sit for 40 minutes to dry at room temperature before baking. Meanwhile, preheat the oven to 300°F.
Bake the Macaron Shells
- Bake the macarons for 12-14 minutes, rotating once after 7 minutes.
- Remove the cookies from the oven and allow them to cool completely on the mat before removing.
Assemble the Macarons
- Because the macarons will be sandwiched, pair up the shells by size. You want the top and bottom of the sandwich cookie to match as closely as possible.
- Add the buttercream to a piping bag with a round or decorative tip and pipe a large mound in the center of each bottom shell.
- Carefully place the flat side of the top shell on top of the filling, pressing down slightly to adhere.
Decorate the Macarons:
- Place a drop of black food coloring gel in the well of a food dedicated paint palette.

- Place an assembled macaron in the center with the smoothest side facing up.
- Dip a thin food grade paintbrush into the black gel and paint the outline of a Jack-O-Lantern face on the macaron shell. Then, use more gel to fill in the design.
- Allow the food gel to dry before storing the cookies. Place the cookies in a single layer in an airtight container. Store in the refrigerator to mature. Allow the cookies to come to room temperature before serving.

Leave a Reply