
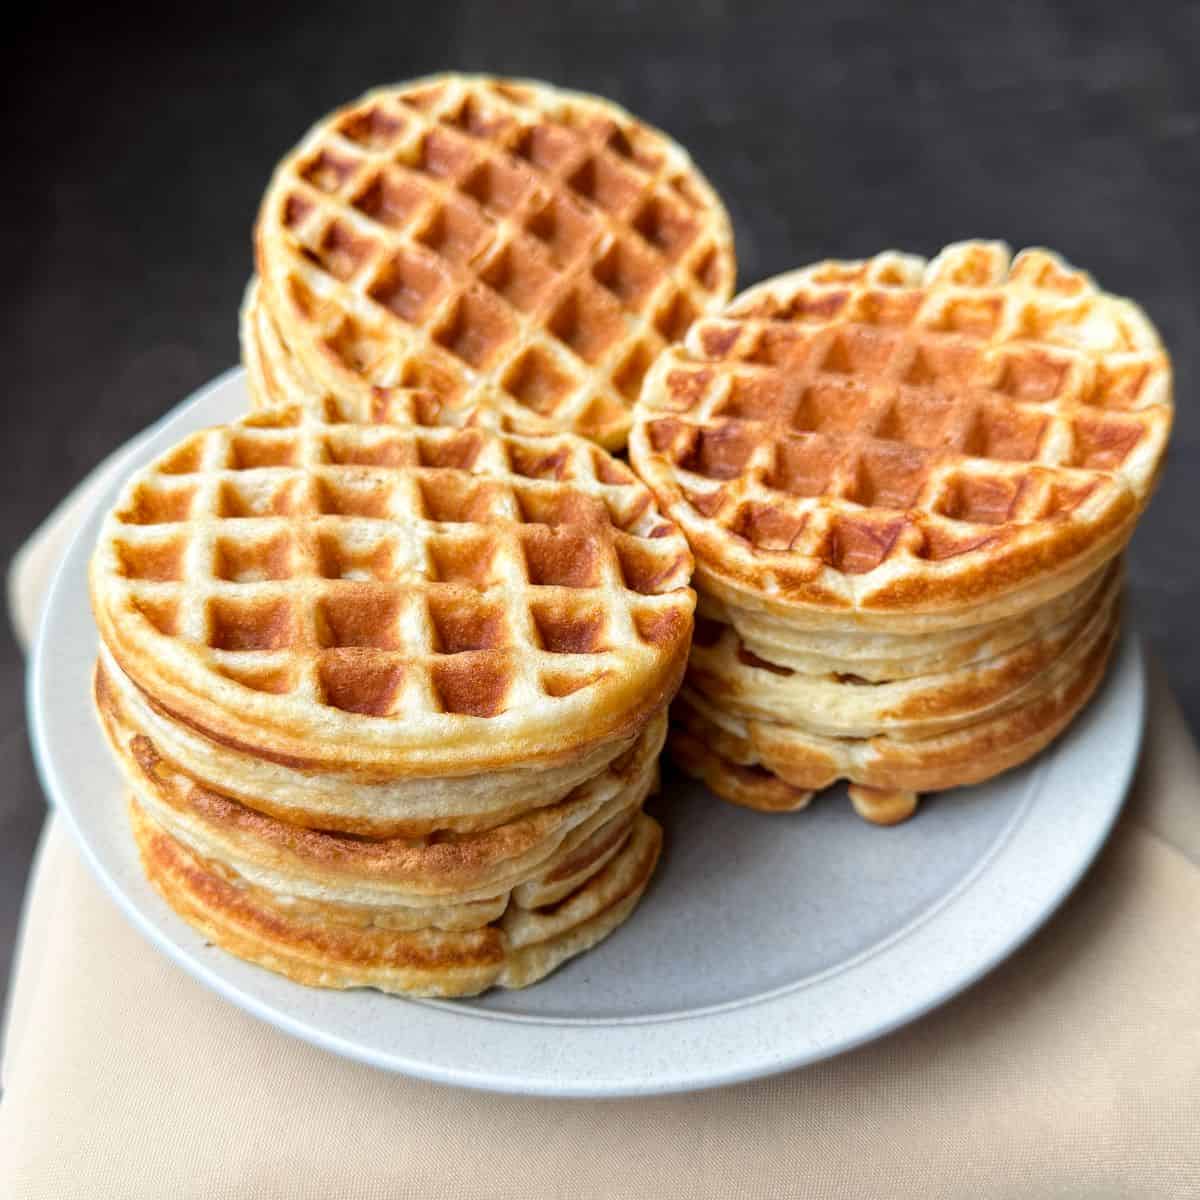
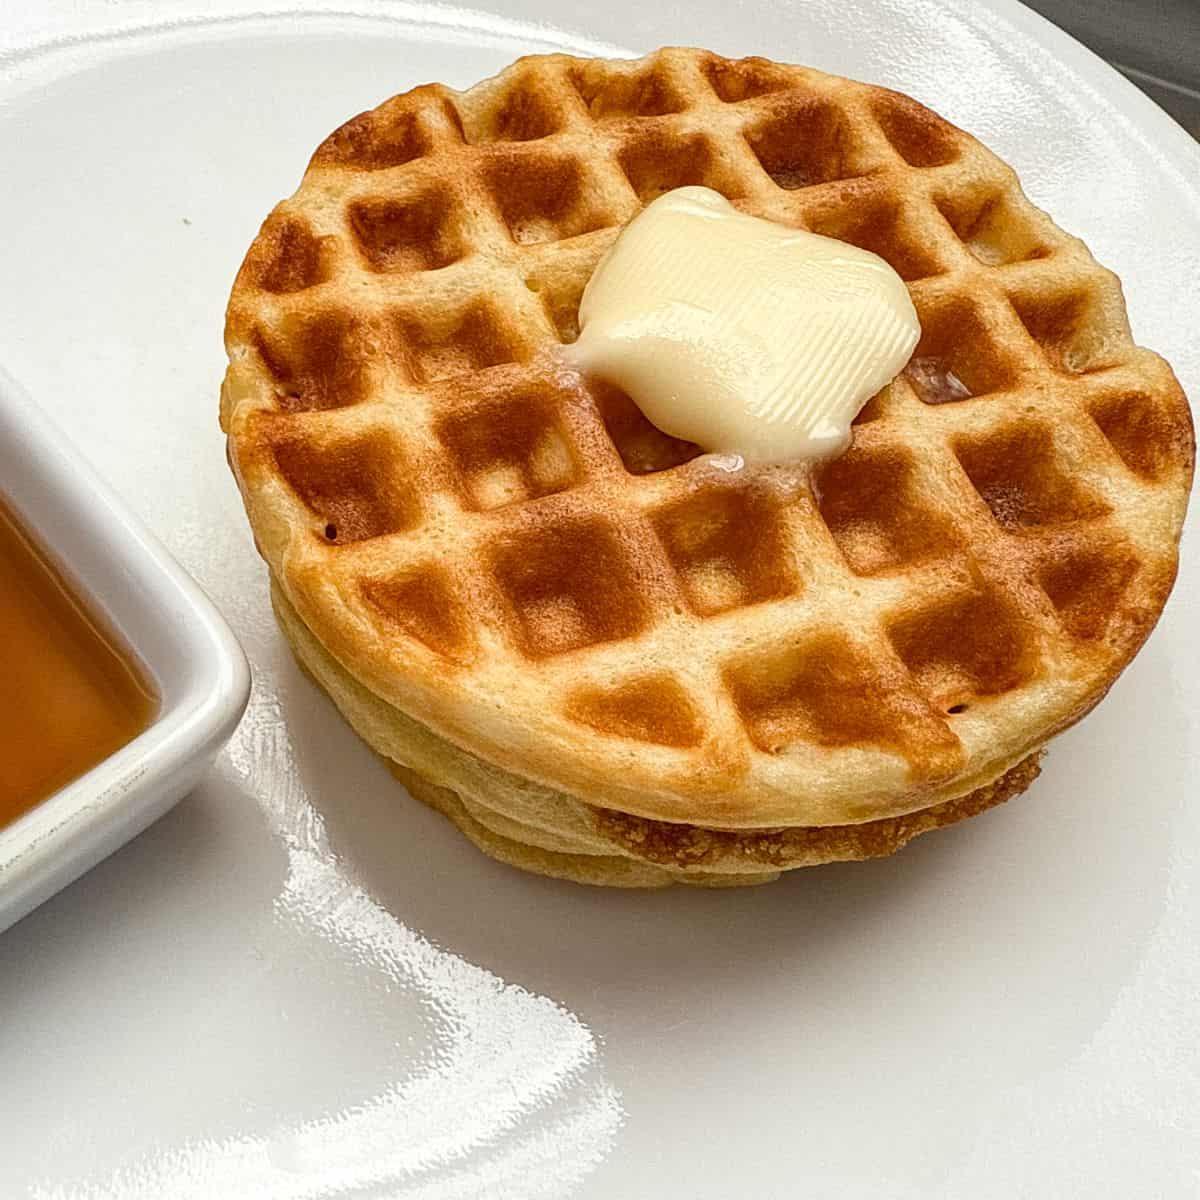
These Easy Buttermilk Waffles are made in just minutes and are fluffy and perfect. They can be topped with fruit, chocolate, or just butter and maple syrup.
For years I have been wanting to find a go-to plain waffle recipe. We love these Pumpkin Waffles, but we tend to only make those in the fall.
The Pumpkin Waffles are made with buttermilk, as are our favorite pancakes, so sticking with buttermilk for the plain waffles was a must.
This batter is very straightforward to make. Initially, I assisted my 13 year old with making them, and now she can make them on her own.
We like to make a bunch of mini waffles to freeze. They can be popped in the toaster from frozen for a quick breakfast on busy school mornings!
SEE ALL OF MY PANCAKE AND WAFFLE RECIPES HERE!
Prepare the Waffle Iron
You can make this batter in any type of waffle maker. I have tried it in 3 different ones. The reason I like this mini waffle maker is that it makes waffles the perfect size for reheating in the toaster.

I like to make extra and then freeze the leftovers for quick breakfasts for the girls.
The most important step in waffle making is to prepare the waffle iron before turning it on.
I do not like using cooking spray on waffle makers. I find that it leaves a sticky residue more often than using pourable oil.
I use a squeeze bottle of canola oil to apply some oil to each plate and then use a paper towel to distribute the oil into every crevice and surface that will come into contact with the batter.
The paper towel is also good for soaking up excess oil. You want a thin layer here, not pools of oil, or your first waffle will be oil-soaked.

Spending a little more time on this step will save you time later. In my opinion, the worst thing to happen in waffle making has to be waffles sticking to the waffle iron!
Once your plates are oiled properly, the next most important tip in waffle making is to make sure you preheat the waffle maker sufficiently. If the iron is not hot enough, the waffles will stick.
Check your waffle maker's instructions for information on how to know when the iron is preheated. Sometimes a light will go off when it's ready. I like to preheat the waffle iron before making the batter so I know it's definitely ready by the time the batter is made.
Make the Batter
This is a very simple batter much like buttermilk pancakes. The dry ingredients are mixed together in a bowl. Then, the wet ingredients are mixed in a separate bowl. Next, the wet ingredients are added to the dry and mixed until a lumpy batter is formed.
Lastly, the melted butter is stirred in. The batter is now ready to cook.
Cook the Waffles
Pour the batter onto the bottom plate of the waffle maker, taking into consideration that the batter will spread once the lid is closed. This may be anywhere from ¼ to 1 cup of batter depending on the size of your waffle maker.
Close the lid and cook until the waffles are a golden color, about 5 minutes depending on the size of your waffle maker. For mini waffles, it was about 3 to 4 minutes.
Repeat with the remaining batter, making sure to allow the iron to reheat in between waffles.

I do not have to re-oil my plates in between waffles, only at the beginning. This may be dependent on how well-seasoned or non-stick your particular waffle maker is.
Storage
Store leftover waffles in single layers separated by waxed paper in gallon sized freezer bags. Pop them in the toaster from frozen for quick breakfasts.
Gluten Free Option
I have not tried it myself with this recipe, but I have good luck using Bob's Red Mill Gluten Free 1 to 1 Baking Flour in place of all purpose flour in many other recipes.
📖 Recipe

Easy Buttermilk Waffles
Ingredients
- vegetable or canola oil (for brushing the waffle maker)
- 1¾ cup all purpose flour
- 2 tablespoons granulated sugar
- 1¾ teaspoon baking powder
- ¼ teaspoon baking soda
- ¼ teaspoon kosher salt
- 1¾ cup well-shaken buttermilk
- 2 large eggs
- 2 teaspoons vanilla extract
- 8 tablespoons butter (melted and slightly cooled)
- maple syrup, jam, berries or yogurt (for serving)
Instructions
Prepare the Waffle Iron
- Drizzle vegetable or canola oil over each plate of the waffle maker. Use a paper towel to distribute the oil into every crevice and surface that will come into contact with the batter. Soak up the excess oil with the paper towel.
- Preheat a waffle iron to medium-high. Check your waffle maker's instructions for information on how to know when the iron is preheated. Properly preheating the iron at the beginning and in between each waffle is critical to prevent sticking.
Make the Batter
- In a large bowl, whisk together the flour, sugar, baking powder, baking soda and salt.1¾ cup all purpose flour, 2 tablespoons granulated sugar, 1¾ teaspoon baking powder, ¼ teaspoon baking soda, ¼ teaspoon kosher salt
- In a medium bowl, whisk together the buttermilk, eggs and vanilla.1¾ cup well-shaken buttermilk, 2 large eggs, 2 teaspoons vanilla extract
- Stir the buttermilk mixture into the flour mixture until a batter is formed.8 tablespoons butter
- Fold in the butter until incorporated, being careful not to overmix the batter.
Cook the Waffles
- Pour the batter onto the bottom plate of the waffle maker, taking into consideration that the batter will spread once the lid is closed. This may be anywhere from ¼ to 1 cup of batter depending on the size of your waffle maker.
- Close the lid and cook until the waffles are a golden color, about 5 minutes depending on the size of your waffle maker. For mini waffles, it may take 3 to 4 minutes.
- Repeat with the remaining batter, making sure to allow the iron to reheat in between waffles. If the waffle maker is well-seasoned or non-stick, you may not need to re-oil the plates between waffles.
- Serve the waffles immediately with butter, syrup, jam, berries or yogurt.


Leave a Reply