
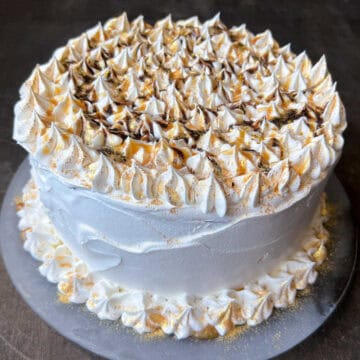
This Caramel Mocha Ice Cream Cake has a rich brownie crust, layers of coffee ice cream, caramel and fudge and is covered in whipped topping. It has all of the flavors of a Starbucks Frappuccino. It is the ultimate dessert for frozen coffee lovers!

When my daughter turned 13th, also her Golden Birthday, we celebrated with a bunch of gold treats. She came up with the idea for this homemade ice cream cake.
In the past, she has requested my Brownie Peppermint Ice Cream Cake, so this time she decided to put a coffee spin on it due to her love of Starbucks Frappuccinos (decaf, of course).
Her vision for the cake was a brownie crust, followed by a layer of coffee ice cream, caramel sauce, another layer of coffee ice cream, a hot fudge layer, and then covered in whipped topping.
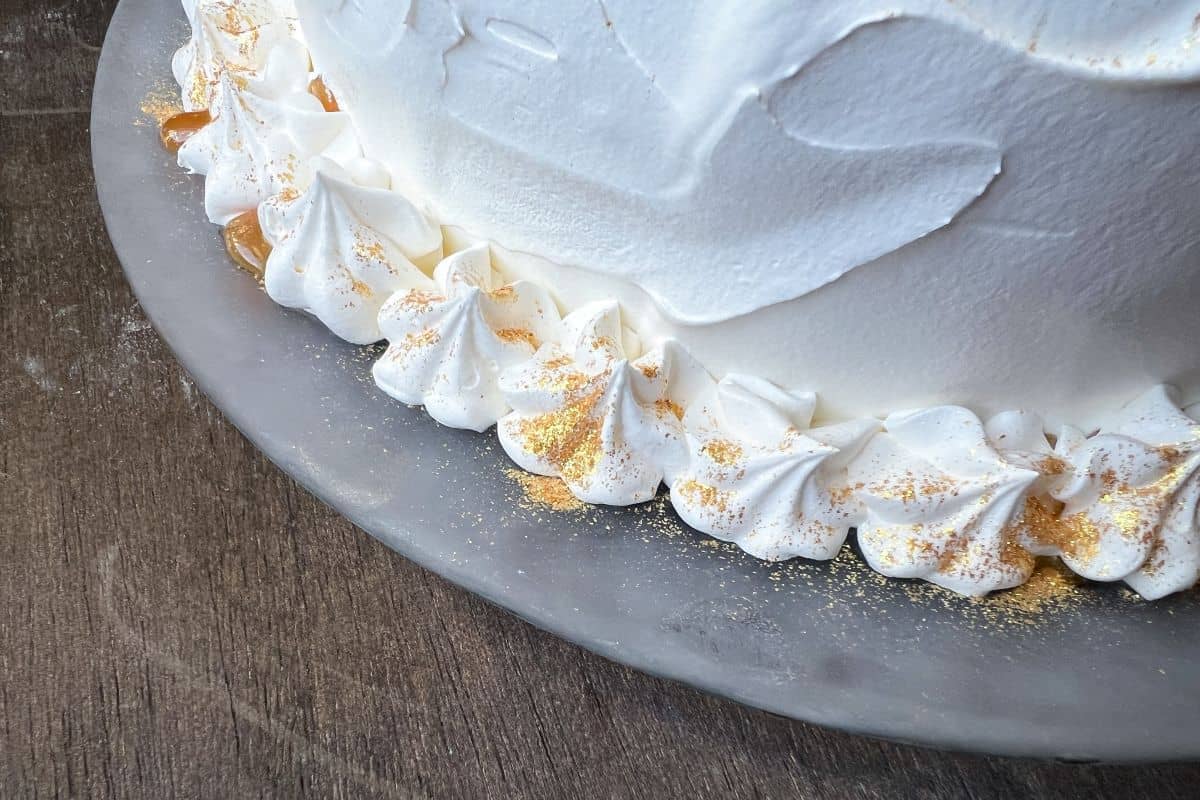
I decorated the top with pipped whipped topping and drizzled caramel sauce and chocolate syrup to resemble the top of a Frappuccino.
I also used the most beautiful edible gold glitter and gold stars to give it sparkle. I used these gold stars to decorate a mocha cheesecake for my middle daughter's Starbucks Birthday Party the previous year.
Everyone loved this cake, especially the birthday girl!
If you'd like to make this cake a "no bake" ice cream cake, just use the Oreo cookie crust from the DQ Ice Cream Cake recipe. There's also a Chocolate Chip Cookie Ice Cream Cake if you'd like to use a chocolate chip cookie cake crust.
Jump to:
Supplies
Other than the ingredients for the ice cream cake, you will need:
- 9-inch springform pan
- parchment paper
- strip of rolled acetate
- Scotch tape
- disposable piping bag
- large star tip, like 1M or 2D piping tip
- edible gold glitter
- Wilton Edible Accents Gold Stars
Prepare the Springform Pan
Ice cream cakes work well made in a springform pan because the outer ring of the pan is removeable. This means you can slide the cake onto a cutting board for easier slicing.
To prepare the springform pan, I like to cut a parchment paper circle to the size of the pan and stick it to the inside of the springform with a little bit of butter or baking spray. Then, I rub butter or spray on top of the parchment and around the sides of the pan.
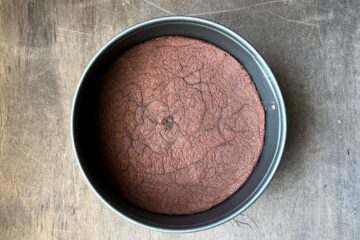
Bake the Brownie Crust
The butter and chocolate are melted in the top of a double boiler. This can also be done in a heatproof bowl set on top of a pot of simmering water. You're just trying to melt the chocolate gently with indirect heat. After the chocolate and butter are melted, the chocolate mixture is set aside to cool.
The flour and salt are sifted together in a small bowl. The sugar, eggs and vanilla are whisked together in a large bowl.
Then, the cooled chocolate mixture is mixed into the egg mixture. After that is combined, the flour mixture is folded in just until it is blended. The batter is then transferred to the prepared pan.
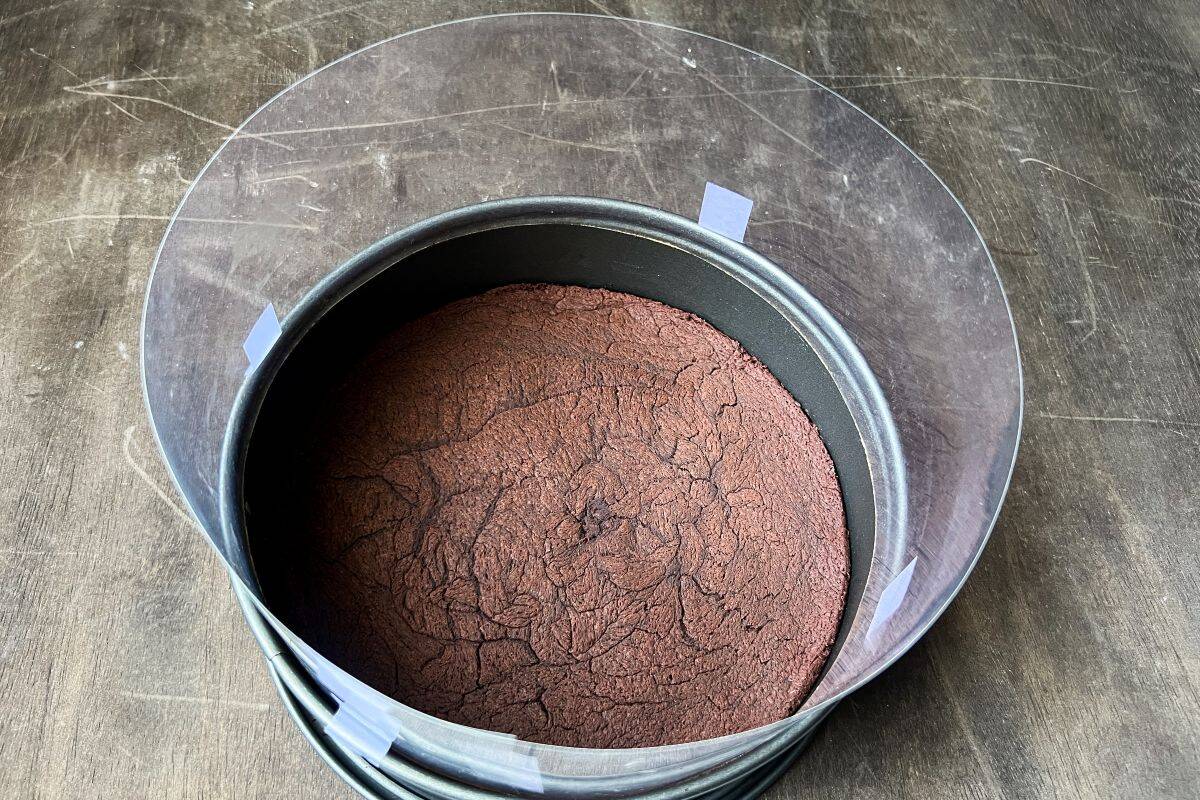
The brownie crust is baked just until a toothpick inserted 1 inch away from the sides of the pan comes out clean. This ensures that the brownie is not overbaked and will remain softer when frozen.
After the brownie comes out of the oven, I used the back of a large spoon to press the crust down to make it thinner. This is the same method from my aunt's Grasshopper Pie crust.

Once the crust has cooled completely, it is ready for the ice cream.
Add the Layers of Ice Cream
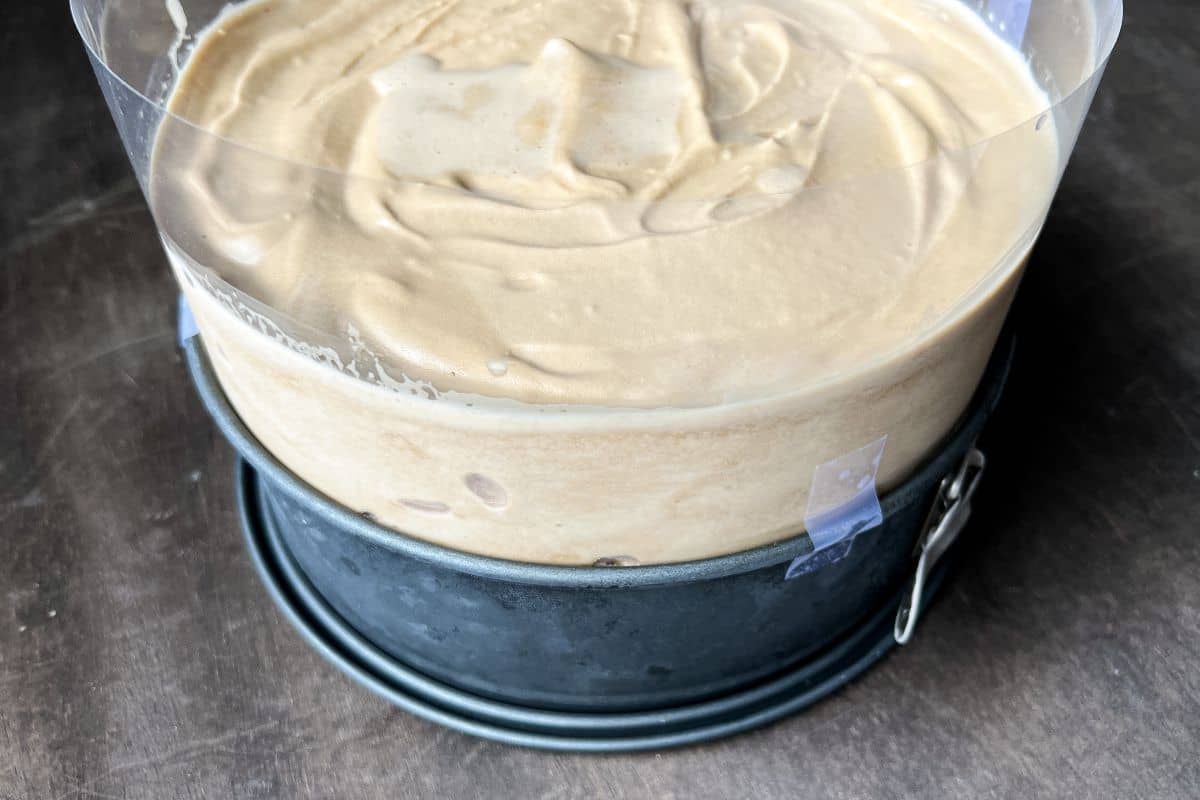
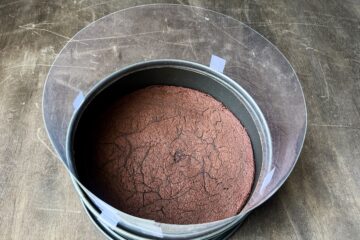
At this point, I added an acetate collar to the top rim of the springform because I knew I wanted the cake to be tall like a traditional round birthday cake. This cake also needed to serve at least 14 people, preferably with leftovers!
The acetate serves as an extension of the sides of the springform, essentially making the pan taller. You do not want to bake with it on, but it is ideal for filling with cold ingredients like ice cream.
First, I added a layer of softened coffee ice cream. I purchased a gallon container, so I used half of the container for this layer. I smoothed the top and then let that freeze for a few hours.
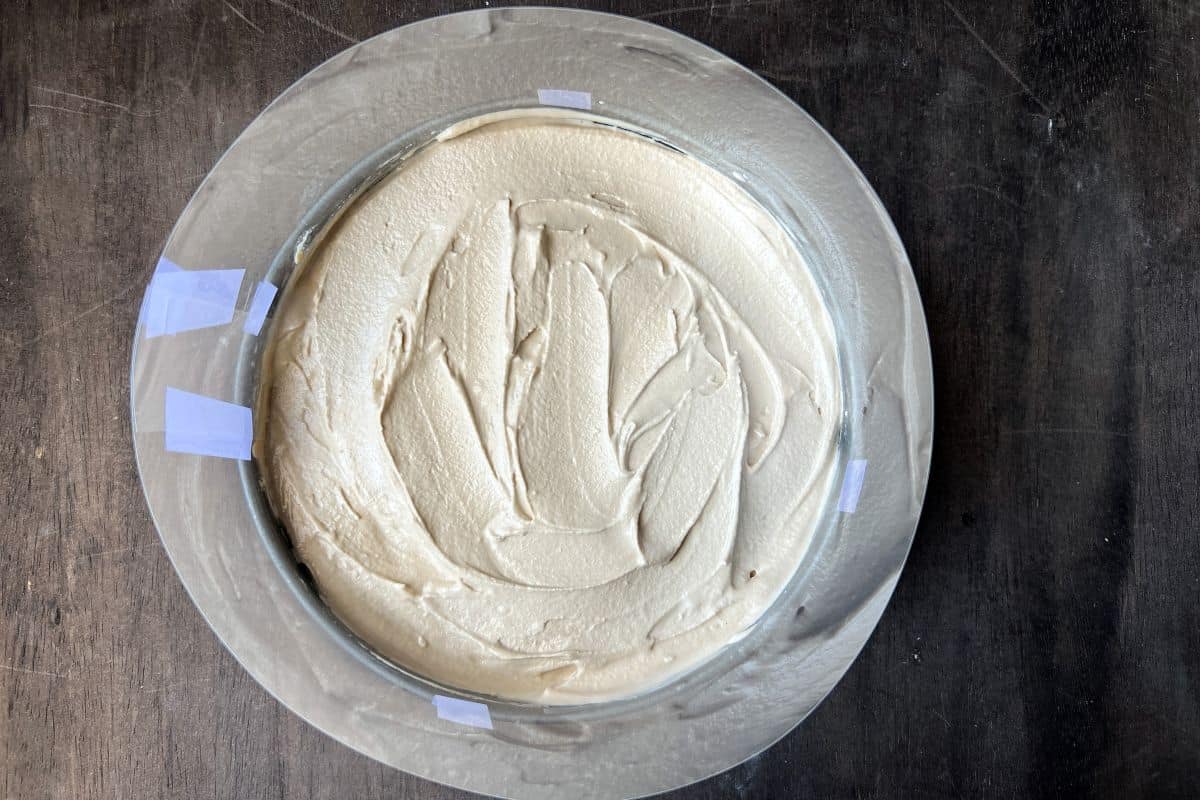
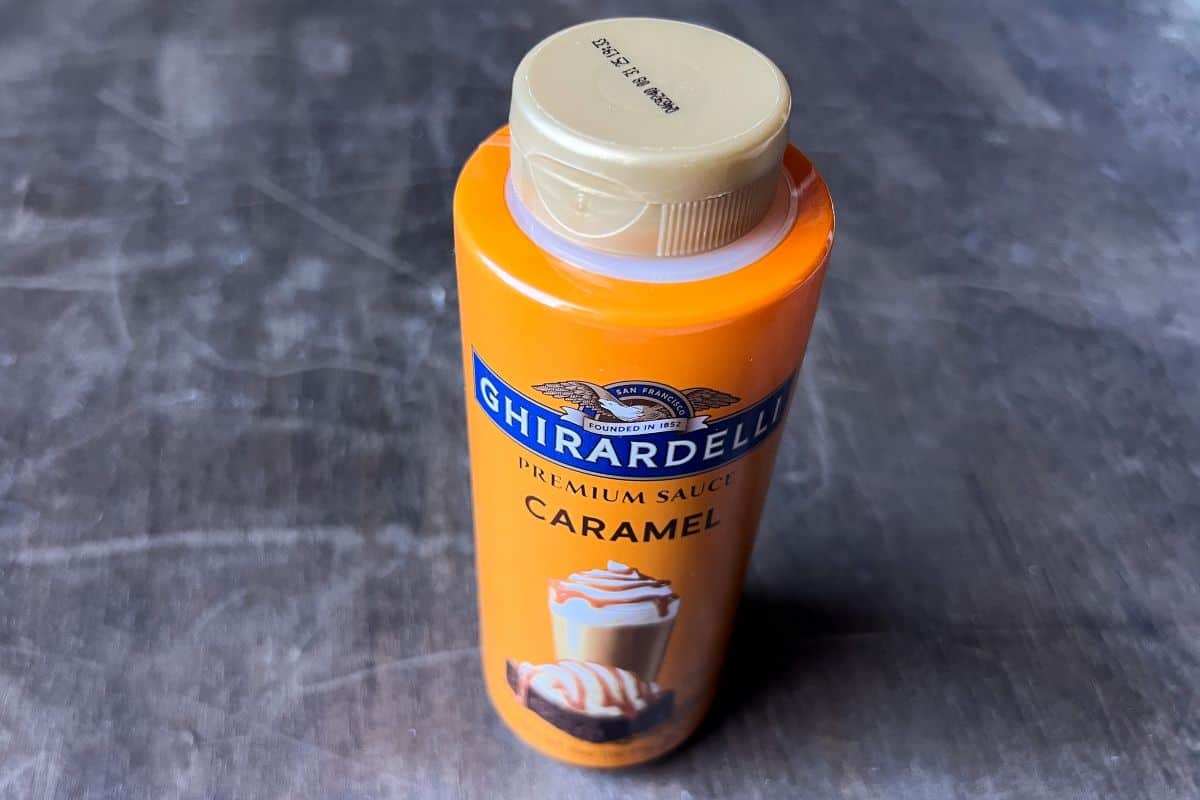
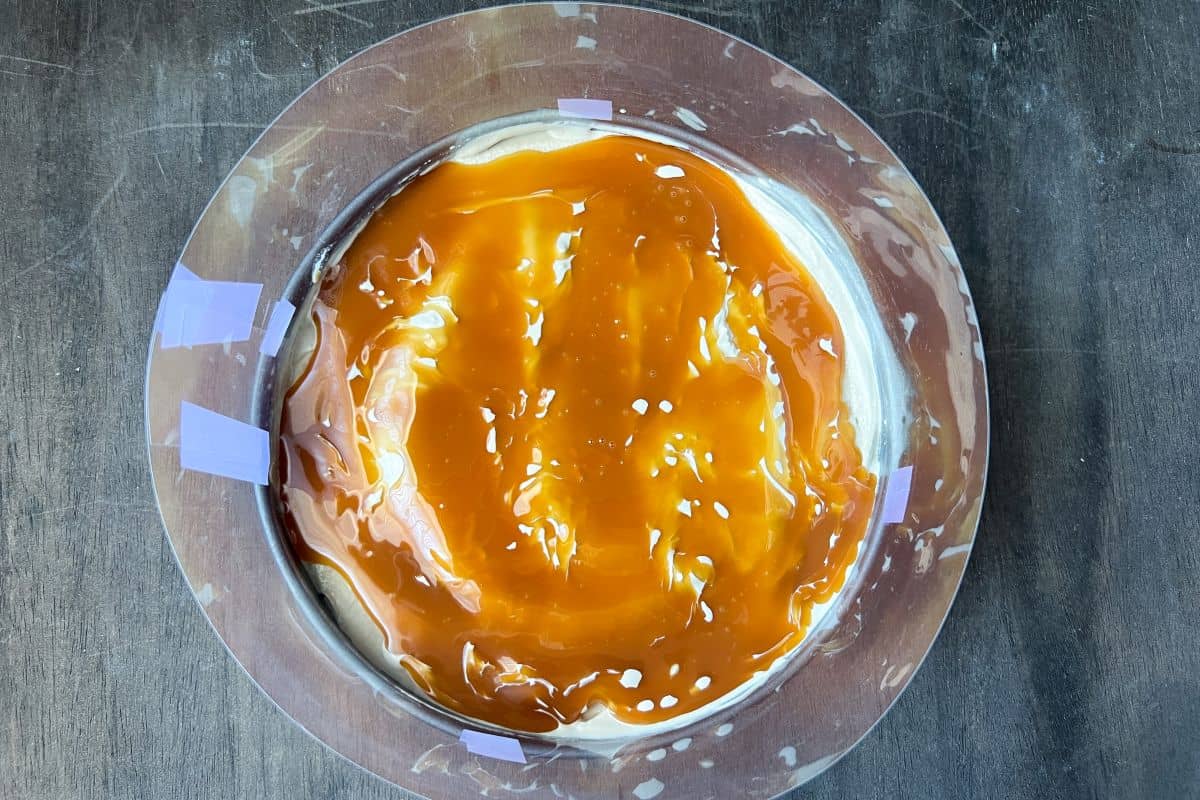
Next, I added a layer of caramel sauce. I used Ghirardelli bottled caramel sauce.
This sauce was a little thinner than I expected and didn't thicken much when frozen, so it started oozing out the bottom of the cake. This may not be a bad thing considering it's decorated like a Frappuccino, but if that bothers you, I recommend using a thicker caramel sauce, perhaps one in a jar.
Another option is to make a border with the ice cream before freezing to help contain the sauce better.
After adding a thin layer of caramel, I froze the cake for another few hours.
Then, I added the rest of the coffee ice cream and allowed that to freeze for a couple hours to get the cake as cold as possible before adding the hot fudge.
Make and Add the Hot Fudge
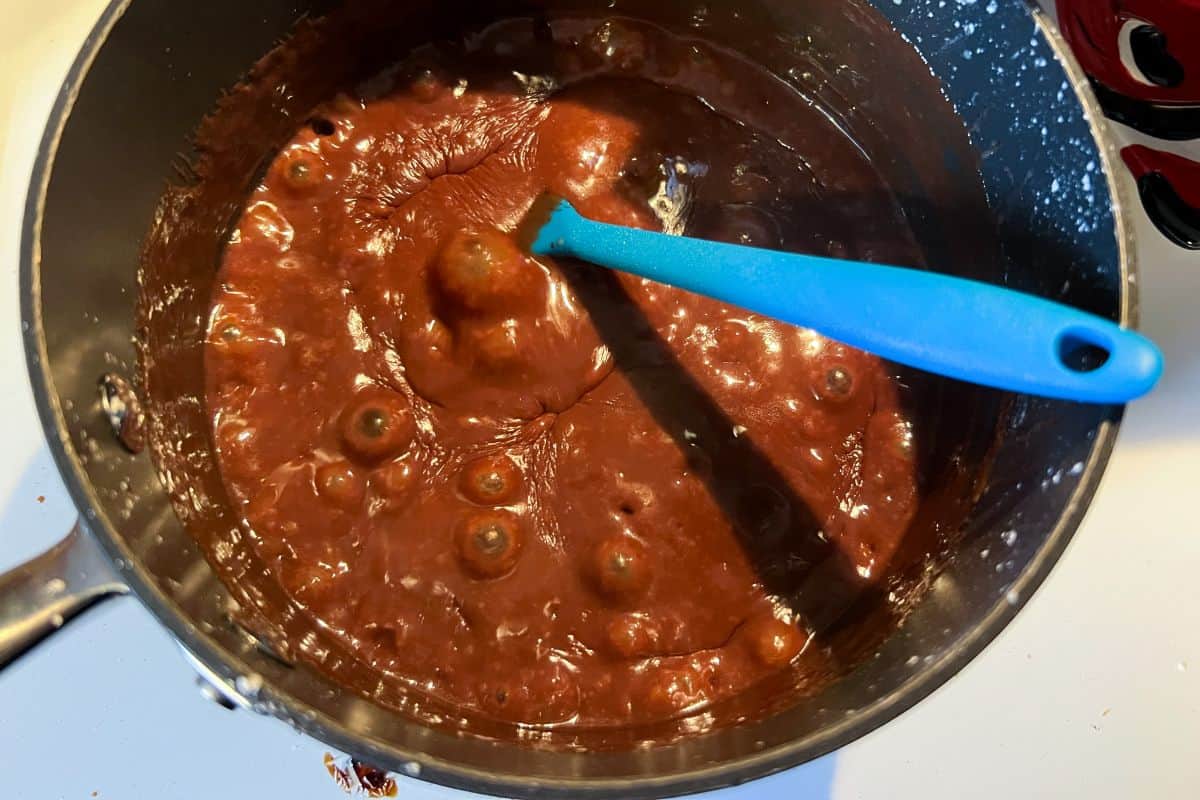
This hot fudge could not be easier. You simply add the ingredients together in a small saucepan and boil, stirring frequently, for 8 minutes.
Off heat, you stir in the vanilla extract and continue stirring until the fudge is smooth.
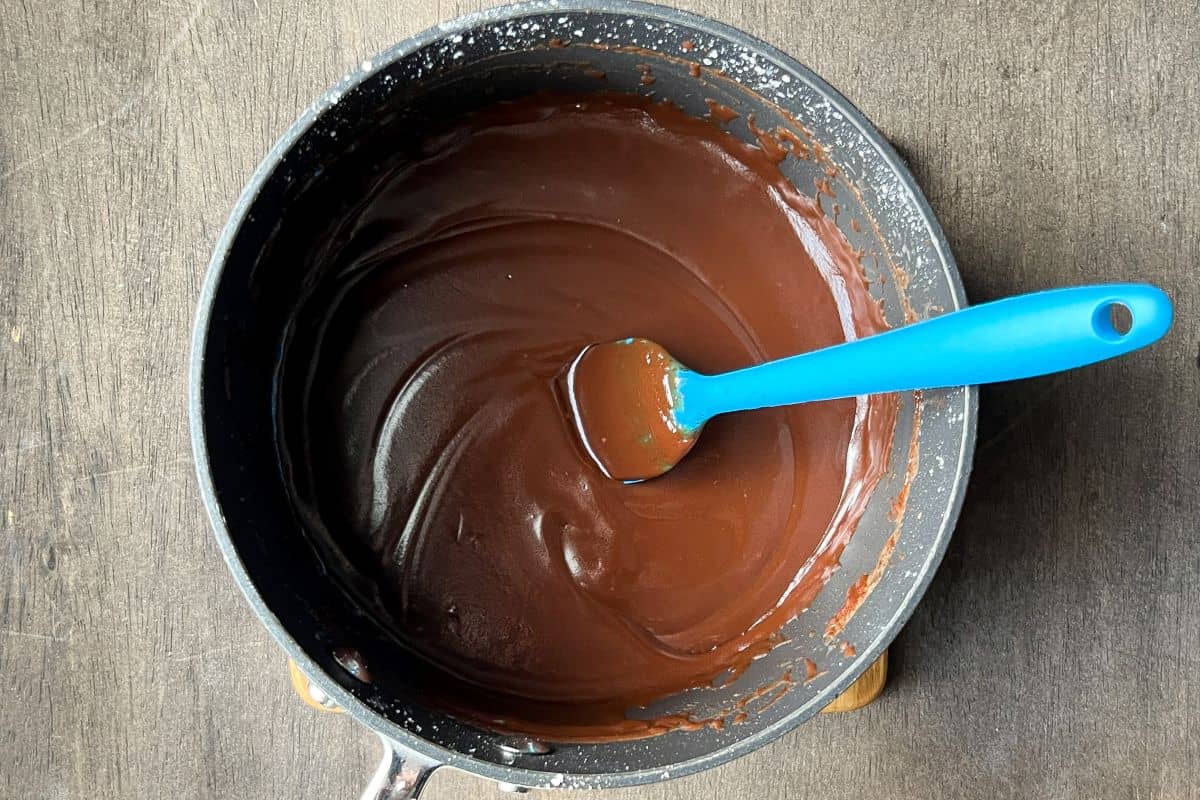
I like to allow the fudge to cool at room temperature for a bit before adding it to the ice cream or it will melt it considerably. You want the fudge to still be pourable and spreadable so you're able to smooth it into an even layer.
After the fudge has been added, once again freeze the cake.
Frost the Cake with Whipped Topping
After the hot fudge is set, it's time to frost the cake.
Remove the springform pan collar. You may need to run a plastic knife around the edges to loosen the ice cream from the sides of the pan.
Carefully peel off the acetate. You can discard it or wash it and save it for next time.
Then, carefully slide a thin spatula or offset icing spatula underneath the crust to loosen from the bottom of the springform. Slide the cake onto a serving platter.

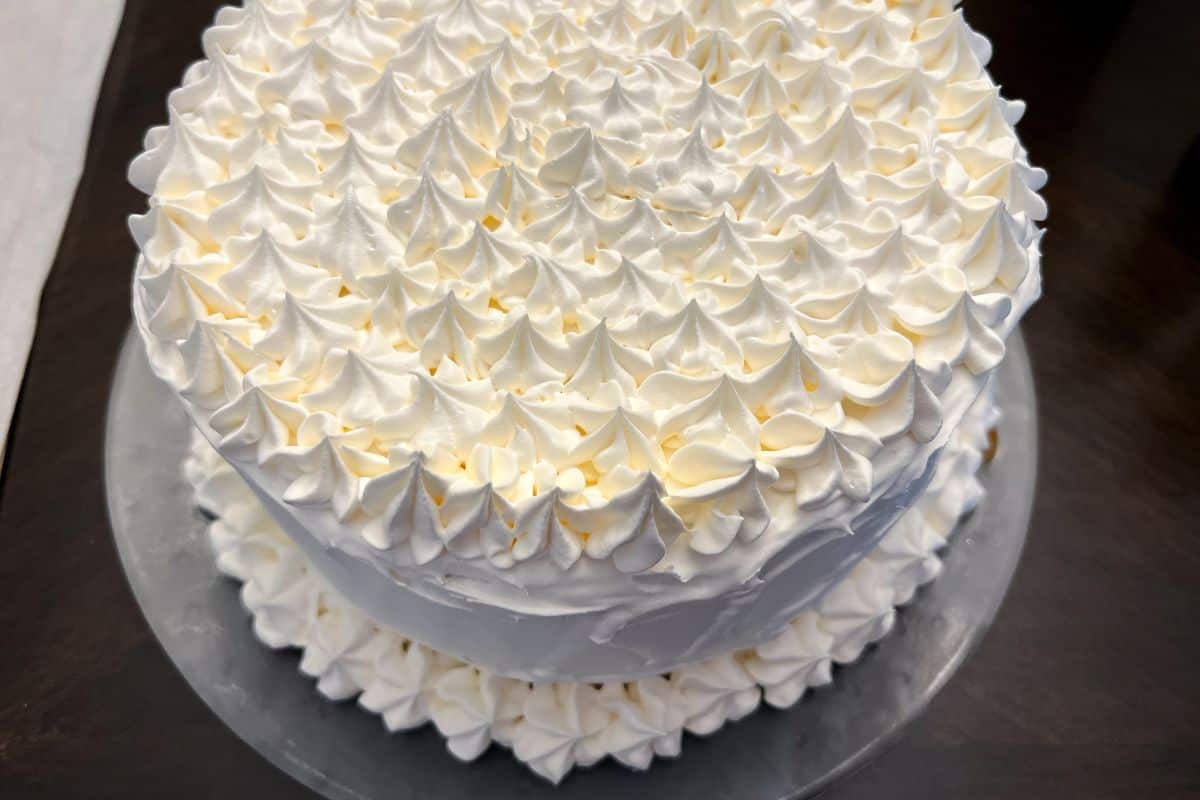
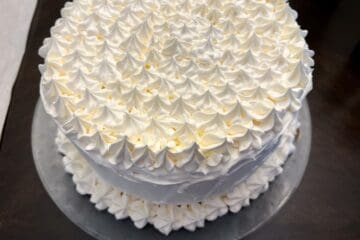
I first covered the entire cake in a layer of whipped topping.
To give the cake an upscale Frappuccino look, I piped on large stars of whipped topping using a disposable piping bag fitted with a large star tip. I also added a border of stars around the cake platter to cover where the cake meets the glass.
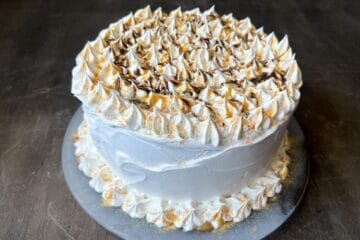
Decorate the Cake
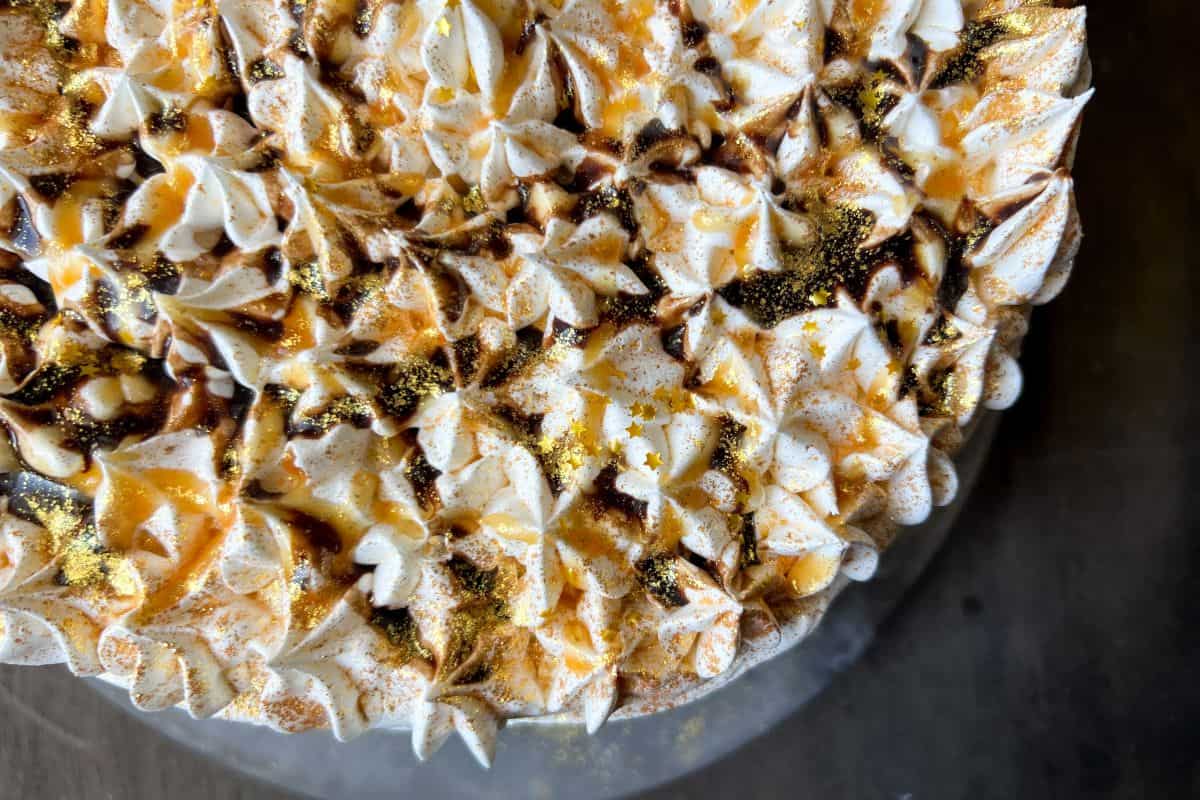
To decorate, I drizzled more of the Ghirardelli caramel sauce and some Hershey's chocolate syrup in overlapping diagonal lines across the top of the cake. This doesn't have to look perfect, just like a real Frappuccino.
Then, I sprinkled the top of the cake with gold edible glitter.
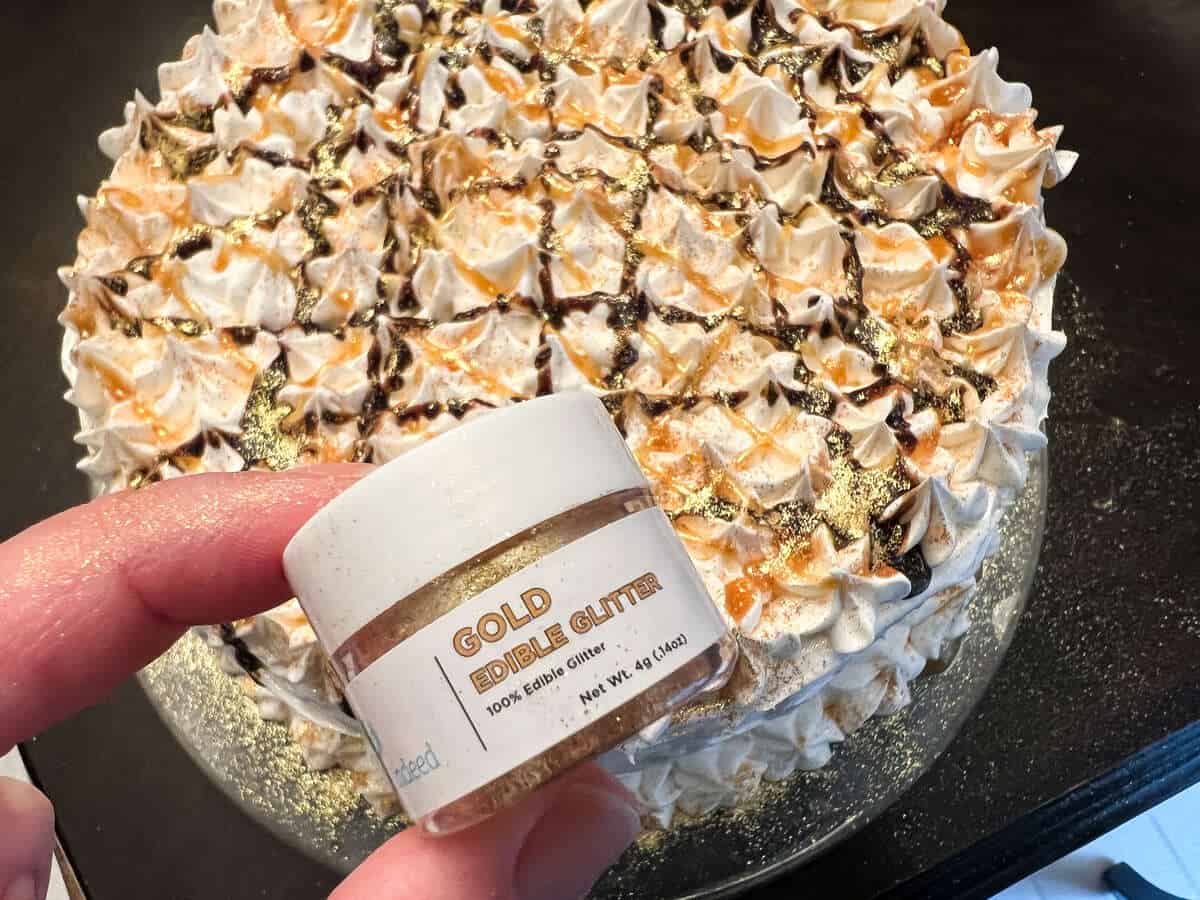
I also sprinkled the glitter on the bottom star border of the cake.

Lastly, I added some gold Wilton edible stars to the top. I love these so much and have added them to so many cakes and cookies over the years.
Storage and Serving
Store the ice cream cake in the freezer until about 10 to 15 minutes before serving. You want the brownie crust and ice cream to soften slightly but not start melting. The rate at which the ice cream melts will depend on the fat content of the ice cream, which varies by brand. It will also depend on the temperature of the room.
To serve, slide the cake onto a cutting board and use a large knife to cut into slices. Just like a traditional cake, you may find it easier to remove a large chunk of cake first to get it started and then begin cutting off smaller slices from there.
Gluten Free Option
Use a gluten free measure-for-measure flour, like Bob's Red Mill, in place of the all purpose flour in the brownie layer.
📖 Recipe
Caramel Mocha Ice Cream Cake
Equipment
- 1 9-inch round springform pan
- roll of acetate
- Scotch tape
- Disposable piping bag
- large star tip like 1M or 2D
Ingredients
For the Brownie Crust:
- 8 tablespoons butter
- 8 ounces bittersweet chocolate
- 2 tablespoons all purpose flour
- ¼ teaspoon salt
- 6 tablespoons sugar
- 2 eggs
- ½ teaspoons vanilla extract
For the Ice Cream Layers:
- 1 gallon coffee ice cream
- prepared caramel sauce
For the Hot Fudge Layer:
- 1 cup powdered sugar
- ⅓ cup semisweet chocolate chips
- 6 ounces evaporated milk
- 4 tablespoons butter
- ½ teaspoon vanilla extract
For Topping:
- 16 ounces whipped topping (thawed, such as Cool Whip)
- chocolate syrup
- edible gold glitter
- edible gold stars
Instructions
Make the Brownie Crust:
- Preheat oven to 350°F.
- Grease bottom of 9-inch springform pan with butter or baking spray. Cut a circle of parchment paper and place inside the bottom of the pan. Grease the paper and sides of the pan.
- In the top of double boiler or in a heatproof bowl set over a pot of simmering water, melt the butter and the chocolate. Set aside to cool to room temperature.8 tablespoons butter, 8 ounces bittersweet chocolate
- In a small bowl, sift together flour and salt. Set aside.2 tablespoons all purpose flour, ¼ teaspoon salt
- In a large bowl, whisk together the sugar, eggs and vanilla. Stir in cooled chocolate mixture until well blended. Fold in flour mixture until just combined.6 tablespoons sugar, 2 eggs, ½ teaspoons vanilla extract
- Transfer batter to the prepared pan. Bake for 15 - 20 minutes, or until a toothpick inserted 1 inch away from the outer edge comes out clean.
- While the brownie is still warm, using the back of a large spoon, press down on the crust all over to make it thinner.
- Cool brownie crust until it reaches room temperature before proceeding to add the ice cream.
Add Ice Cream Layers:
- Attach an acetate collar to the top of the cooled springform pan using tape to extend the edges of the pan upward.
- Spoon half of the softened ice cream on top of brownie crust and smooth the surface. Freeze for at least 2 hours to set.

- Add a thin layer of caramel sauce on top of the ice cream layer. Freeze for at least 2 hours.

- Spread the remaining ice cream on top of the caramel and smooth into an even layer. Freeze for at least 2 hours. While the ice cream freezes, make the hot fudge.

Make the Hot Fudge:
- Combine first 4 ingredients of hot fudge sauce in a saucepan and bring to a boil for 8 minutes, stirring occasionally.1 cup powdered sugar, ⅓ cup semisweet chocolate chips, 6 ounces evaporated milk, 4 tablespoons butter

- Remove from heat and stir in vanilla. Allow to cool.½ teaspoon vanilla extract
- Add cooled hot fudge sauce on top of ice cream layer and freeze until firm.
Assemble the Ice Cream Cake:
- Slide a plastic knife around the edges of the springform collar and carefully remove it. Remove the acetate collar. Slide a thin spatula under the crust to loosen and transfer the cake to a serving platter.

- Cover the sides of the cake in a smooth layer of whipped topping.
- Transfer whipped topping to a disposable piping bag fitted with a large star tip. Pipe stars around the bottom of the cake and over the entire top of the cake.
- Drizzle caramel sauce and chocolate syrup in a crisscross pattern over the top of the cake. Sprinkle gold edible glitter on top and over the bottom star edge. Sprinkle with gold edible stars.
- Freeze the cake until ready to serve, for at least 3 hours.

Leave a Reply