
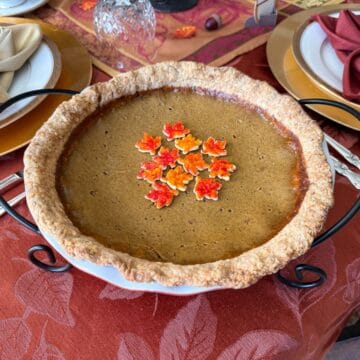
These Painted Pie Crust Leaves are perfect for decorating fall pies like Pumpkin Pie. They can be added around the outer edge or in the center to add pops of color to an otherwise neutral colored dessert.

My family loves to decorate Thanksgiving pies with decorative leaf shapes of pie crust. This tradition began when my aunt purchased small leaf cutters for our annual pie baking night many years ago.
Sometimes we add the leaves around the perimeter of the pie, sometimes we arrange them in the center, and they are useful for covering up cracks in pumpkin pies.
We have baked them plain or added cinnamon sugar before baking. Most recently, I wanted to try painting them with food coloring gel.
I experimented by painting some store bought sugar cookie dough the same way, but those leaves spread and did not look nearly as nice as the pie dough leaves.
These turned out very cute and gave a nice pop of color to the neutral canvas of a pumpkin pie!
Supplies
- 1 pie crust, store bought or homemade
- rolling pin
- small leaf cutters, similar to these
- food dedicated paint palette
- food safe paintbrush
- yellow, orange and red food coloring gel, like AmeriColor or Chefmaster
- optional: clear alcohol like Everclear, vodka or extract
Cut the Leaves
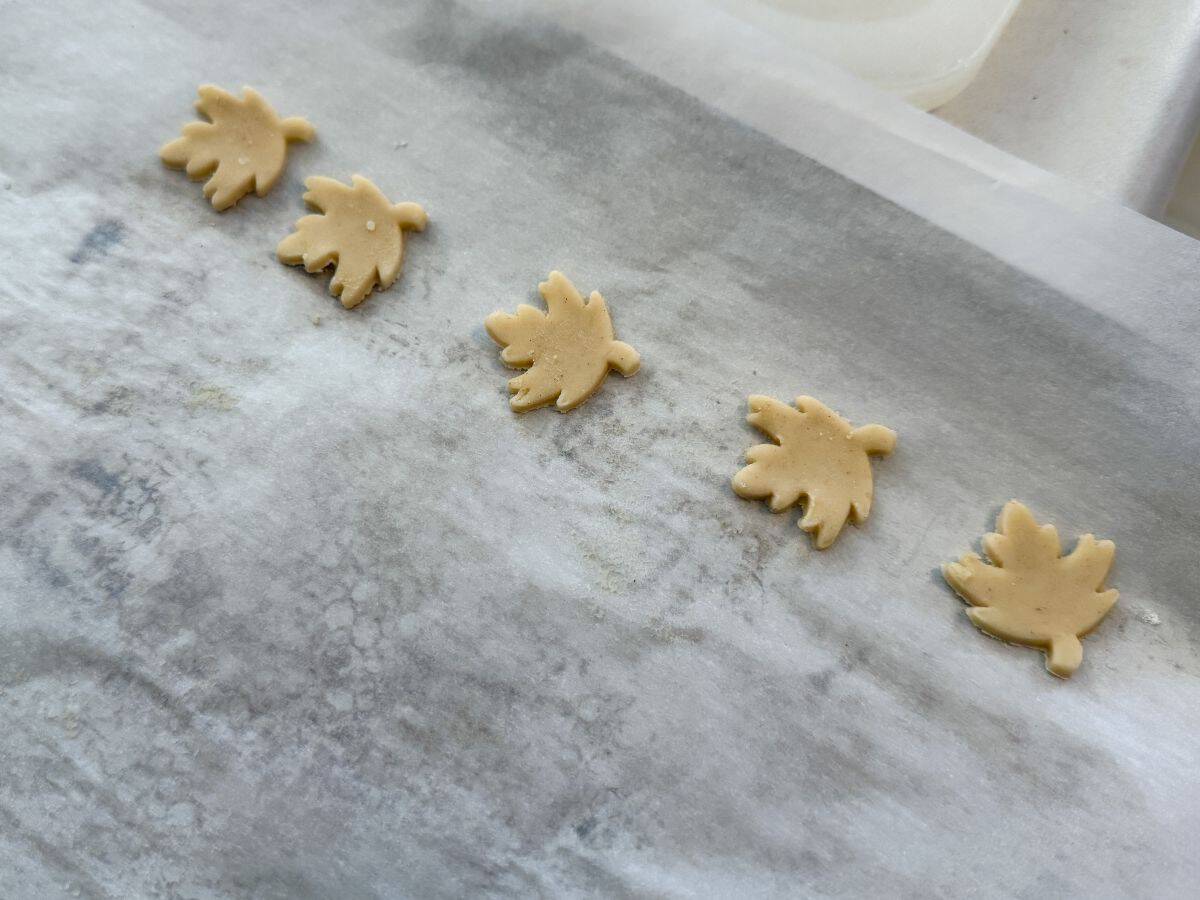
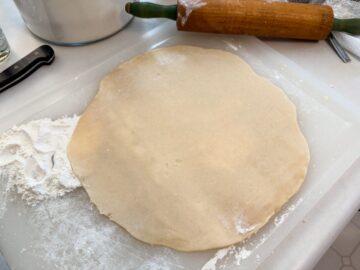
Start by rolling the pie dough out into a large circle, about 12- to 14-inches in diameter, on a floured surface. You can use a homemade All Butter Pie Dough or a store bought dough.

My set of decorative pie crust cutters is from Williams-Sonoma. My exact set is not available, but a current set is similar to mine. Any small leaf cutter will work.
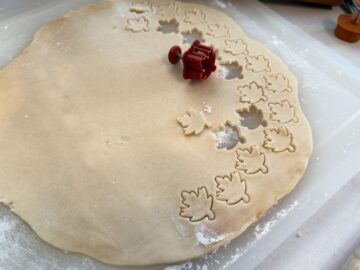
Some cutters have the option of pressing down a design that adds veining to the leaves. If yours do not and you want those details, you can add them with a knife, but it is time consuming.

Cut the dough into leaf shapes and transfer them onto a parchment lined cookie sheet.
Paint the Leaves
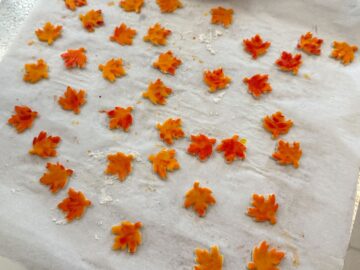
Place a drop of yellow, orange and red food coloring gel into each of 3 wells of a food dedicated paint palette. I use both AmeriColor and Chefmaster brands of gel.
If the food coloring gel is too thick, you can add a drop of clear alcohol, like Everclear, vodka, or a clear extract (like clear vanilla extract, rum extract, etc.)

Dip a food safe paintbrush into one of the colors and paint it on a pie crust leaf. Then, add spots of other colors to give it the look of a changing fall leaf.
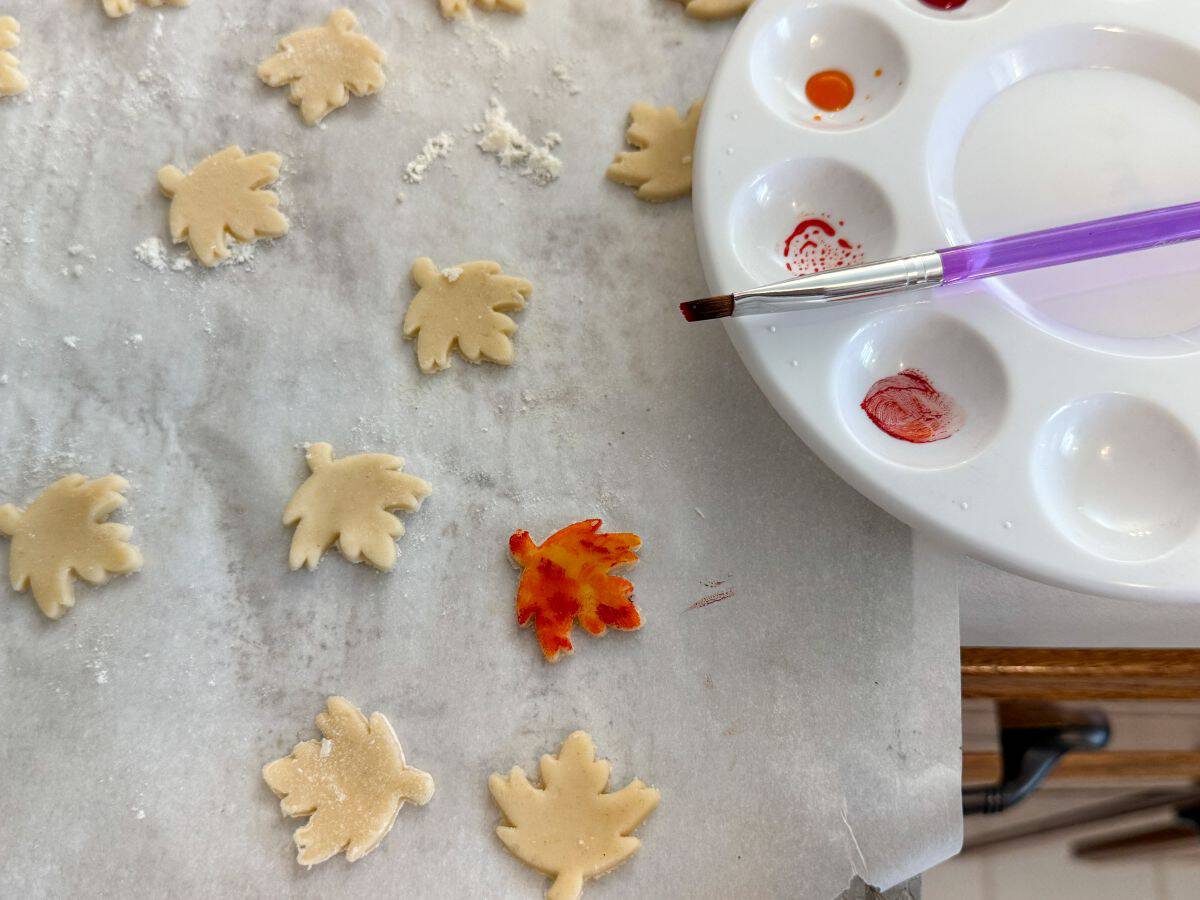
For mine, I painted the entire leaf yellow, then added areas of orange and red to give it a variegated look.
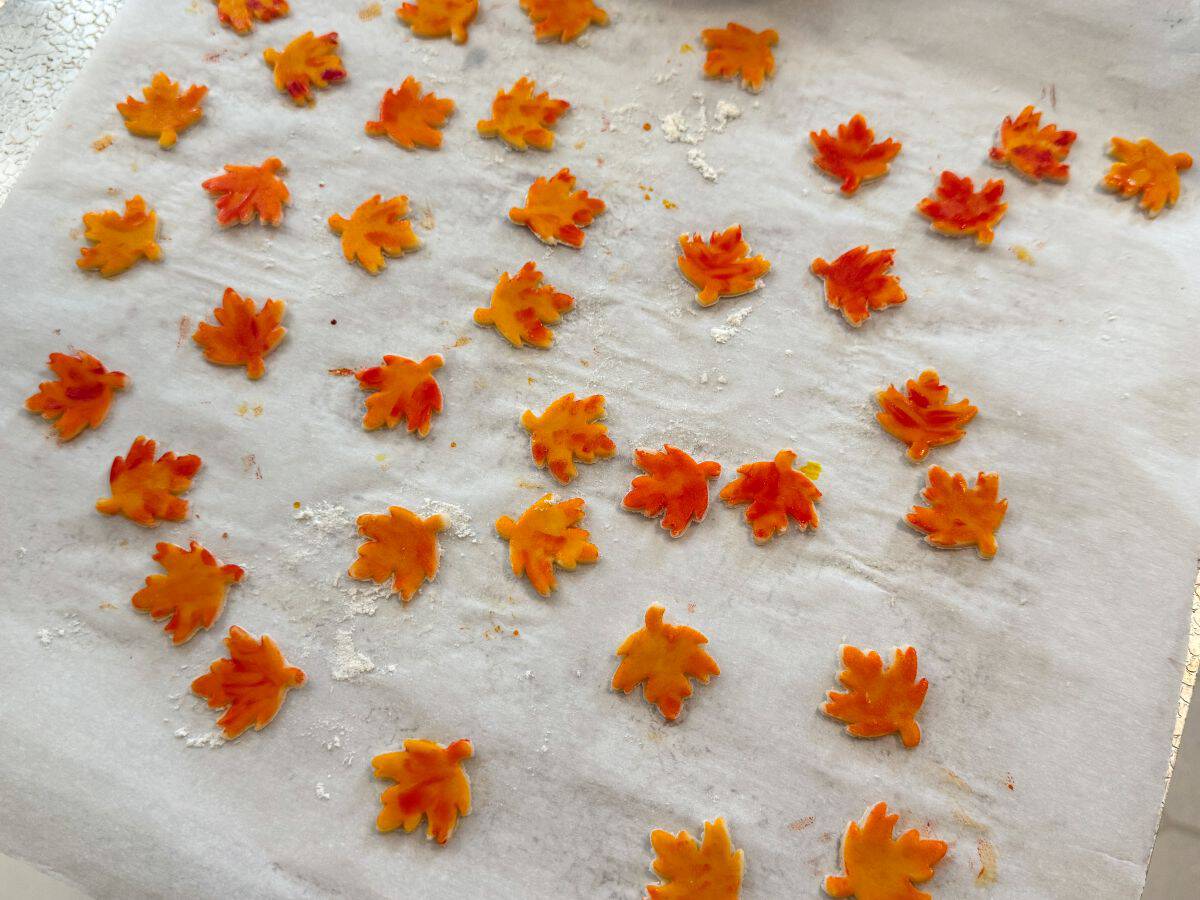
Bake the Leaves
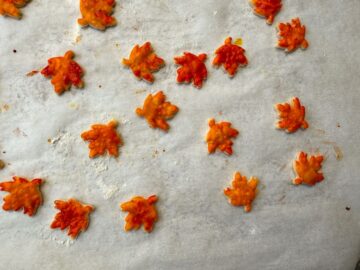
Bake the leaves in the oven until the dough is set, about 7 to 10 minutes depending on your pie crust recipe.

Allow the leaves to cool completely on the pan at room temperature before using or storing.
Storage
Store the painted leaves in an airtight container at room temperature until ready to place on pie. Leaves are best consumed within a few days.
Gluten Free Option
Use a gluten free store bought or homemade gluten free pie crust to make the leaves. Use a gluten free flour blend, like Bob's Red Mill Gluten Free 1 to 1 Baking Flour, to flour the surface and cutters.
📖 Recipe
Painted Pie Crust Leaves
Equipment
- Rolling Pin
- small leaf cutters, similar to these
- food dedicated paint palette
- food-safe paintbrush
Ingredients
- 1 pie crust (store bought or homemade)
- yellow, orange and red food coloring gel
- clear alcohol like Everclear, vodka or extract (optional)
Instructions
Cut the Leaves
- Roll the pie dough on a floured surface into a large circle, about 12- to 14-inches in diameter.
- Cut the dough into leaf shapes and transfer them onto a parchment lined cookie sheet.
- Preheat the oven to the temperature your pie dough recipe requires. For a Pillsbury crust, preheat to 450°F.
Paint the Leaves
- Place a drop of yellow, orange, and red food coloring gel into each of 3 wells of a food dedicated paint palette. If the food coloring gel is too thick, you can add a drop of clear alcohol, like Everclear or vodka, or a clear extract.

- Dip a food safe paintbrush into one of the colors and paint it on a pie crust leaf. Add spots of other colors to give it the look of a changing fall leaf. For example, you can paint the entire leaf yellow then add areas of orange and red to give it a variegated look.

- Repeat until all of the leaves are painted.
Bake the Leaves
- Bake the leaves until the dough is set, about 7 to 10 minutes depending on your pie crust recipe.
- Allow the leaves to cool completely on the pan at room temperature.
- Store the painted leaves in an airtight container at room temperature until ready to place on pie. Leaves are best consumed within a few days.


Leave a Reply