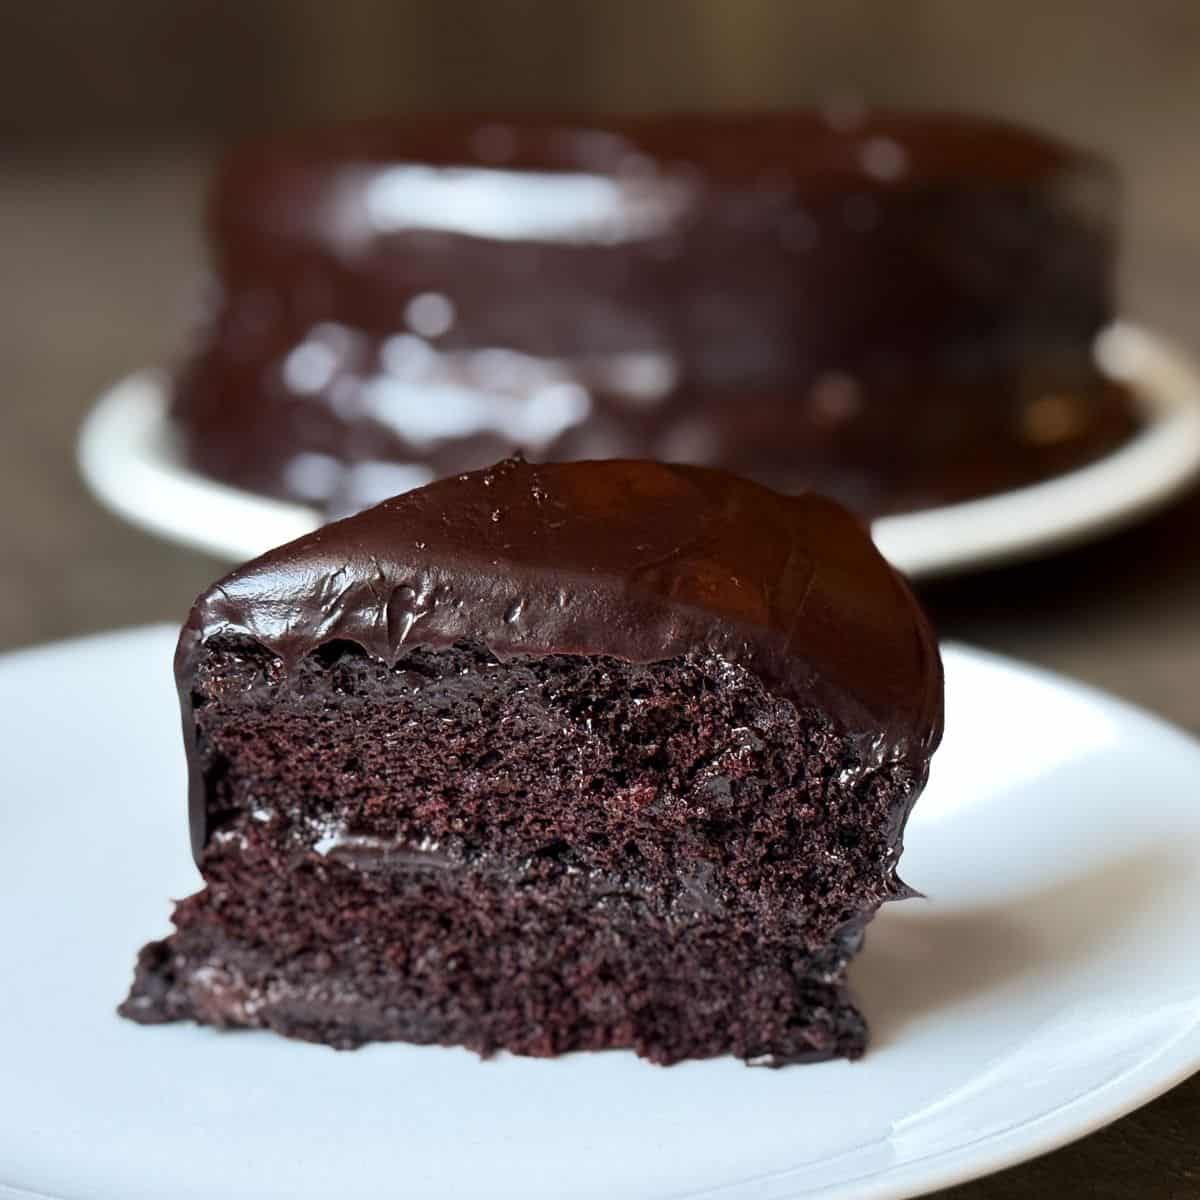
This Old Fashioned Chocolate Cake features moist chocolate cake layers separated by a glossy cooked chocolate frosting. This is truly a cake for chocolate lovers! This recipe is naturally egg free.
My mom and my aunt have been searching for years for a chocolate frosting recipe that their mother would make to frost a white cake. Unfortunately, when their mother passed away, the recipe was no where to be found.
Knowing the frosting was a dark colored cooked chocolate frosting, my mom has tried many recipes over the years and has had my aunt taste test them. Each one has failed.
They had almost accepted that they would never again taste that frosting when my mom decided to try this recipe from Cuisine at Home magazine. Spoiler alert: it was a winner!
The frosting on this cake is that dark-colored, chocolaty glossy frosting they so fondly remember. My aunt says the true test will be to try it on a white cake, which is in the works.
This cake recipe is similar to the Hershey's Black Magic cake, with some noticeable exceptions, the biggest being it does not have eggs or buttermilk.
Given that this cake is called "Old Fashioned," it makes me wonder if it was born out of the Great Depression, as many Depression Era cakes did not use eggs, milk or butter due to cost and scarcity.
This can be helpful when baking with an egg allergy in mind or if you don't want to buy a specialty ingredient like buttermilk. We did find that the sponge was a little drier two days after baking than the Black Magic Cake, so take that into consideration if planning to make it far in advance.
We all loved both the cake and the frosting! If you love chocolate, this is definitely a recipe to try!
Bake the Cakes
For this cake, the dry ingredients are whisked together in a bowl, while the wet ingredients are mixed in a measuring cup. The wet is then added to the dry and stirred together.
For the cake pans, I like using Cake Baking Strips to allow the cakes to rise evenly and not dome. I always use Pam for Baking to ensure my cakes come out of the pans easily, but you can grease and flour the pans if you prefer. Using a parchment circle in the bottom of the pans is best practice for making sure your cakes do not stick to the pan.
Make the Frosting
To make this glossy chocolate frosting, start by melting the butter in a saucepan. Then, stir in the sugar, cocoa powder and salt. This mixture will be thick and grainy.
In a measuring cup, combine the cream, sour cream and instant coffee. Add this mixture to the chocolate and continue to whisk and cook until the mixture is smooth.
Off heat, add the vanilla, then cool the icing until it is spreadable. This can take several hours. If you're pressed for time, you can chill the icing then rewarm it in the microwave by heating in 20-second intervals, stirring after each interval, until the frosting is spreadable.
Assemble the Cake
Place the first cake layer on a cake plate or cake board. You can use a small amount of icing to adhere the cake.
Use an offset icing spatula to cover the the top of the first layer with icing. Place the second layer on top, and cover the entire cake with a layer of icing.
Storage
This cake is best enjoyed the day it is baked or the day after. The cake will start to lose moisture after day 2.
Gluten Free Option
Although I haven't tried it myself with this recipe yet, I have good results substituting Bob's Red Mill Gluten Free 1 to 1 Baking Flour in place of all purpose flour in chocolate cake recipes.
📖 Recipe
Old Fashioned Chocolate Cake
Equipment
- 2 8-inch round cake pans
Ingredients
For the Cake:
- 3 cups all purpose flour
- 2 cups sugar
- ½ cup unsweetened cocoa powder
- 2 teaspoon baking soda
- 1 teaspoon table salt
- 2 cups hot water
- ¾ cup vegetable oil
- 2 tablespoon distilled white vinegar
- 1 tablespoon instant coffee granules
- 1 tablespoon vanilla extract
For the Glossy Chocolate Icing:
- 8 tablespoons butter
- 1½ cups sugar
- 1¼ cups unsweetened cocoa powder
- 1 pinch salt
- 1¼ cups heavy whipping cream
- ¼ cup sour cream
- 1 teaspoon instant coffee granules
- 2 teaspoon vanilla extract
Instructions
Bake the Cakes:
- Preheat the oven to 350°F with a rack in the center. Spray two 8-inch round cake pans with nonstick spray.
- Grease two 8-inch round cake pans or spray with nonstick baking spray. Line the bottoms of the pans with rounds of parchment paper, grease the parchment, then flour the insides of the pans, tapping out excess. Use cake baking strips to prevent cake doming, if desired. Set pans aside.
- In a large mixing bowl, whisk together the flour, sugar, cocoa, baking soda and salt.3 cups all purpose flour, 2 cups sugar, ½ cup unsweetened cocoa powder, 2 teaspoon baking soda, 1 teaspoon table salt
- In a large measuring cup, combine the water, oil, vinegar, instant coffee and vanilla. Add the wet ingredients to the dry ingredients and whisk just until combined; a few lumps are fine.2 cups hot water, ¾ cup vegetable oil, 2 tablespoon distilled white vinegar, 1 tablespoon instant coffee granules, 1 tablespoon vanilla extract
- Divide the batter evenly between the prepared pans.
- Bake the cakes until a toothpick inserted in the center comes out clean, 35-40 minutes.
- Cool the cakes on a rack for 15 minutes, then invert them onto the rack. Leave cakes upside down to cool completely and flatten if needed.
Make the Icing:
- Melt the butter in a large saucepan over medium heat.8 tablespoons butter
- Stir in the sugar, cocoa and salt. The mixture will be thick and grainy.1½ cups sugar, 1¼ cups unsweetened cocoa powder, 1 pinch salt
- In a large measuring cup,, combine the heavy cream, sour cream and instant coffee, mixing until smooth. Gradually add the cream mixture to the chocolate until blended and smooth.1¼ cups heavy whipping cream, ¼ cup sour cream, 1 teaspoon instant coffee granules
- Cook, whisking constantly, until the sugar has dissolved and the mixture is smooth and hot to the touch, 6-8 minutes. Do not boil.
- Remove the pan from the heat and add the vanilla. Cool the icing at room temperature until spreadable, 2-3 hours. You will have about 4 cups of icing.2 teaspoon vanilla extract
Assemble the Cake:
- Place the first cake layer on a cake plate or cake board. You can use a small amount of icing to adhere the cake.
- Use an offset icing spatula to cover the the top of the first layer with icing. Place the second layer on top, and cover the entire cake with a layer of icing.
Leave a Reply