
Wicked Sugar Cookies
These Wicked Sugar Cookies are made with royal icing and have simple designs featuring the Wicked logo and phrases.
Servings 12 cookies (approx.)
Equipment
- disposable piping bags
- Plastic tip coupler
- small round tips like #5
- food dedicated paint palette
- disposable plastic transfer pipette
- food-safe paintbrush
Ingredients
- 1-2 batches sugar or shortbread cookies see note
- 1 batch Easy Royal Icing see note
- black royal icing powder
- pink and green food coloring gel
- black food coloring pen or marker such as FooDoodlers
Optional Decor:
- edible pink luster dust
- clear alcohol like Everclear, vodka or clear vanilla extract
Instructions
Bake the Cookies
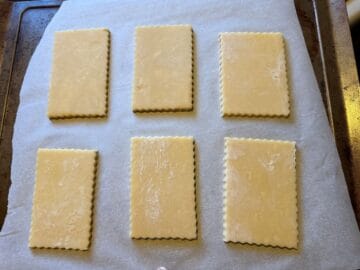
- Roll the dough into ¼-inch thickness and cut it into rectangles with either a scalloped or straight edge (or both). Use a ruler to keep the size of the cookies consistent. Make a mixture of thinner, longer rectangles and some that are wider.

- Bake the cookies according to your recipe's instructions and allow them to cool to room temperature.
Outline the Cookies
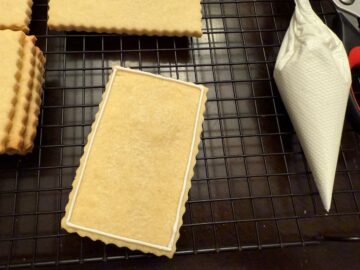
- Starting with the untinted (white) stock royal icing, add about ¼ cup to a bowl and add very small amounts of warm water to achieve outline consistency icing, carefully stirring with a small silicone spatula to avoid introducing bubbles into the icing.
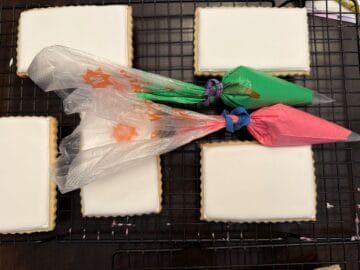
- Transfer the icing to a disposable piping bag and cut off a very small piece of the tip to make a small round opening. Start by just snipping off a tiny amount; you can always cut more if the opening is too small. Outline the wider cookies by piping a rectangular border on the top of each cookie.
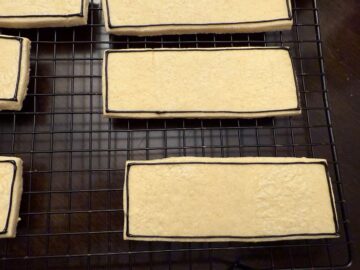
- Prepare outline consistency black royal icing by adding small amounts of warm water to the black icing powder. Transfer to a piping bag with the tip cut off.
- Pipe a black outline around the longer rectangle cookies.
- Allow the outlines to dry at least 1 hour before proceeding to the flood step.
Flood with Royal Icing
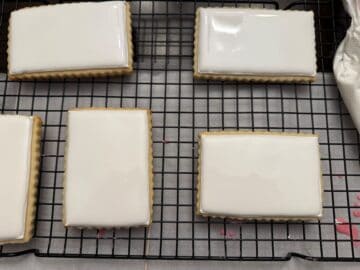
- Prepare flood consistency untinted (white) royal icing by thinning stock royal icing with small amounts of water until desired consistency is achieved.
- Transfer the icing to a disposable piping bag, and cut off a small amount of the tip. Fill the center of each white outlined cookie with the white icing. Use a toothpick or a scribe tool to swirl the icing on the cookie to pop any bubbles.
- Prepare flood consistency black royal icing. Transfer to a disposable piping bag with the tip cut off. Fill the center of each black outlined cookie. Use a toothpick or scribe tool to swirl the icing and pop any bubbles.

- Allow the icing to dry completely at room temperature, about 18 to 24 hours, before adding the details.
Add the Details
- Prepare pink and green royal icing that is just slightly thinner than outline consistency. Transfer each to a piping bag with the tip snipped off.
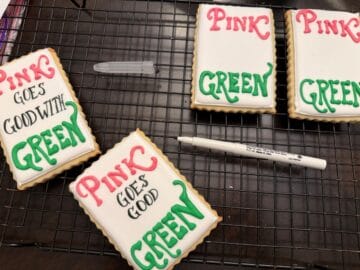
- With the pink icing, pipe the word "Pink" on the top of half of the white cookies in portrait mode and the word "GOOD" on the bottom of the other white cookies in landscape direction.

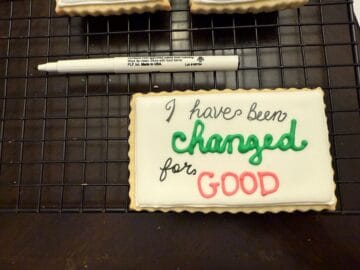
- With the green icing, pipe the word "GREEN" at the bottom of the portrait cookies and "changed" in the middle of the landscape cookies.
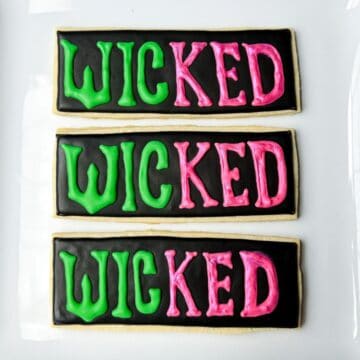
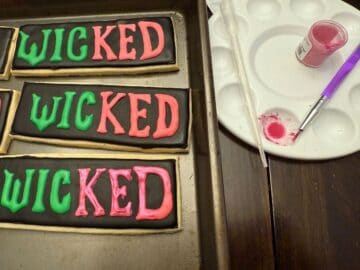
- Use the green to pipe the letters W-I-C on the black cookies and the pink to pipe the letters K-E-D, making the letters mimic the Wicked logo font.
- Allow all of the lettering to dry completely.
- Use a black food coloring marker to wrote the words "GOES GOOD WITH" in the center of the portrait cookies and "I have been" at the top of the landscape cookies, along with "for" before the pink "GOOD."
- To add some shine to the pink letters on the black cookies, add some drops of clear alcohol to pink luster dust and brush onto the pink letters.
Notes
Shortbread Cookies recipe HERE
Cut Out Sugar Cookies recipe HERE
Easy Royal Icing recipe HERE
Storage: I never recommend stacking royal icing cookies. The grease from the top cookie can transfer to the royal icing of the bottom cookie and ruin the design. I prefer to store them in a single layer in an airtight container at room temperature. If you must stack them, use aluminum foil between the layers.
You're Gonna Bake It After All
bakeitafterall.com