
Nut Free Polar Bear Macarons
These Nut Free Polar Bear Macarons are adorable and delicious. They are filled with vanilla buttercream and decorated with white and black royal icing and sparkling sanding sugar. This recipe is also gluten free.
Servings 26 cookies (approx.)
Calories 117kcal
Equipment
- 2 macarons mats optional
- 2 half baking sheets
- 1 digital kitchen scale
- toothpicks
- disposable piping bags
- medium round tip such as #12
- small round tip such as #7
- plastic tip couplers
Ingredients
For the Macaron Shells:
- 126 grams oat flour
- 126 grams powdered sugar
- 100 grams egg whites see note
- ¼ teaspoon cream of tartar
- 90 grams granulated sugar
- 1 teaspoon clear vanilla extract see note
- white and purple/violet food coloring gel
For the Decorations:
- Easy Royal Icing see note
- white sanding sugar Great Value brand recommended
- black royal icing powder
For the Filling:
- 10 tablespoons salted butter
- 1 dash table salt
- 5 ounces powdered sugar see note
- 1 tablespoon heavy cream
- 1½ teaspoons vanilla extract
Instructions
Prepare the Batter:
- Place a macaron mat on each of 2 baking sheets. You can also use parchment paper with 1-inch circles drawn on underneath. Set these aside.
- Place a medium round tip, like a #12, in a disposable piping bag. Fold over the top of the bag and place it in a tall glass or in a piping bag holder so it will be easy to fill with the batter. Set this aside. If you'd like to use a small round tip, like a #7, for the ears, repeat the same process in a separate glass.
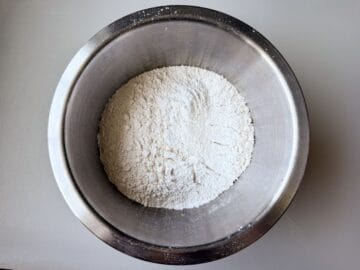
- Sift together the oat flour and the powdered sugar in a medium-sized bowl, then whisk to combine them completely. Set this bowl aside.
- Place the egg whites in the bowl of a stand mixer fitted with the whisk attachment and beat on medium-high until frothy. Add the cream of tartar, then slowly add the granulated sugar, one spoonful at a time, with the mixer still running.
- Add the vanilla extract, white food coloring gel, and a tiny amount of violet/purple food coloring gel. Continue to beat the mixture until the meringue forms stiff peaks. Remove the bowl from the mixer.

- Using a silicone spatula, carefully fold ⅓ of the flour/powdered sugar mixture into the meringue. Then, add the remaining ⅔ of the flour mixture and continue folding until you reach just before the figure 8 stage. See note.
- Once the batter is the proper consistency, transfer it to the prepared piping bag(s). Pipe 1-inch circles of batter onto the first macaron mat. Then, pipe two small ears at the top of each circle using either the same medium round tip or a small round tip.

- Once the batter has been piped on a full tray, slam the tray down hard on the counter or a table several times to force any air bubbles to the surface. If desired, take a toothpick and pop large bubbles then smooth out the hole left after the bubble pops.

- Pipe the batter onto the second macaron mat. You will not fill the entire mat.
- Allow the batter to dry at room temperature for 40 minutes. Meanwhile, preheat the oven to 300°F.
Bake the Macaron Shells:
- Bake the macaron shells for 12-15 minutes, rotating the pan once about 7 minutes into the bake. Only bake one pan at at time.
- Allow the shells to cool completely on the mats before removing them. To remove more easily, push up on the mat from underneath to help them pop off. If you have trouble with them sticking, that may mean they are underbaked. Some of the shells in the center of the tray may have a little bit of sticking. Very carefully use a stiff metal spatula to pry them off the mat, taking care not to rip the shell.

- The cooled shells can be stored in an airtight container in the refrigerator or freezer, or you can decorate them immediately.
Add the Decorations:
- Pair up the shells by size.

- Prepare untinted royal icing to a medium consistency, not as thick as outline but not quite as thin as flood. Transfer to a disposable piping bag with a small opening of the tip cut off. Pipe two inner ears and a larger oval shaped snout on each top shell. Immediately sprinkle with white sanding sugar while the icing is still wet. To leave the snout without sugar, pipe the ears, sprinkle with sugar, shake off excess, then pipe the snout. Allow the icing to set.

- Prepare the black royal icing to an outline consistency. Transfer to a disposable piping bag with a small opening of the tip cut off.
- Pipe on two eyes, a nose, and a mouth if you prefer.

- Allow the royal icing to set before filling the macarons.
Make the Filling:
- In the bowl of a stand mixer fitted with the whisk attachment, beat butter and salt at medium-high speed until smooth, about 20 seconds. NOTE: If using a hand-held mixer, increase mixing times by at least 50%.
- Add powdered sugar and beat at medium-low speed until most of the sugar is moistened, about 45 seconds.
- Scrape down bowl and beat at medium speed until mixture is fully combined, about 15 seconds; scrape bowl, add heavy cream and vanilla extract, and beat at medium speed until incorporated, about 10 seconds.
- Increase speed to medium-high and beat until light and fluffy, about 4 minutes, scraping down bowl once or twice. This step is important to create a smooth and whipped buttercream.
Assemble the Macarons:
- Keeping the shells in pairs, place the bottoms shell, shiny side up, next to the top shell for each of the pairs.
- Fill a disposable piping bag with the tip cut off with the buttercream. Pipe it onto the bottom shells.

- Carefully sandwich the macarons by holding the top shell by the edges and pressing down slightly.

Notes
See more details for making the shells in Nut Free French Macarons recipe HERE
I highly recommend weighing the ingredients listed in grams. French macarons are notoriously finicky and require precise measurements. I recommend using cracked whole eggs, not store bought egg whites.
100 grams of egg whites is the equivalent of the whites from about 3 ⅓ large eggs
Clear vanilla extract is used here in place of traditional vanilla extract to keep the batter lighter. You could use a different flavor of clear extract if you prefer, such as almond extract or imitation almond extract to keep the macarons nut free.
Macaronage: The process of incorporating the dry ingredients into the meringue is called macaronage. I recommend reading about this at America's Test Kitchen to familiarize yourself with how the batter should look. This step is critical for the shells forming "feet" properly. For oat flour batter, you want to stop mixing the batter before you get to the figure 8 stage.
Easy Royal Icing recipe HERE
5 ounces of powdered sugar is about 1¼ cups
Storage: Store the assembled cookies in an airtight container in the refrigerator for up to several days or the freezer for up to 1-2 months. If refrigerated or frozen, allow the cookies to come to near room temperature before serving.
Nutritional information is only an estimate and will vary based on your ingredients and substitutions.
You're Gonna Bake It After All
bakeitafterall.com
Nutrition
Serving: 1cookie | Calories: 117kcal | Carbohydrates: 17g | Protein: 1g | Fat: 5g | Saturated Fat: 3g | Polyunsaturated Fat: 0.3g | Monounsaturated Fat: 1g | Trans Fat: 0.2g | Cholesterol: 12mg | Sodium: 44mg | Potassium: 32mg | Fiber: 0.3g | Sugar: 14g | Vitamin A: 143IU | Vitamin C: 0.003mg | Calcium: 5mg | Iron: 0.2mg