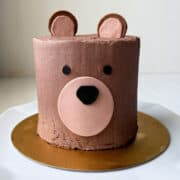
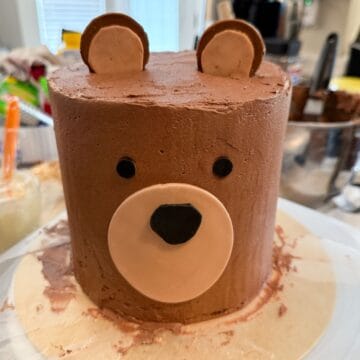
Teddy Bear Cake
This Teddy Bear Cake consists of 3 moist chocolate cake layers with vanilla buttercream filling and a chocolate buttercream on the outside. Easy rolled fondant decorations make the cute bear face.
Servings 12 or more
Equipment
- 1 8-inch cake pan
- 3 6-inch cake pans
- 4 Even Bake Cake Strips
- 1 small fondant rolling pin with guides
- 1 small circular biscuit cutter
- 1 large circular biscuit cutter
- 1 round gold cake board
- 1 large round piping tip like 2A
- 1 10-inch gold cake board
Ingredients
For the Fondant Decorations:
- white rollable fondant or gum paste
- brown food coloring gel
- black rollable fondant or gum paste
- powdered sugar for rolling fondant
For the Chocolate Cake:
- 3 ounces fine-quality semisweet chocolate such as Callebaut or Ghirardelli
- 1½ cups hot brewed coffee
- 3 cups sugar
- 2½ cups all purpose flour
- 1½ cups unsweetened cocoa powder not Dutch process
- 2 teaspoons baking soda
- ¾ teaspoon baking powder
- 1¼ teaspoons salt
- 3 large eggs
- ¾ cup vegetable oil
- 1½ cups well-shaken buttermilk see note
- ¾ teaspoon vanilla extract
For Assembly:
- 1 batch Easy Vanilla Buttercream see note
- 1 batch Easy Chocolate Buttercream see note
Instructions
Make the Fondant Ears:
- It is important to make the ears at least a day in advance of assembling the cake so they have time to dry. If you use gum paste instead of fondant, you may not need as much time.
- Wearing food safe gloves, break off a piece of white fondant and add a small amount of brown food coloring gel. Work the fondant in your hands until a light brown color is achieved.
- Break off a small piece of the light brown fondant and wrap the rest in plastic wrap to avoid it drying out.
- Add more brown food gel to the small piece until a rich brown color is achieved.
- Lightly dust a work surface with powdered sugar and roll the rich brown fondant into a thin layer with a small fondant rolling pin with guides. The guides on the rolling pin help ensure an even thickness.
- Use a small round biscuit cutter to press lightly into the fondant to make the round shape. You're just making an indent to show you where to cut.
- Cut around the circle at the top with a sharp paring knife and make a long triangle shape on the other side so the ears can be pressed down into the top of the cake. Do this for both ears.
- Repeat this process with a small piece of the light brown fondant, but cut it a little smaller than the rich brown fondant. You do not need the long triangle shape. Wrap the rest of the light brown fondant tightly in plastic wrap and place in an airtight container. This piece will be used to make the bear's snout during cake assembly.
- Use a dot of royal icing, water, or even melted chocolate to attach the light brown fondant on top of the darker brown to make the inside of the ear. Press down gently to get them to stick together. Repeat with the second ear.
- Set the ears aside to dry at room temperature.

Bake the Cakes:
- Preheat oven to 300°F.
- Spray one 8-inch and three 6-inch round cake pans with non-stick baking spray containing flour, such as Pam for Baking. Alternatively, line the bottoms of the pans with parchment paper and grease and flour the sides of the pan and the parchment. Add a moist cake baking strip around each pan. Set aside the pans.

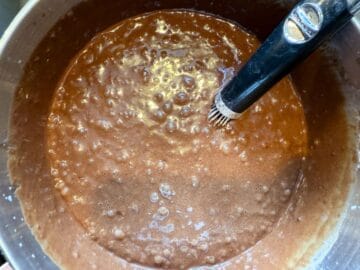
- Finely chop the chocolate and combine with hot coffee in a bowl. Let mixture stand, stirring occasionally, until chocolate is melted and mixture is smooth.3 ounces fine-quality semisweet chocolate, 1½ cups hot brewed coffee
- In a large bowl sift together sugar, flour, cocoa powder, baking soda, baking powder and salt.3 cups sugar, 2½ cups all purpose flour, 1½ cups unsweetened cocoa powder, 2 teaspoons baking soda, ¾ teaspoon baking powder, 1¼ teaspoons salt

- In the bowl of a stand mixer, beat the eggs until thickened slightly and lemon colored, about 3 minutes. If using a hand-held mixer, this will take about 5 minutes.3 large eggs
- Whisk in the oil, buttermilk, vanilla, and melted chocolate coffee mixture by hand until well combined.¾ cup vegetable oil, 1½ cups well-shaken buttermilk, ¾ teaspoon vanilla extract

- Whisk or fold in the sugar mixture until just combined. Batter will be very thin.
- Fill the 6-inch pans and half way with batter and add remaining batter to the 8-inch pan.
- Bake the cakes in the middle of the oven until a tester inserted in the center comes out clean. The 6-inch cakes will likely bake faster than the 8-inch cake. Begin checking them at 30 minutes. Do not overbake.
- Remove the pans from the oven, take off the cake baking strips, and all the cakes to cool in the pan for 10 minutes.
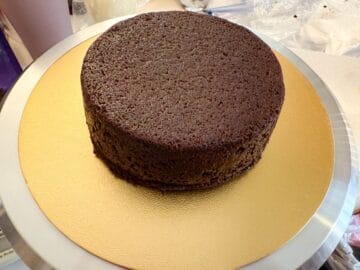
- Run a thin knife around the edges of the pans and invert the layers onto cooling racks. Carefully remove the parchment paper circles, if using. Cool layers completely to room temperature before assembling cake.
- Cake layers may be made 1 day ahead, wrapped tightly in plastic wrap and stored in resealable gallon sized bags at room temperature. Use the 8-inch cake to make cake pops or wrap in plastic wrap and store in freezer in a resealable gallon-sized freezer bag for a later use.
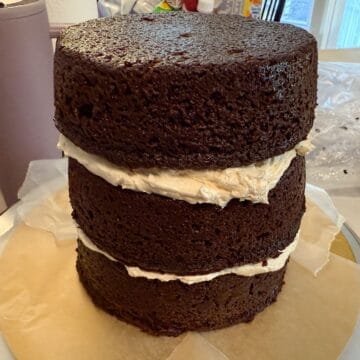
Assemble the Cake:
- Place a 10-inch round cake board on a spinning cake decorating stand.

- Add a small mound of vanilla buttercream to the center of a cake board.

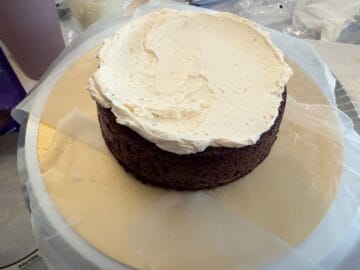
- Place pieces of waxed paper down around the buttercream and put the first cake layer on top. The waxed paper will protect the cake board from getting messy with buttercream. You don't want the paper to be too far under the cake or it will be hard to remove later.
- Cover the top of the cake with an even layer of vanilla buttercream.
- Stack another 6-inch cake on top and repeat until all three layers have been stacked.
- Break three wooden skewers to a size just smaller than the height of the cake and insert them into the cake in the center and two sides, all in a row. These serve as the supports for the cake to prevent sliding.

- Apply a layer of chocolate buttercream to the entire cake.
- Hold a metal cake scraper at an angle against the side of the cake while spinning the cake stand to smooth the surface, adding extra buttercream to fill in gaps as necessary and smoothing the top as well. Repeat this process until the surface is as smooth as you want. Another option is to pop the cake in the refrigerator to chill the buttercream. Then run the metal scraper under hot water to heat it, dry it off, and smooth the surface of the buttercream with the heated scraper.
- To make the fondant face, roll out the saved light brown fondant with a small fondant rolling pin and powdered sugar. Cut the fondant with a large round biscuit cutter.

- Roll black fondant into a thin layer and use a large round piping tip, like a 2A, to cut out two eyes. Free cut a rounded triangle nose with a sharp paring knife.
- Place a dot of royal icing, melted chocolate or white chocolate, or buttercream on the back of the black nose. Place the nose toward the top of the large white circle.

- Place the circle on the front of the cake toward the bottom third, with the nose at the top. Place the two eyes above the nose.
- Insert the ears into the top of the cake, pressing until just the rounded portions are visible.
- Carefully remove the waxed paper, moving each piece back and forth while pulling to prevent the buttercream from sticking. Discard the paper.
- Refrigerate the cake to set the buttercream before covering loosely with plastic wrap.
Notes
If you don't have buttermilk, you may mix 1½ cups whole milk with 1½ tablespoons white vinegar. Let sit for 5 to 10 minutes at room temperature before using.
Easy Vanilla Buttercream recipe HERE
Easy Chocolate Buttercream recipe HERE
Storage: Store the cake at room temperature or in the refrigerator until ready to serve. If refrigerated, allow the cake to come to room temperature before serving. Cake should be consumed with 2-3 days, ideally earlier.
Cake batter adapted from Epicurious.com
You're Gonna Bake It After All
bakeitafterall.com